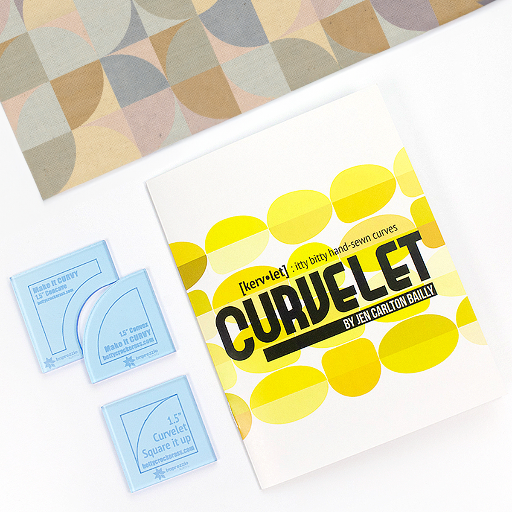
The Curvelet is an amazing little tool that allows you to whip up hand-pieced curves in no time. Create quarter circles, half circles, and full circles with ease! The possibilities are endless, especially when combining Curvelets with Ovalets and Squrvelets! Stay tuned for more about the Ovalet and the Squrvelet in the next Creative Classroom.
How to Use the Curvelet
Jen Carlton Bailly, the designer of the Curvelet, has put together a very helpful booklet that comes with the templates. There are easy to follow illustrated steps as well as a link to an in-depth video that demonstrates how to make quarter, half, and full circle Curvelets! You can watch the video below and then continue reading to see Sue's pro tips on the Curvelet!
Try it Sue's Way
Sue has made a few modifications that may work for you. People learn in many different ways, and we find it helpful to provide optional methods of creating when possible.
Step One
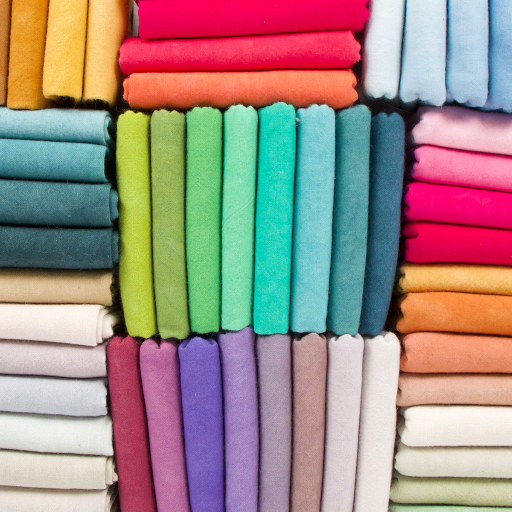
Select your fabric. We fell in love with using Cherrywood Natural Dyed Fat Quarter Fabric Bundles. This high-quality cotton fabric is incredibly soft to the touch and has a signature suede-like appearance.
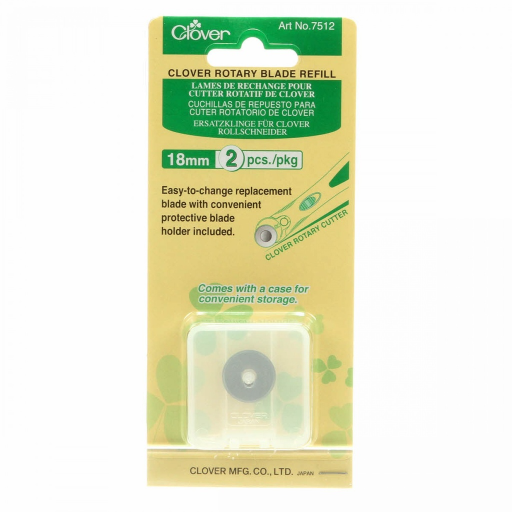
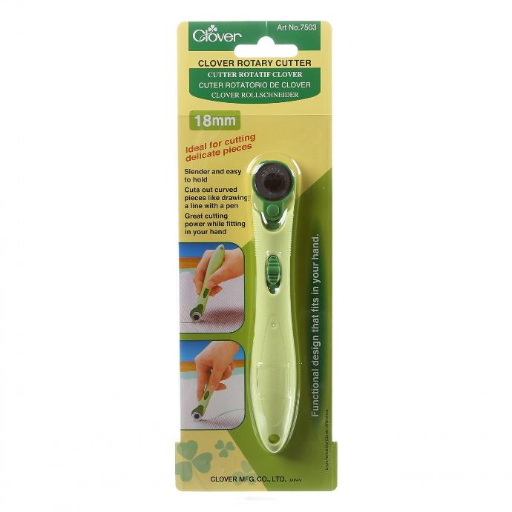
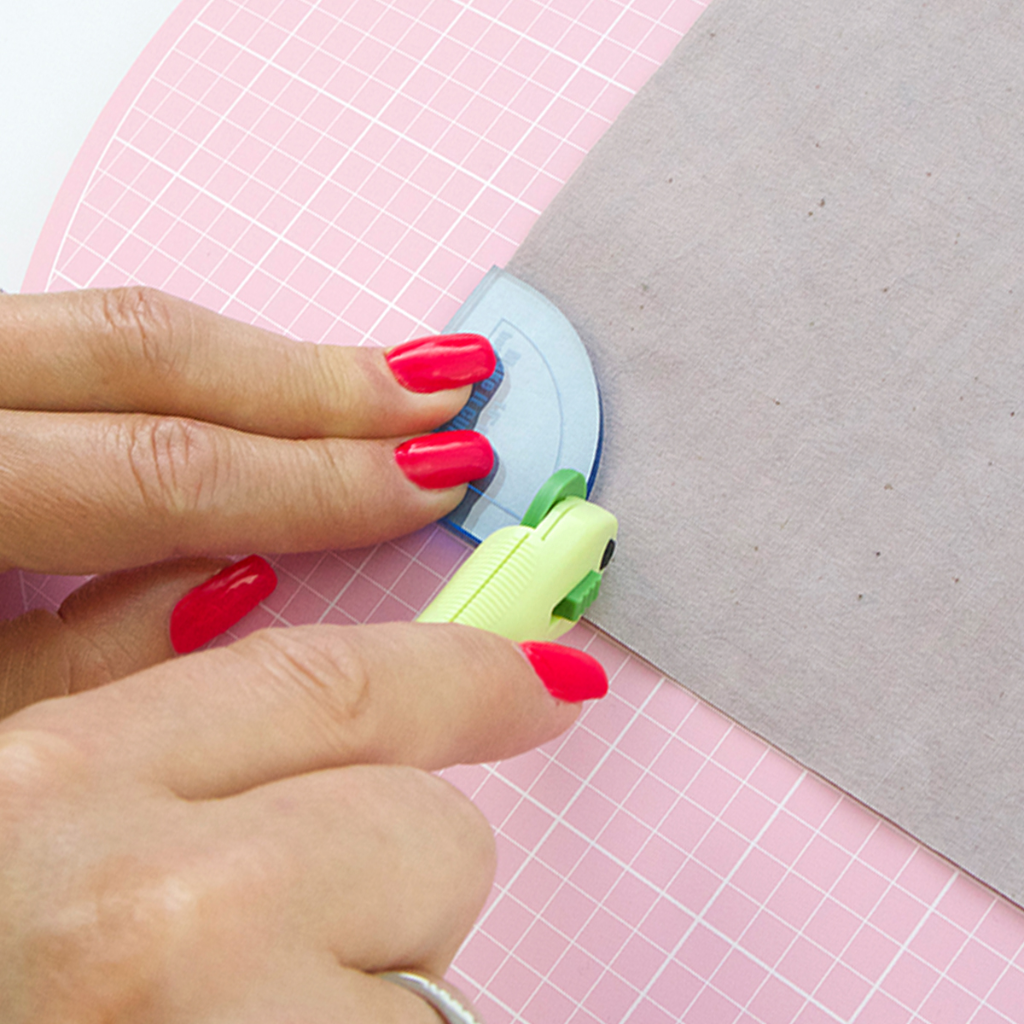
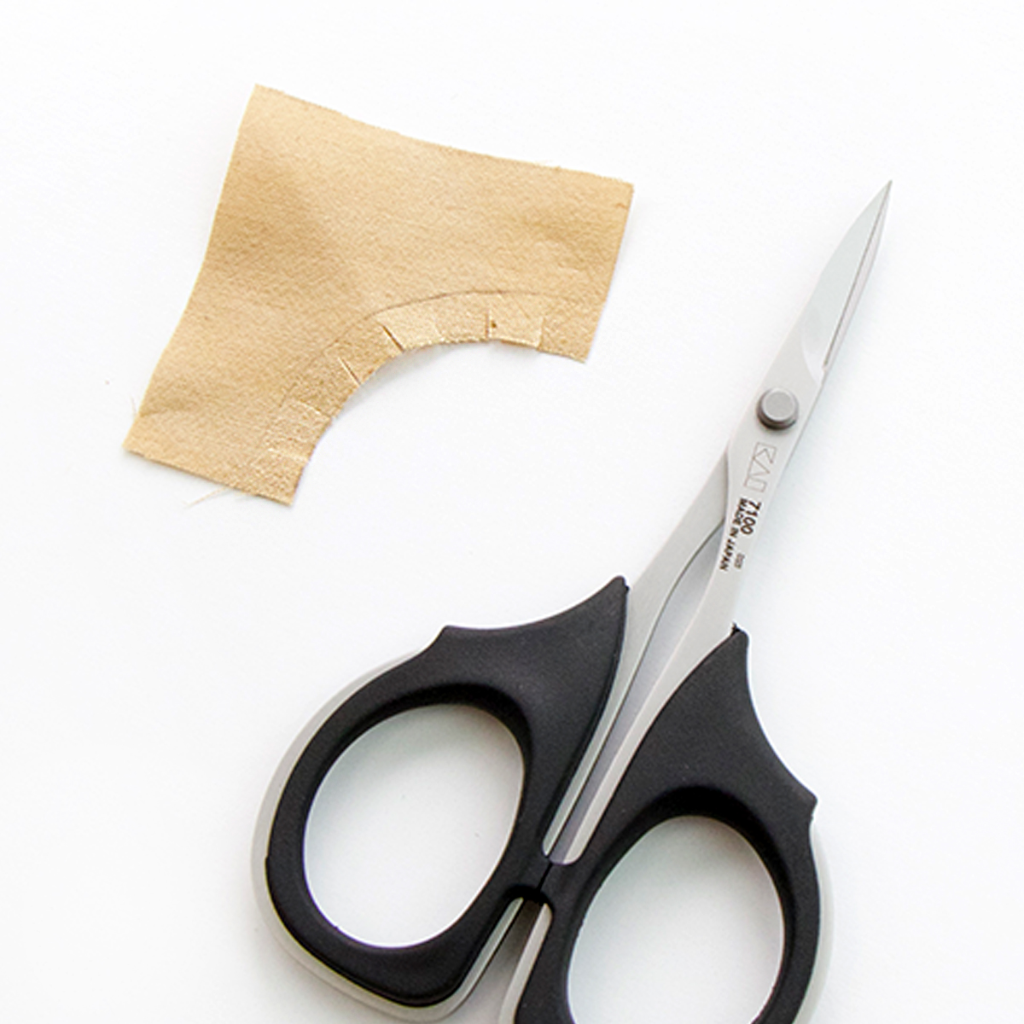
We used the Clover 18-mm Soft Grip Rotary Cutter to cut out the convex (pie slice) and concave shapes. Keep in mind that it takes practice wielding the 18mm on the concave piece. Go slow and practice - safety first!
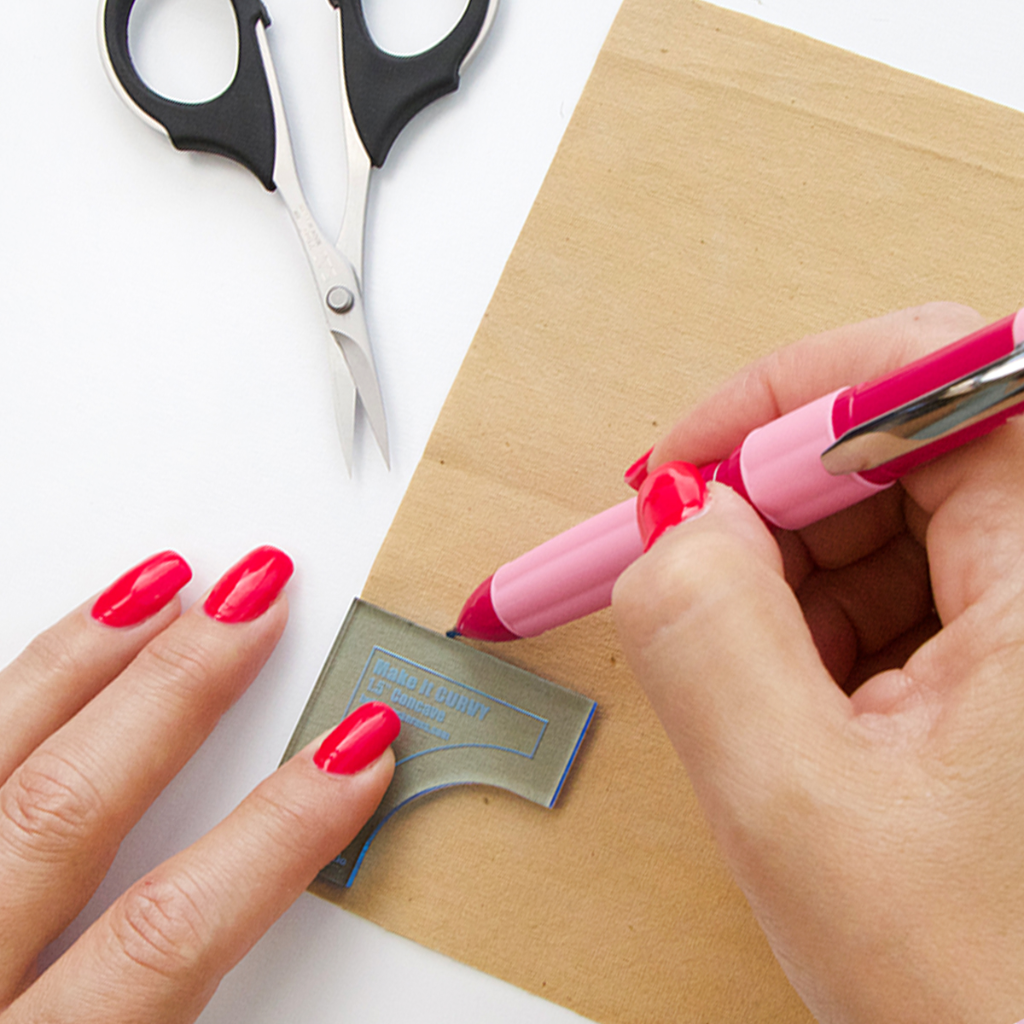
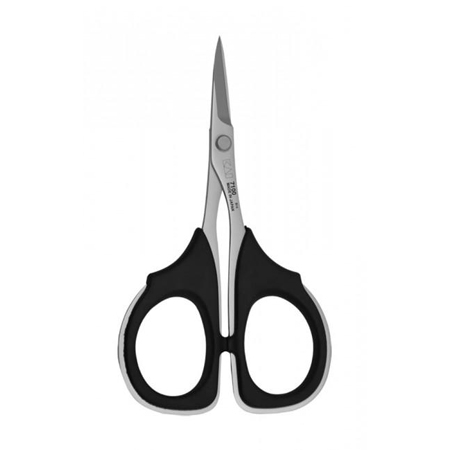
Alternatively, you can trace the templates onto the fabric and cut out the shapes using scissors. We used the Sewline Trio Chalk Pencil to trace around the templates, and the Kai 4" Professional Scissors work fantastic for cutting out small curved shapes. When it comes to snipping around the curves later on, these serrated scissors are the absolute best! There is no need for both scissors and snips!
Step Two
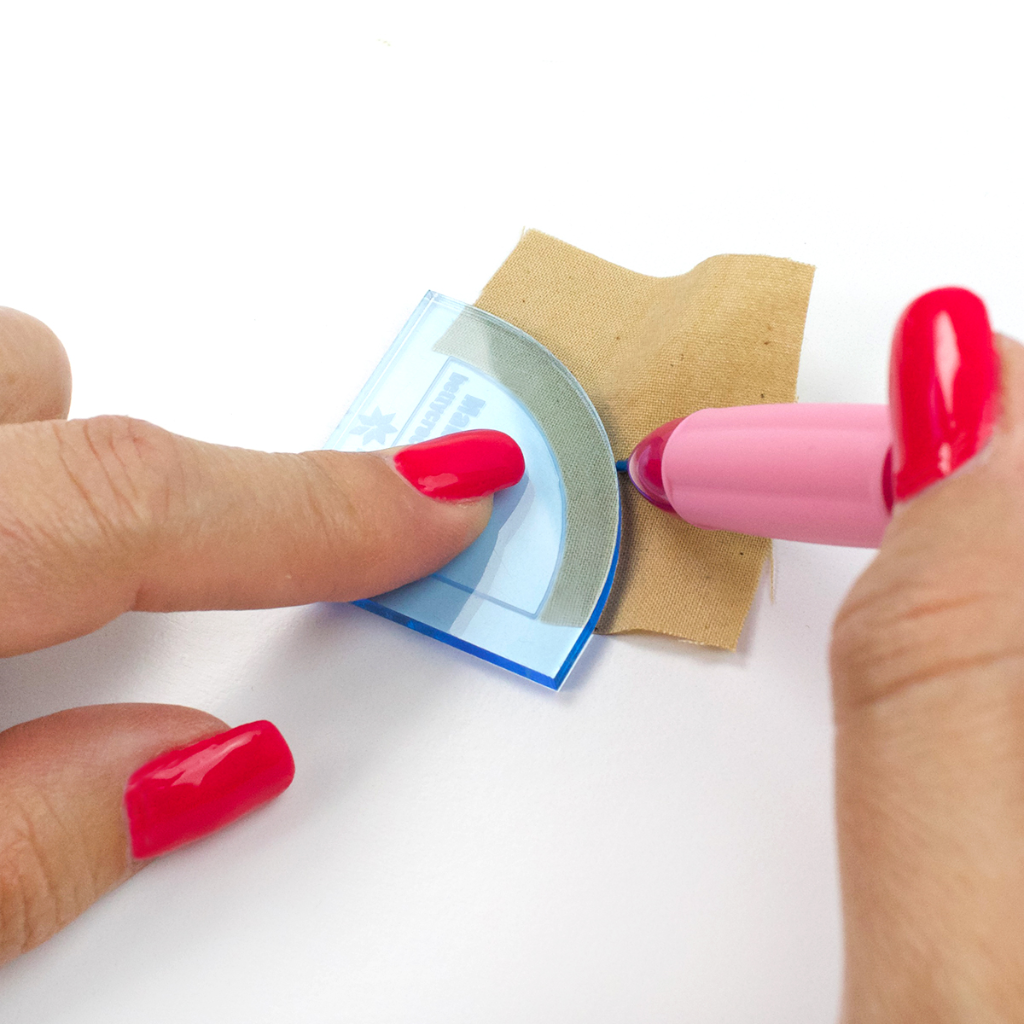
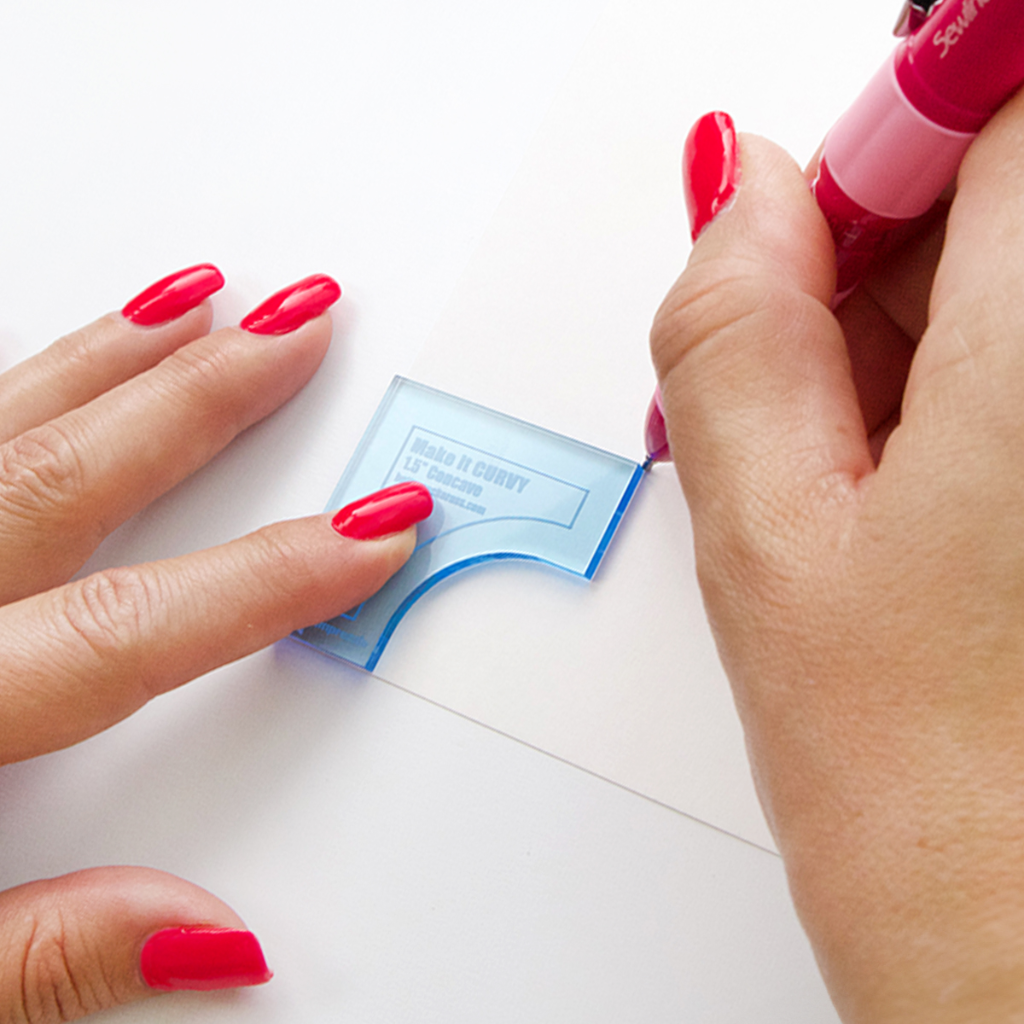
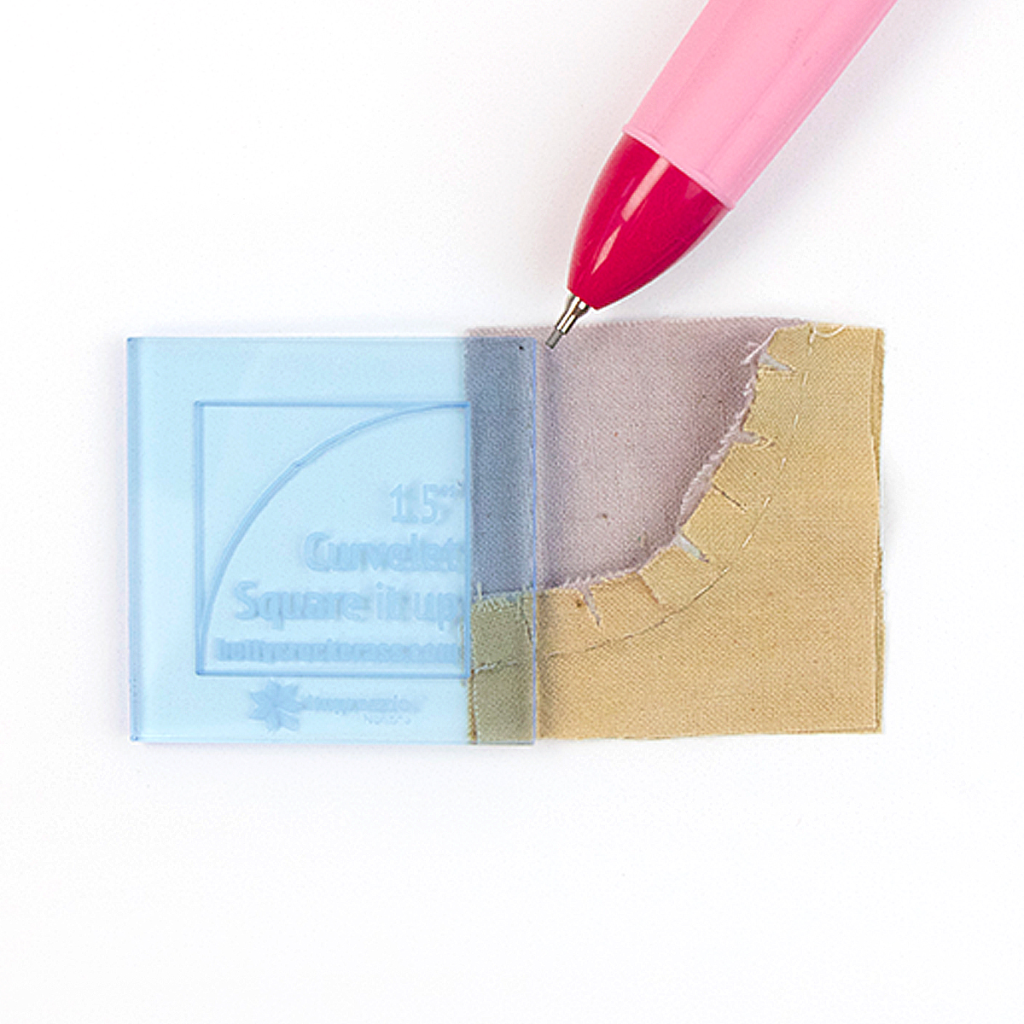
As seen in the Curvelet tutorial video and in the Curvelet booklet, step two directs you to place the convex (pie slice) template on top of the backside of the concave fabric piece. Line up the inside 1/4" line with the edge of the fabric. Adjust as needed to make them match and mark the stitch line.
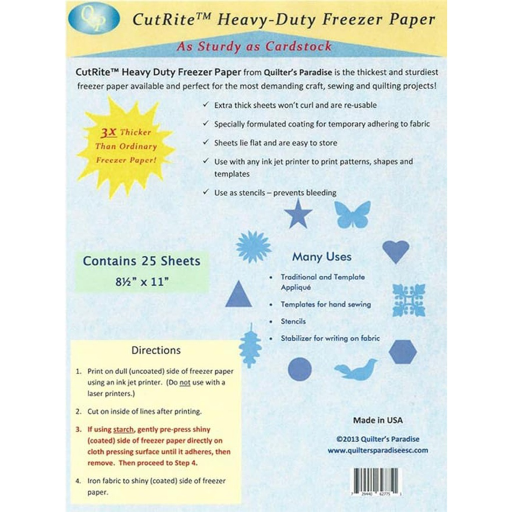
An alternate way of drawing the 1/4" stitch line along the concave curve is to create a freezer paper template. You may find this method easier or faster than adjusting the fabric to fit the curve. See what works best for you!
To create a freezer paper template, trace the concave Curvelet on Heavy Duty Freezer Paper and cut out the shape.
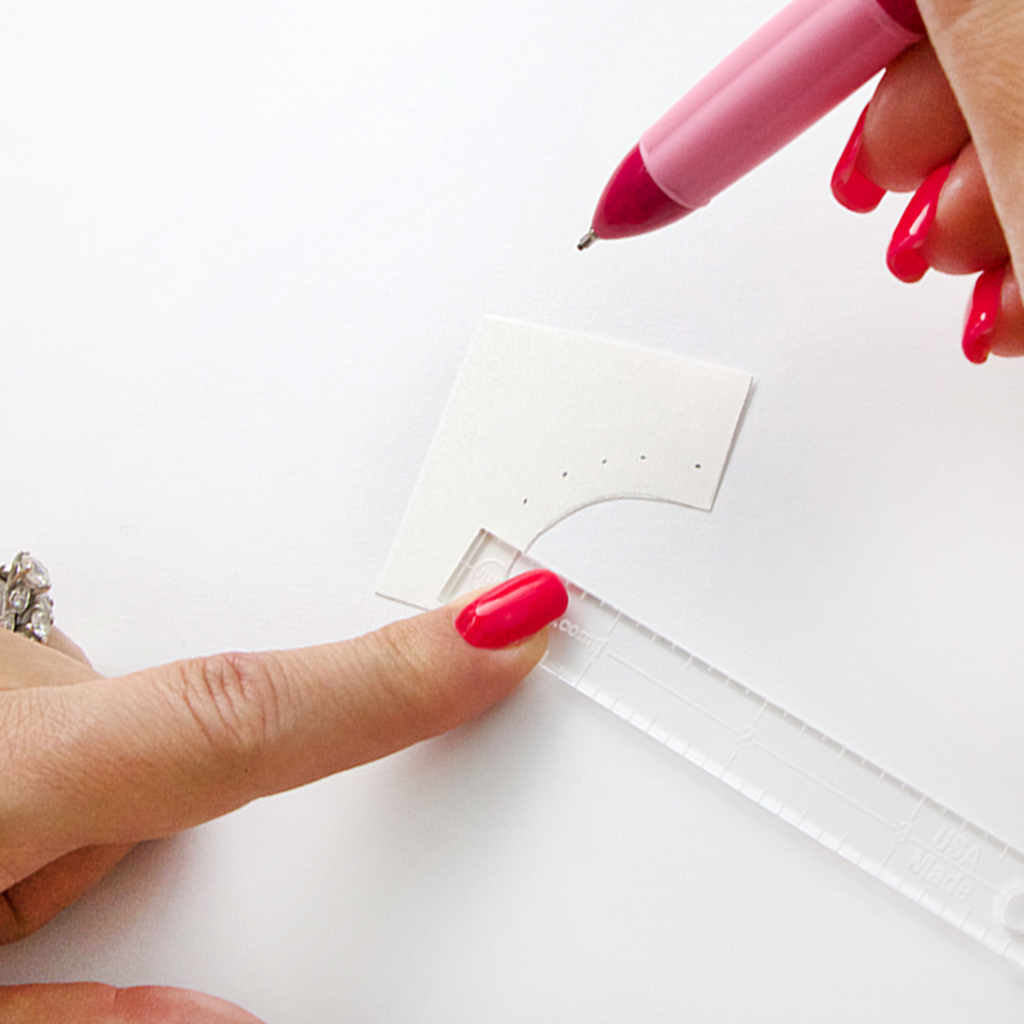
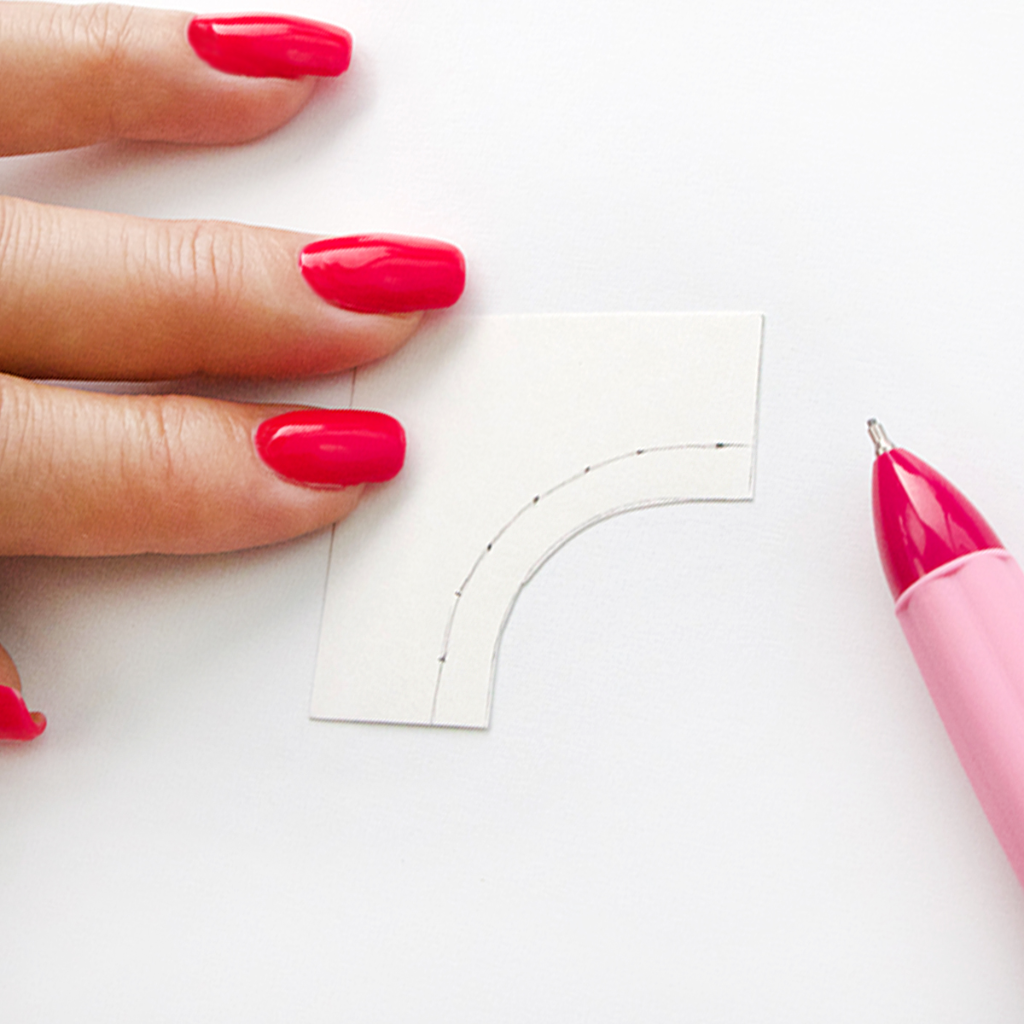
We used a 1/2" Stitch Spacing Ruler to make multiple marks 1/4" in from the concave edge and then simply connected the dots.

Cut along the line.
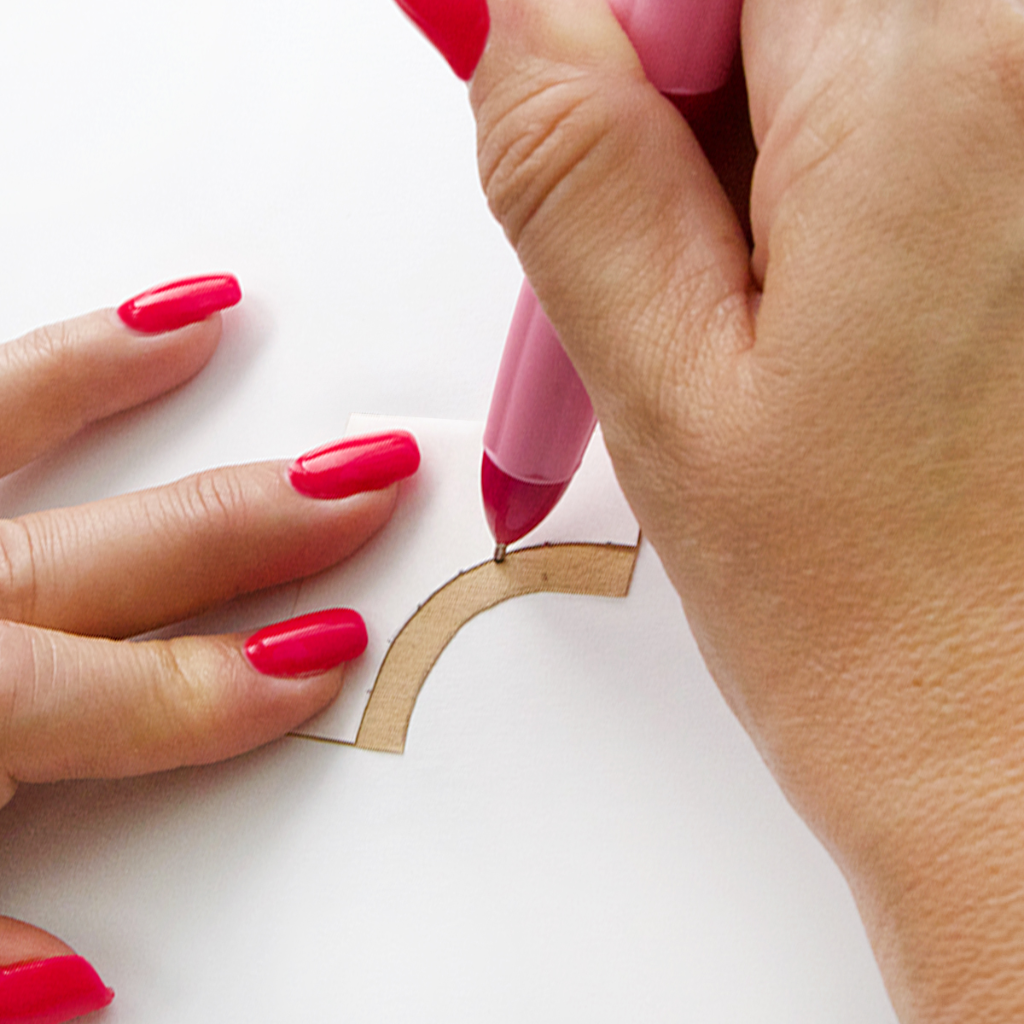
Place the freezer paper template on top of the backside of the concave fabric piece so that the corners match. Trace along the template curve. You now have an accurate 1/4" stitch line.
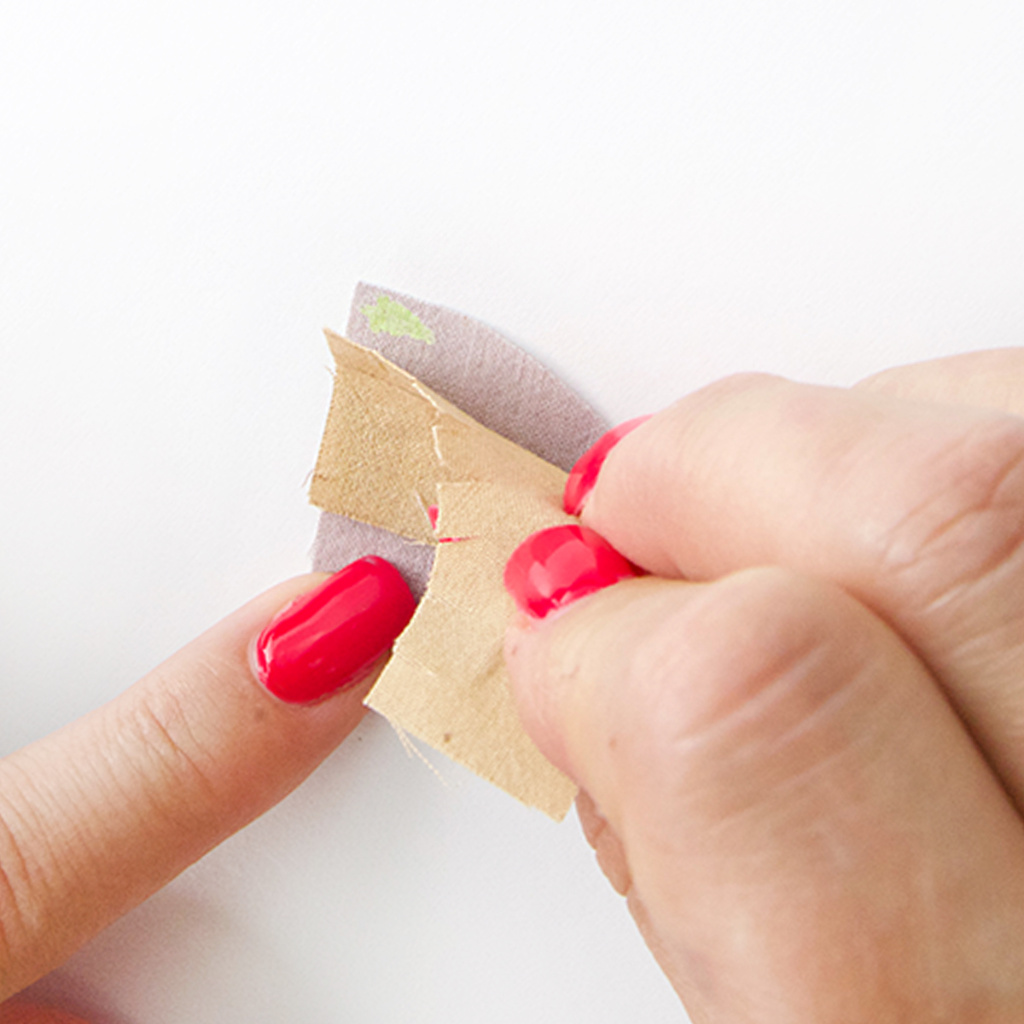
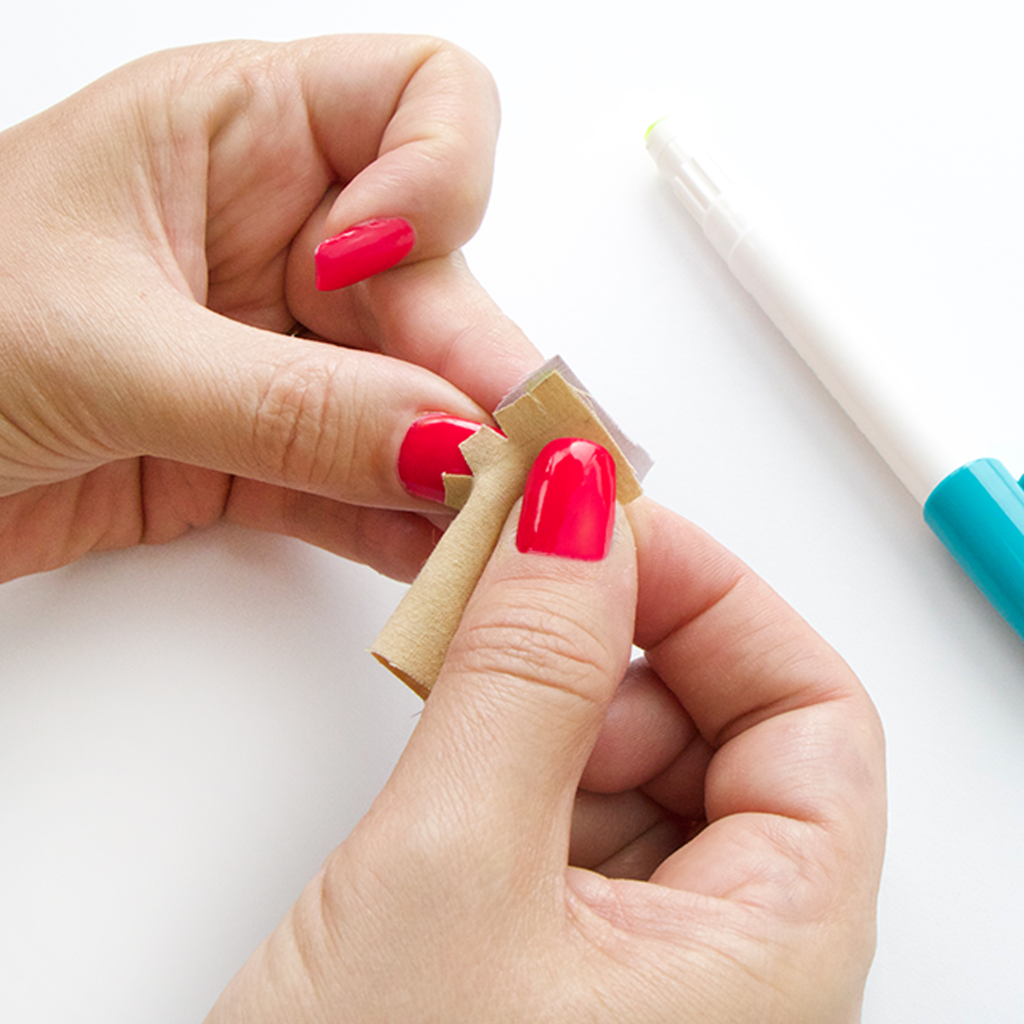
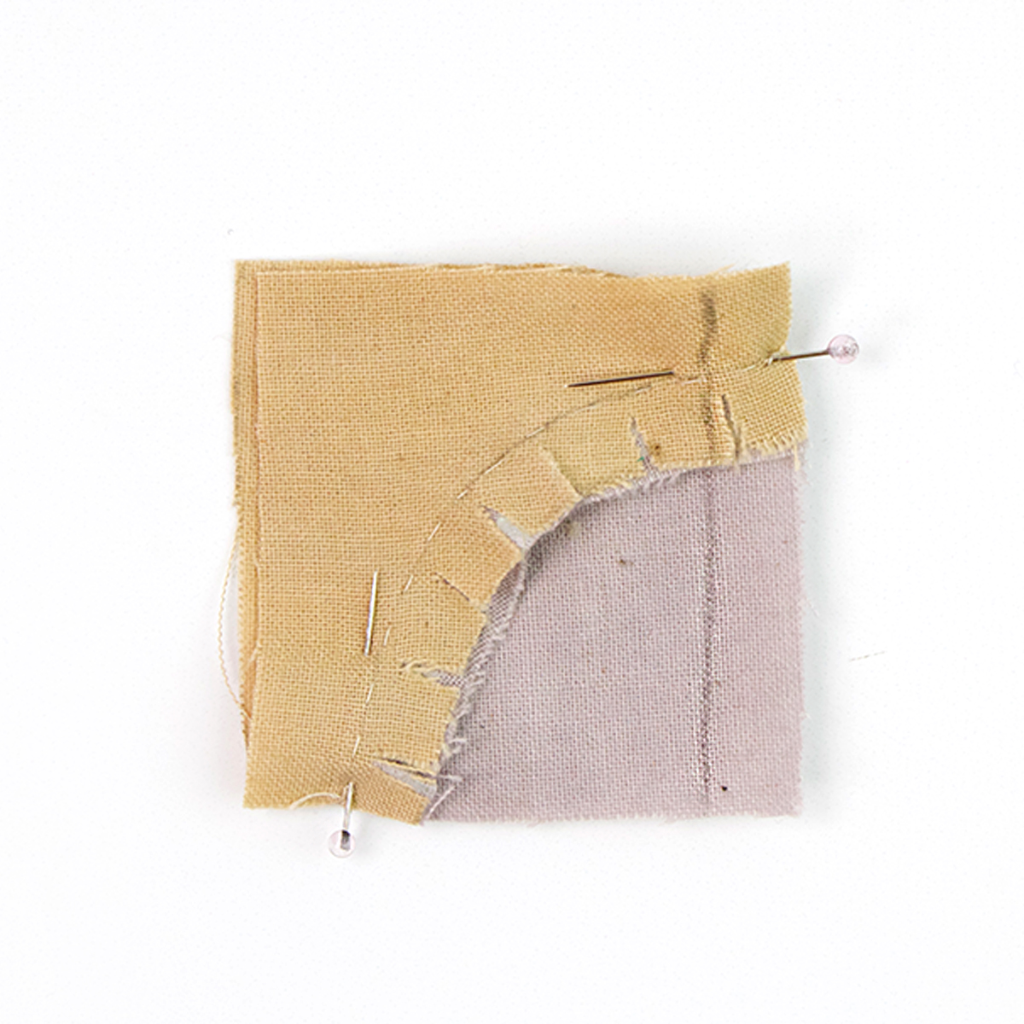
Step Three
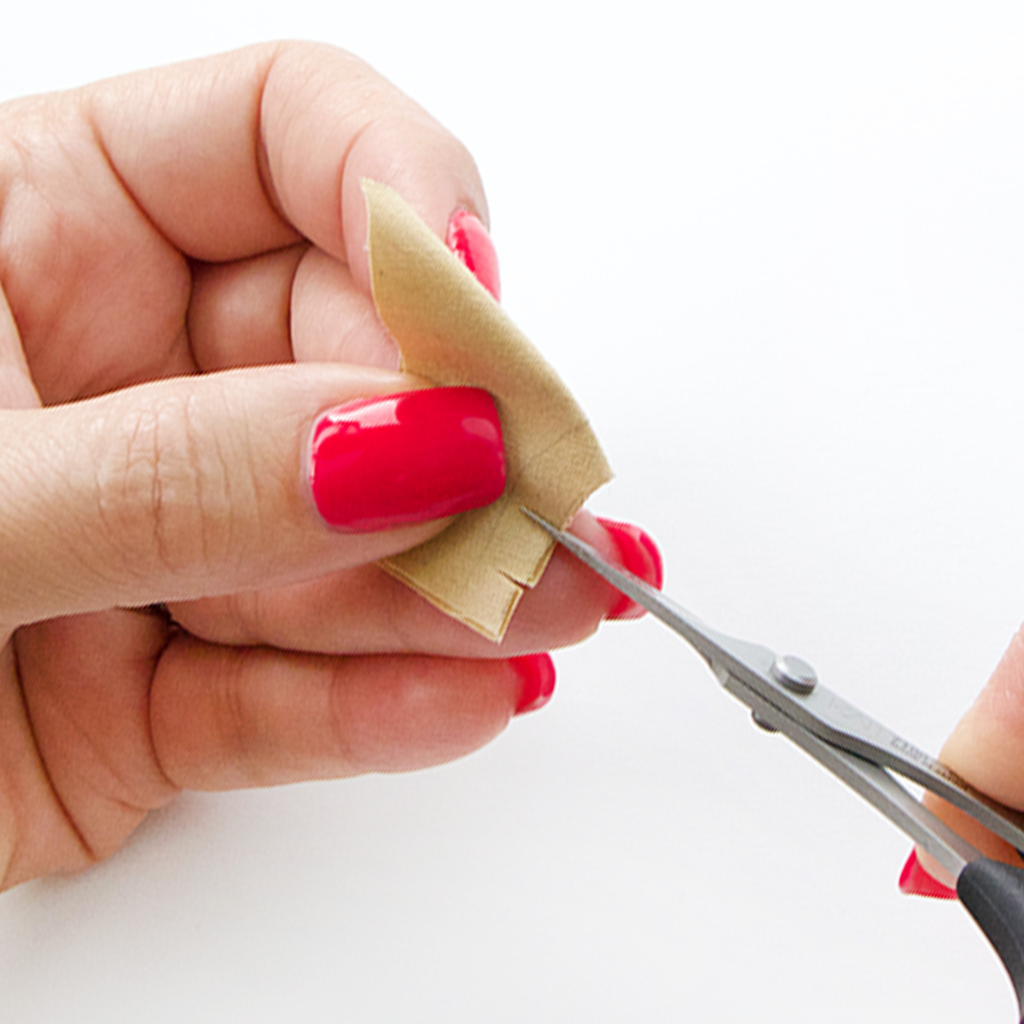
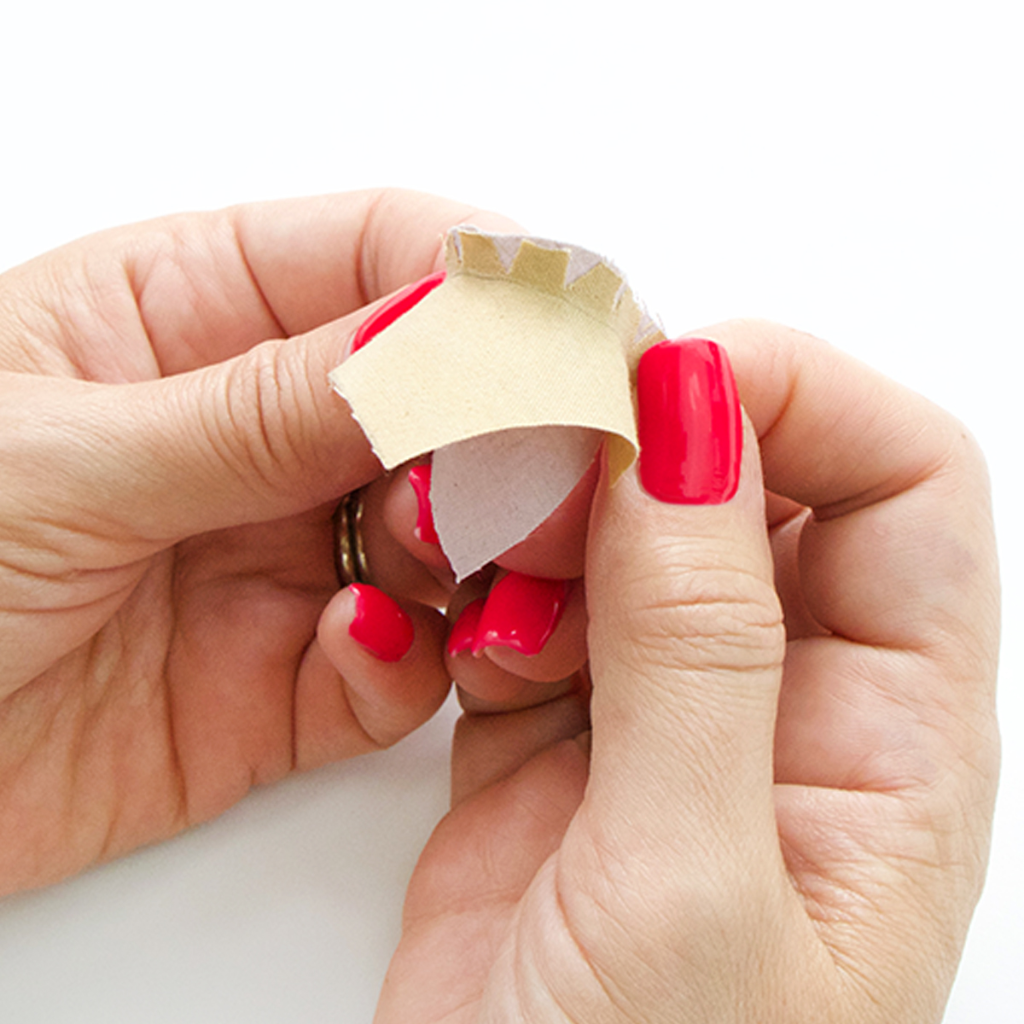
We used the fabulous Kai 4" Professional Scissors to snip just above the stitch line along the concave curve of the fabric. Eight snips is a good number. You may like to fold the fabric in half when snipping.
Step Four
Step four asks you to apply a layer of glue on the right side of the convex (pie slice) curved edge. We prefer to glue the edge one section at a time.
Step Five

With the right sides facing, match the side edges of the curves together. Use the Select Glue Stick to glue one side edge and then the other.
Next, glue the middle of the curve and fill in the glue along the rest of the edge.
Use your fingers to manipulate the two pieces of fabric and make sure they are pressed together smoothly along the glued edge.
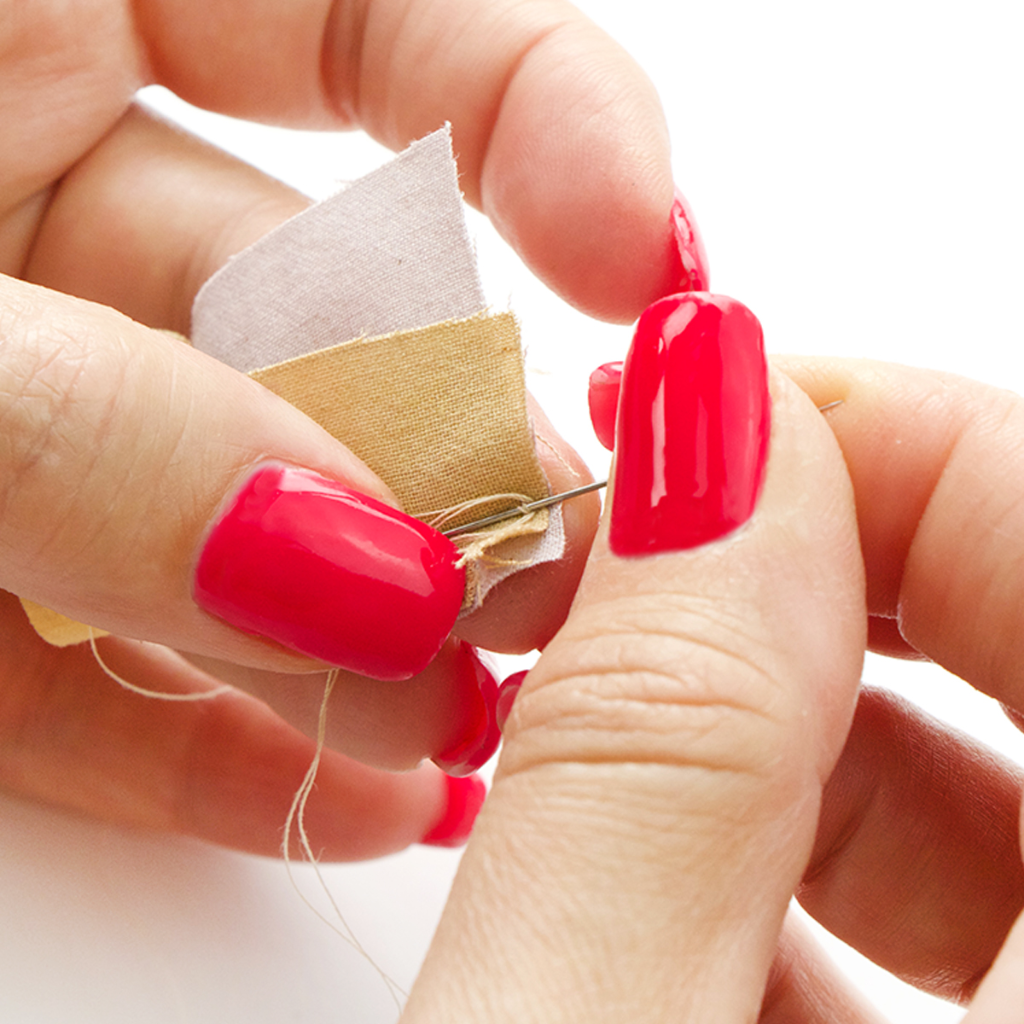
Step Six
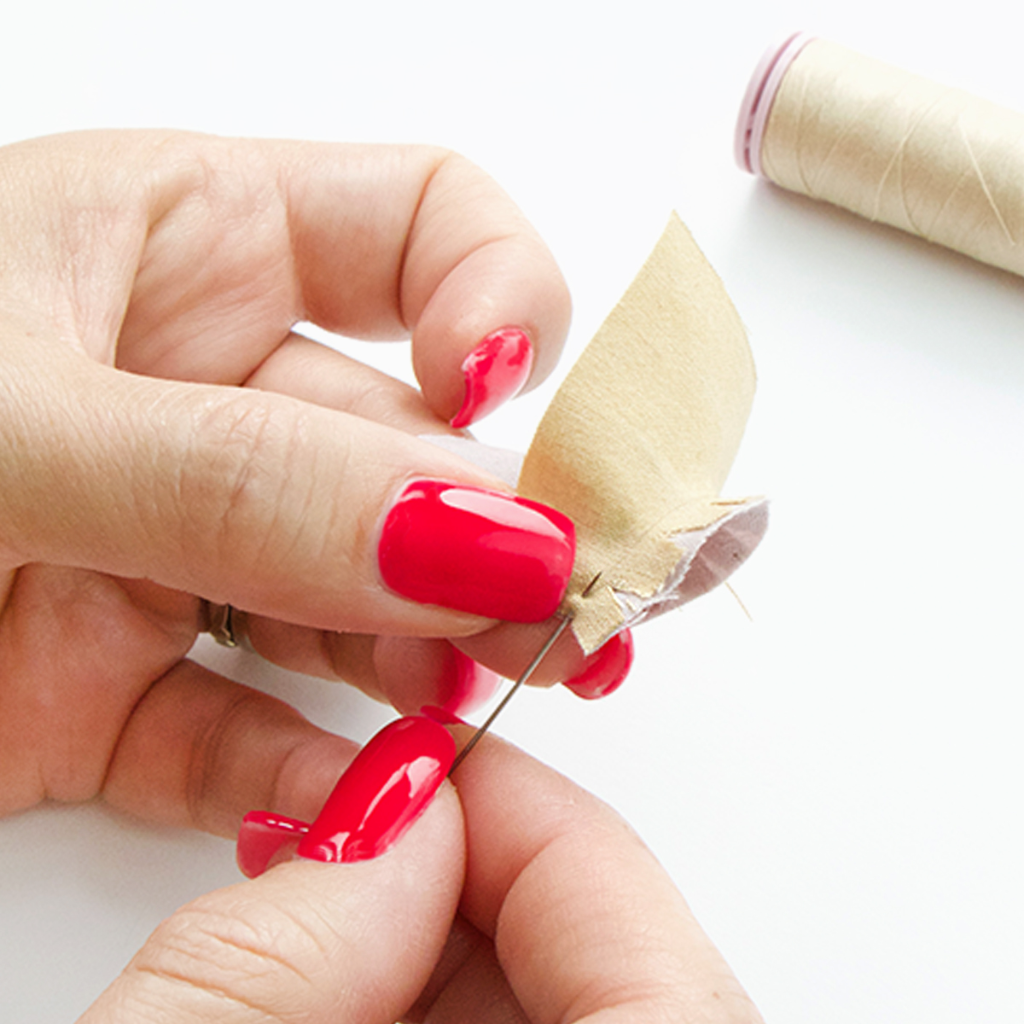
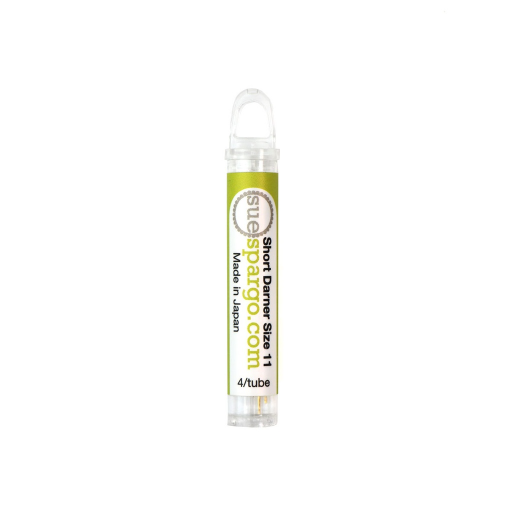
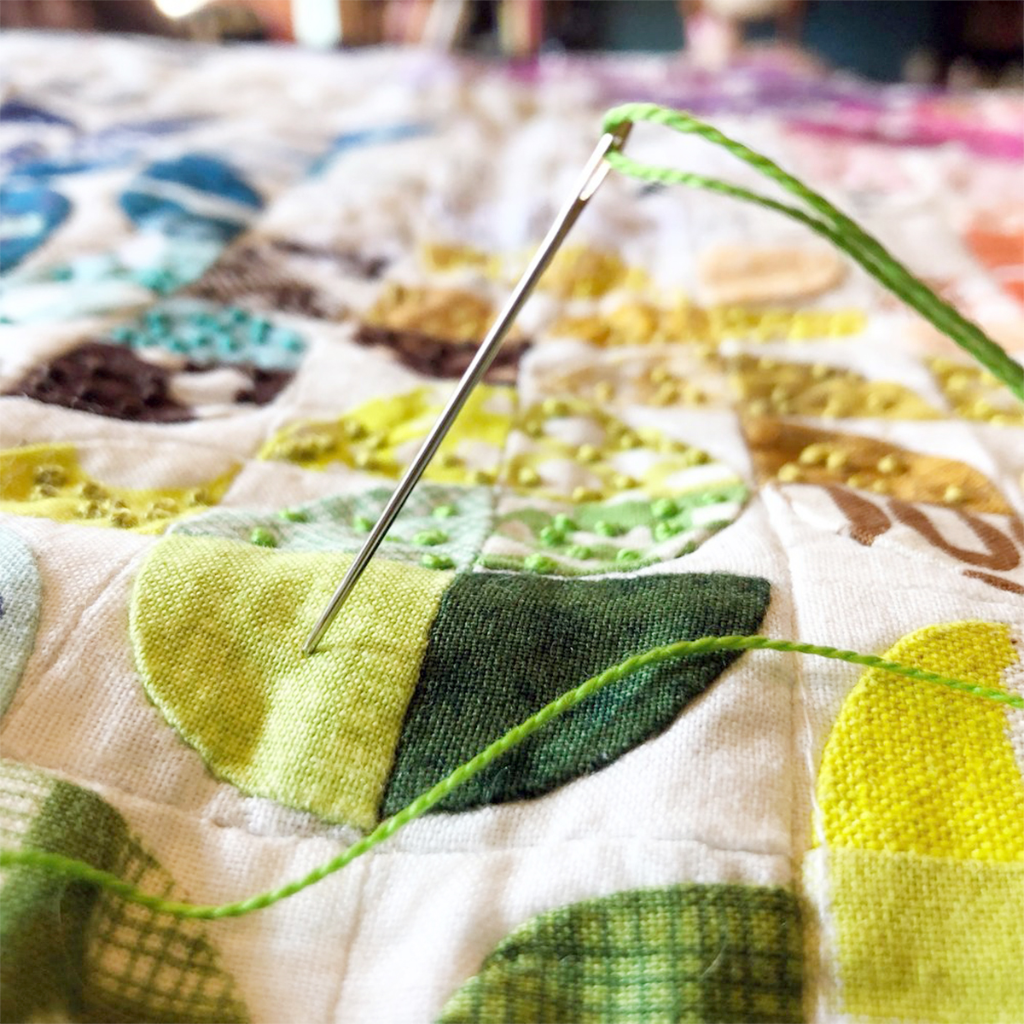
For hand stitching, we like to use a #11 Short Darner Needle with Efina Cotton Thread. Rather than knotting your thread, make a backstitch at the start of the stitch line to secure the thread.
Step Seven

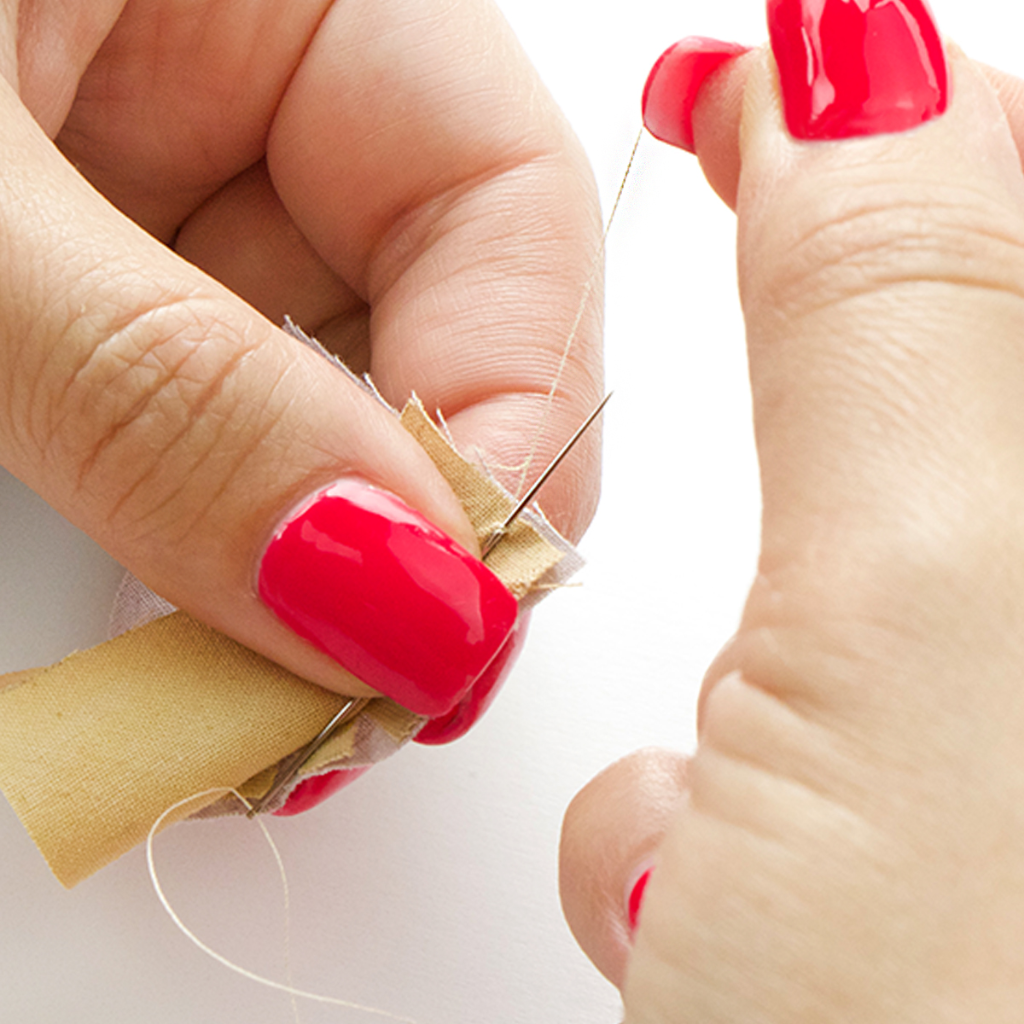
Stitch along the drawn line using a tiny running stitch, backstitching a few times along the way to keep everything secure.
Sue likes to use a tailor's knot at the end of the running stitch. With your needle partially through fabric at the end of the stitch line, take the working thread and wrap it behind and around to the top of the needle.
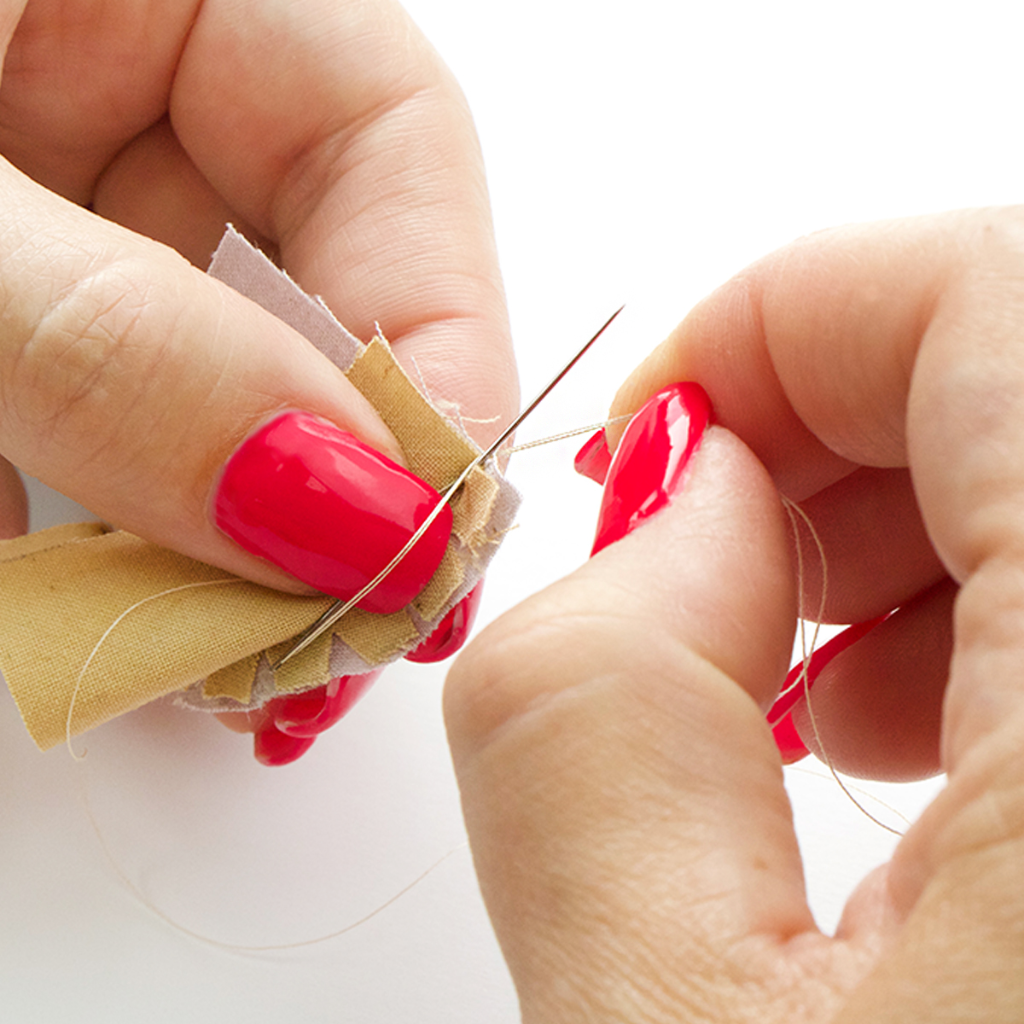
While holding the working thread in place take the thread tail, and wrap it behind and around the top of the needle in the opposite direction that you wrapped the working thread.
The working thread and the tail will now be crossed behind the needle, where they emerge from the fabric.
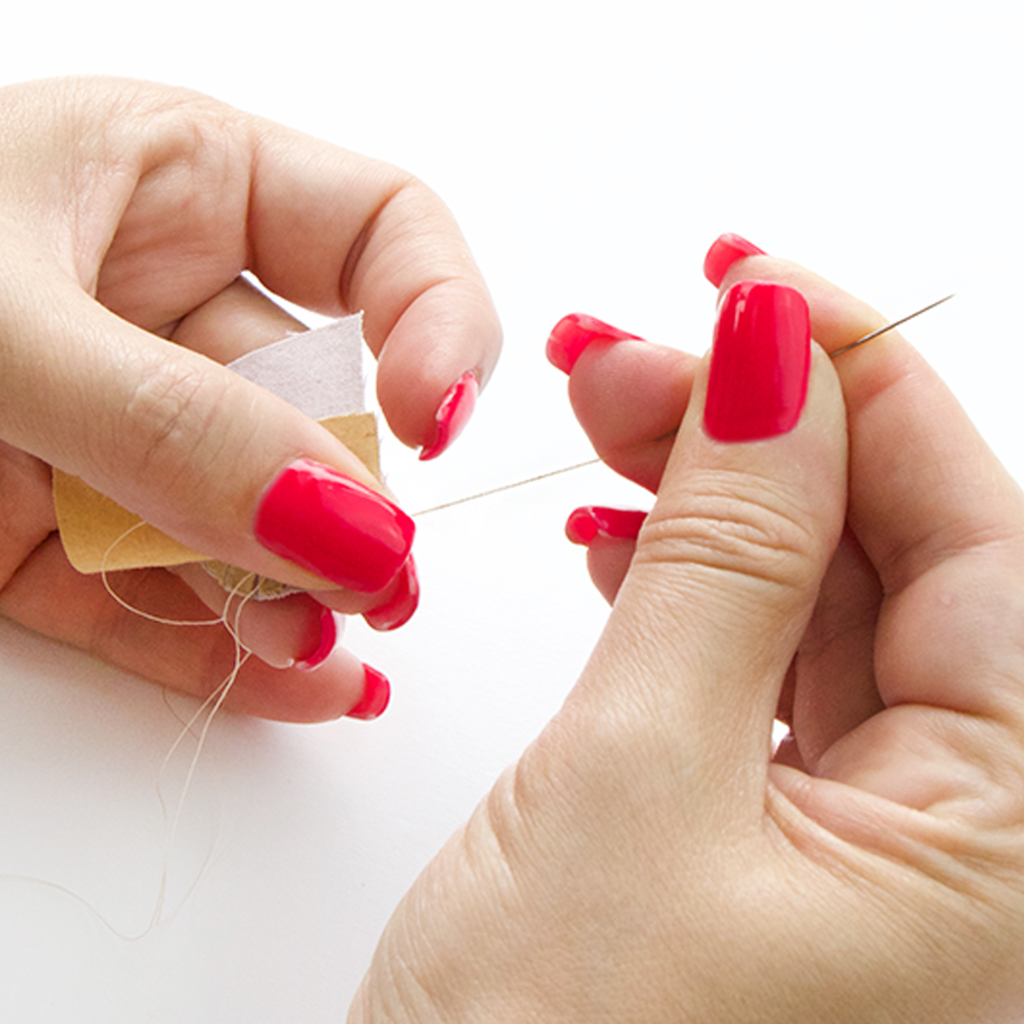
With one hand, pinch and hold where the threads cross as you pull the needle through with the other hand.
Snip the thread after the knot, and now you have completed a flat tailor's knot.
GUESS WHAT! If you're not a fan of hand sewing, we have had success machine sewing these curves! Just make sure the glue has dried, be sure to use a thin needle, and go slow!
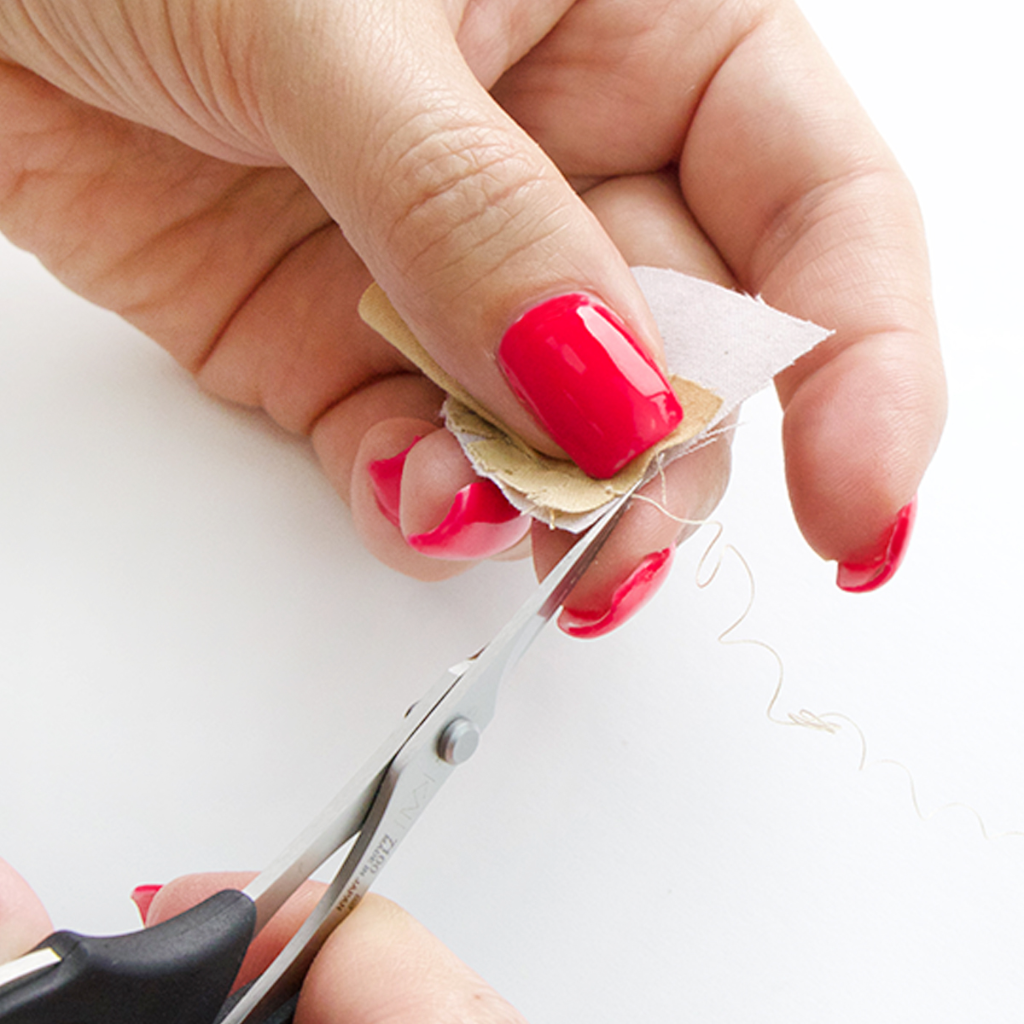
Step Eight
Trim about 1/8" off the seam allowance. This will reduce bulk and allow the curve to lay flat.
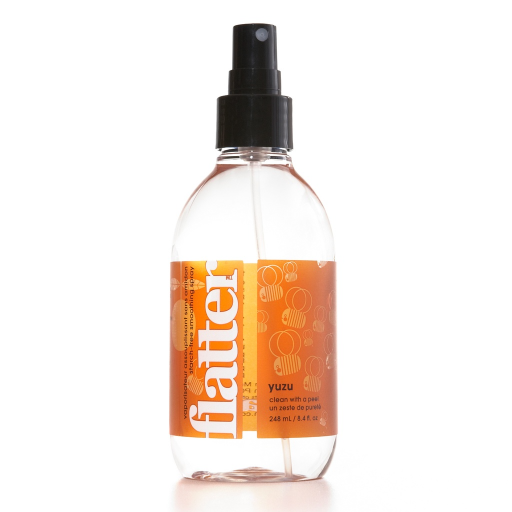
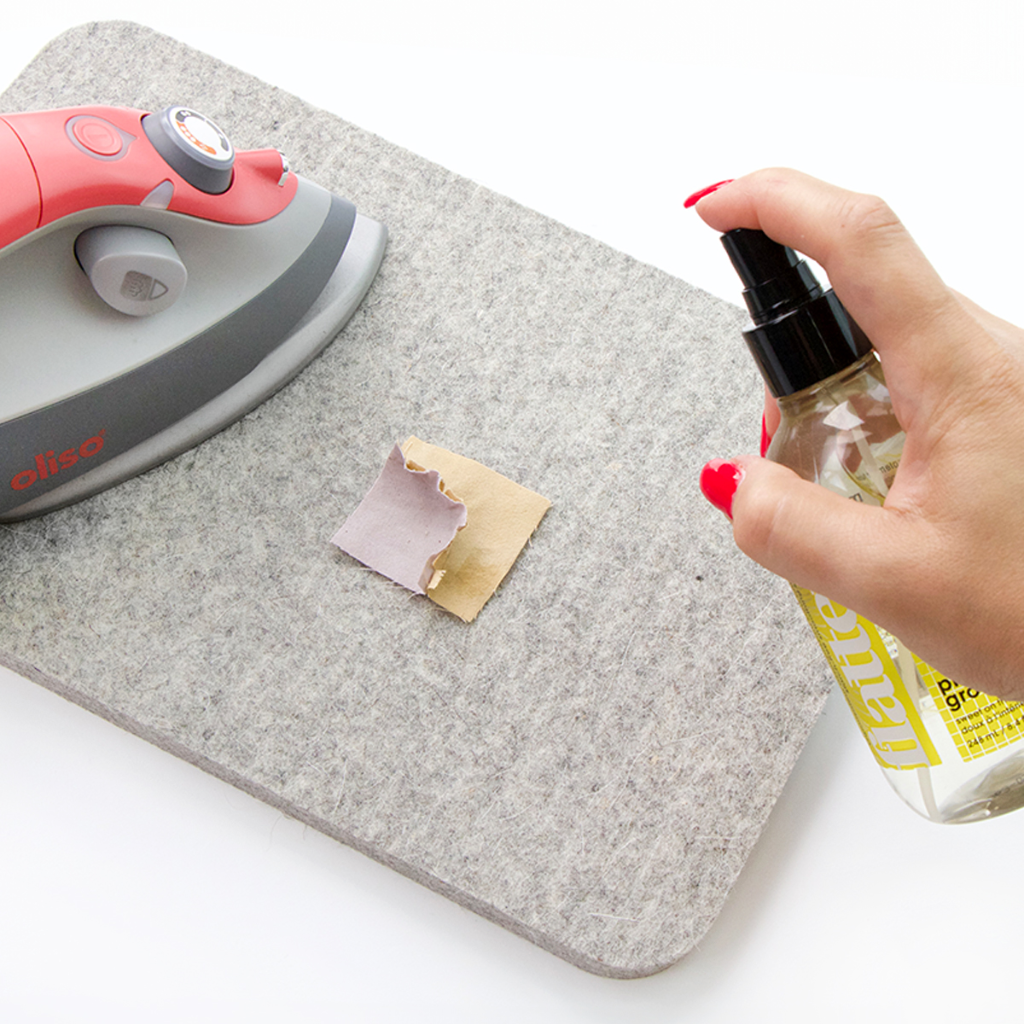
Spritz with Flatter and finger press the seam toward the convex (pie slice) piece before using an iron. The curve will pop nicely and have a cleaner look with the seam pressed in this direction.
Step Nine
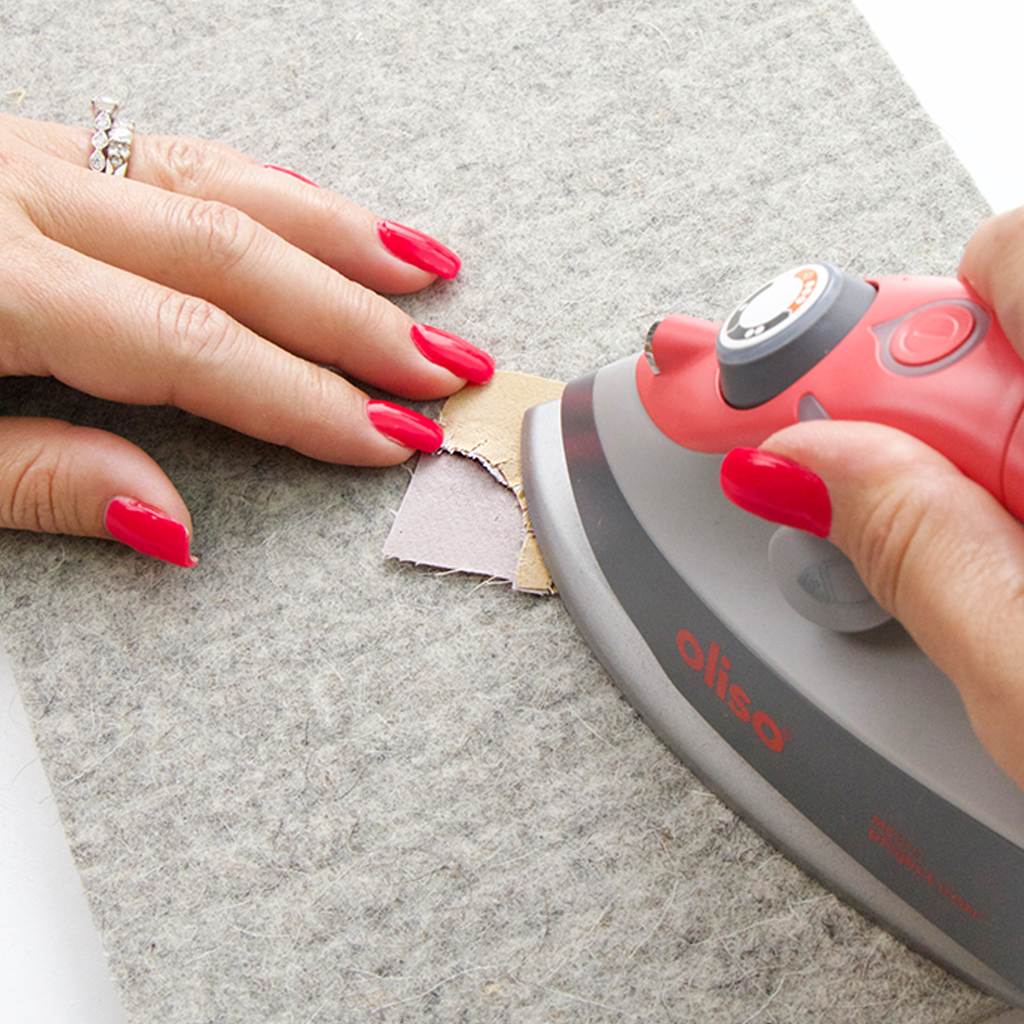
Press the seam flat. The Oliso Mini Iron works great for these small pieces.
Step Ten
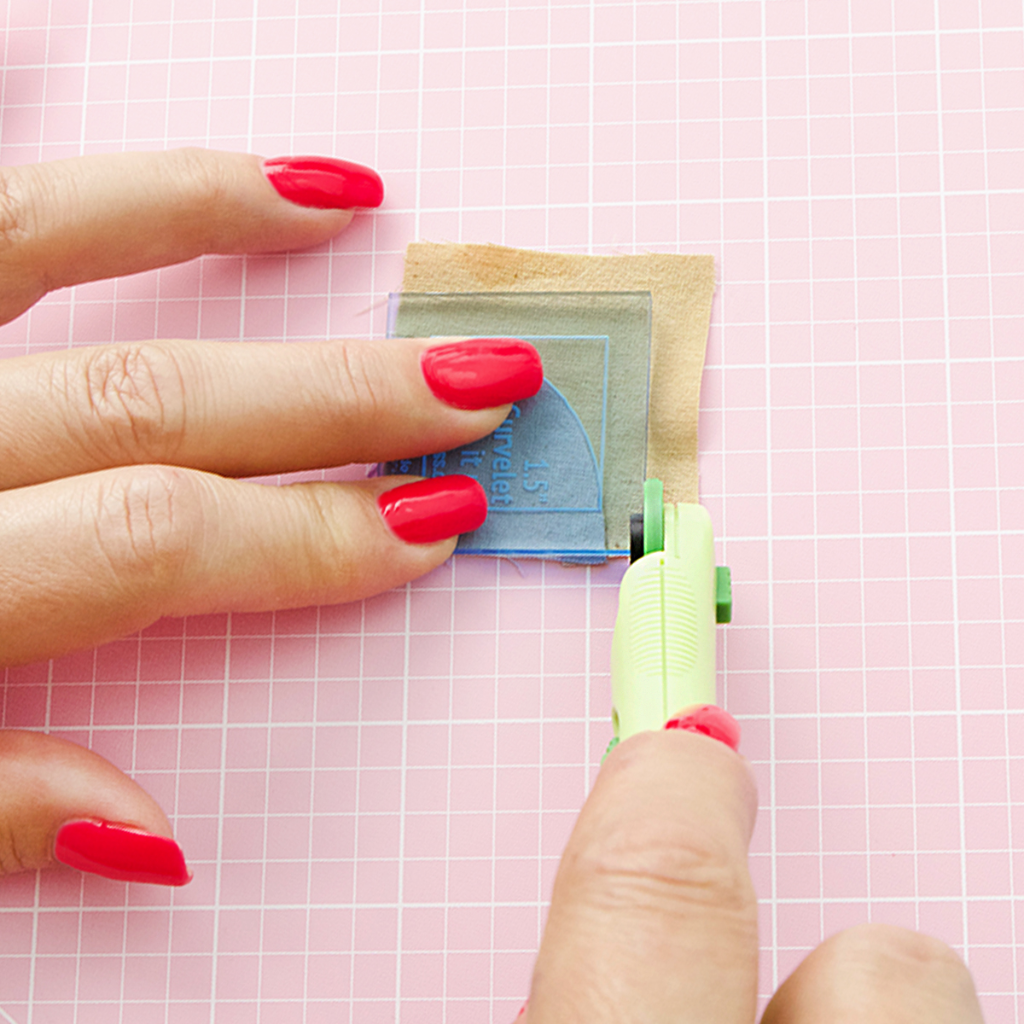
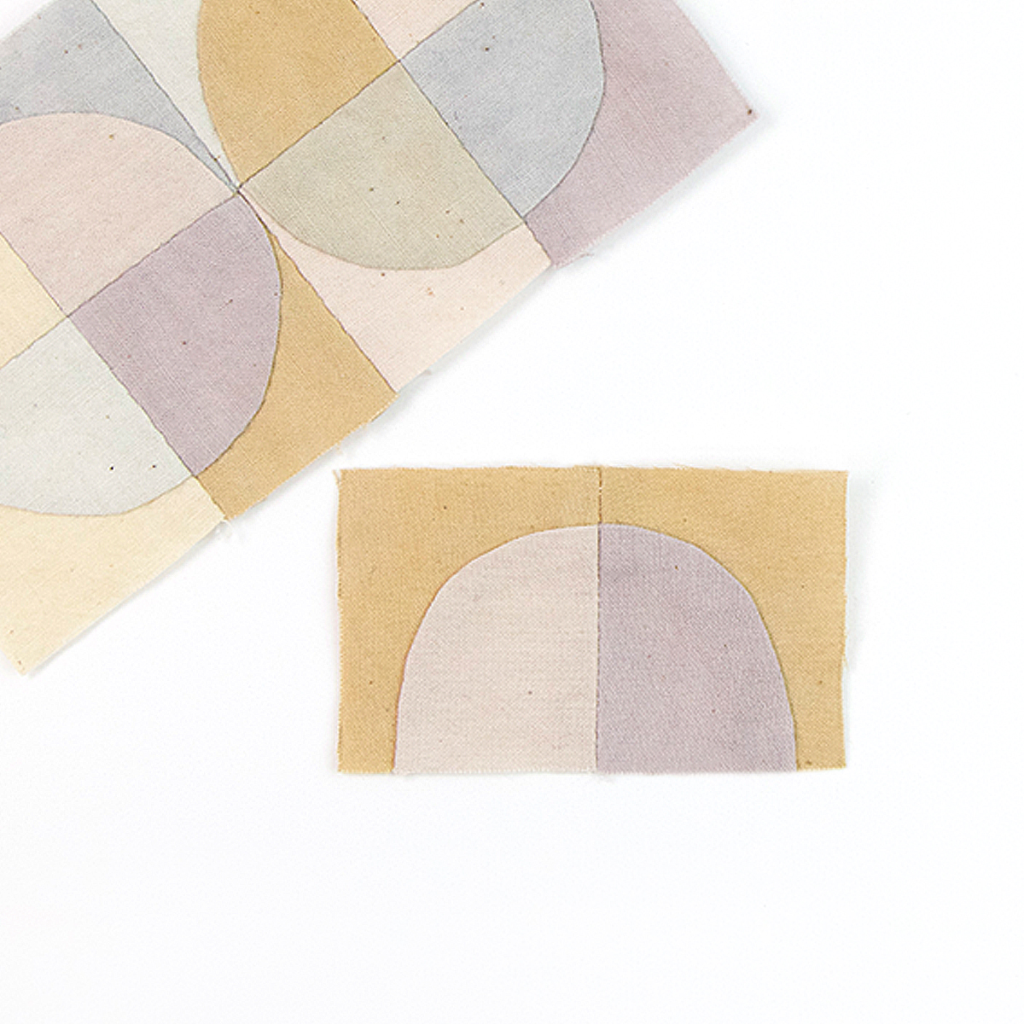
Using the "Square it Up" Curvelet template, trim the block to 1-1/2 inches. Line up the 1/4" mark on the template with the outside edges of the curve. Trim excess. It's important to be careful and accurate with this step. You may choose to trim with a rotary cutter or trace and cut with scissors.
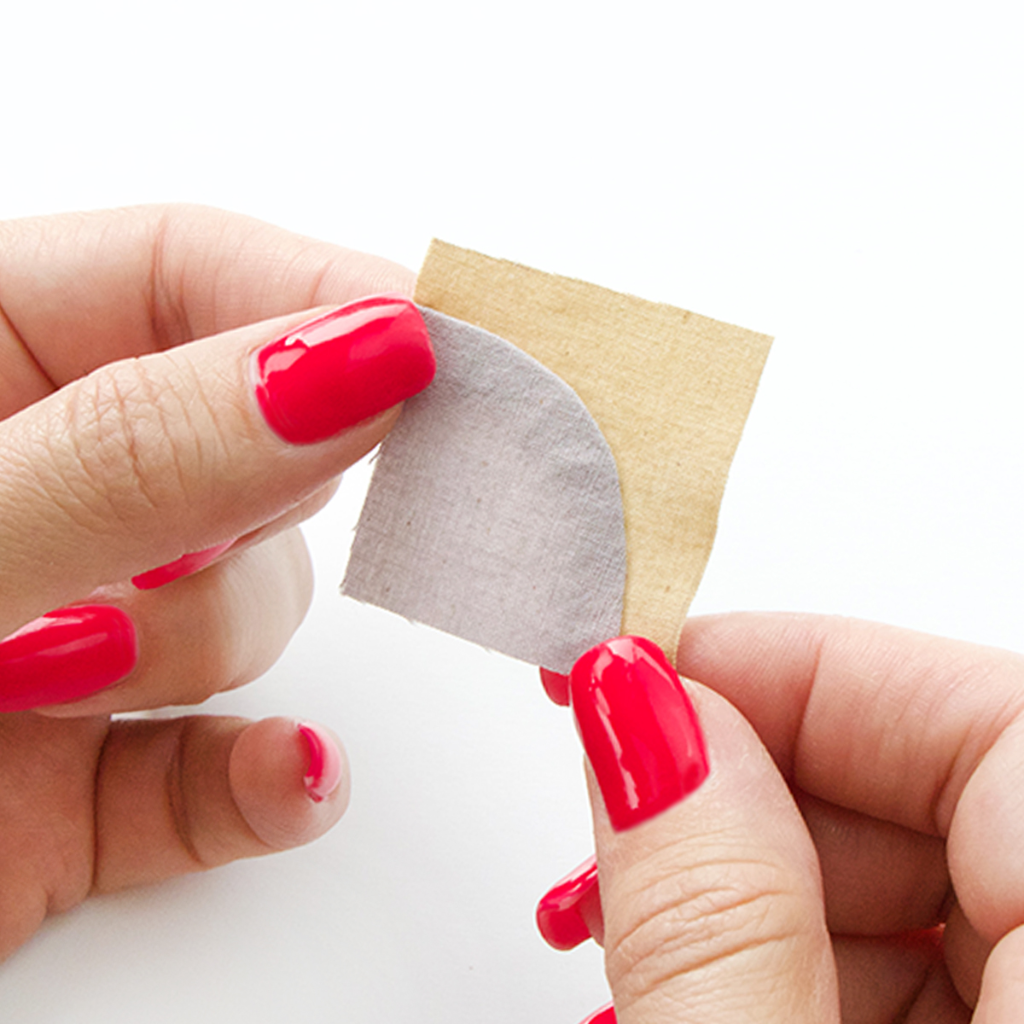
Now admire your perfect little quarter circle!
Interested in creating half circles or full circles? These tutorials are included in the Curvelet booklet and in the tutorial video!
How to Attach Curvelets Together
Place two Curvelet blocks, right sides together. Using the 1/4" on the "Square it Up" template, draw a line along the edge to be sewn.
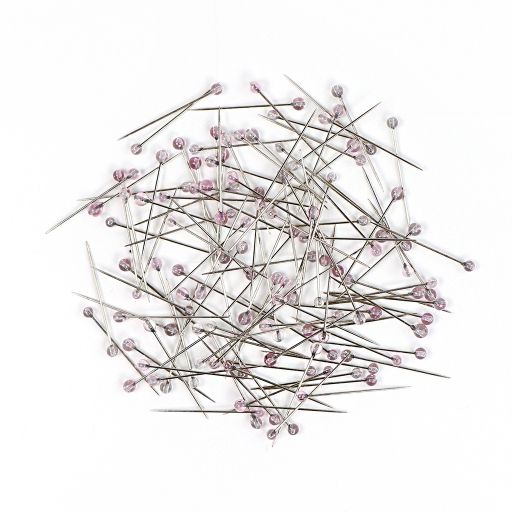
Next, we pinned the blocks together using Little House Applique Pins at points where the two blocks need to match up. You can hand stitch or machine sew along the drawn line.
Spritz with Flatter, press open the seam, and voila! You have your first two Curvelets pieced together!
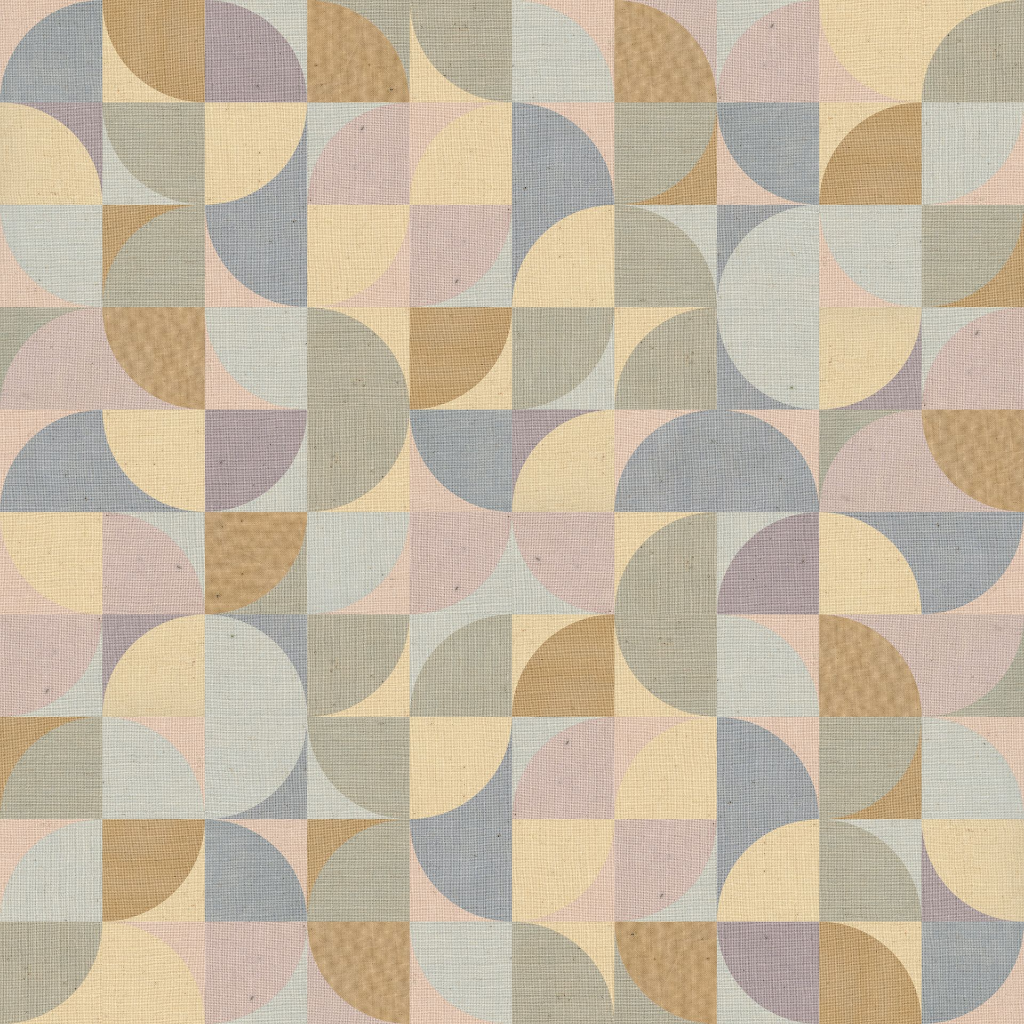
You can create full circles by piecing together quarter circles, or piece them together randomly! Have fun playing with different fabric combinations and experimenting with different orientations of the blocks.
More Inspiration
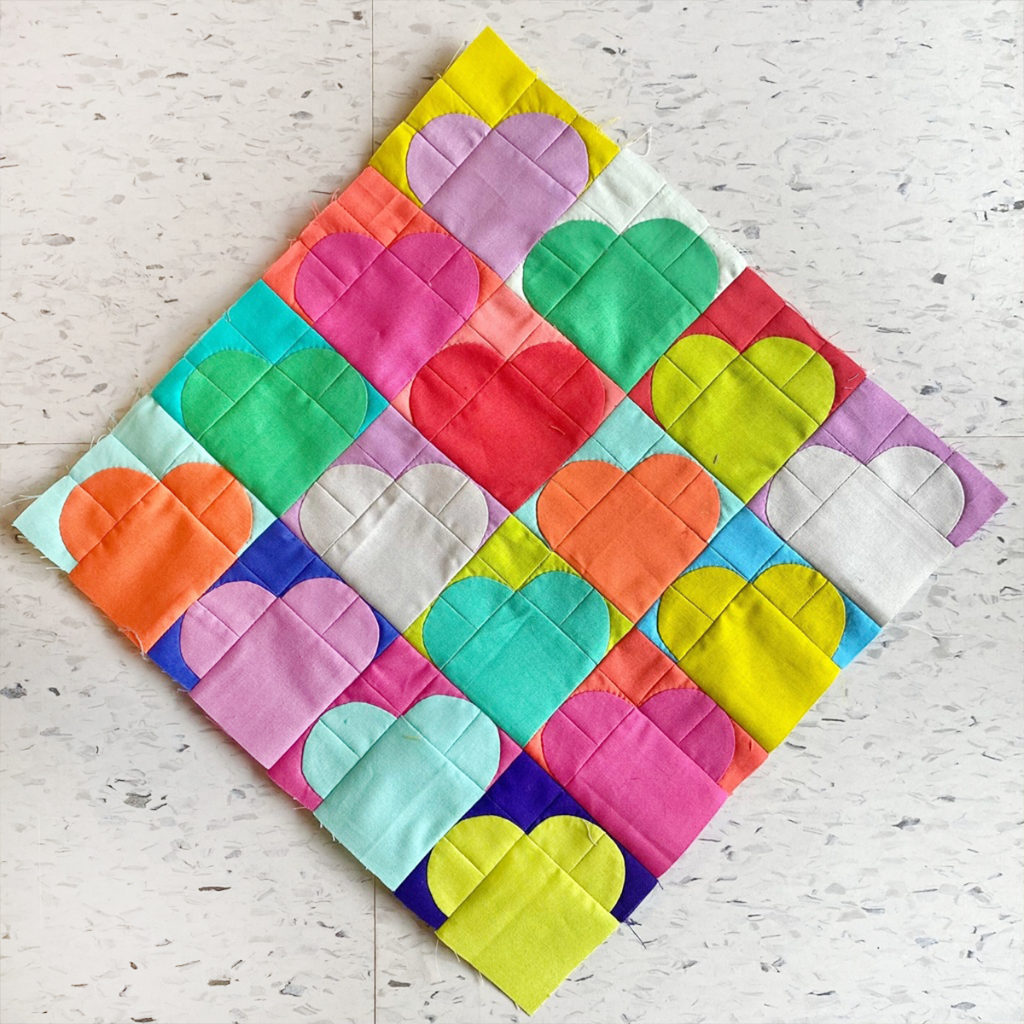
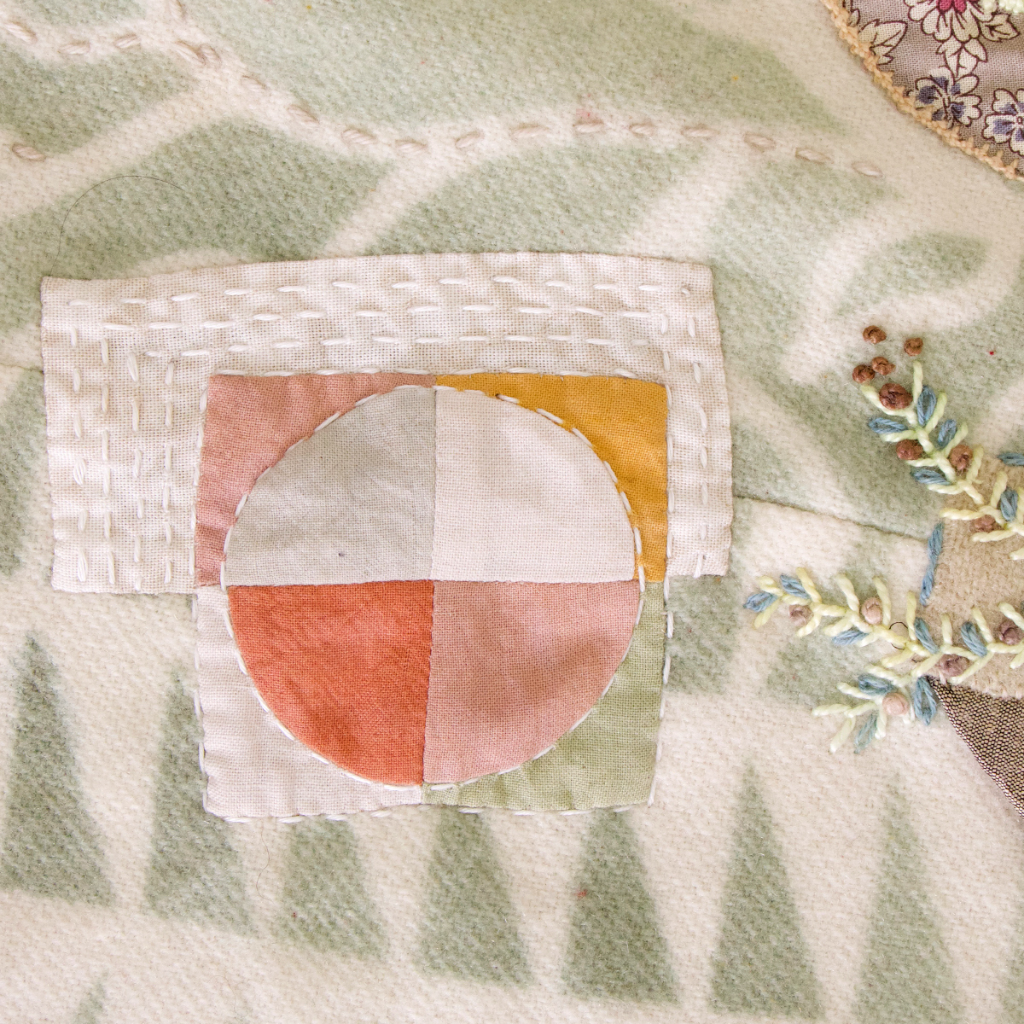
Arrange the blocks to create hearts. How adorable!
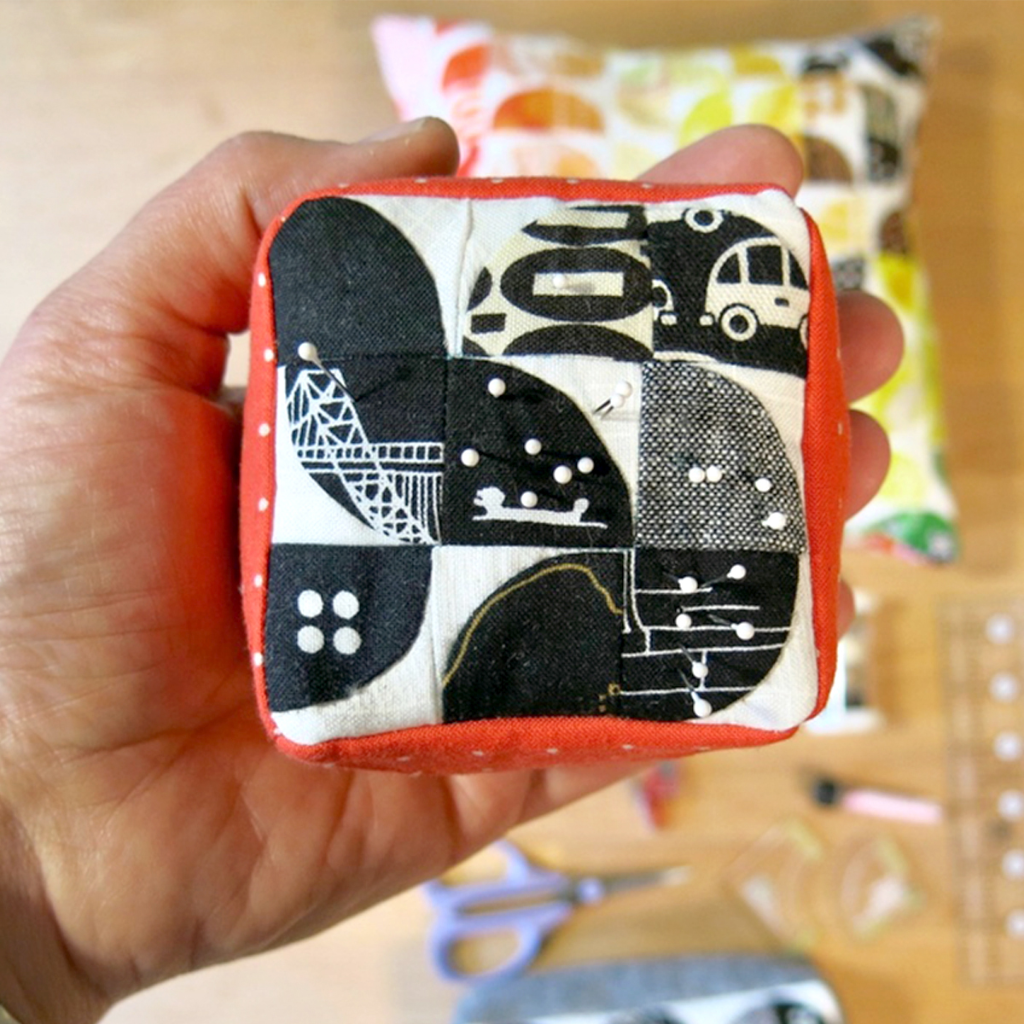
Create a pin cushion top with Curvelets!

Arrange the blocks to create hearts. How adorable!
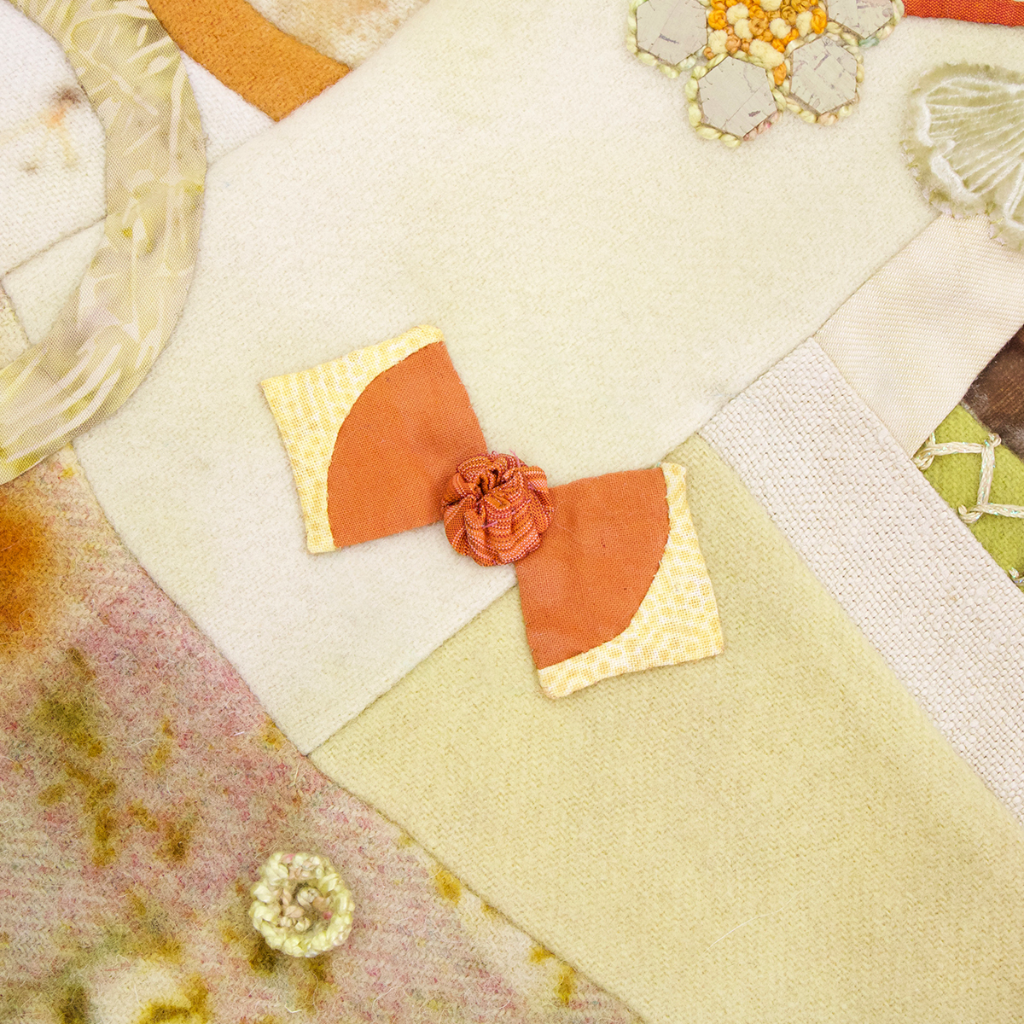
Embellish your Curvelets with embroidery.
Get creative by incorporating Curvelets into your projects.
Create
We've paired down the supply list to what we think works best for creating Curvelets, and we have everything you'll need to get started!