Our love for working with wool is pretty obvious, and wool appliqué is a huge part of this! Whether you always wanted to try or just want a refresher, here's a step by step on wool appliqué basics.
You don't need much to get started with wool appliqué!
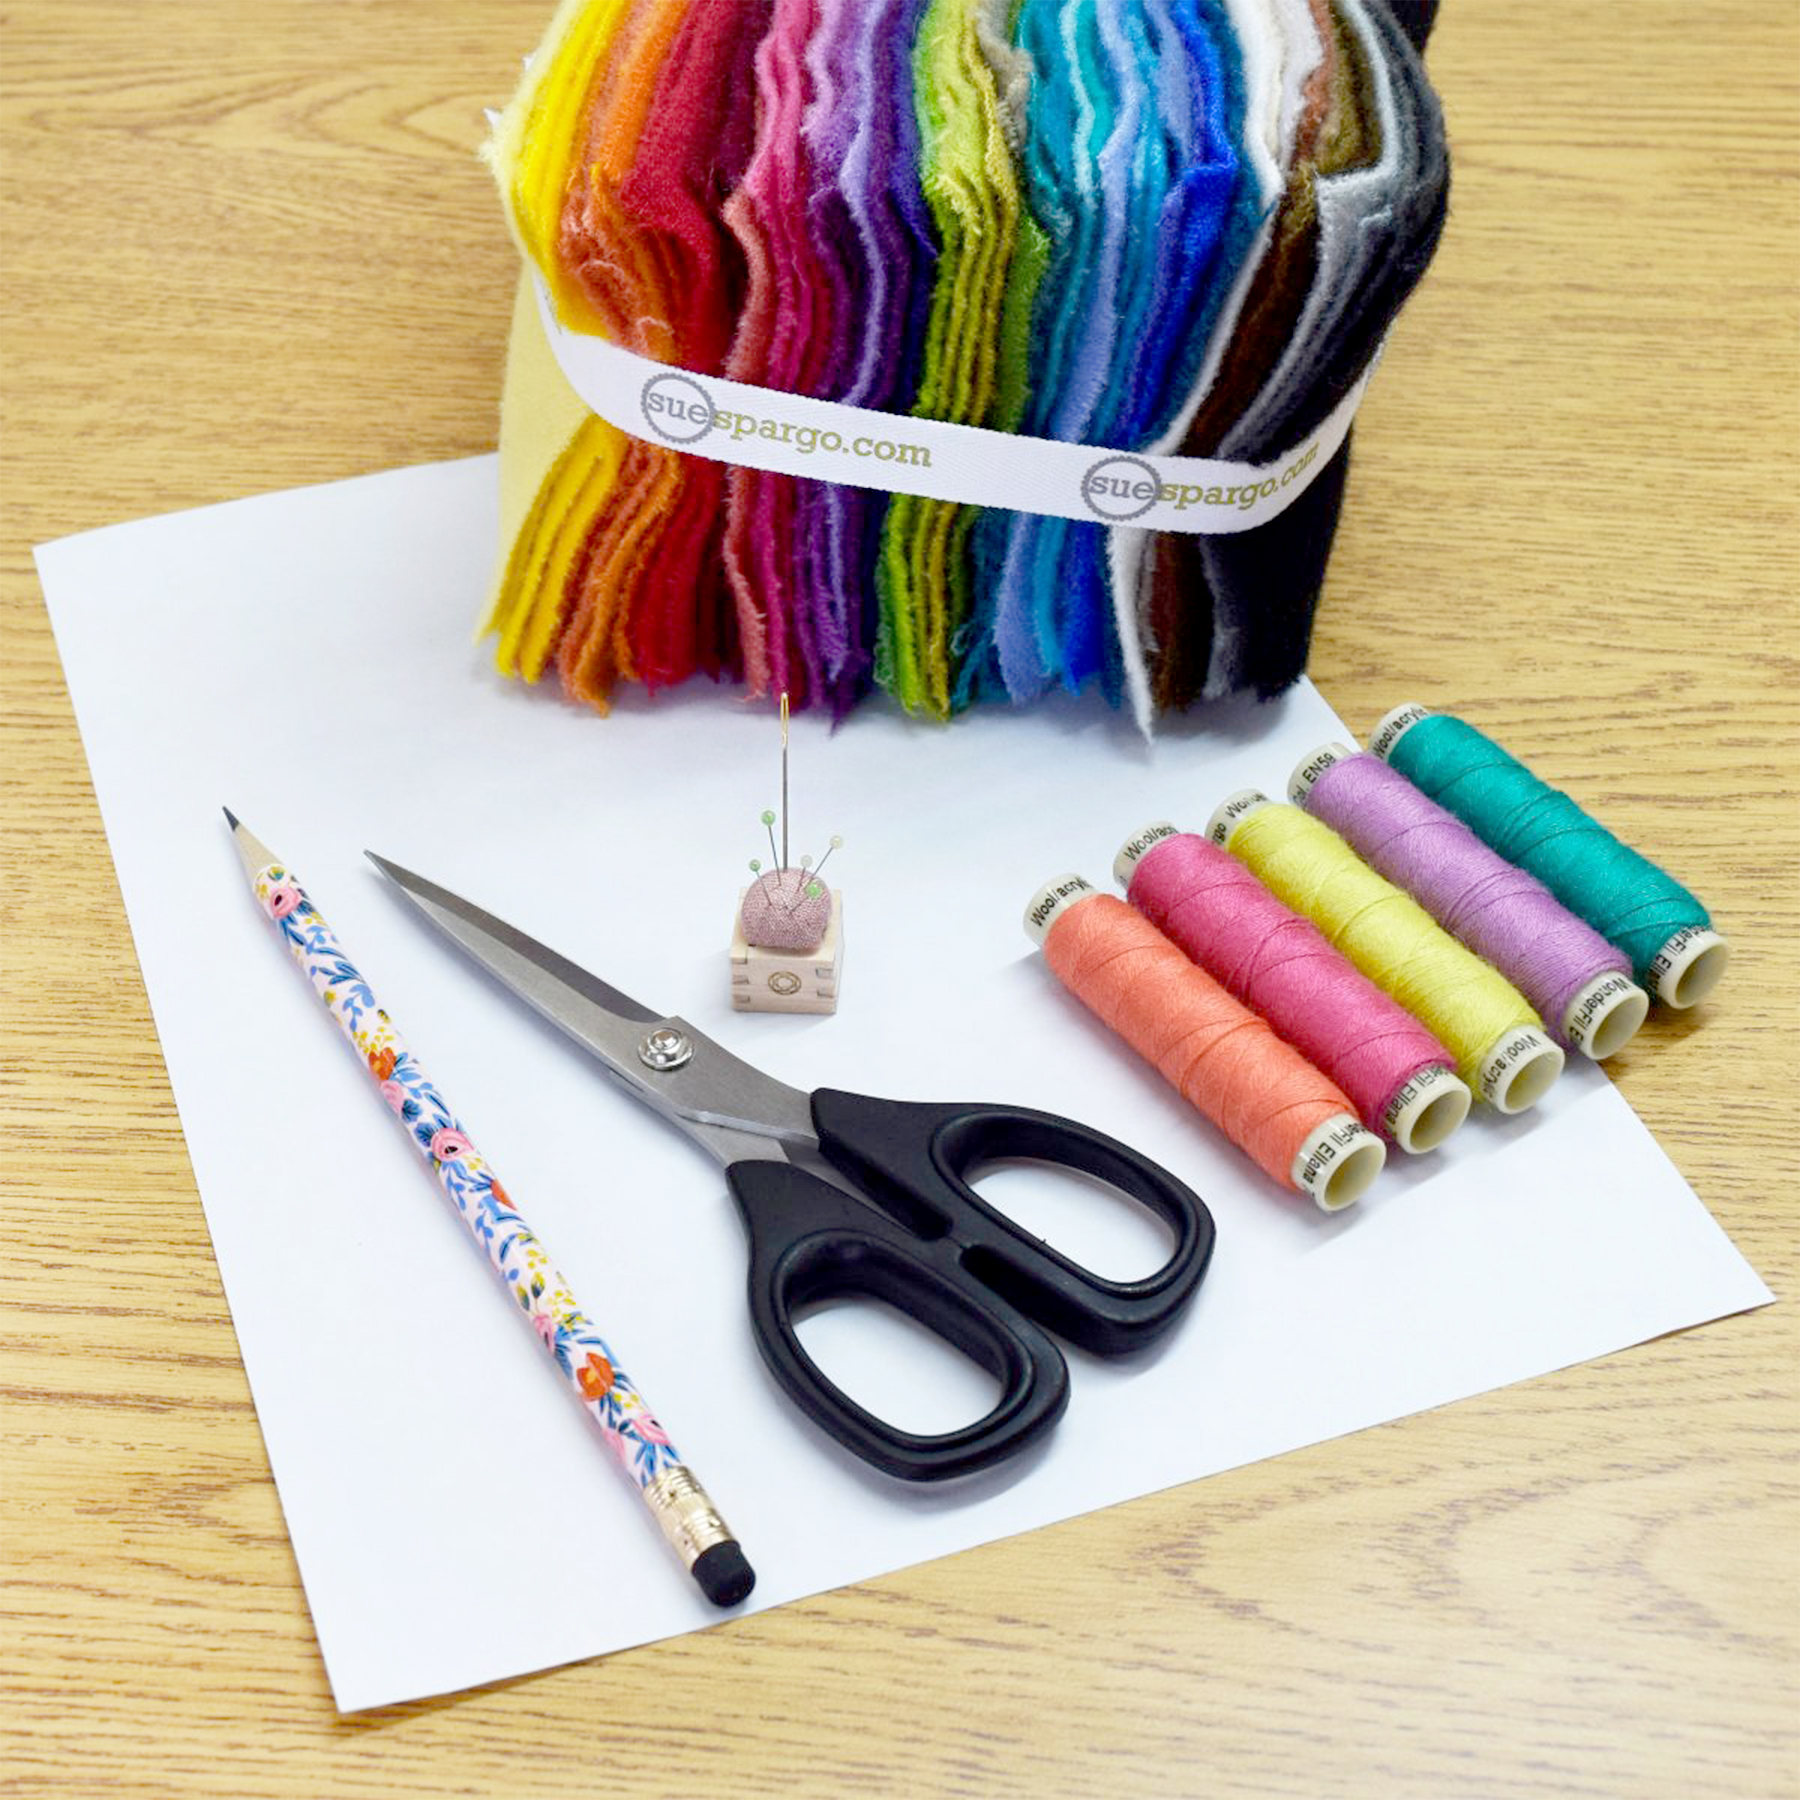
Here are the basic tools:
Wool
- Match your thread to your wool appliqué
Scissors
- Freezer Paper
- Chenille #24 Needle
- Appliqué Pins
- Pencil
- Iron
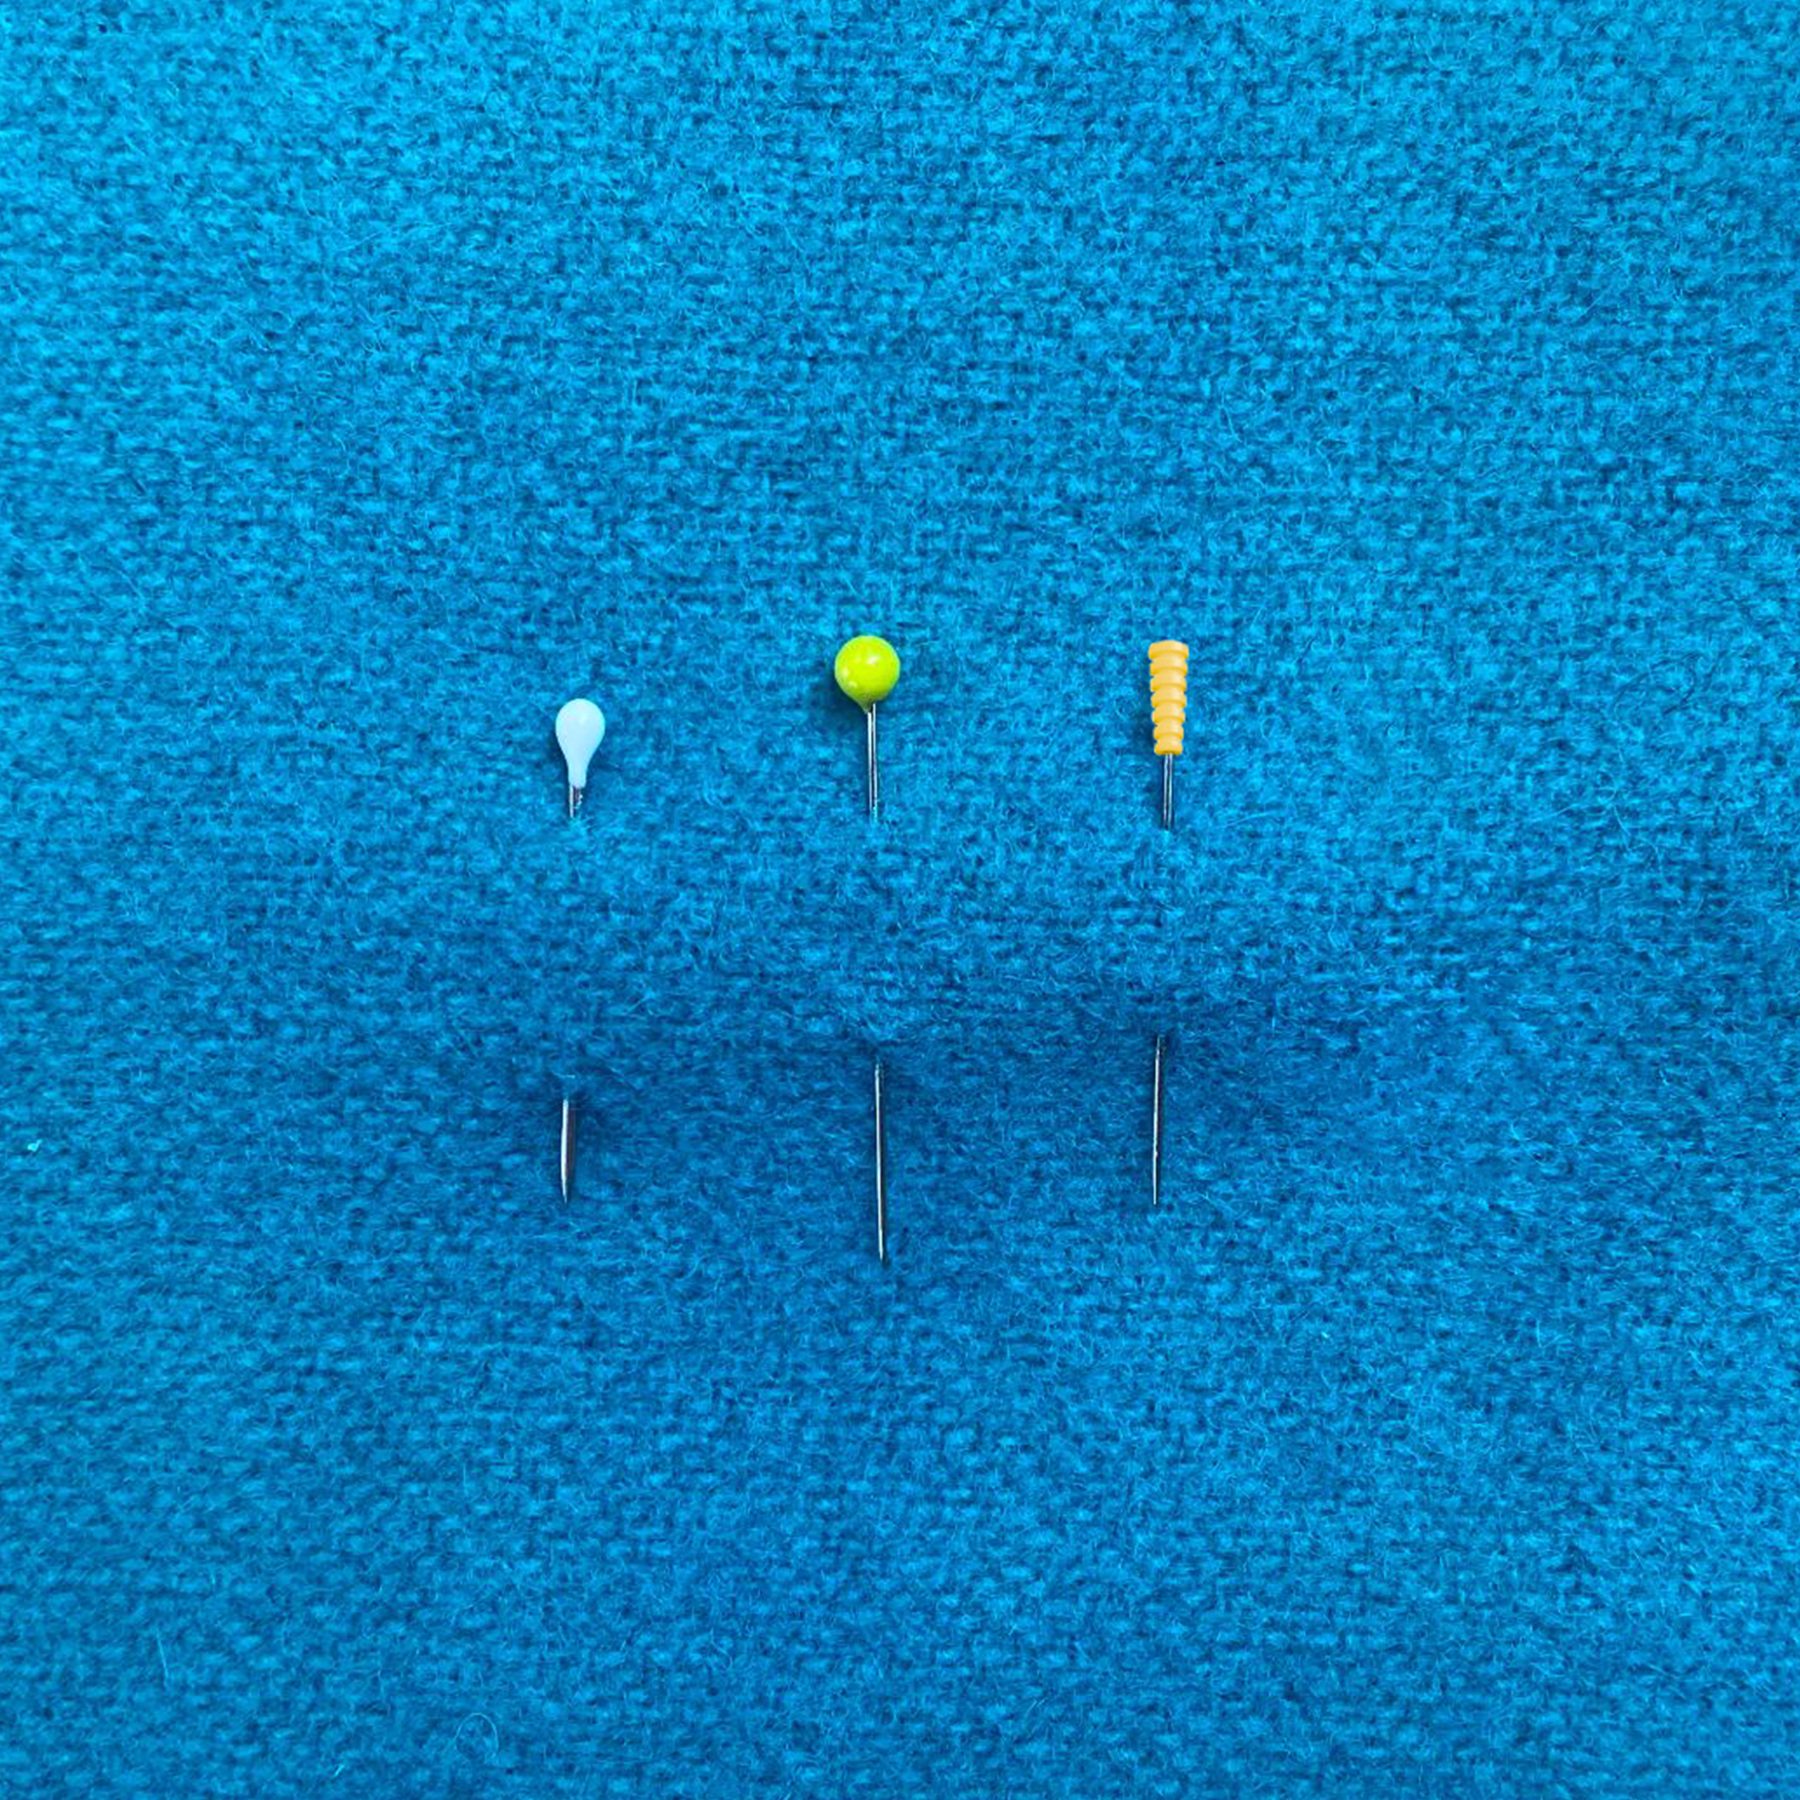
When it comes to appliqué pins, you have a lot of options! We'll give you the run-down on each (from left to right):
Clover Appliqué Pins: These no-budge pins are a Sue Spargo favorite, especially for travel! They're a short, stocky pin with a slightly thicker shaft than most appliqué pins. Their ingenious teardrop head prevents thread from catching while stitching.
Tulip Appliqué Pins: These pins are long and fine, with an extra-sharp point, which makes them ideal for pinning through lots of layers! The body length and large, round head means this pin is very easy to hold and maneuver.
Magic Appliqué Pins: Available in two sizes, regular and fine. We love to use the regular size for wool appliqué. They are the perfect length to hold appliqué pieces in place without getting in the way. The comfort grip handles are easy to hold and easy to find if you drop one!
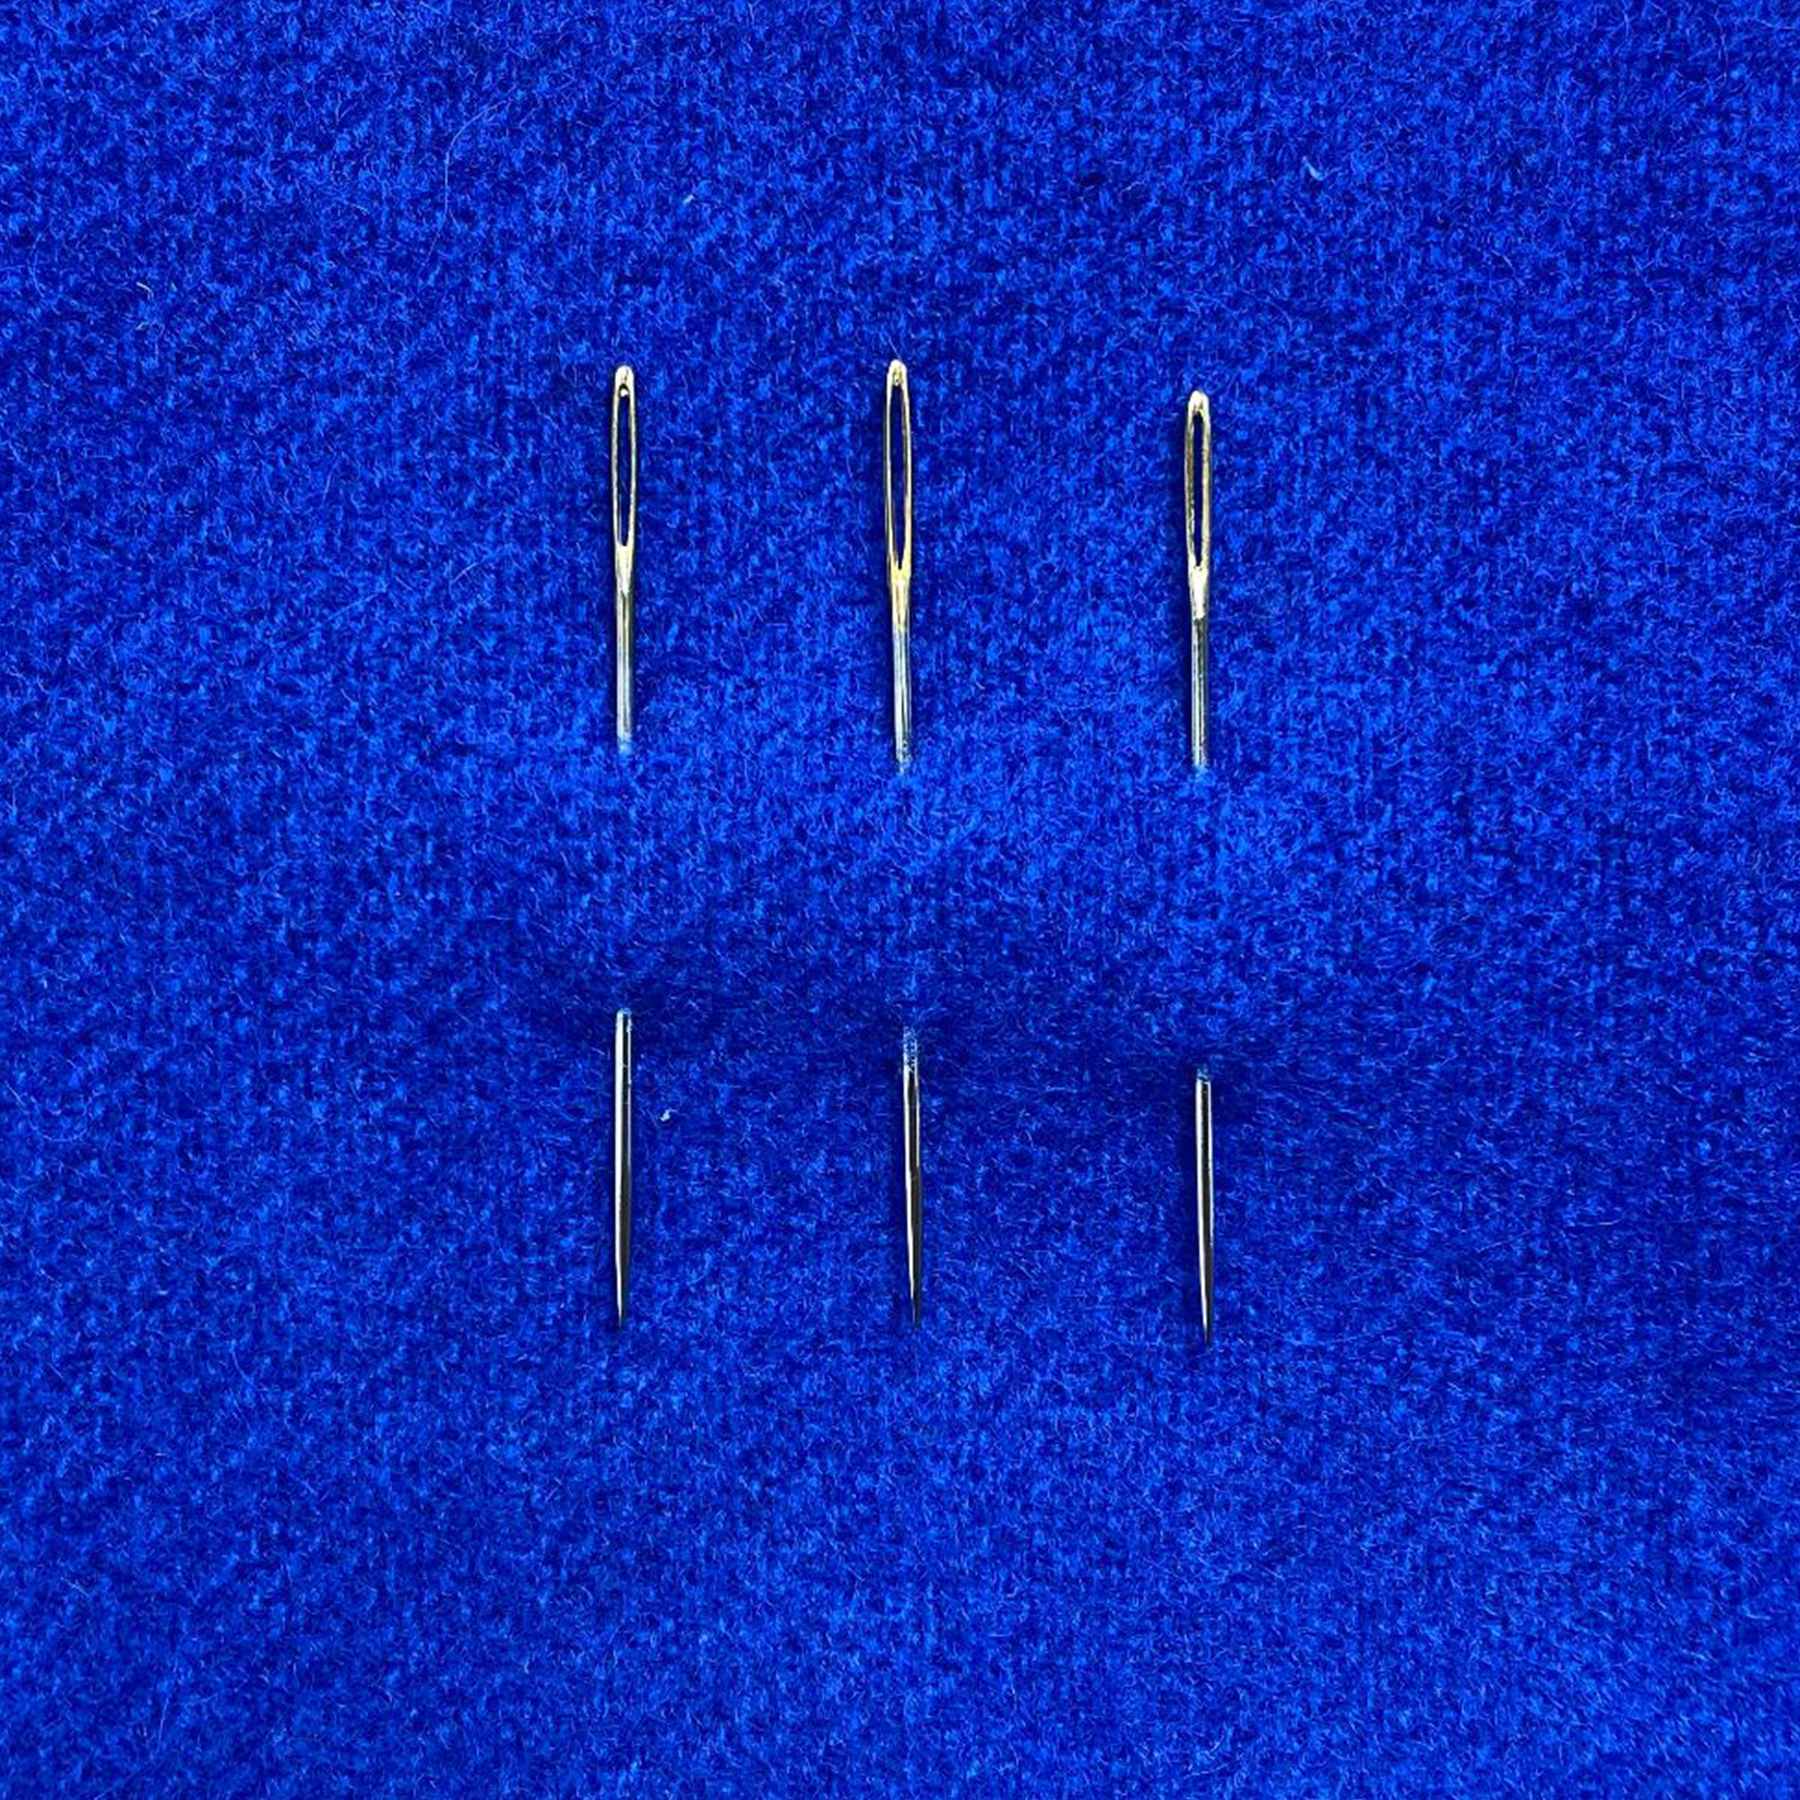
There's also a lot of options when it comes to needles! The Chenille #24 needles we use are (from left to right):
Clover: A nice, Japanese needle with a short, small eye. A good and inexpensive option.
Gold Eye: Japanese Gold Eye needles are very sharp, with the largest eye, making them the easiest to thread.
Tulip: Very sharp, Japanese needles, with the smallest eye of the three. Its smooth body lets it glide through wool easily, with no drag.
Some extra tools may make your wool appliqué go a little smoother!
Some of our favorite optional add-ons include:
- Daylight Wafer Lightbox - this makes tracing a pattern onto freezer paper so easy!
- Little House Rubber Cap Thimbles or Leather Colonial Thimblepads
- Embroidery Needle Threader - For those that struggle to thread a needle, this makes threading wispier ends of Ellana a breeze.
- 4" Kai Japanese Scissors to snip threads and cut those small corners of your appliqué.
- Slimline Lighting - lighting up your workspace is critical!
- Wool Pressing Mat
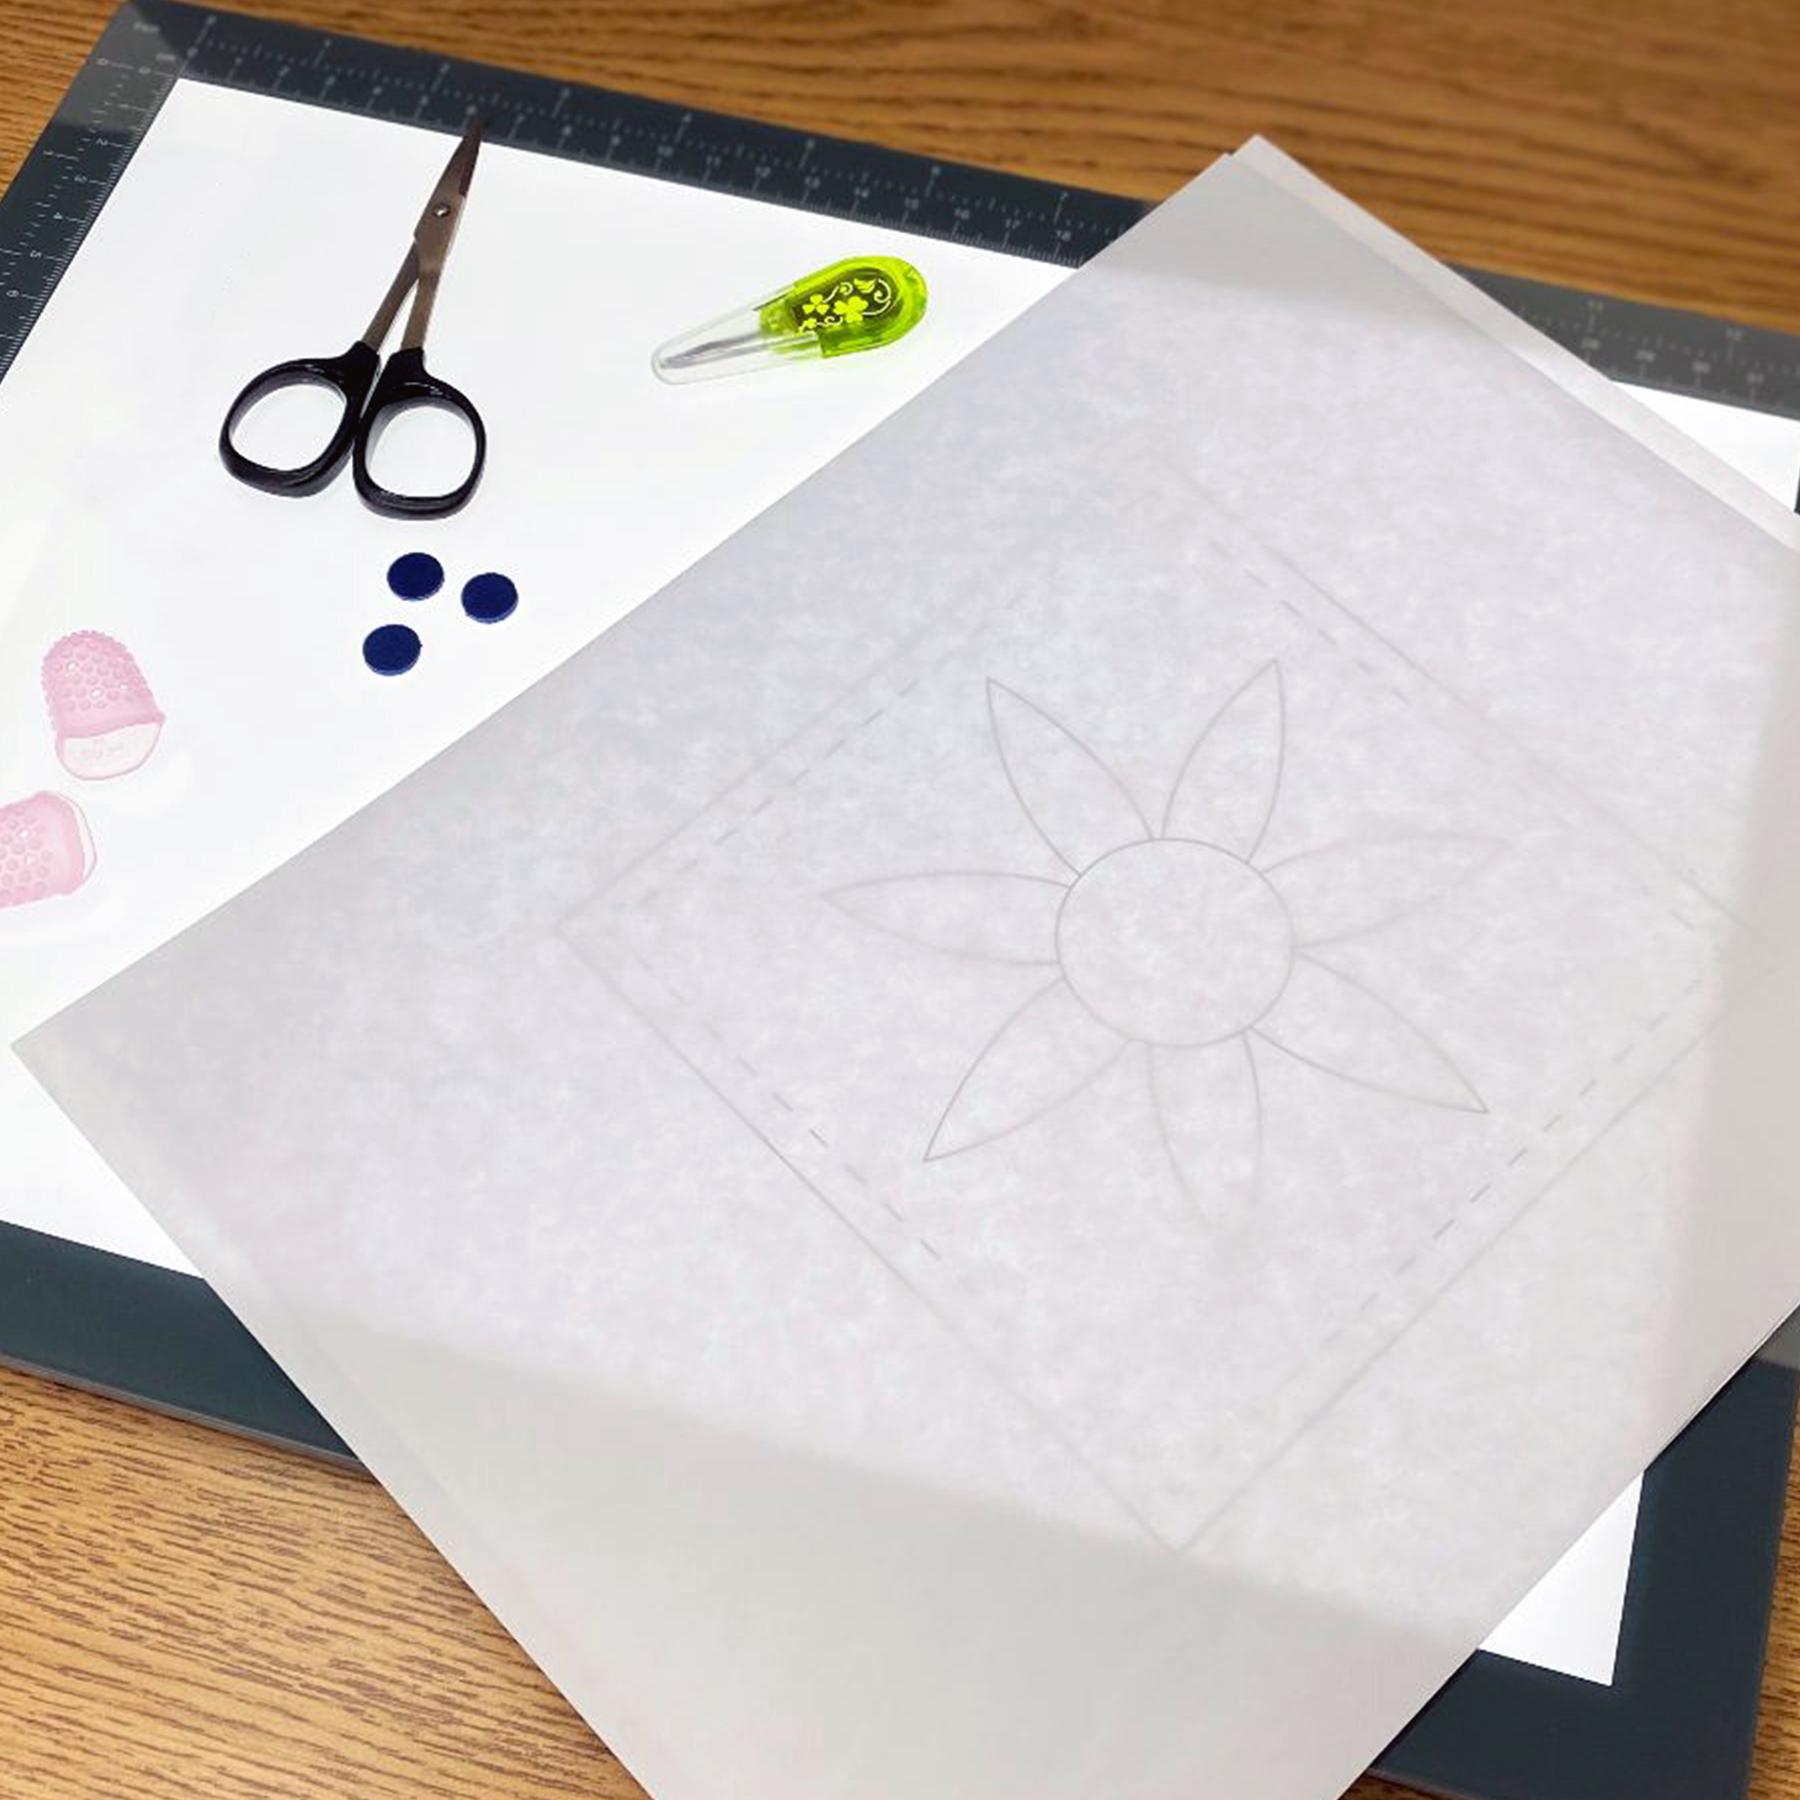
Once you have all your supplies together, it's time to get started!
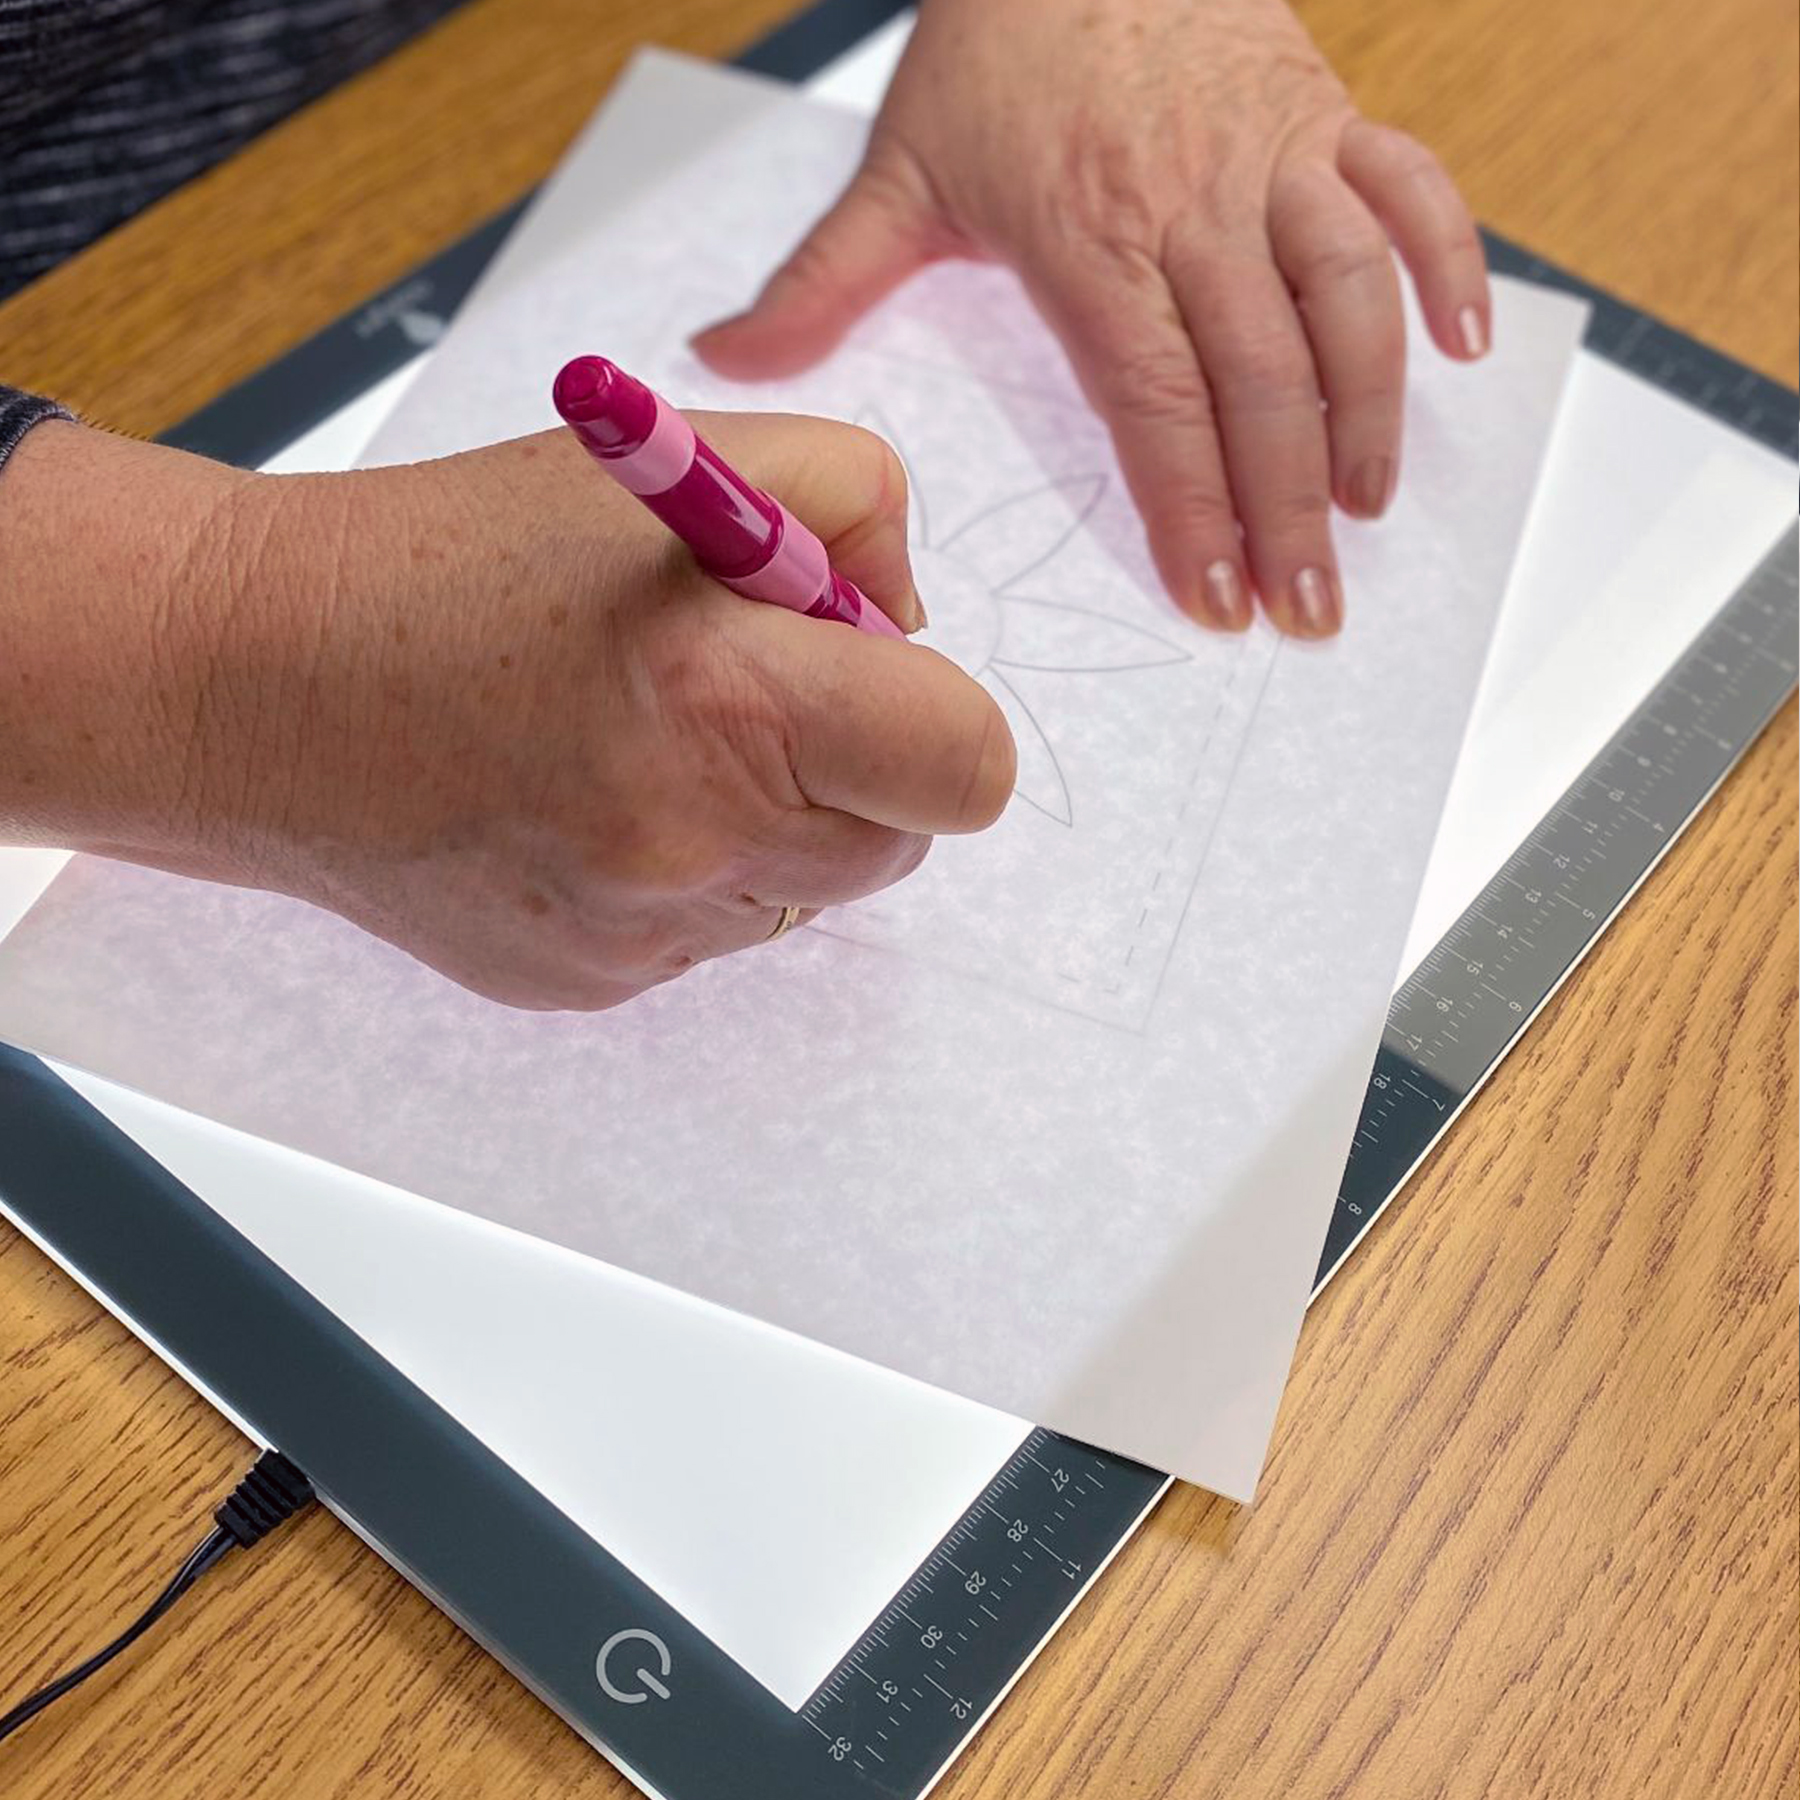
First, trace your pattern or design onto the matte side of the freezer paper.
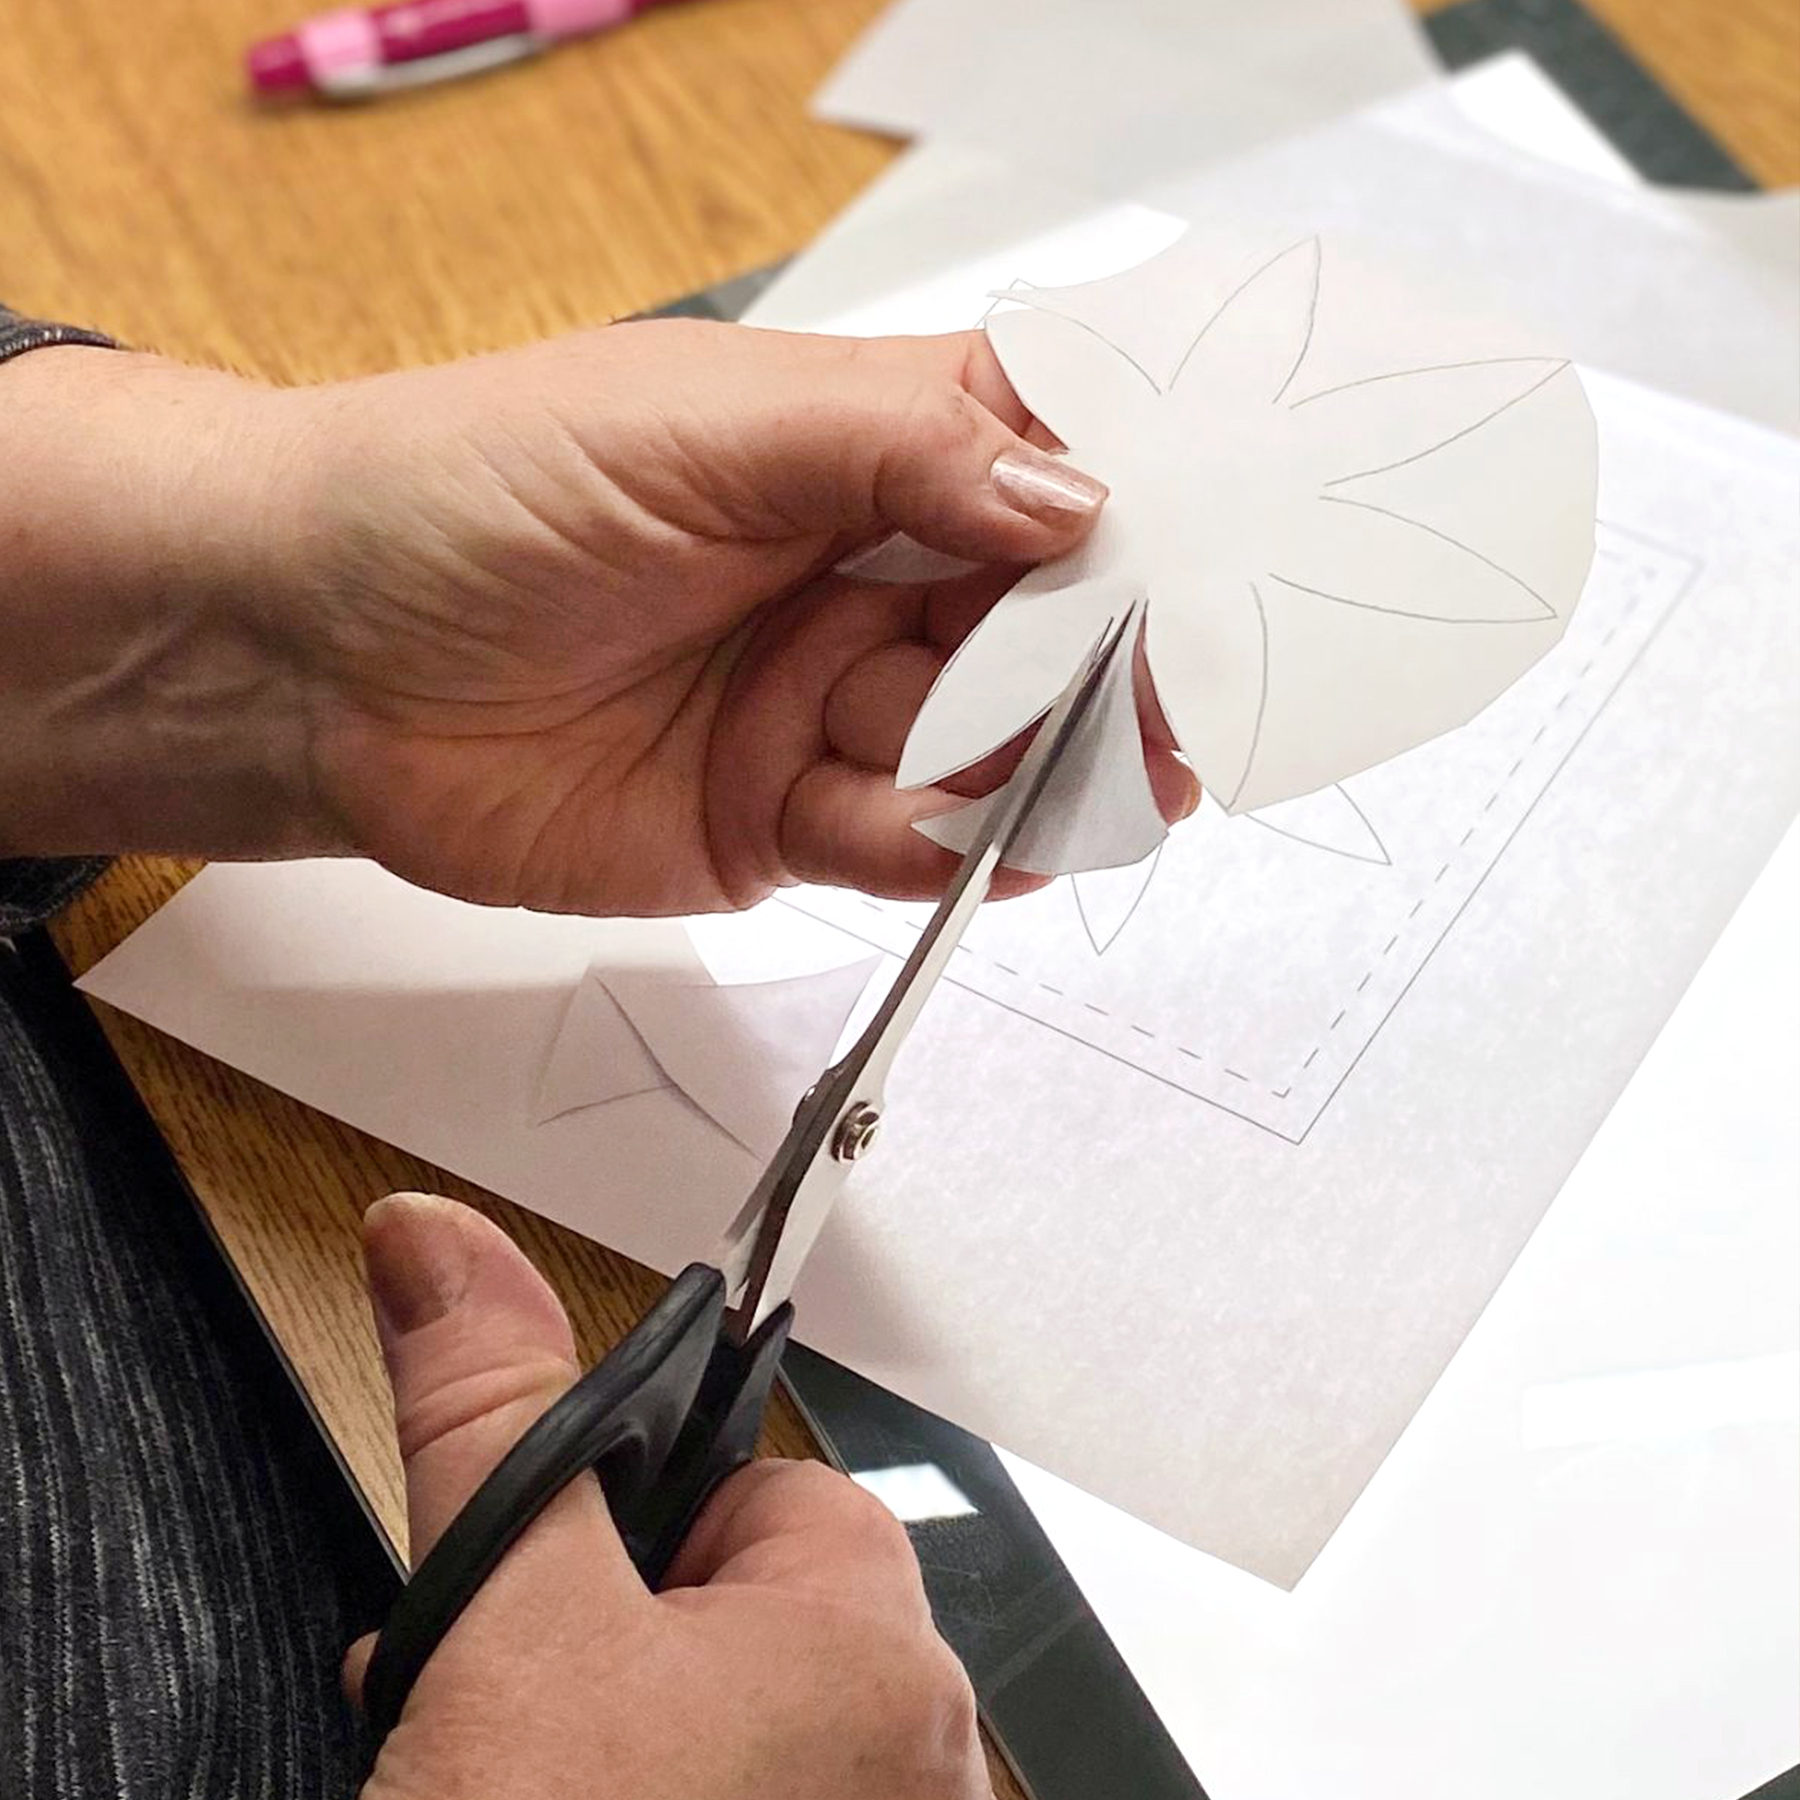
Cut your template out directly on the traced line.
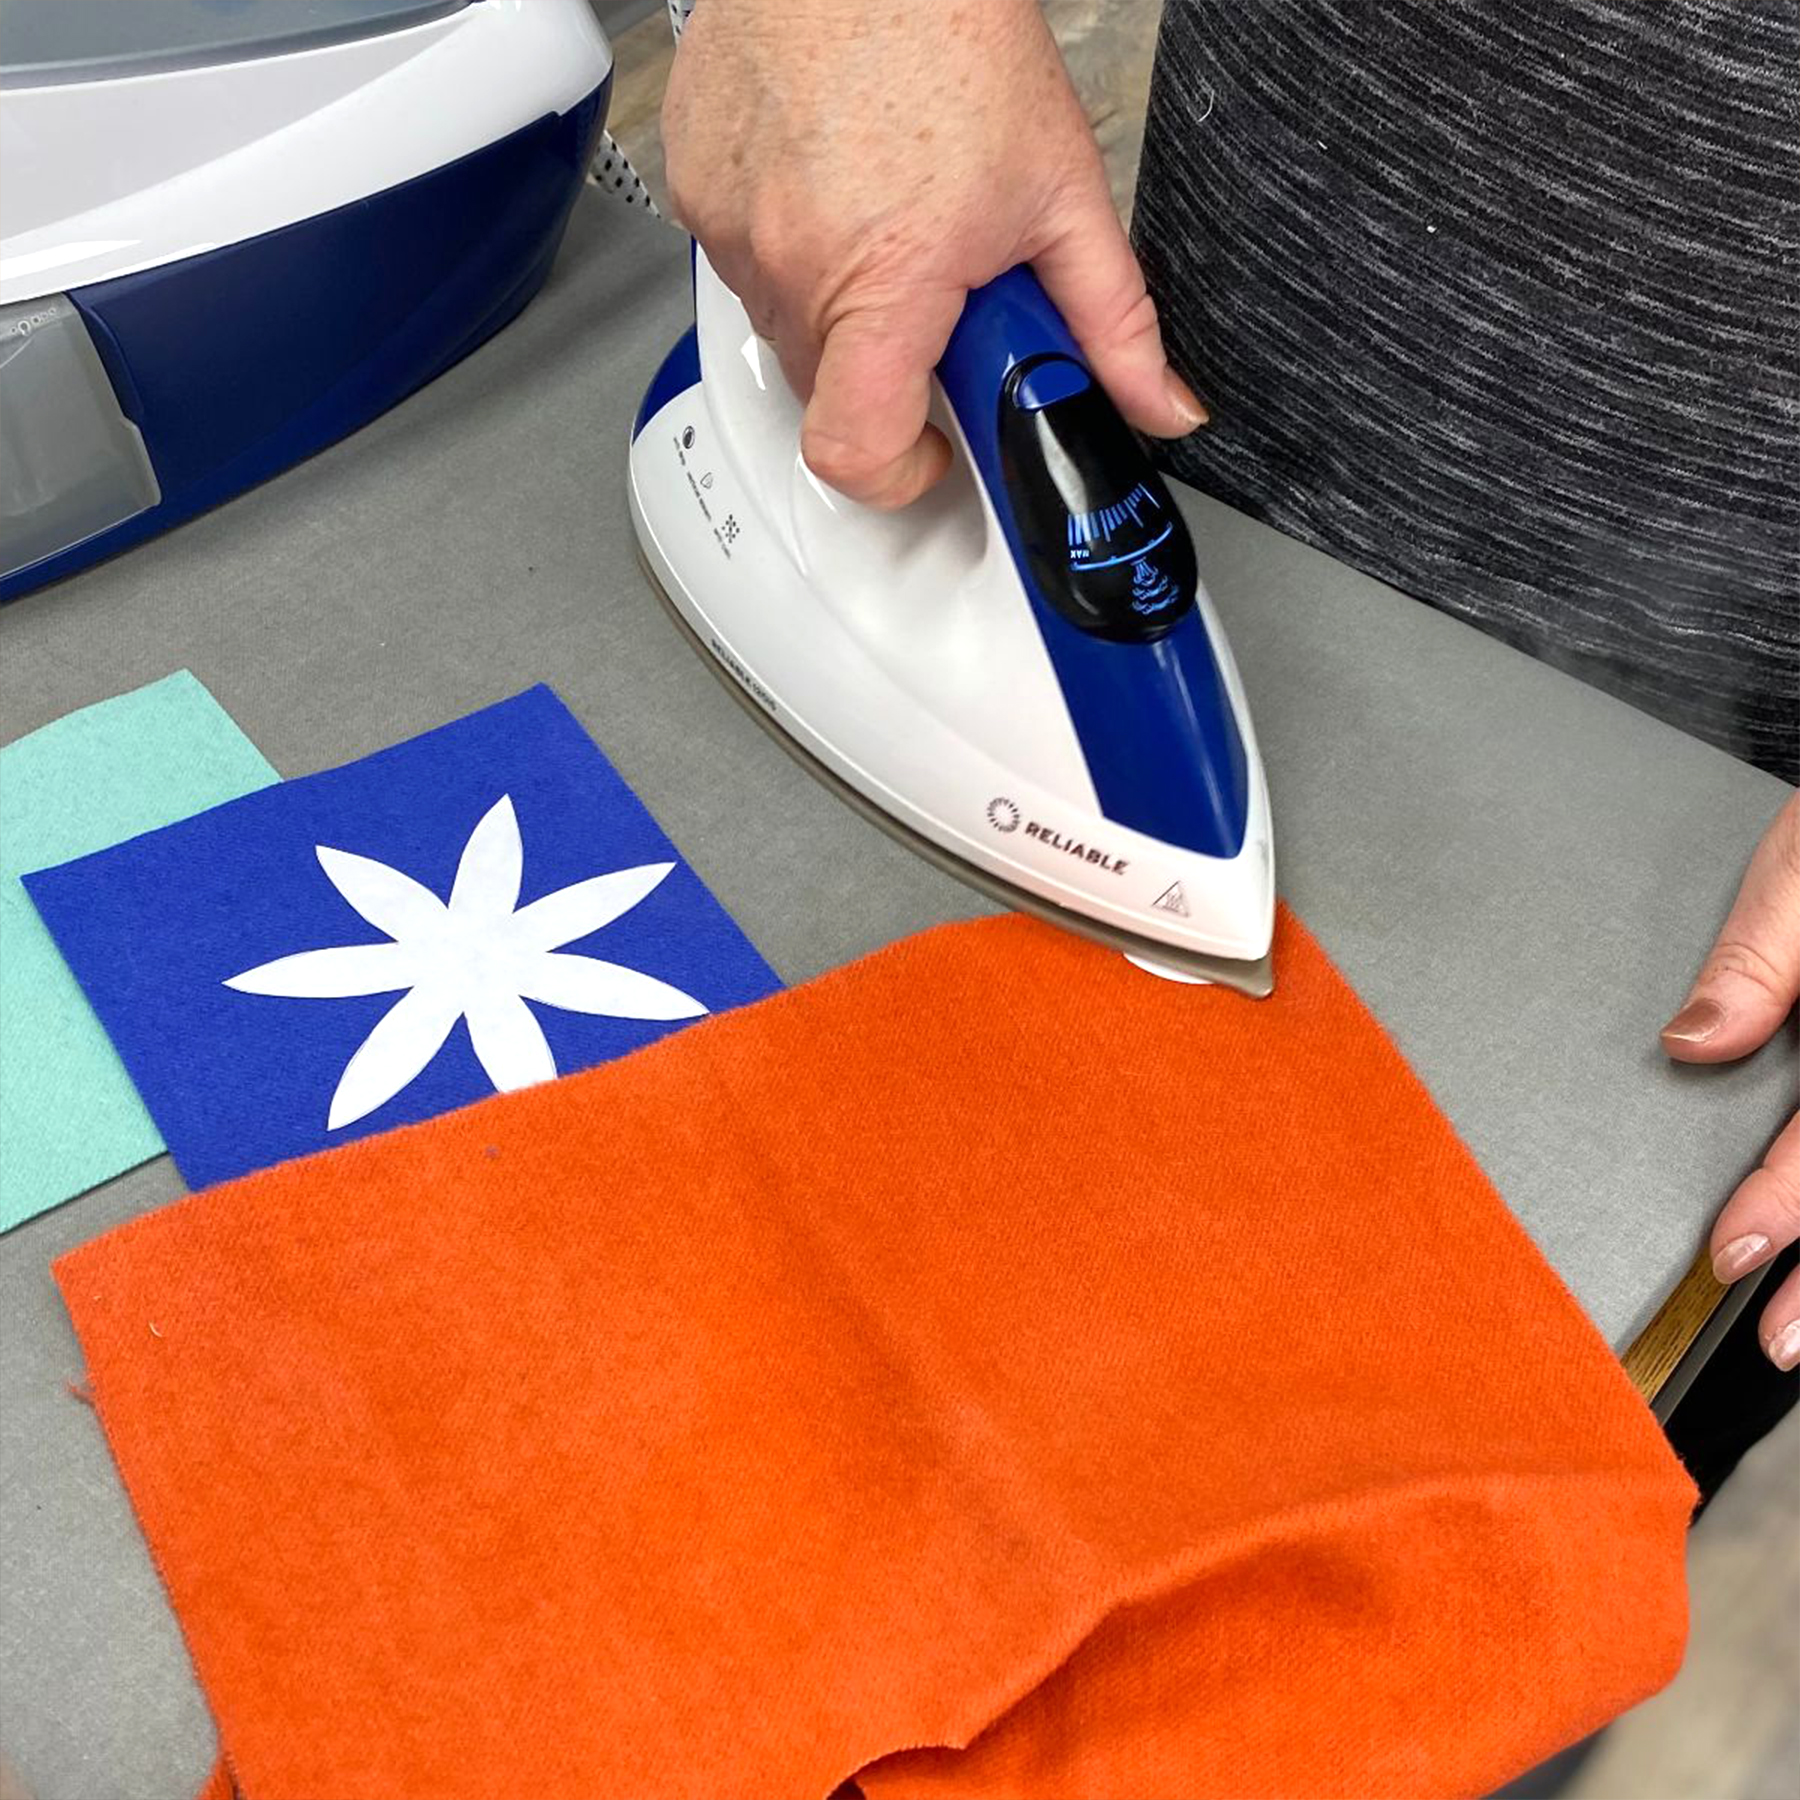
With a dry iron, iron your freezer paper template, shiny side down, to your wool. Make sure to iron your template as close to the edge as possible to conserve wool!
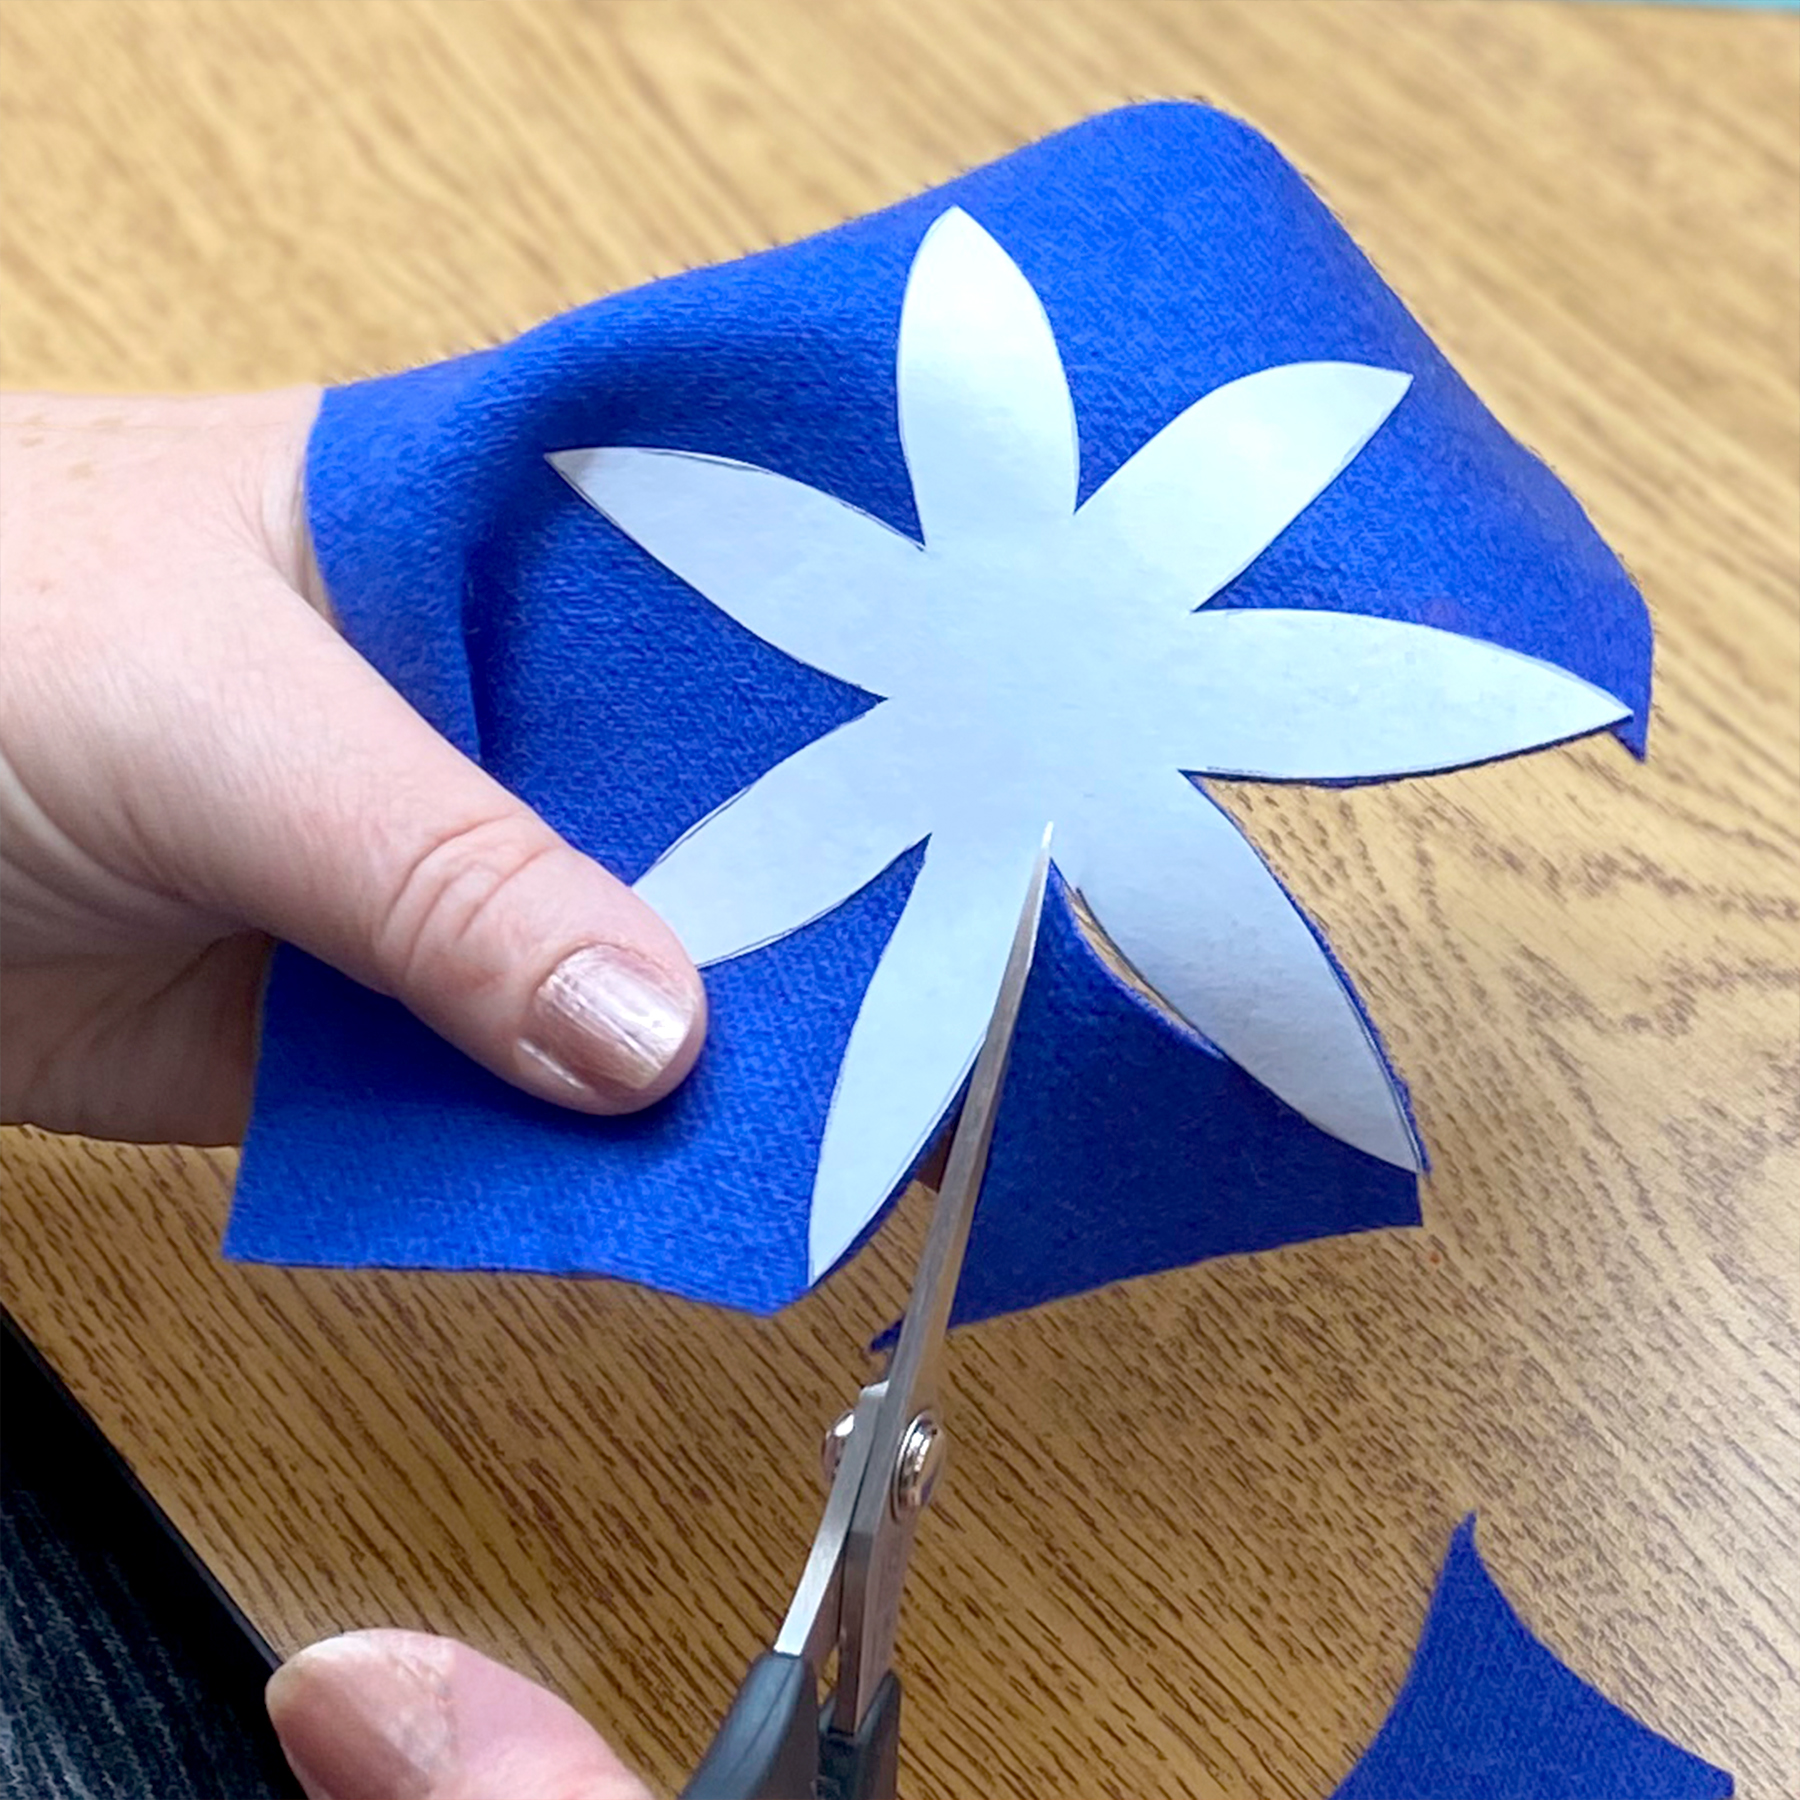
Cut out the wool along the edge of your freezer paper template.
TIP: Cut out wool appliqué pieces exactly the same size as your templates, except on pieces that underlay others, add 1/4” to tuck under. For example, when cutting out a bird's beak, you would add 1/4" to the side that would tuck under the body.

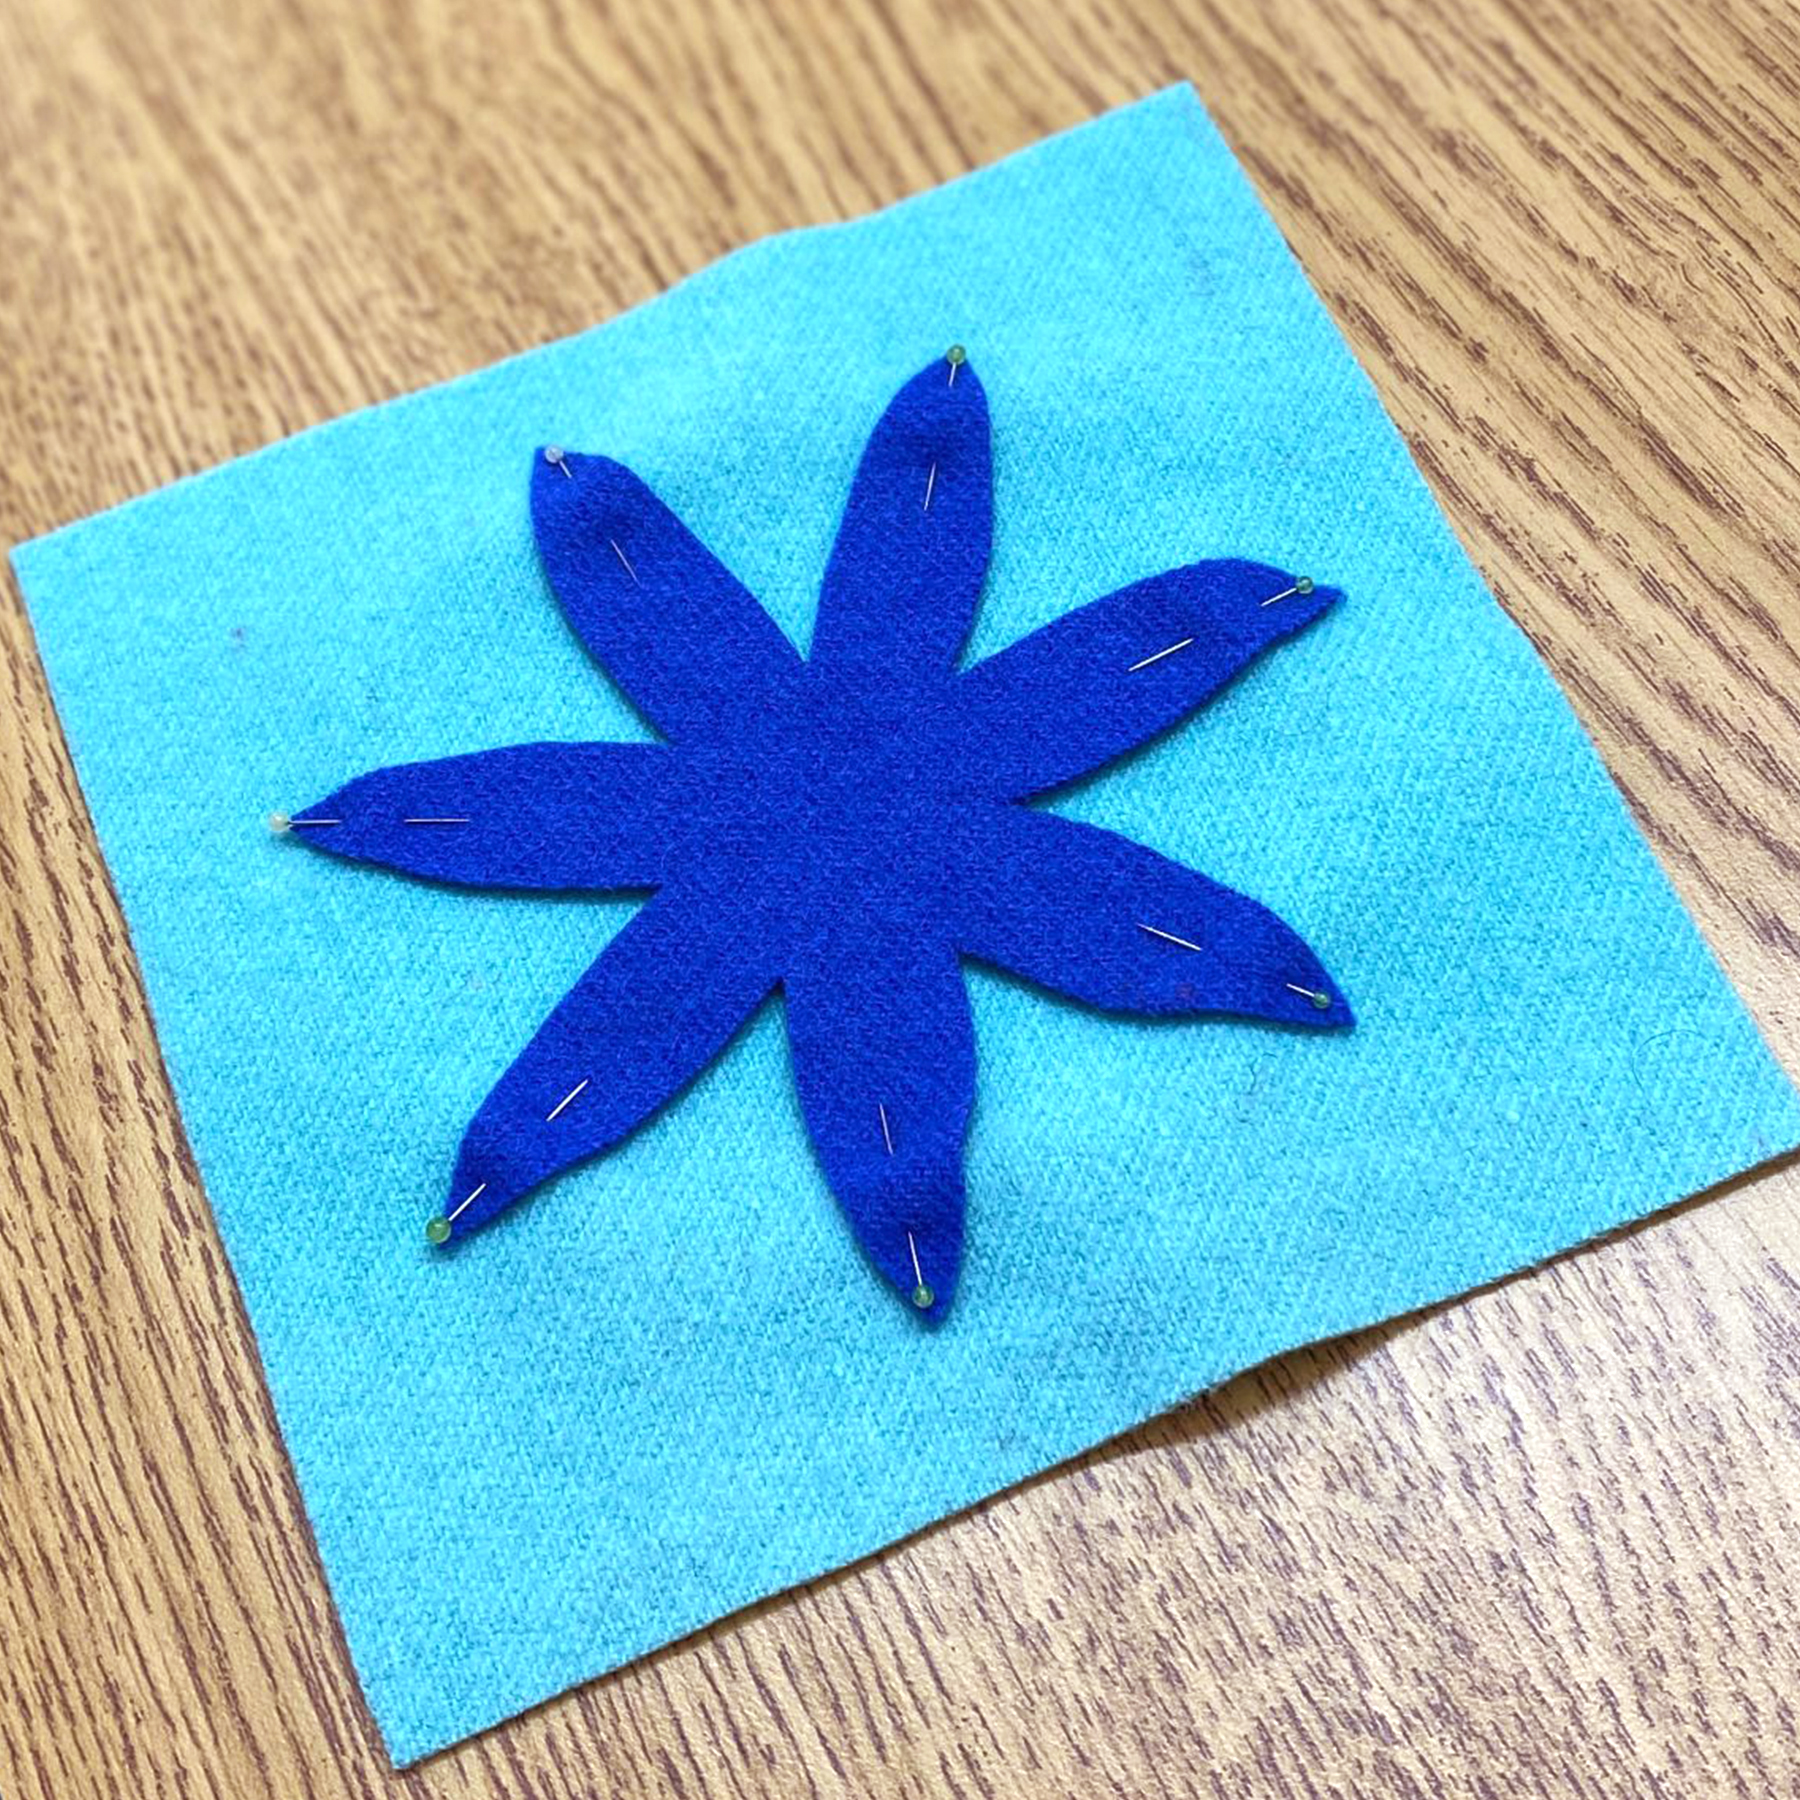
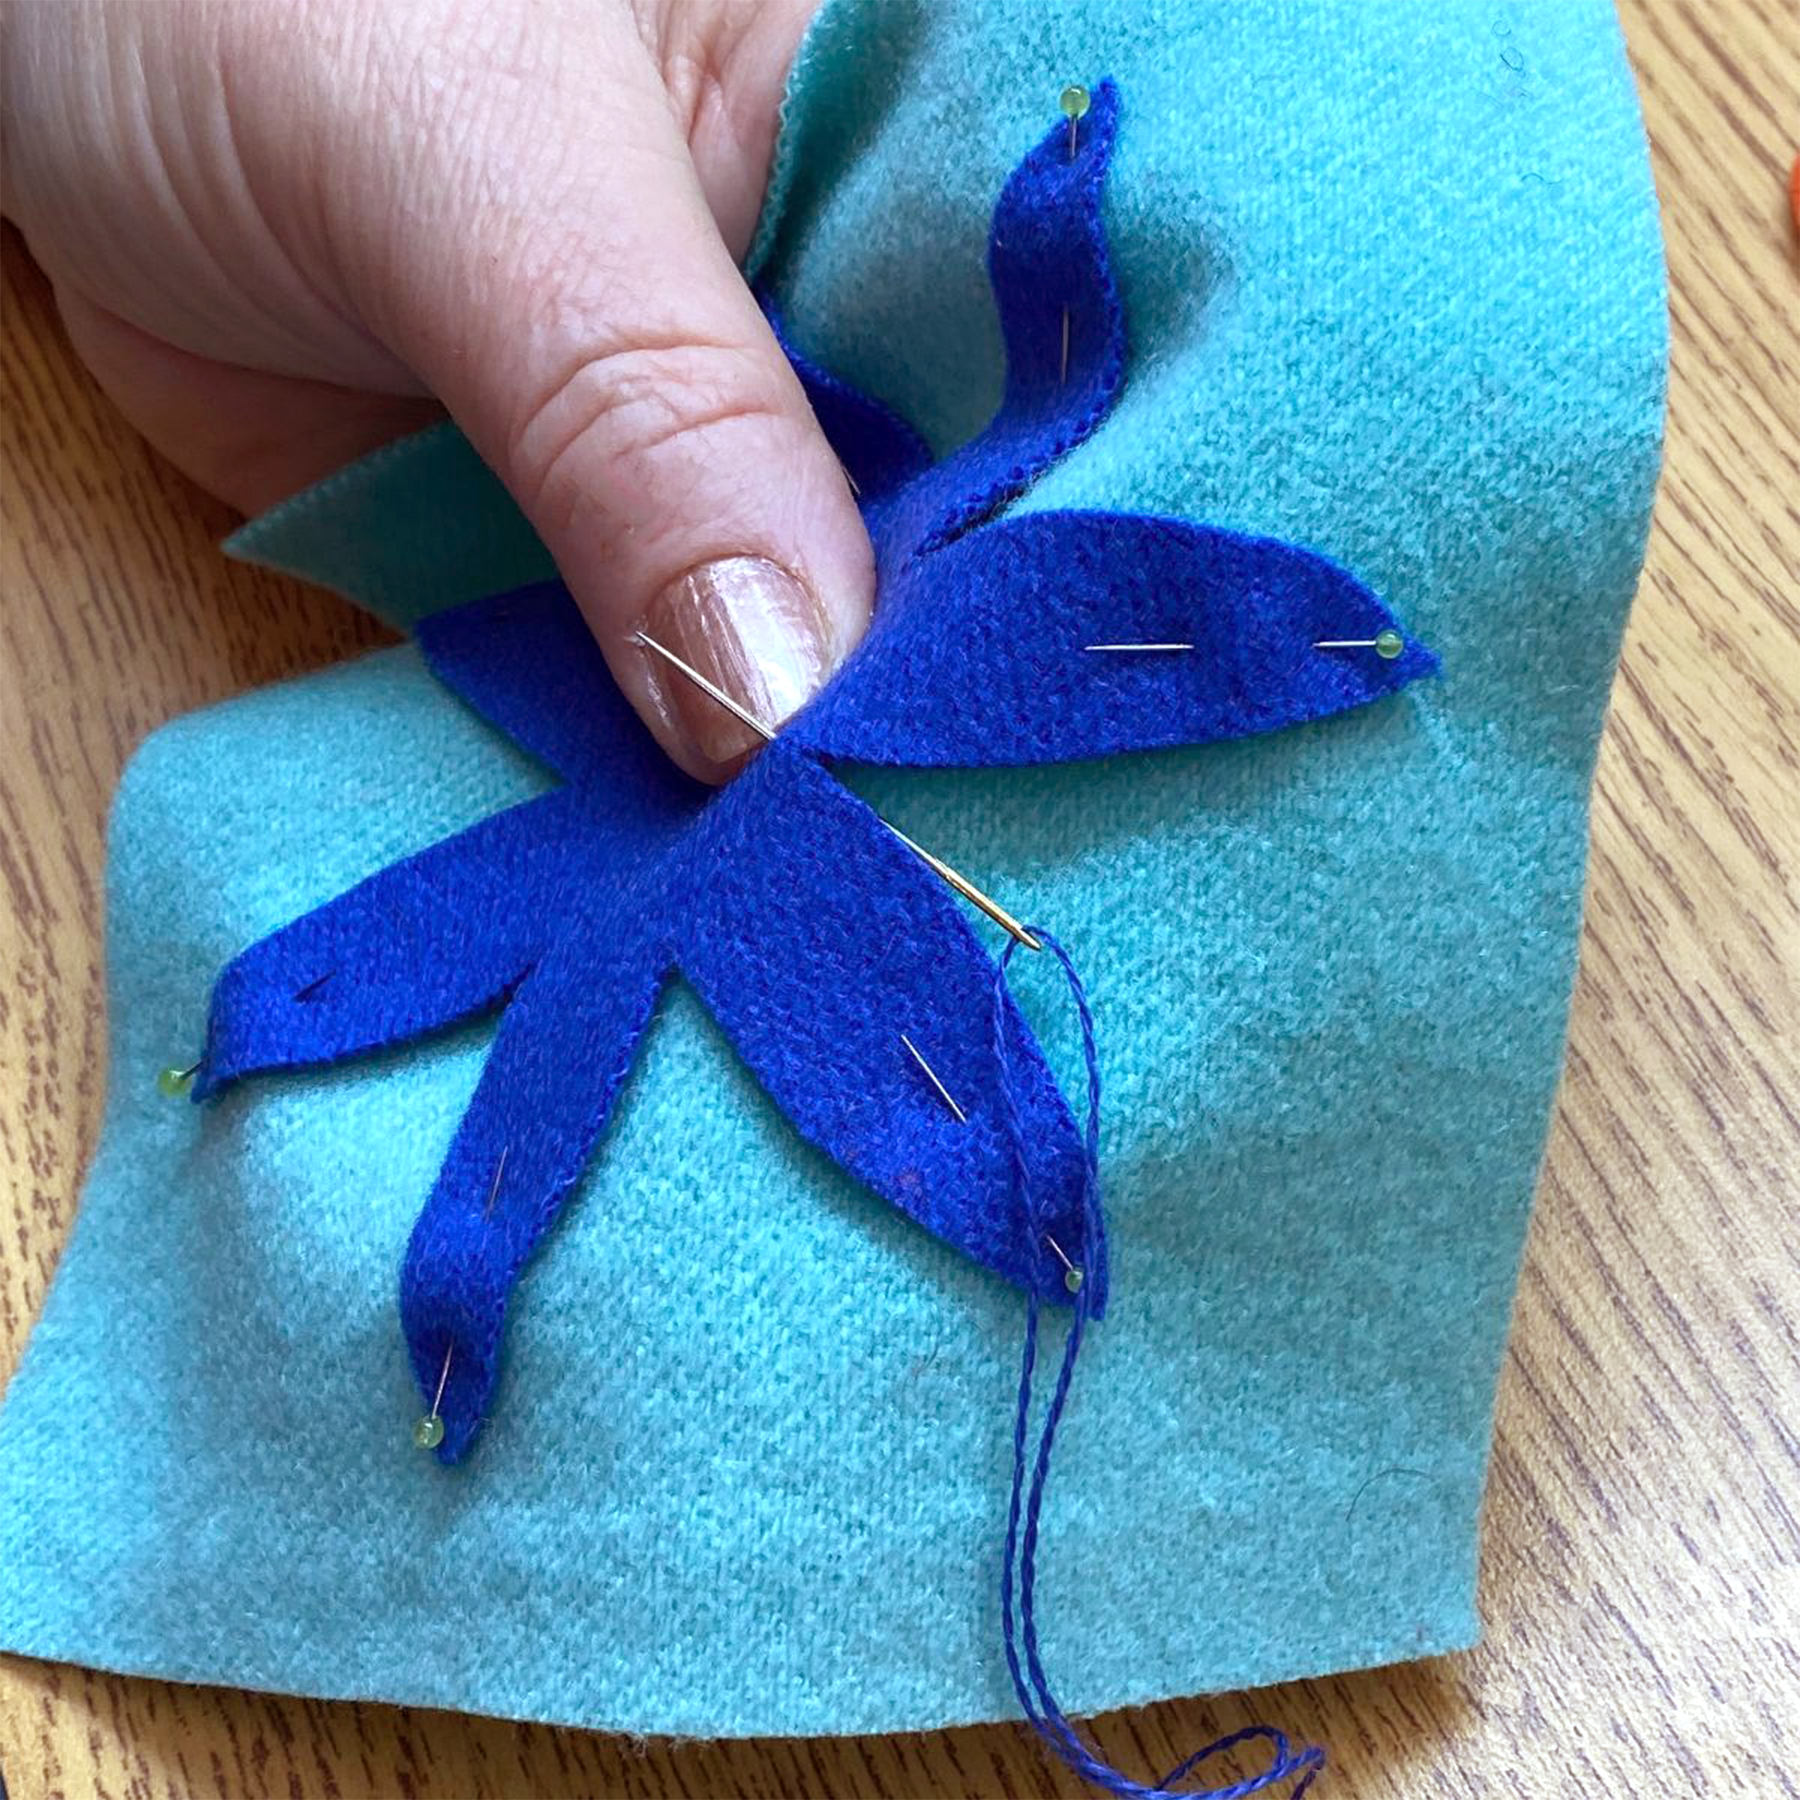
Pin your appliqué in place. There's no need to over-pin, as wool to wool naturally adheres.
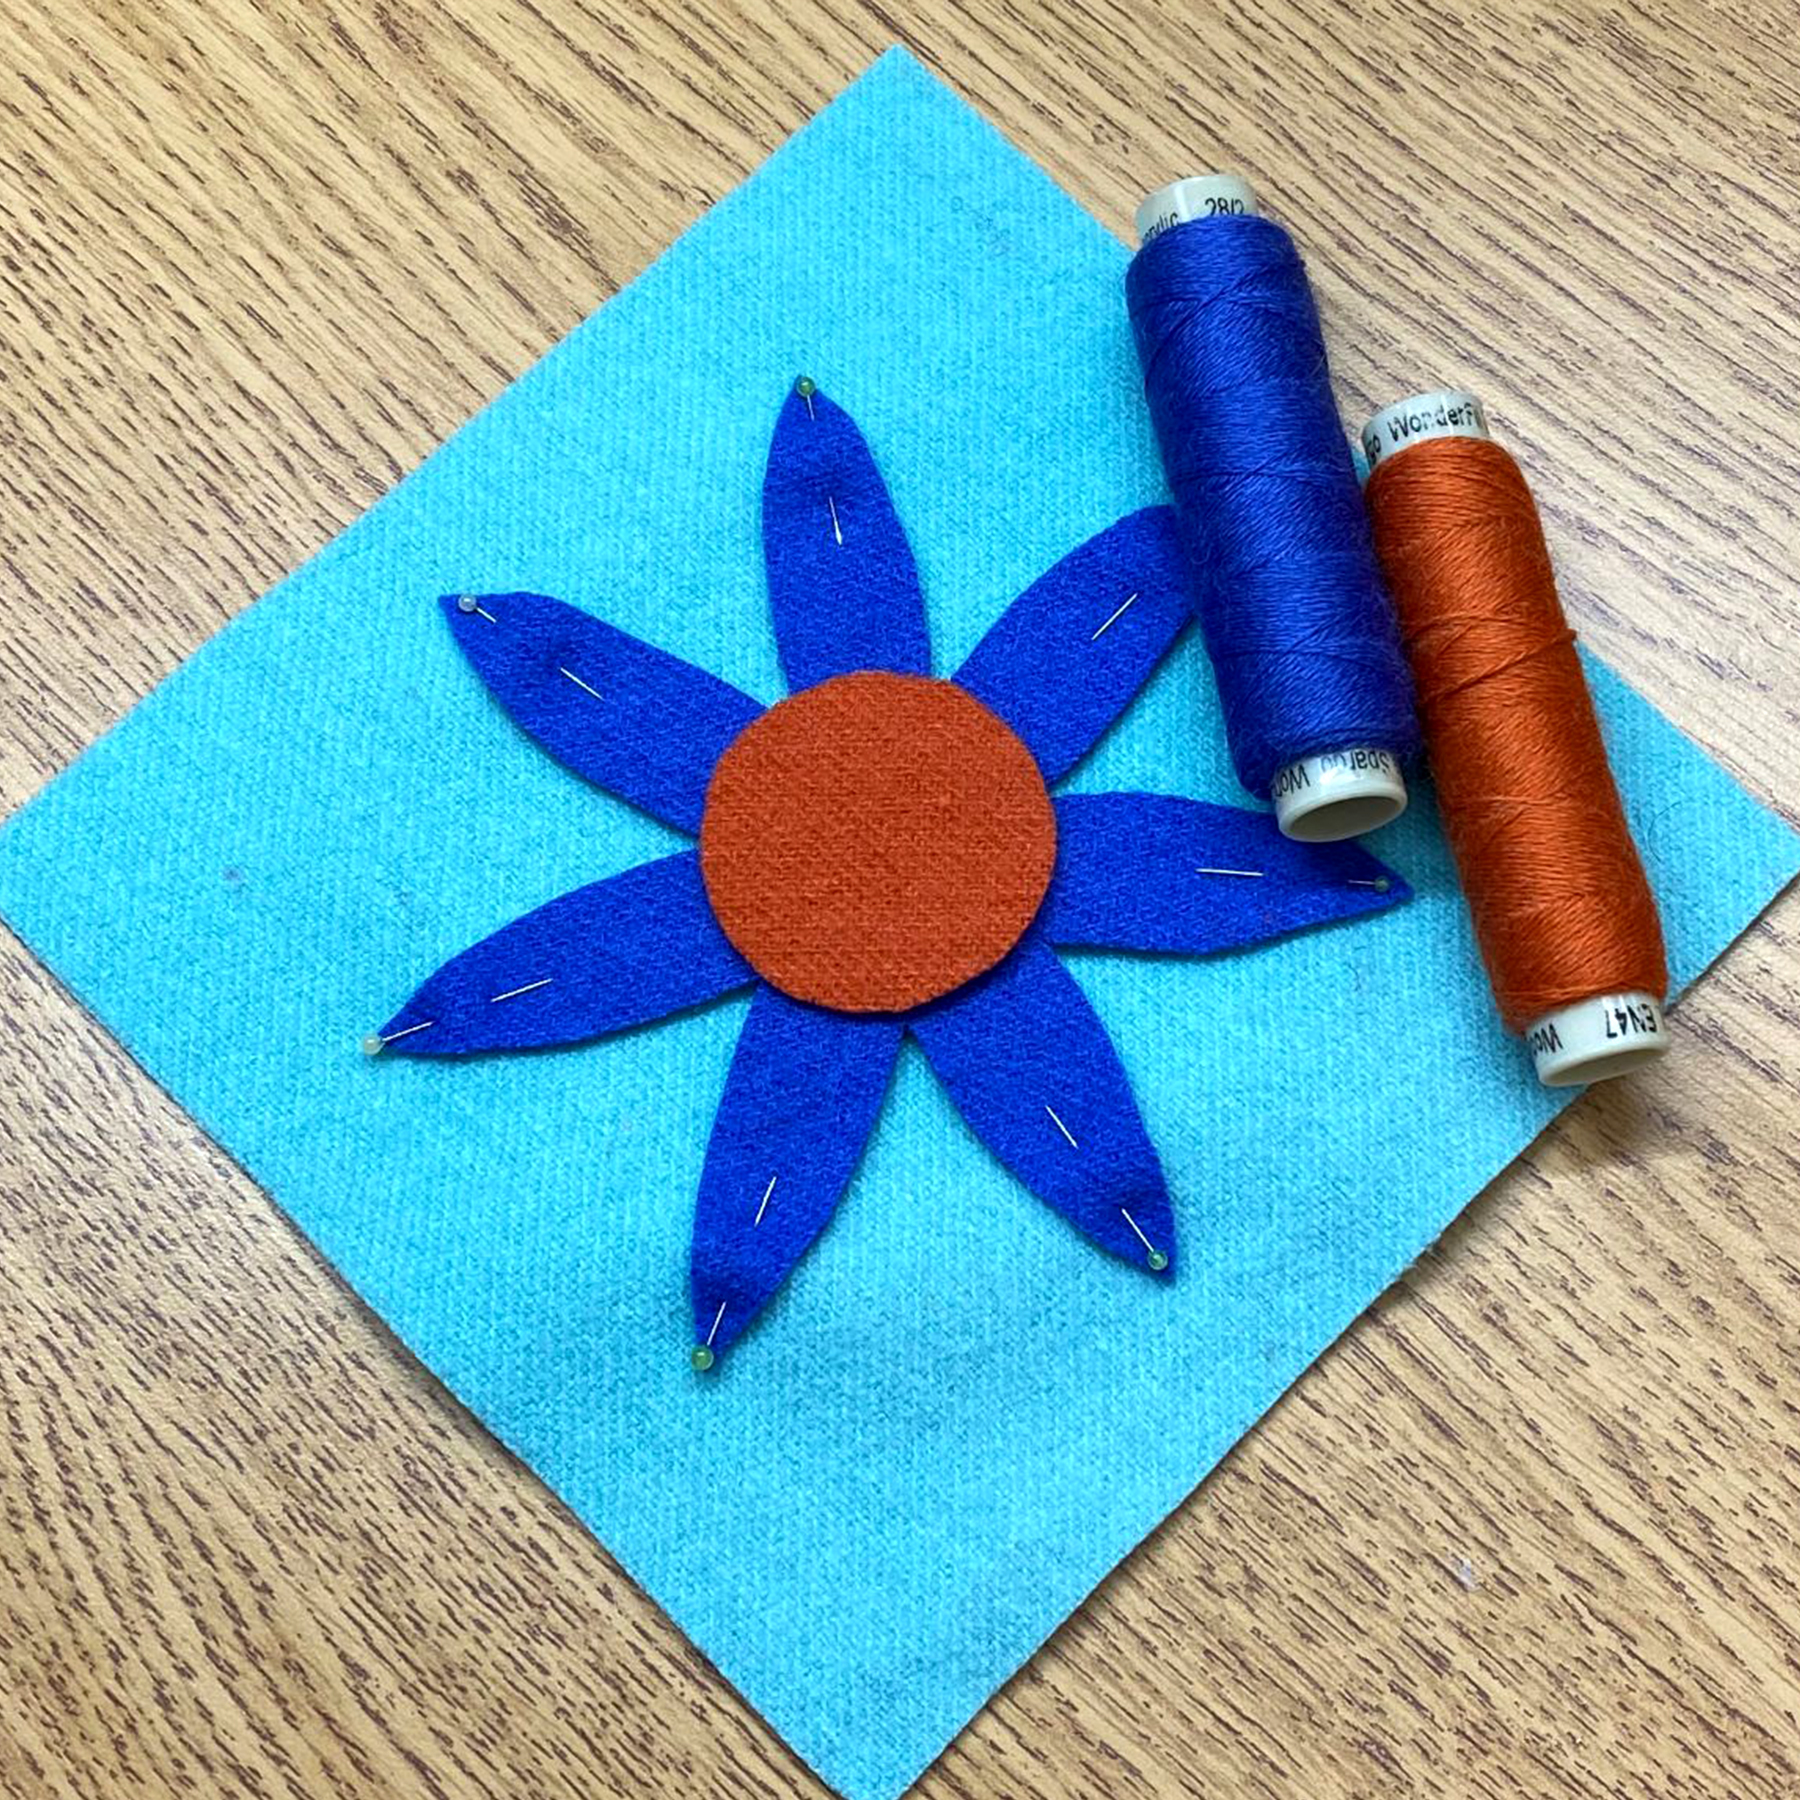
Find the Ellana Wool Thread to match your appliqué. You want the match to be as close as possible, so the stitching won't compete with any embellishing you do later.
Pictured: EN56 (Crystal Blue Persuasion) and 47 (Pumpkin)
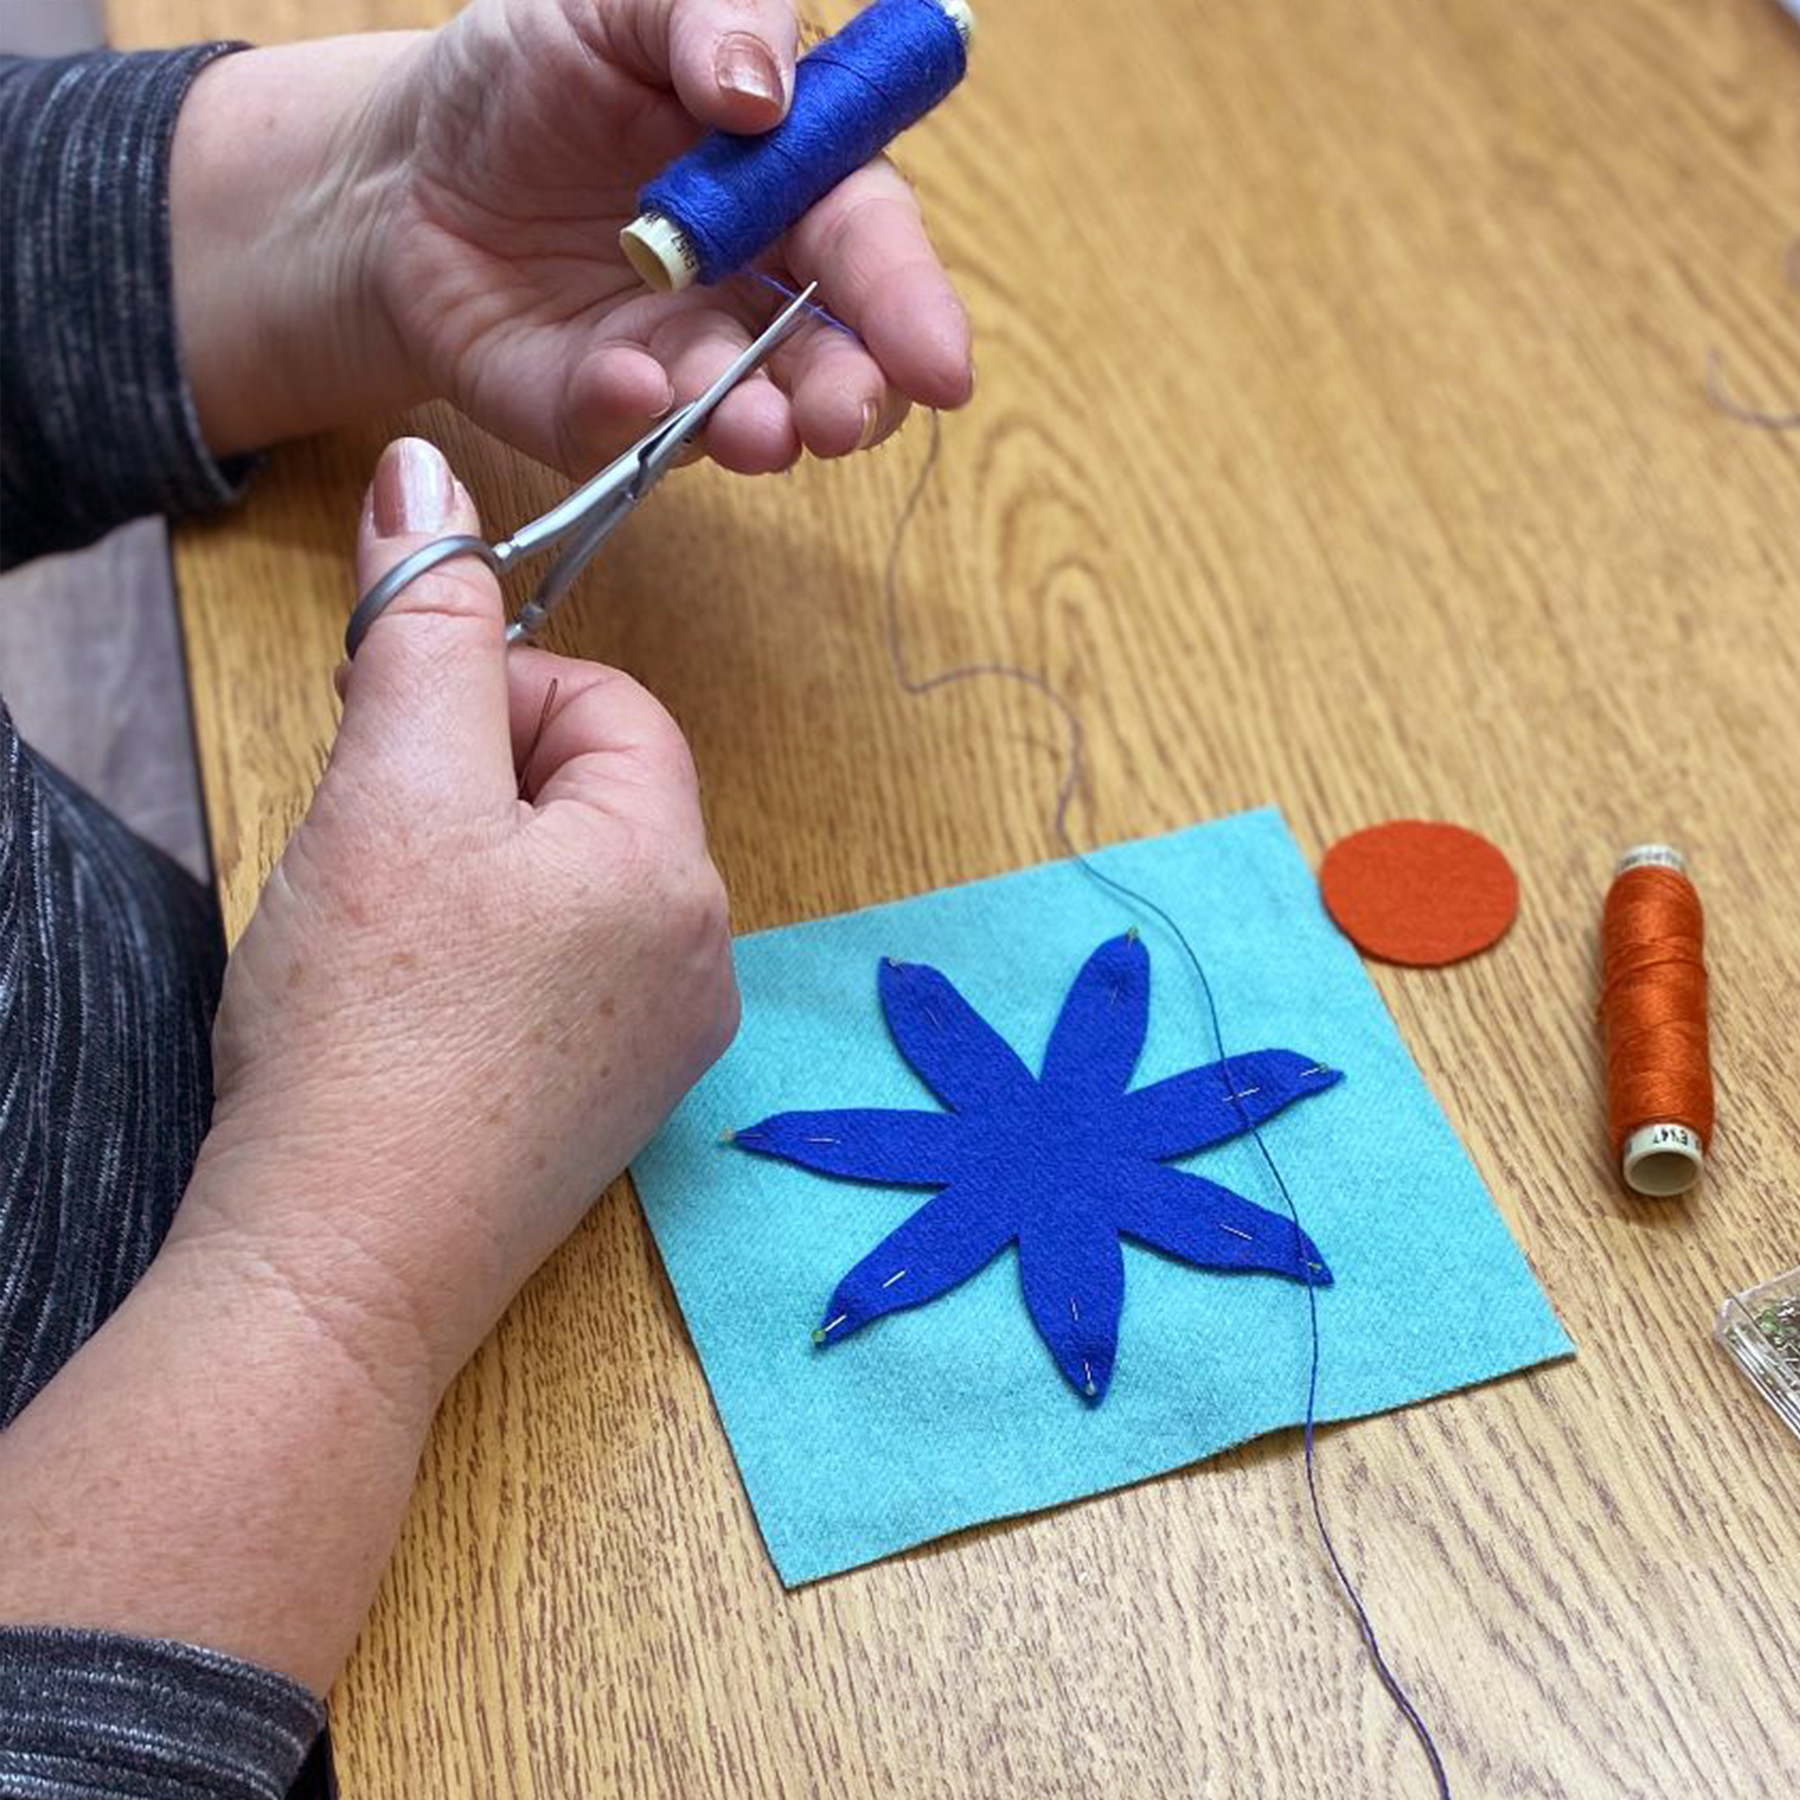
Cut no more than 18" of thread at a time, being sure to knot the end that you cut, so you work with the twist of the thread rather than against it.
TIP: Where you snip is where you knot.
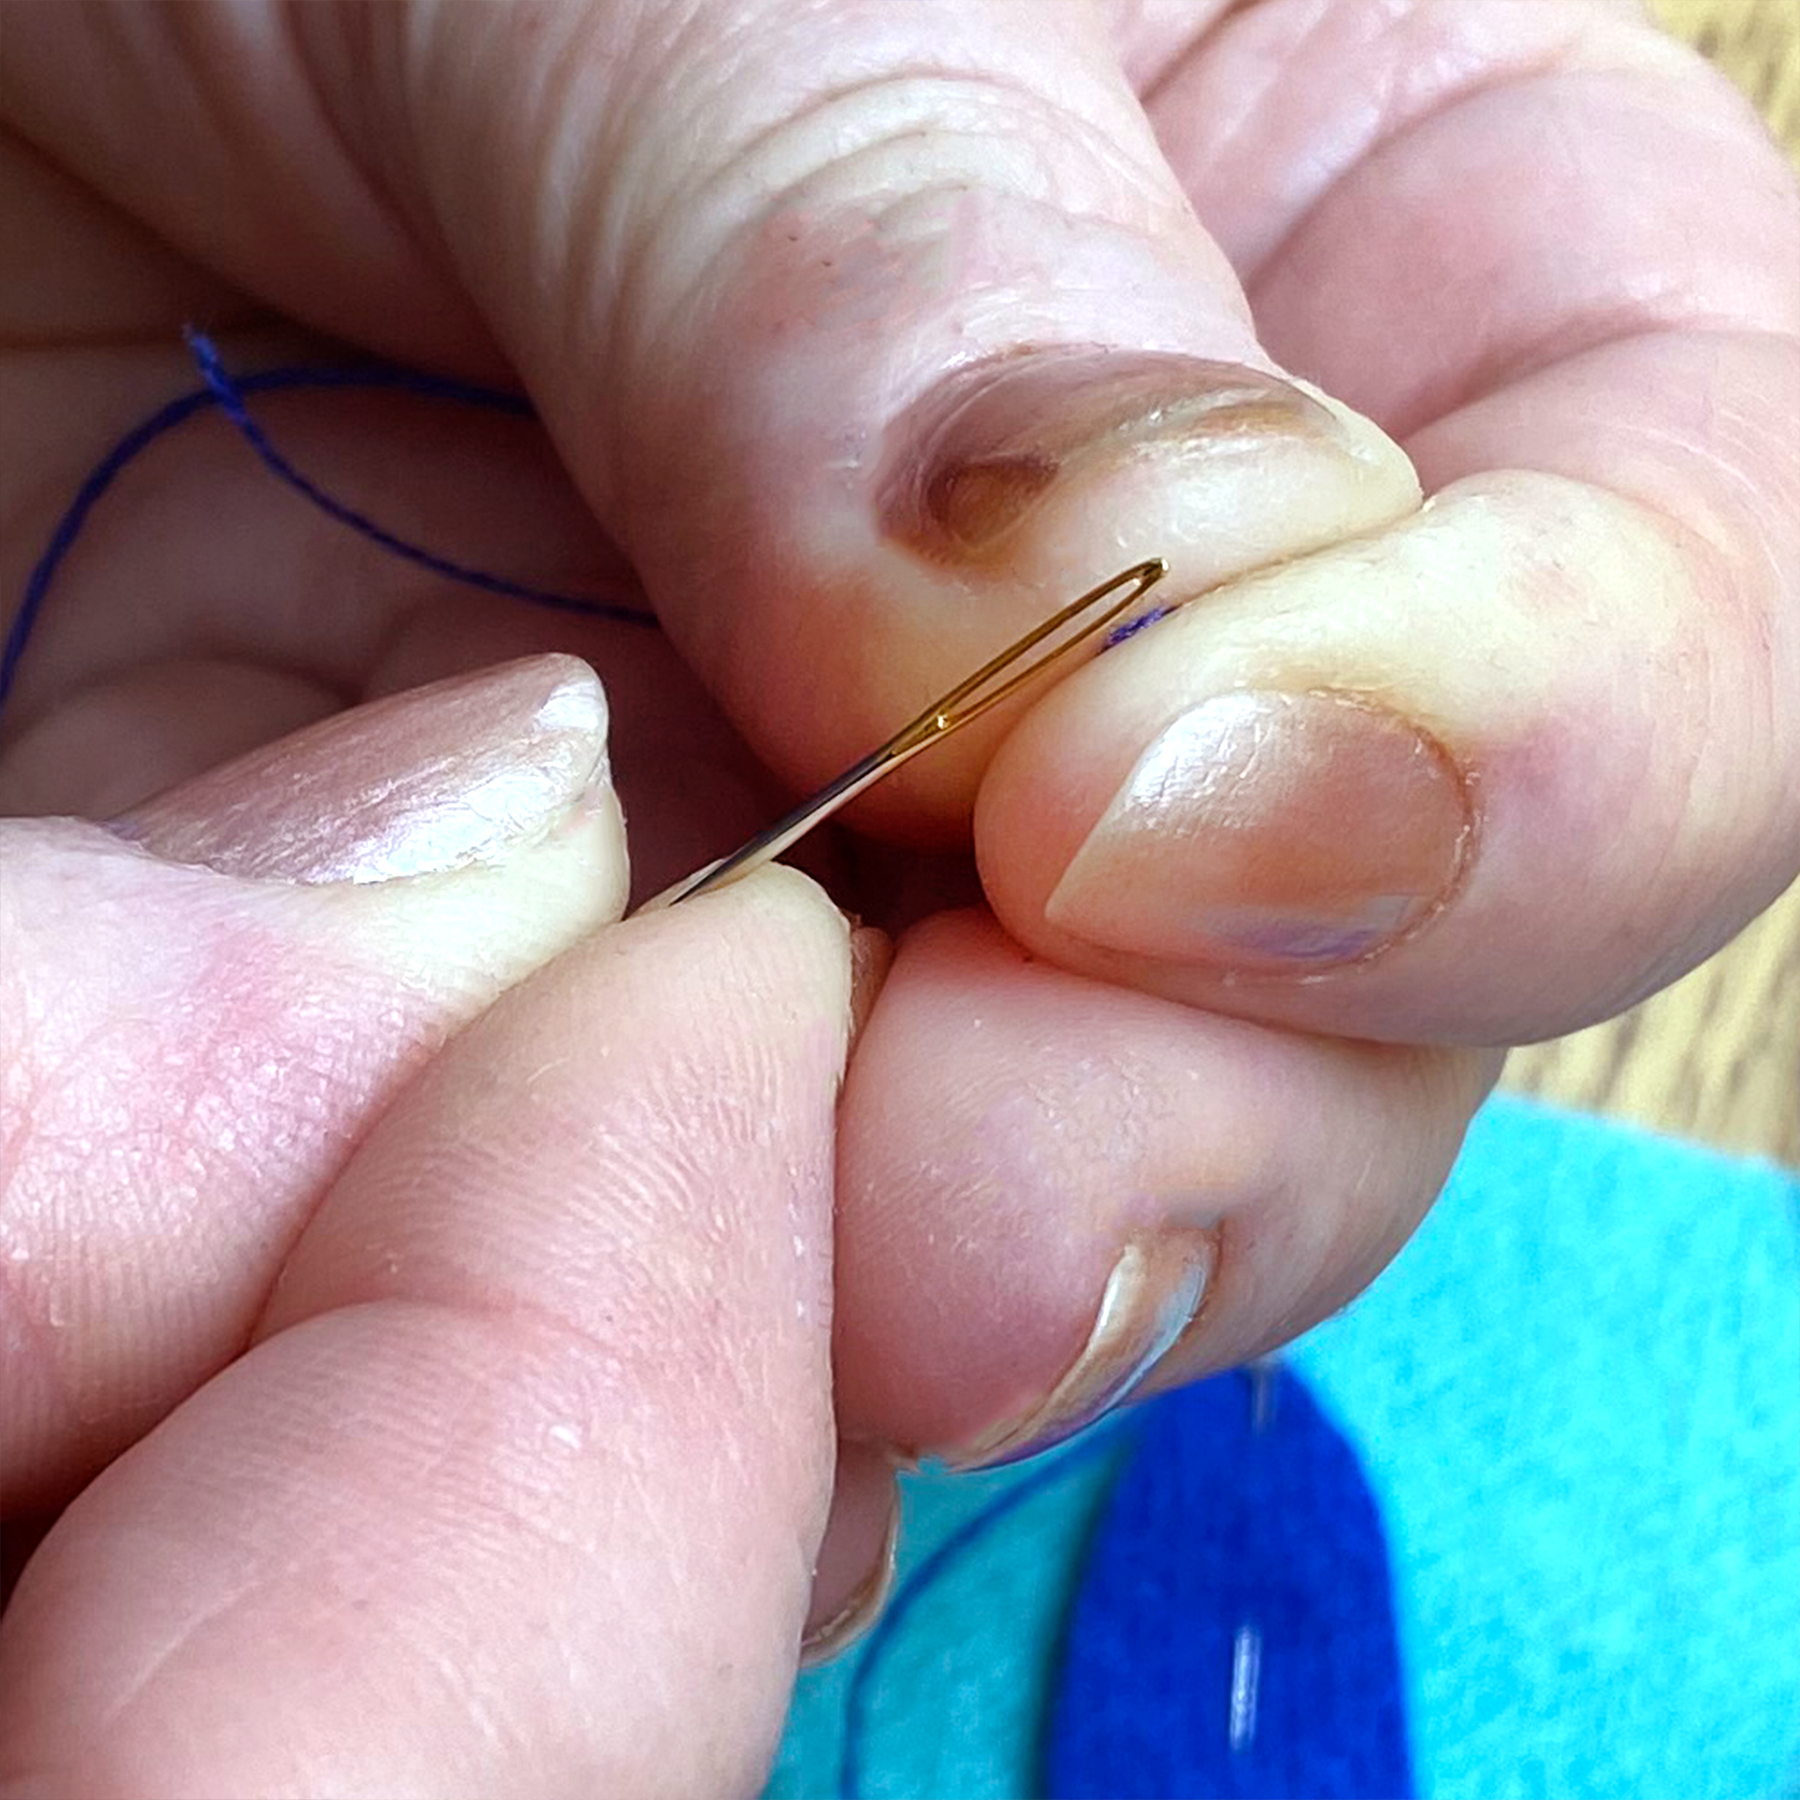
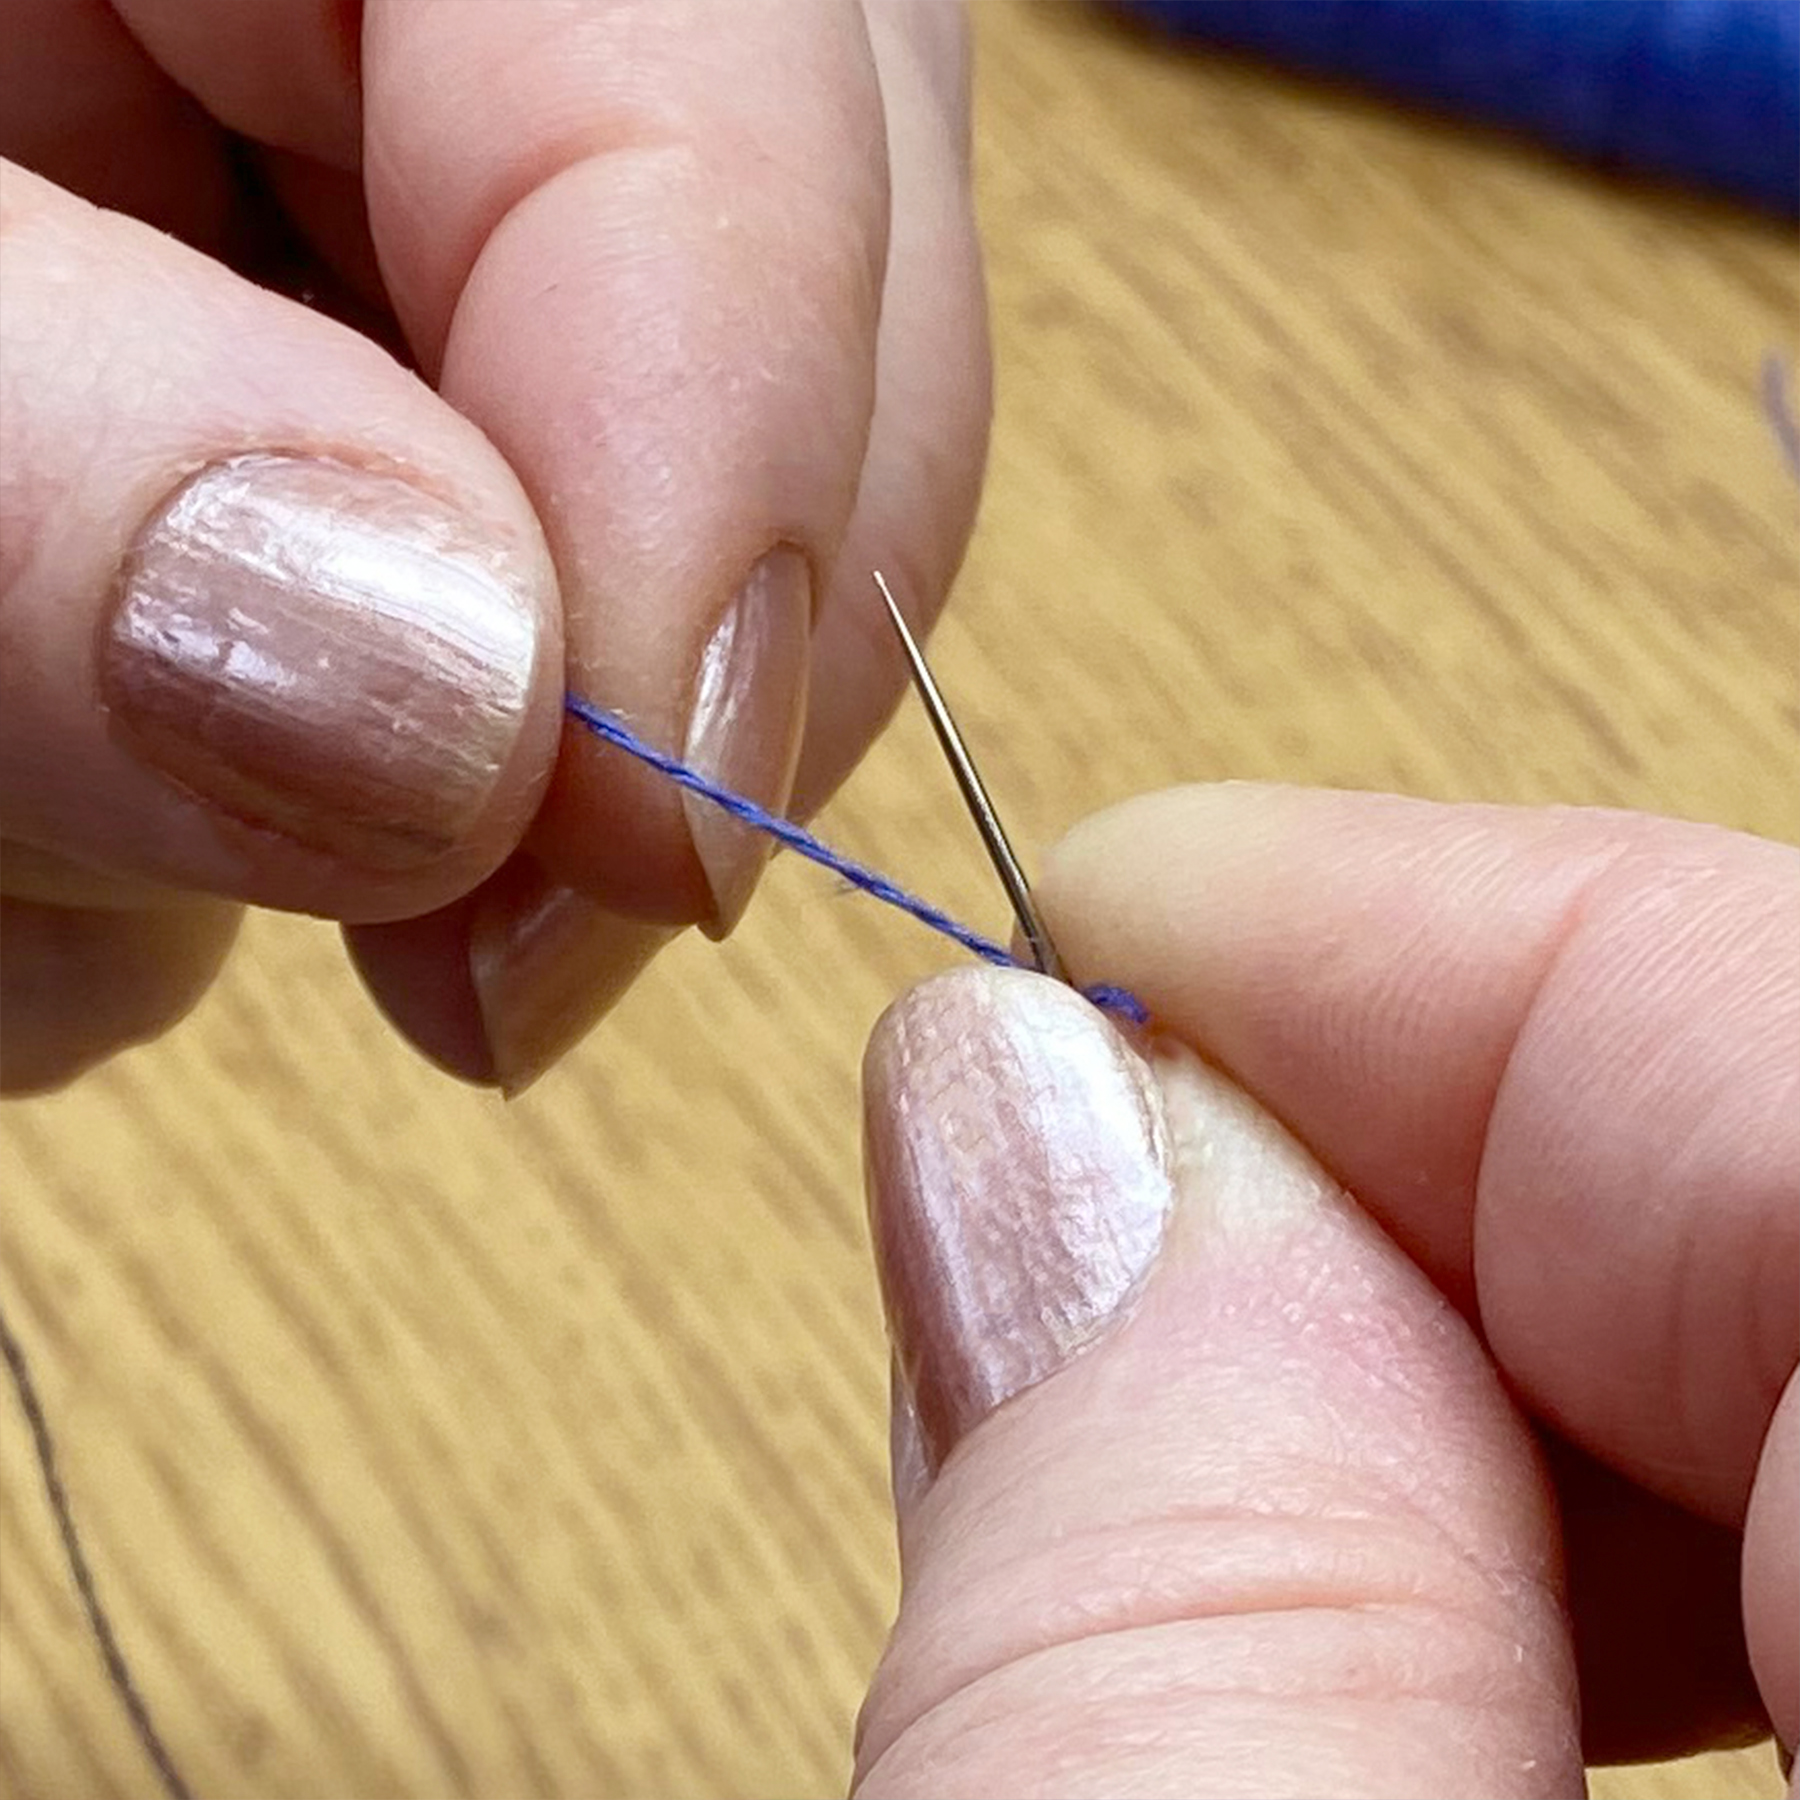
The easiest way to thread a needle with wool thread is to fold the end of the thread over and hold it between your thumb and forefinger. Then, bring the eye of the needle to the thread, which will force it into the eye.
TIP: By taking your needle to your thread, you will thread your needle every time.
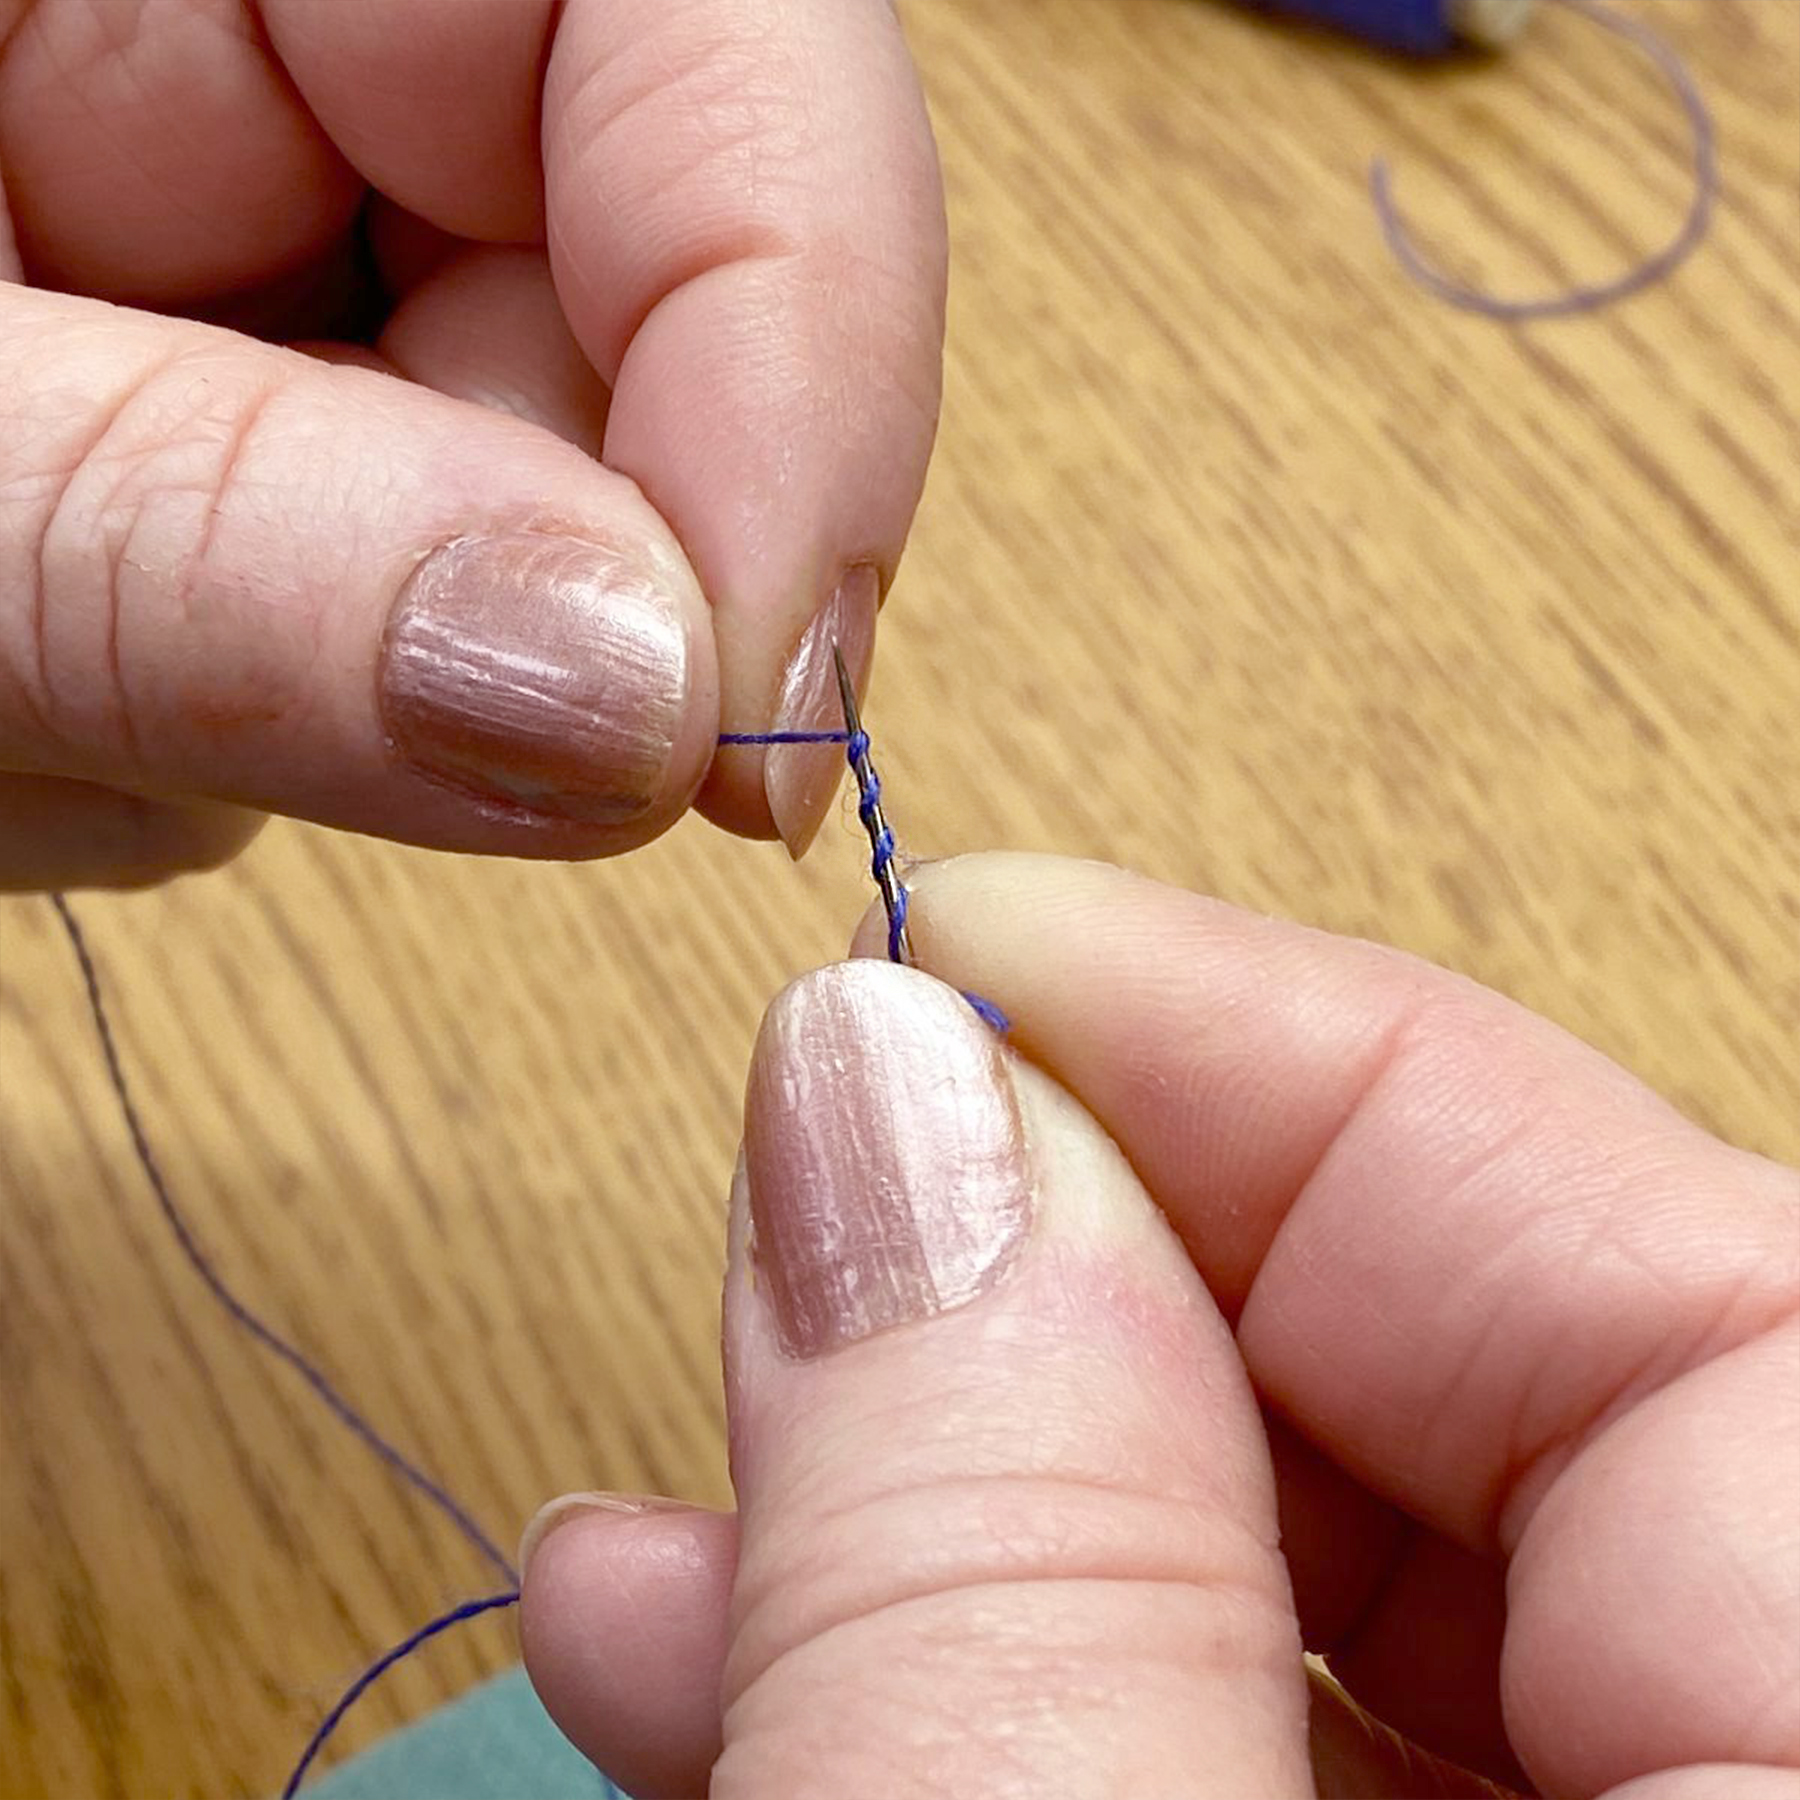
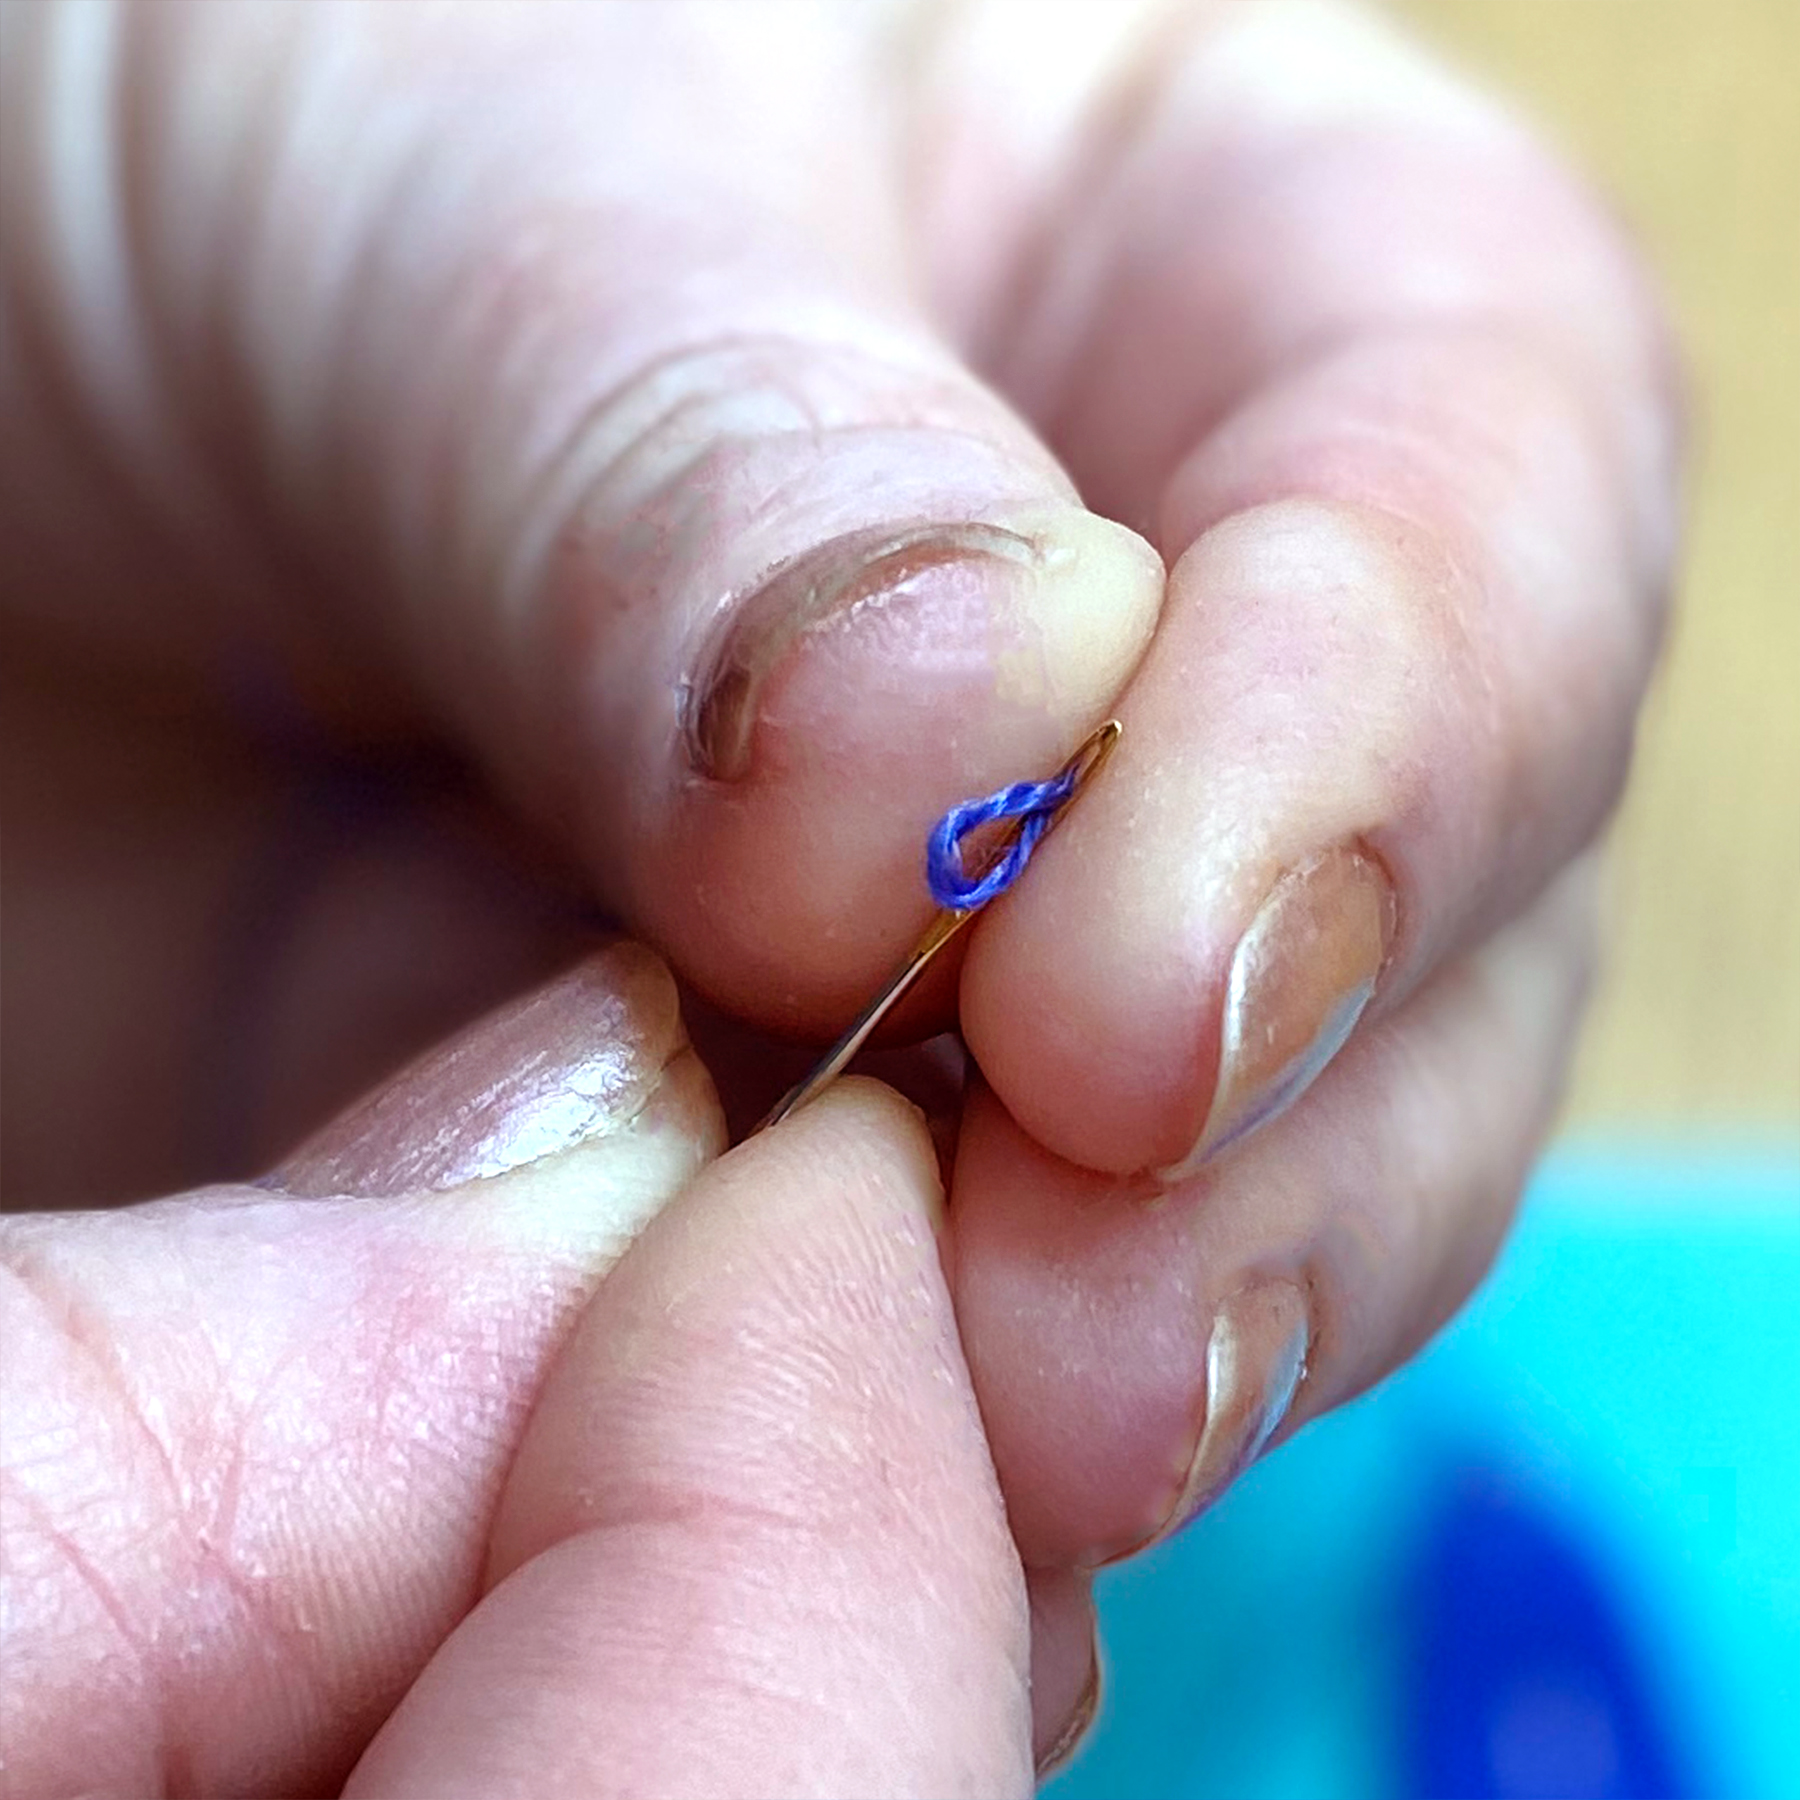
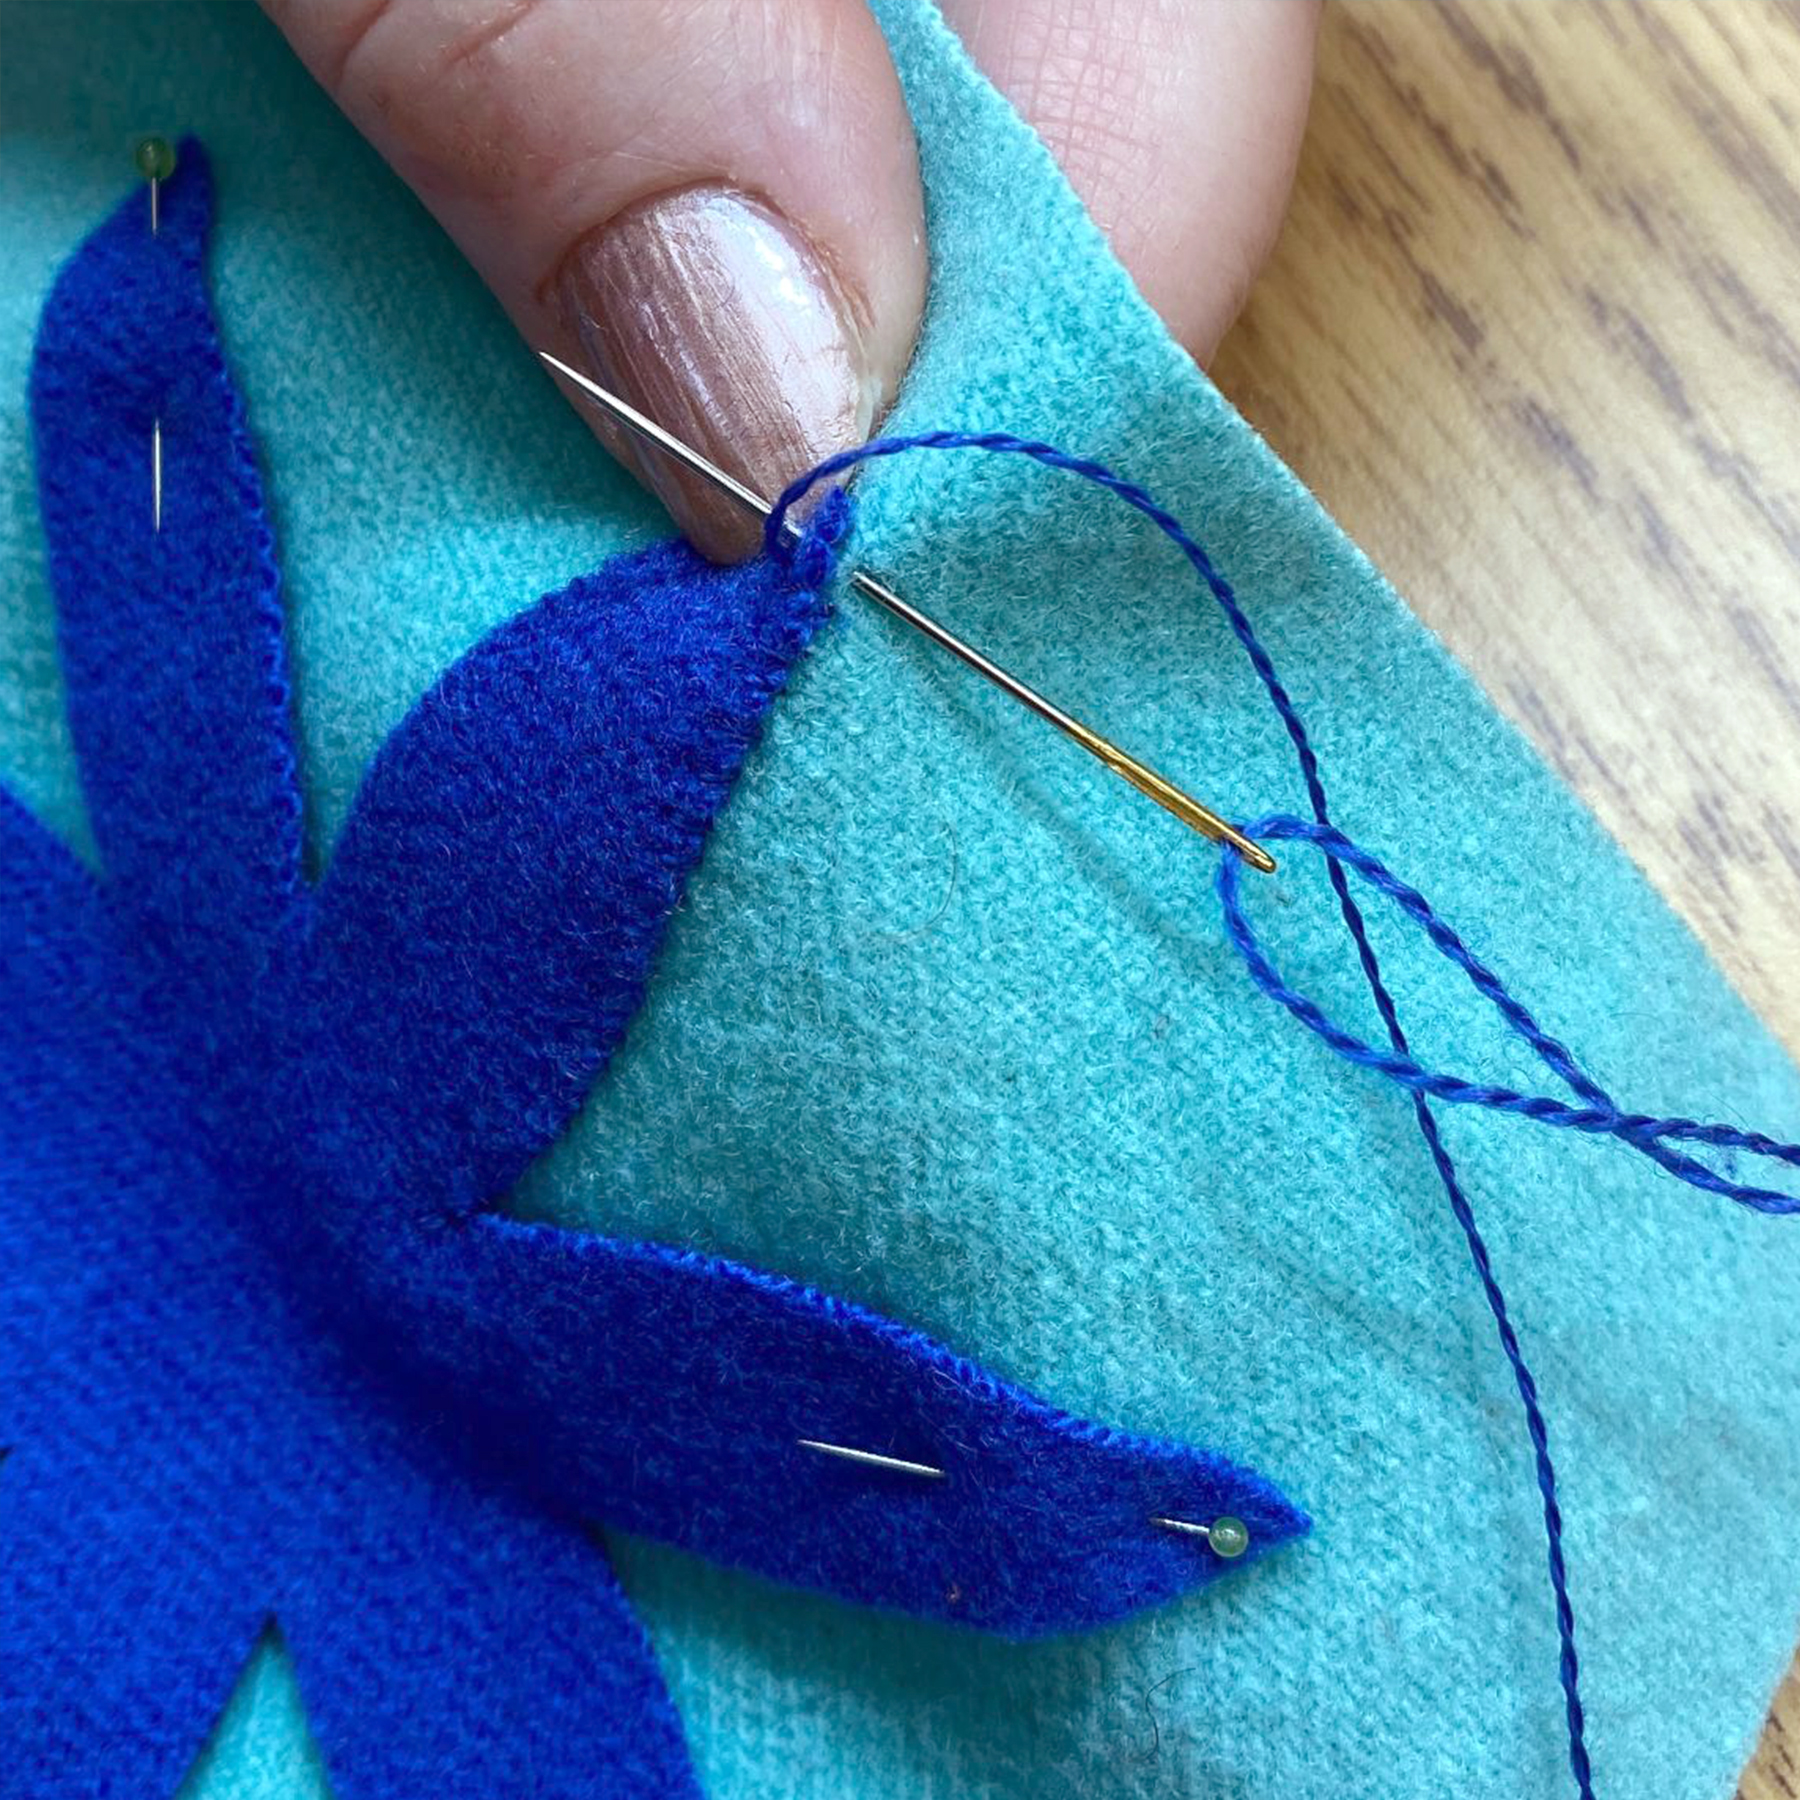
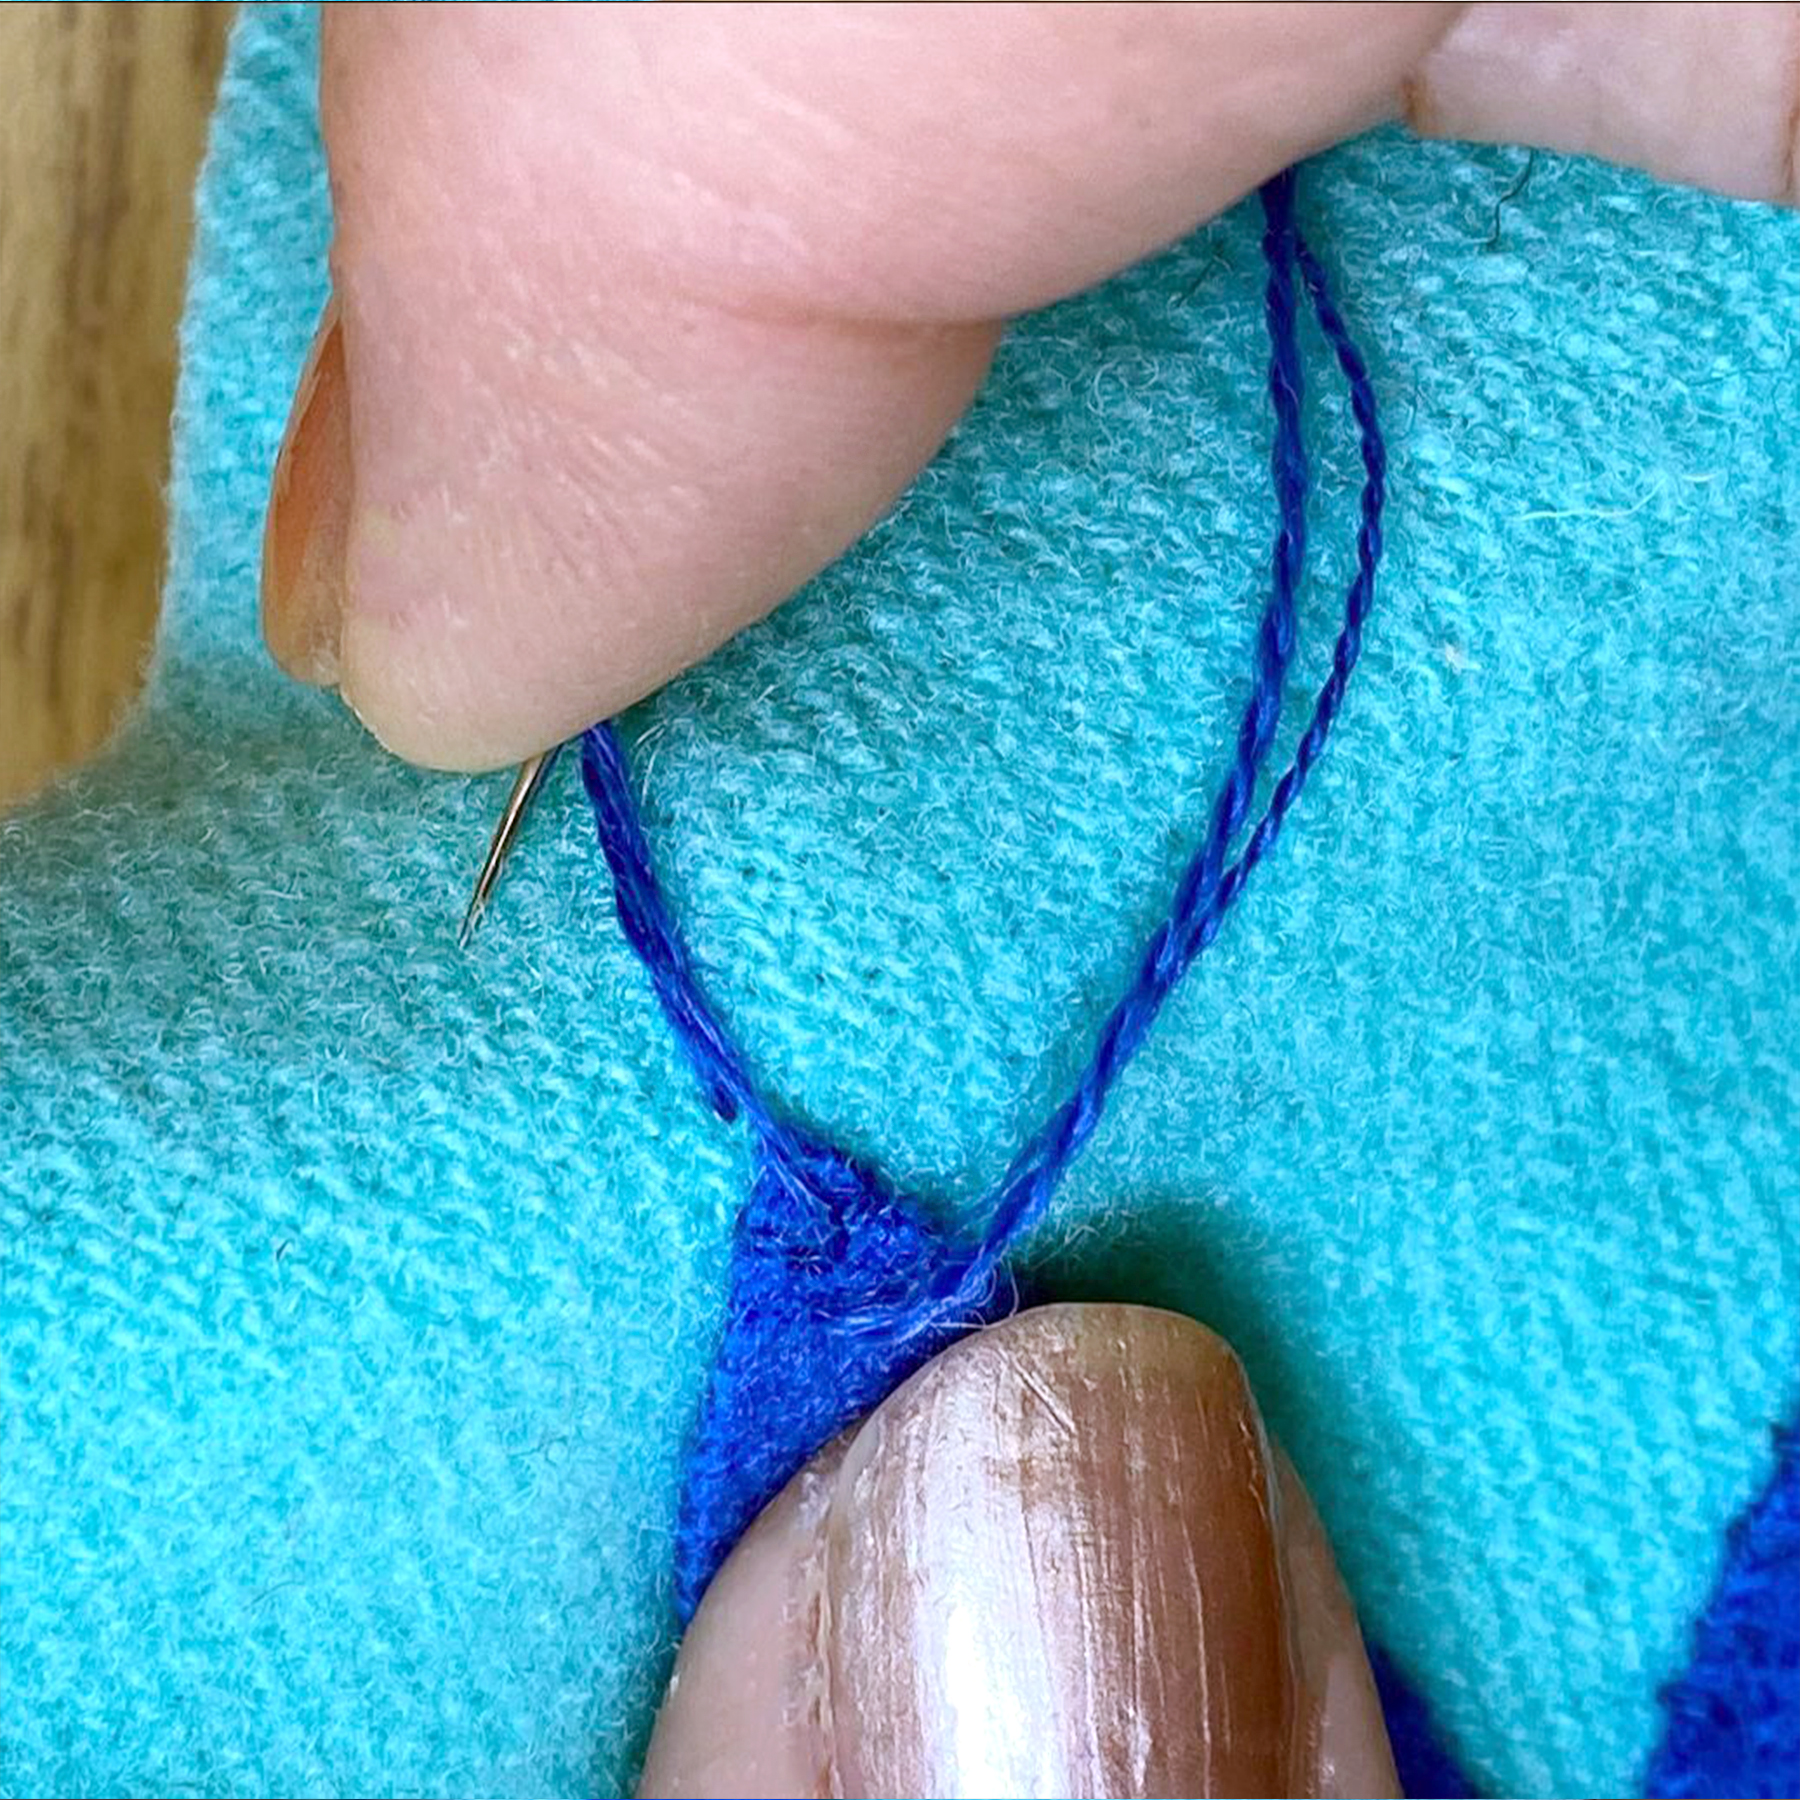
Our favorite way to knot thread is by doing a Quilter's Knot! Place the end of your thread behind your needle, wrapping it counter clockwise 3-4 times. Then, pinch the wraps with your left hand, pulling your needle through with your right, and holding the wraps all the way to the end of your thread.
To start, bring your needle up through your appliqué piece, but not the background. This will hide the knot behind your work.
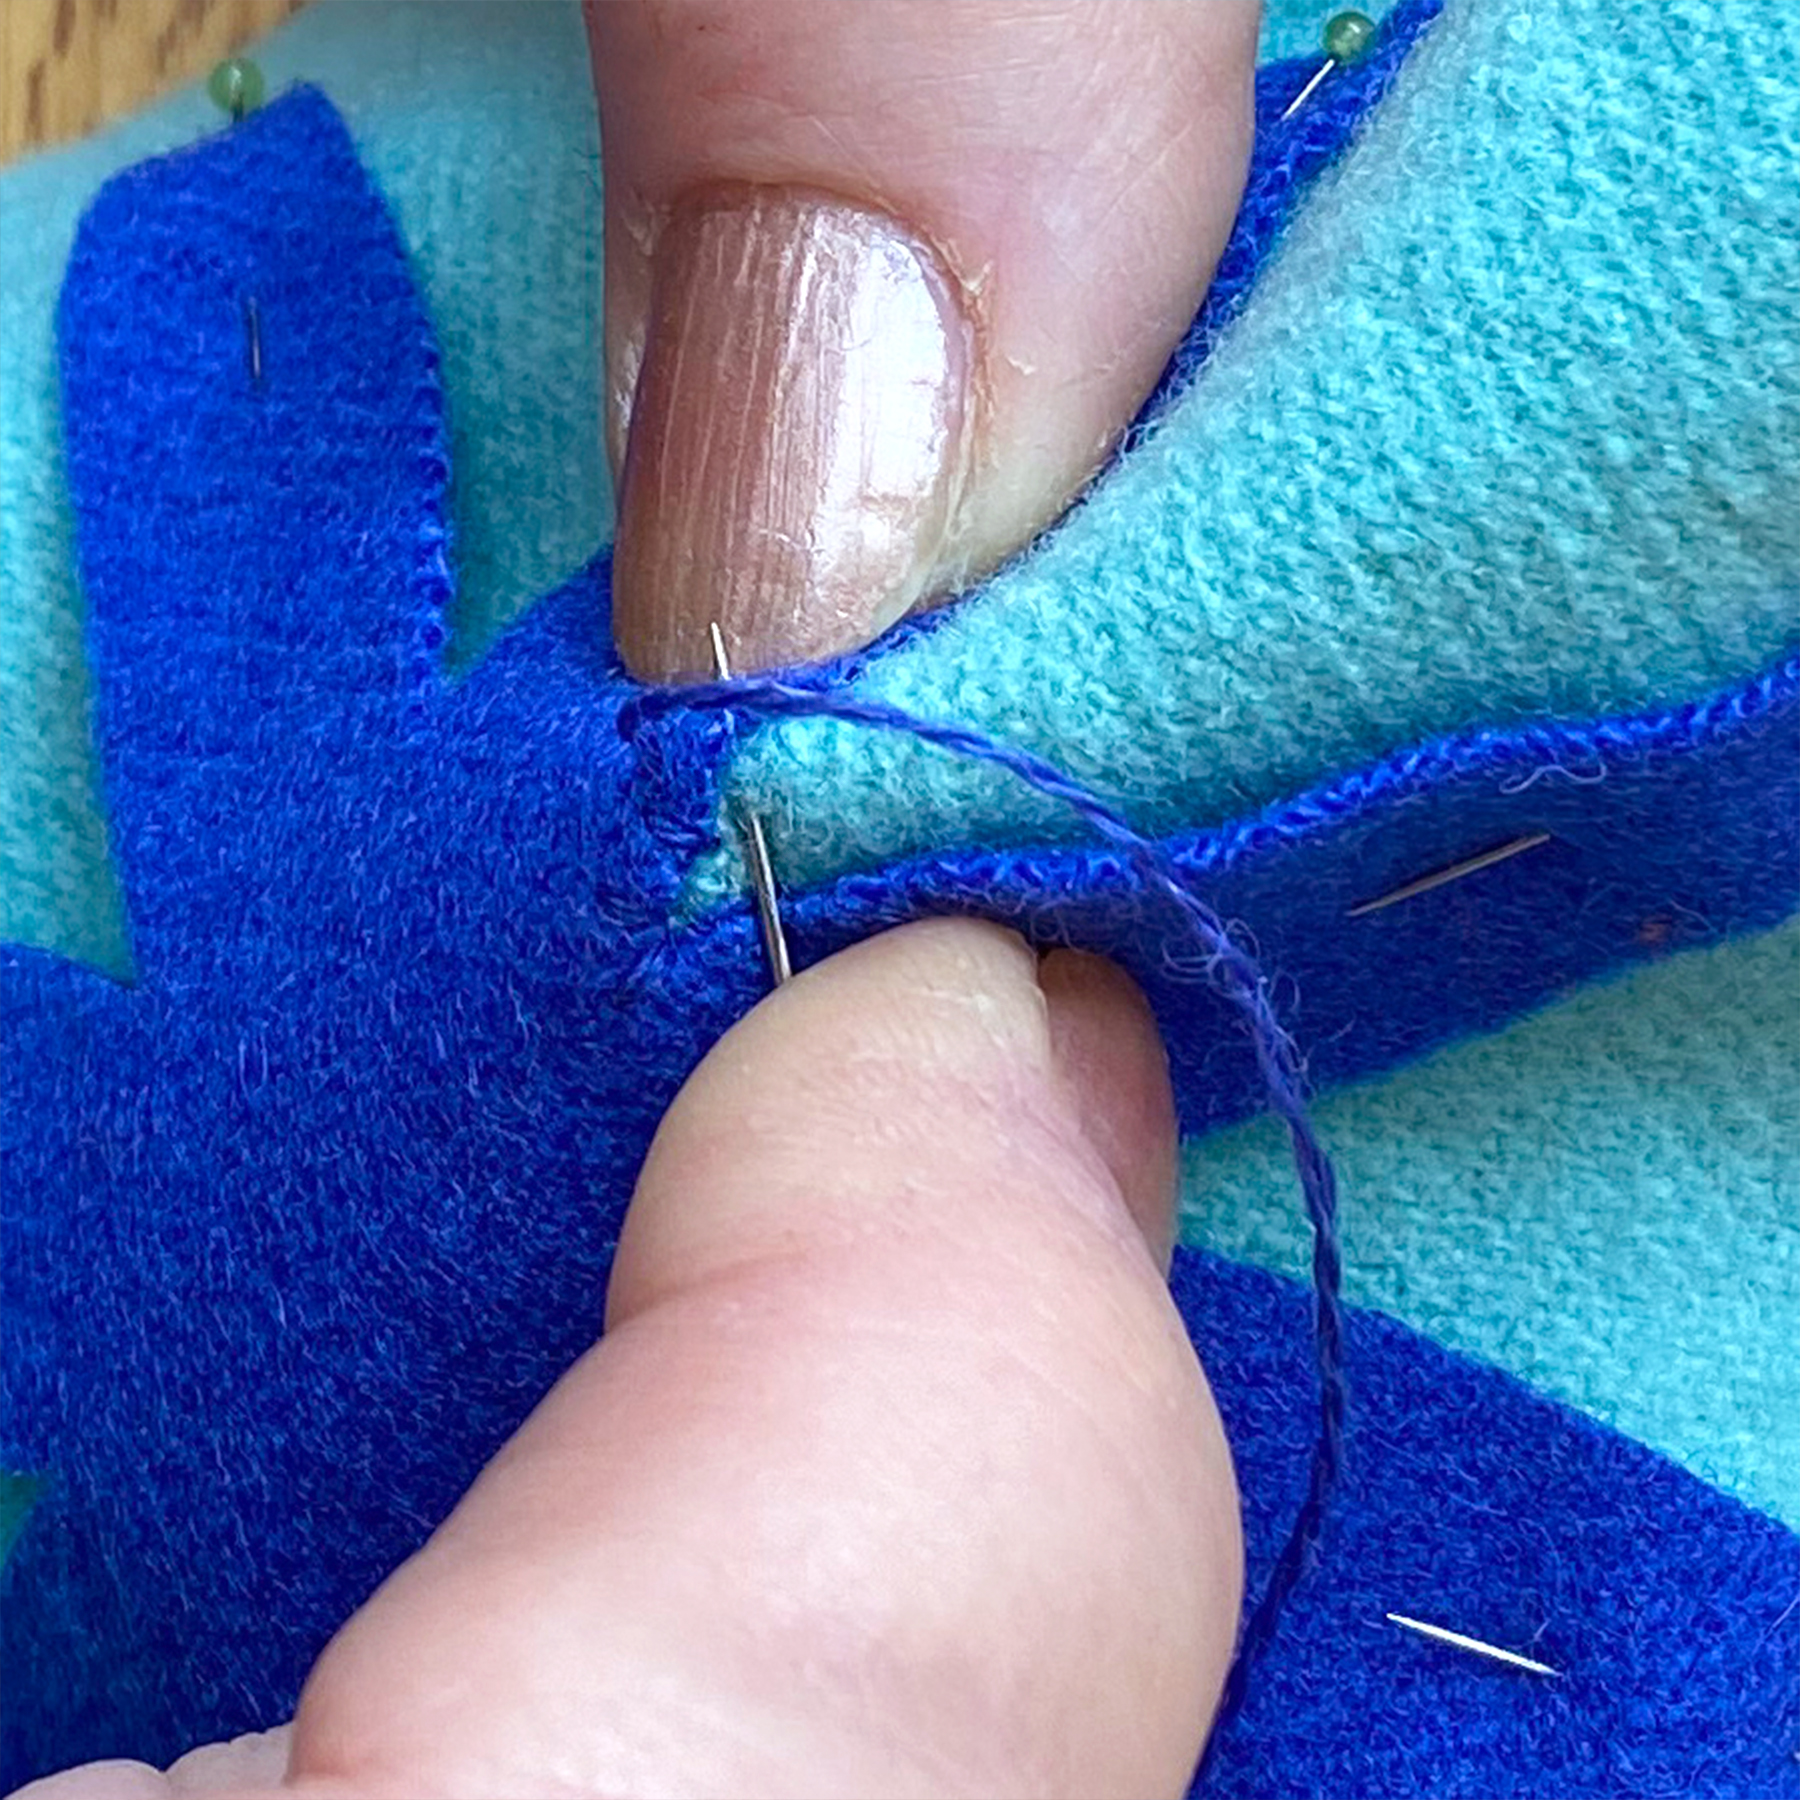
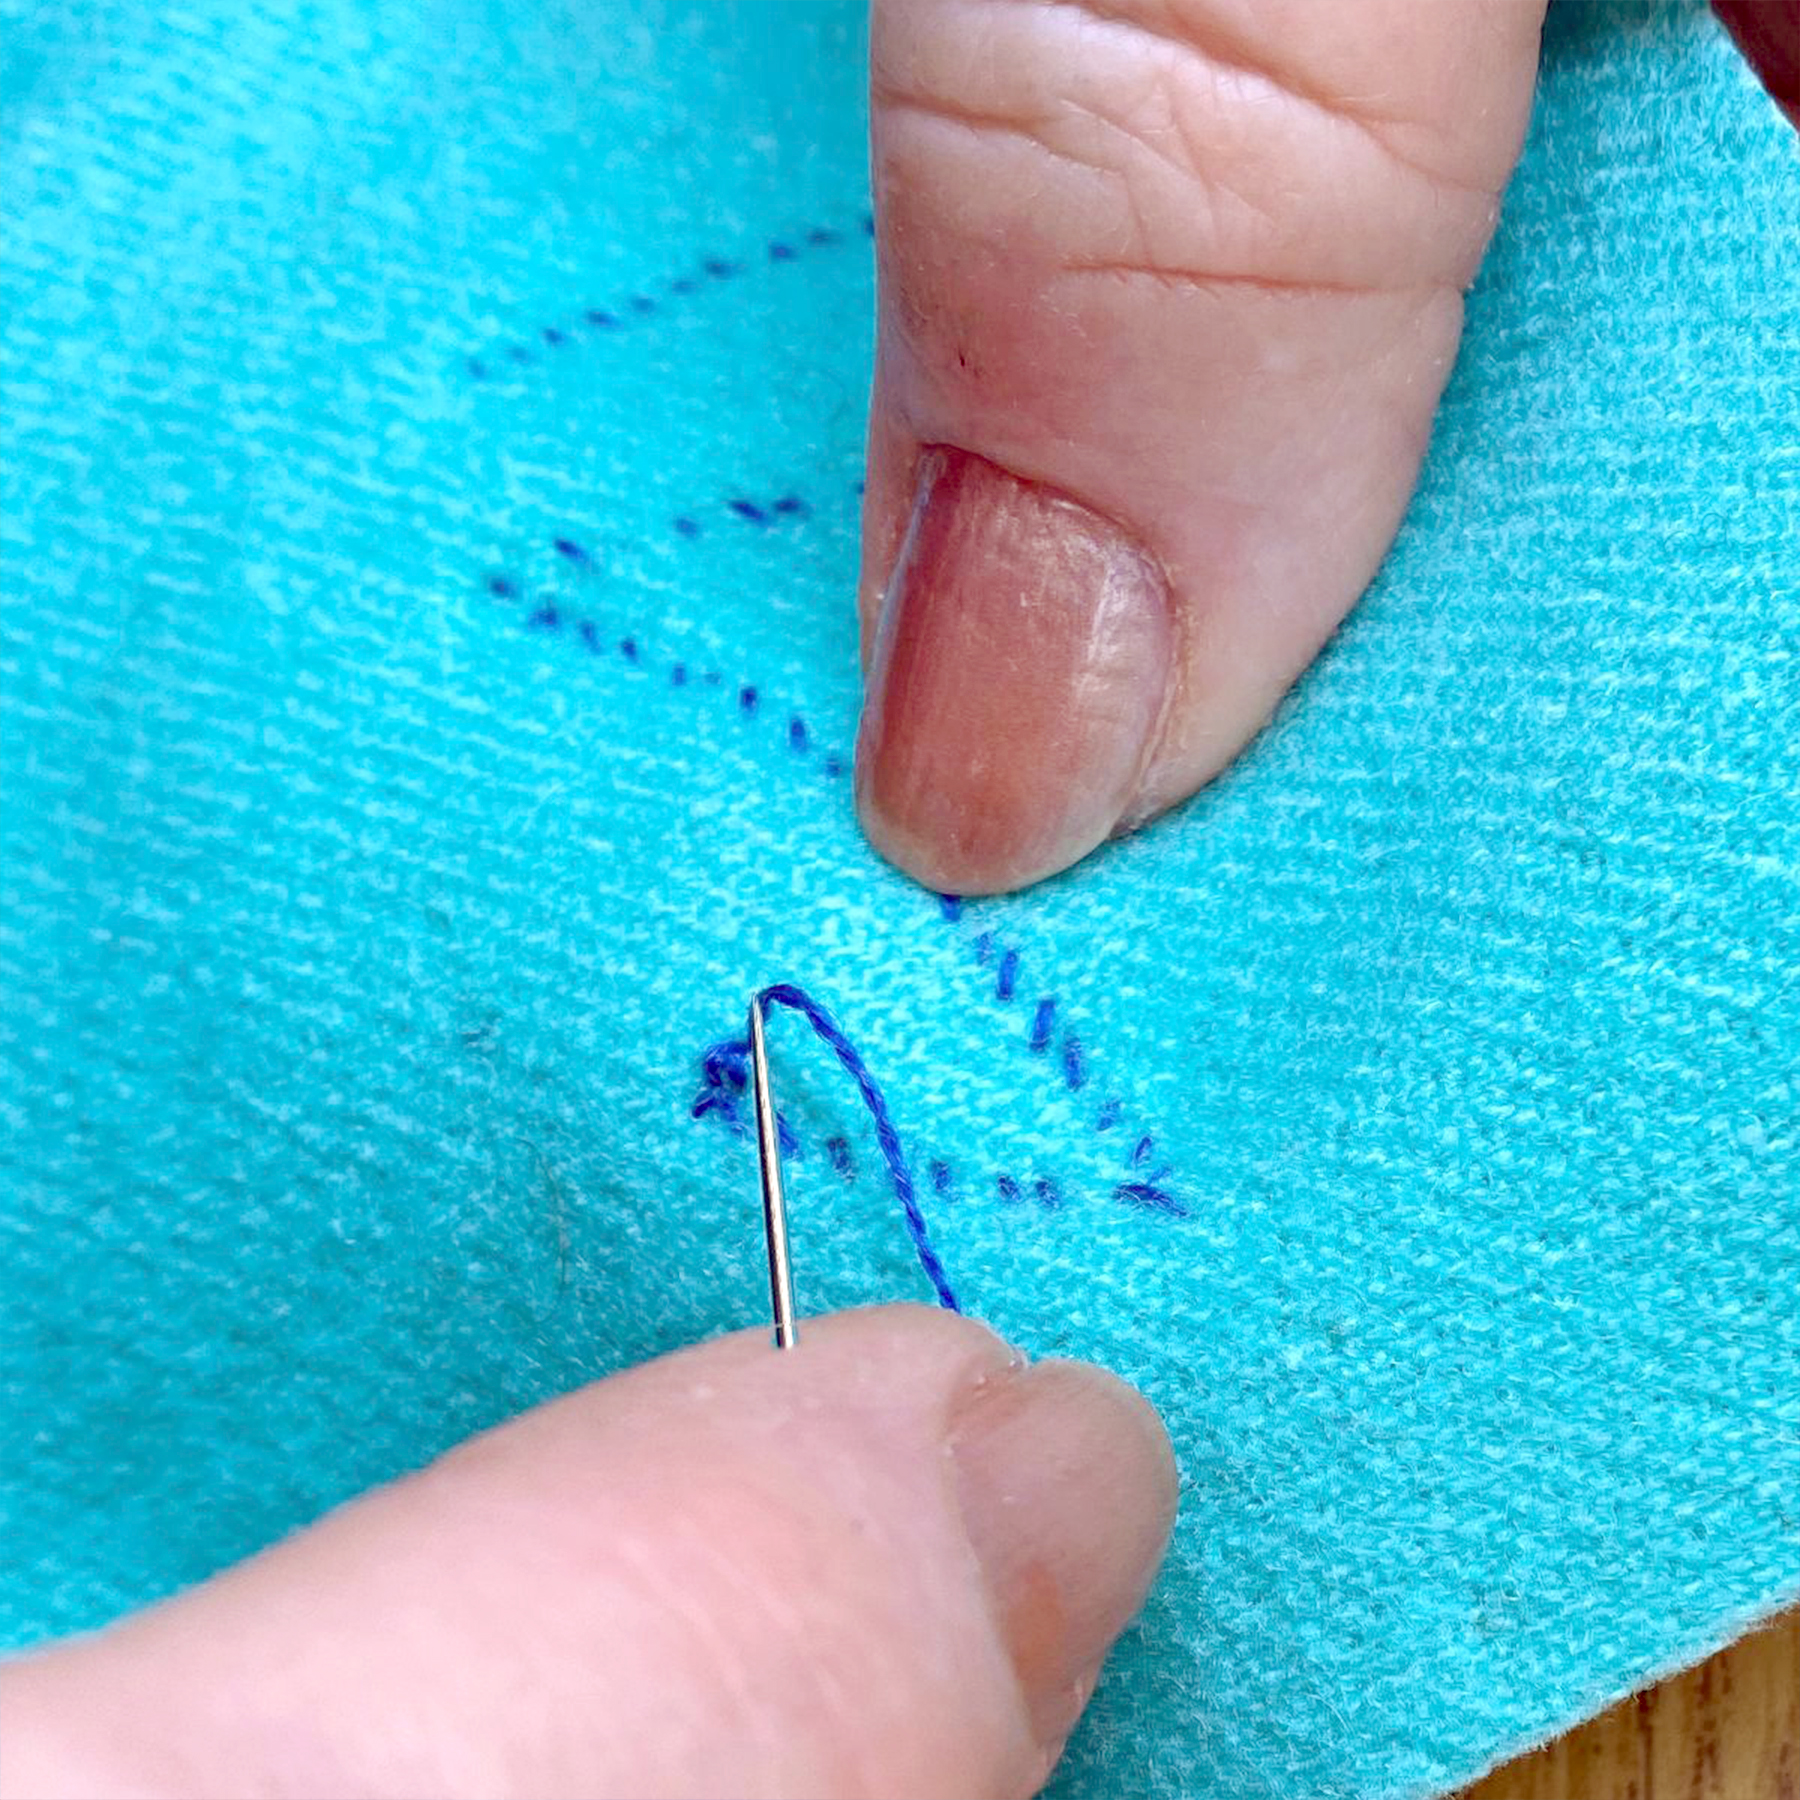
Using a whipstitch, appliqué your piece down. Make a small stitch by taking the needle into your wool background, then bringing the needle up in your appliqué. Pull the needle through. Keep your stitches 1/8" apart and 1/8" deep, parallel to each other and perpendicular to the edge of the appliqué.
There's a special way to keep your points nice and sharp! When you're about 1/8" from a point, bring your needle up through the center of the point. Then, do one stitch to the left of the point, bringing your needle up through the same hole. Repeat on the right side.
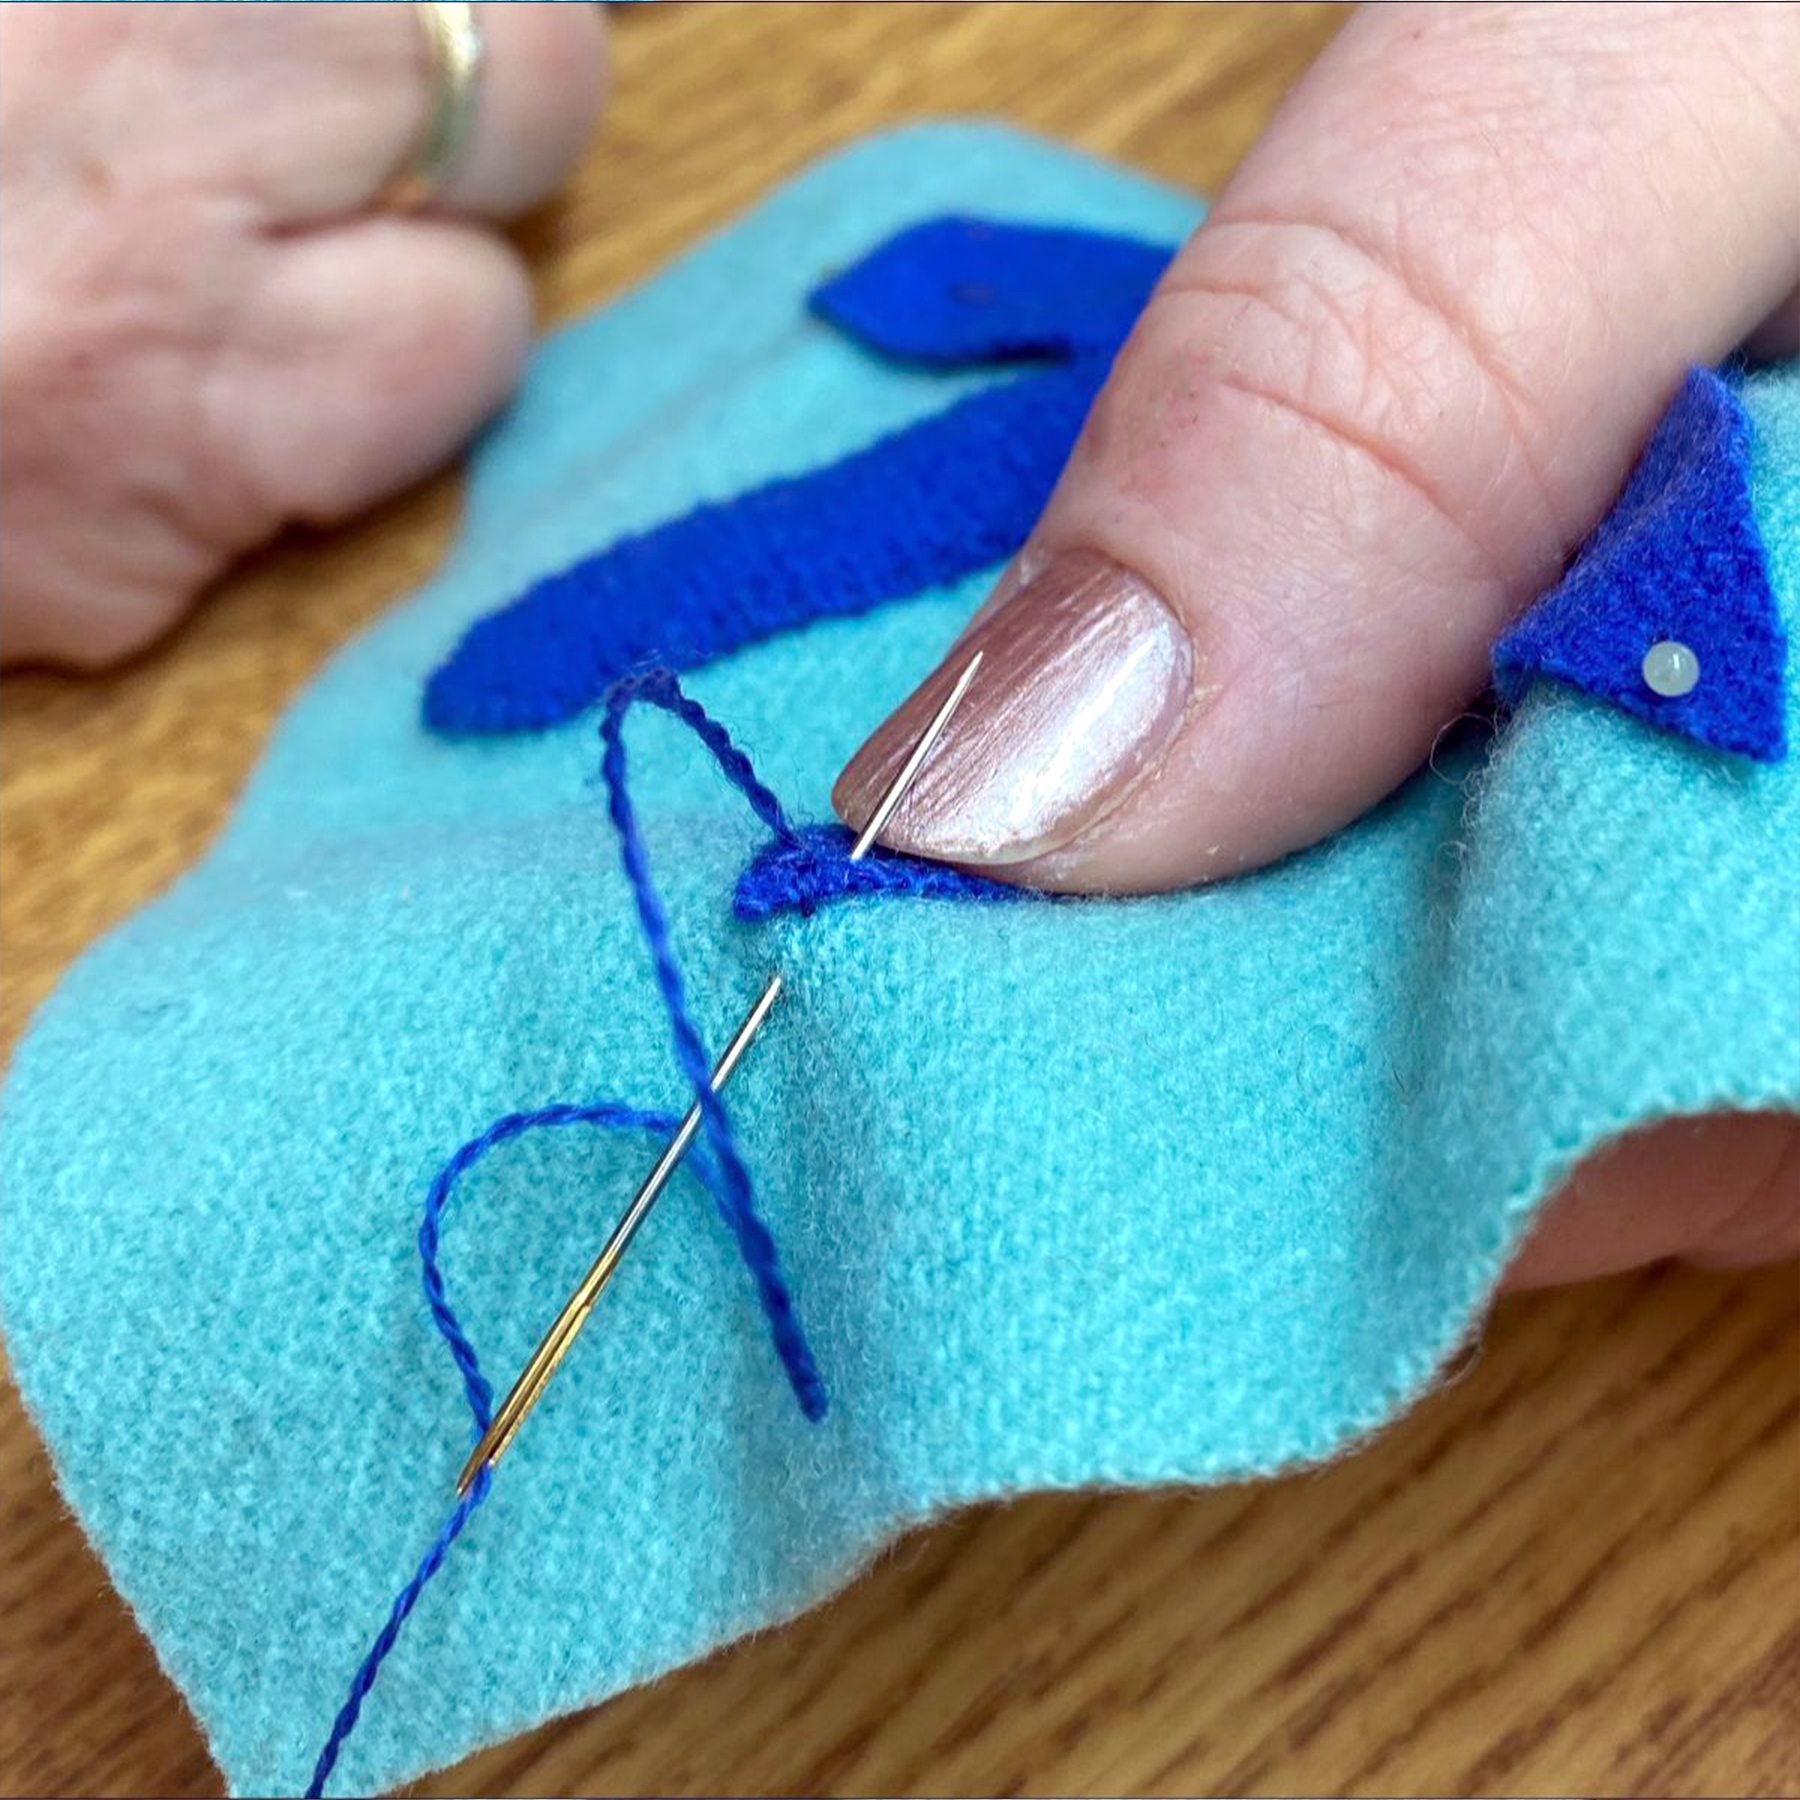
Next, insert your needle directly above the point, bringing it up to the left of the emerging thread, where your next stitch will start. In order to keep your point sharp, pull your thread most of the way through, leaving a small loop. Using the back of your needle, pull the loop tight, away from you. Using your nail to hold the thread on the point, remove your needle from the loop, and pull the stitch through. Your stitch should sit right on the point keeping it straight.
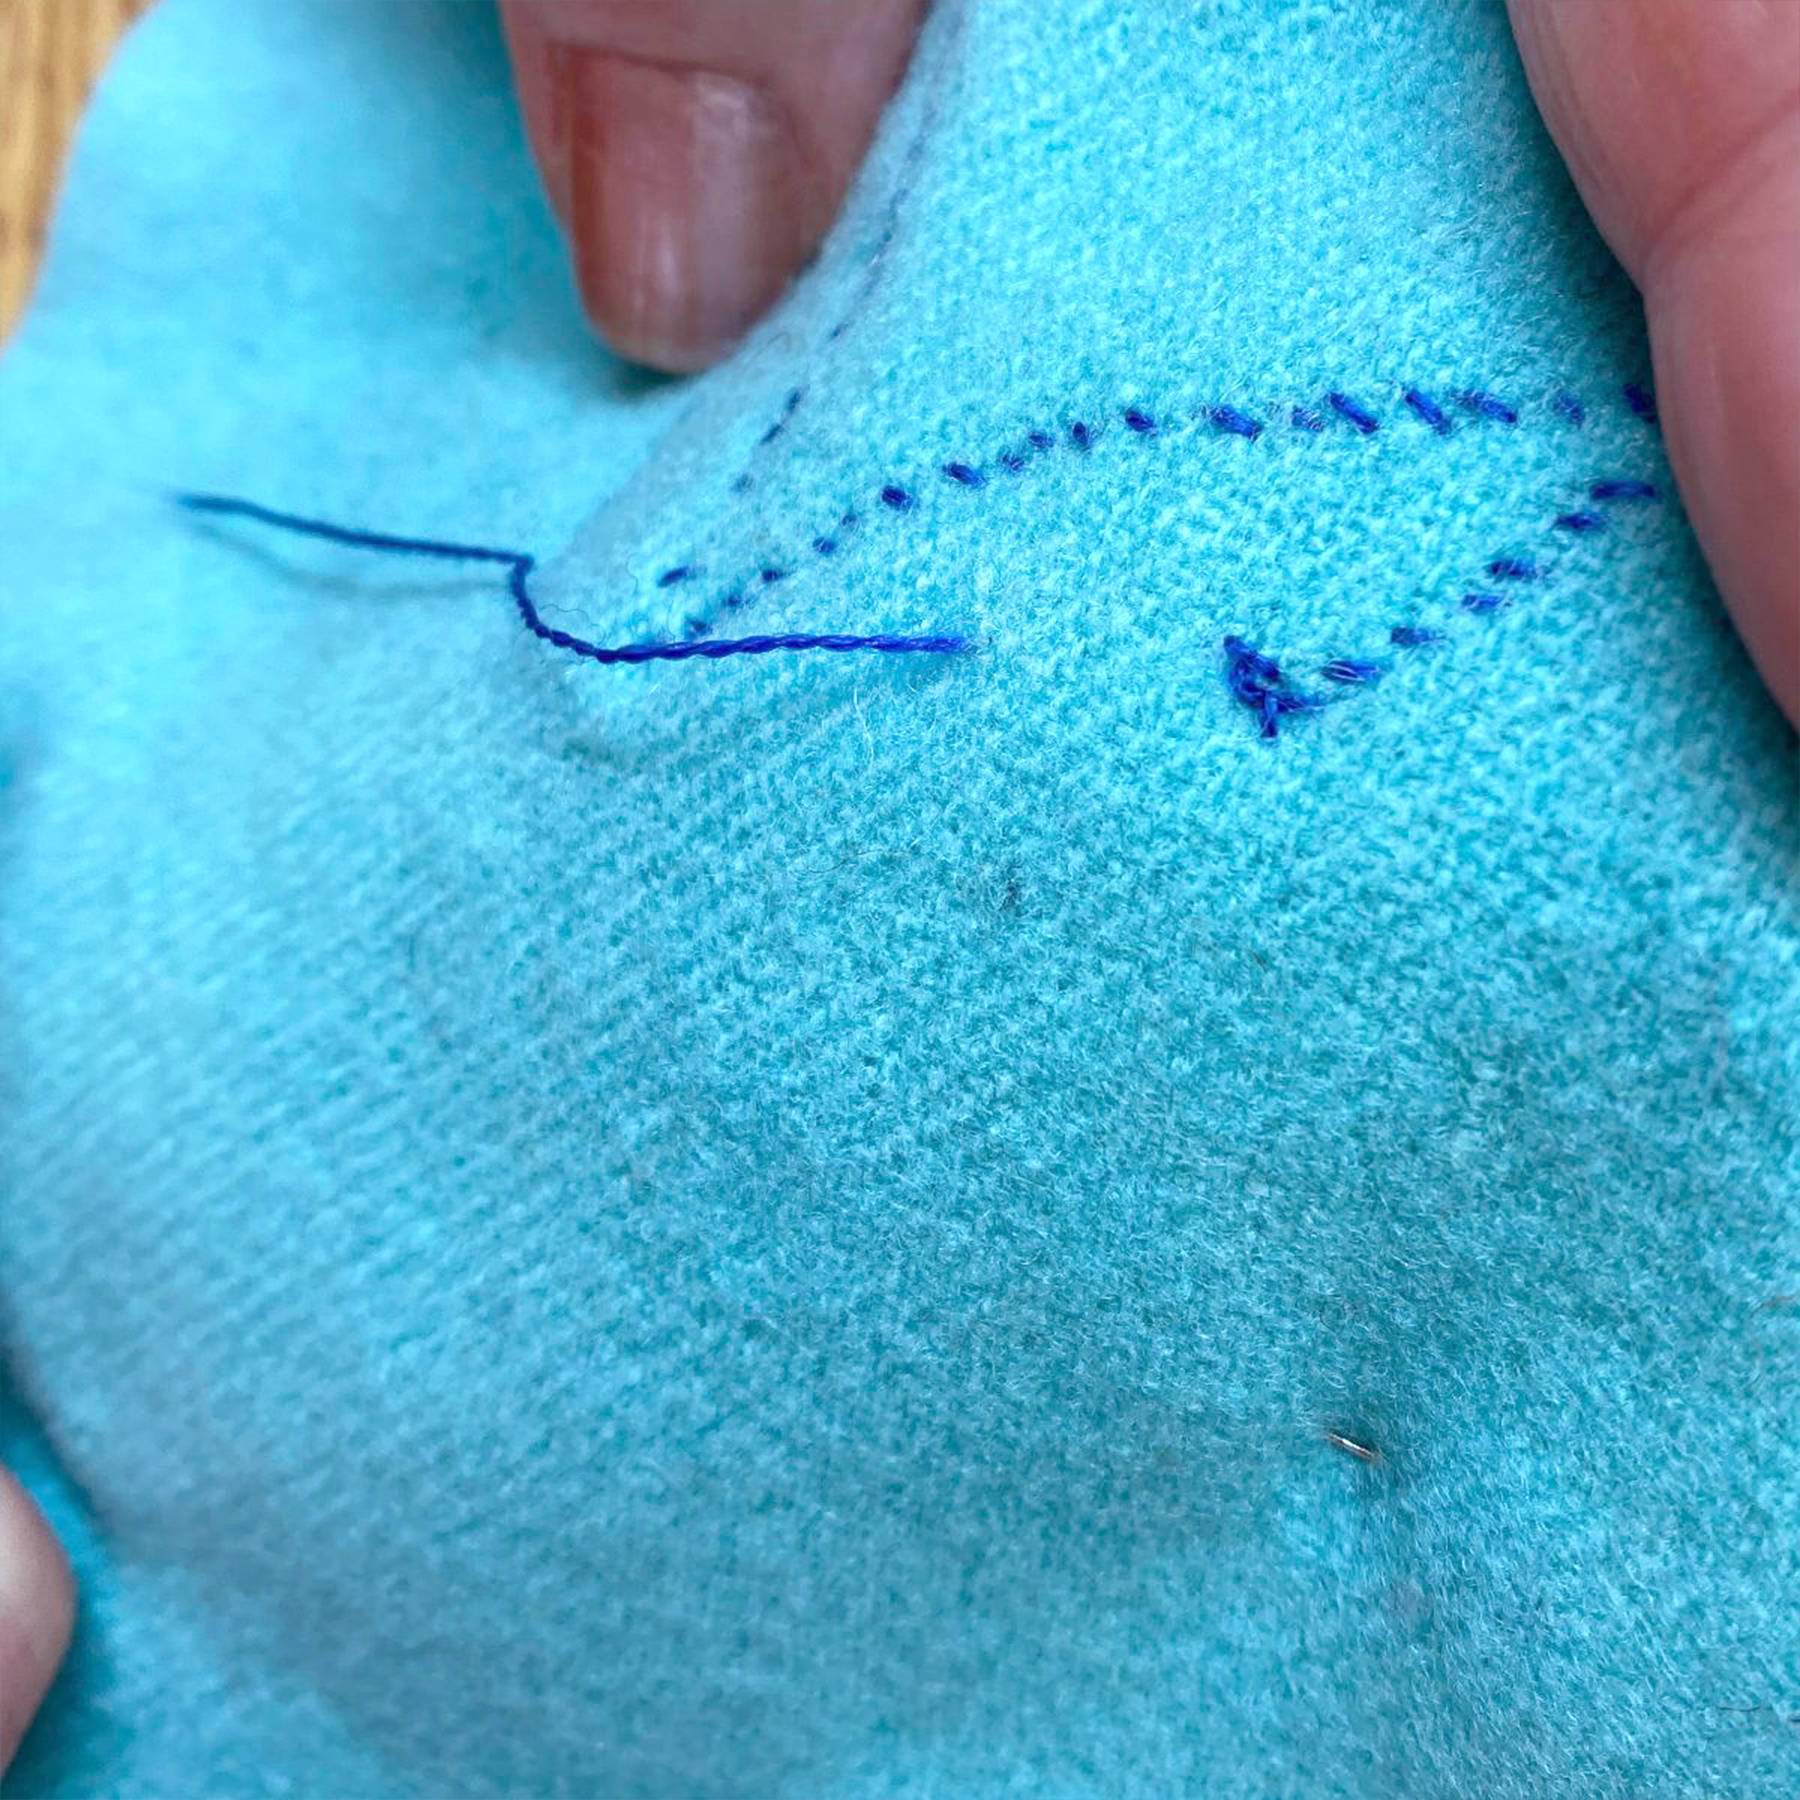
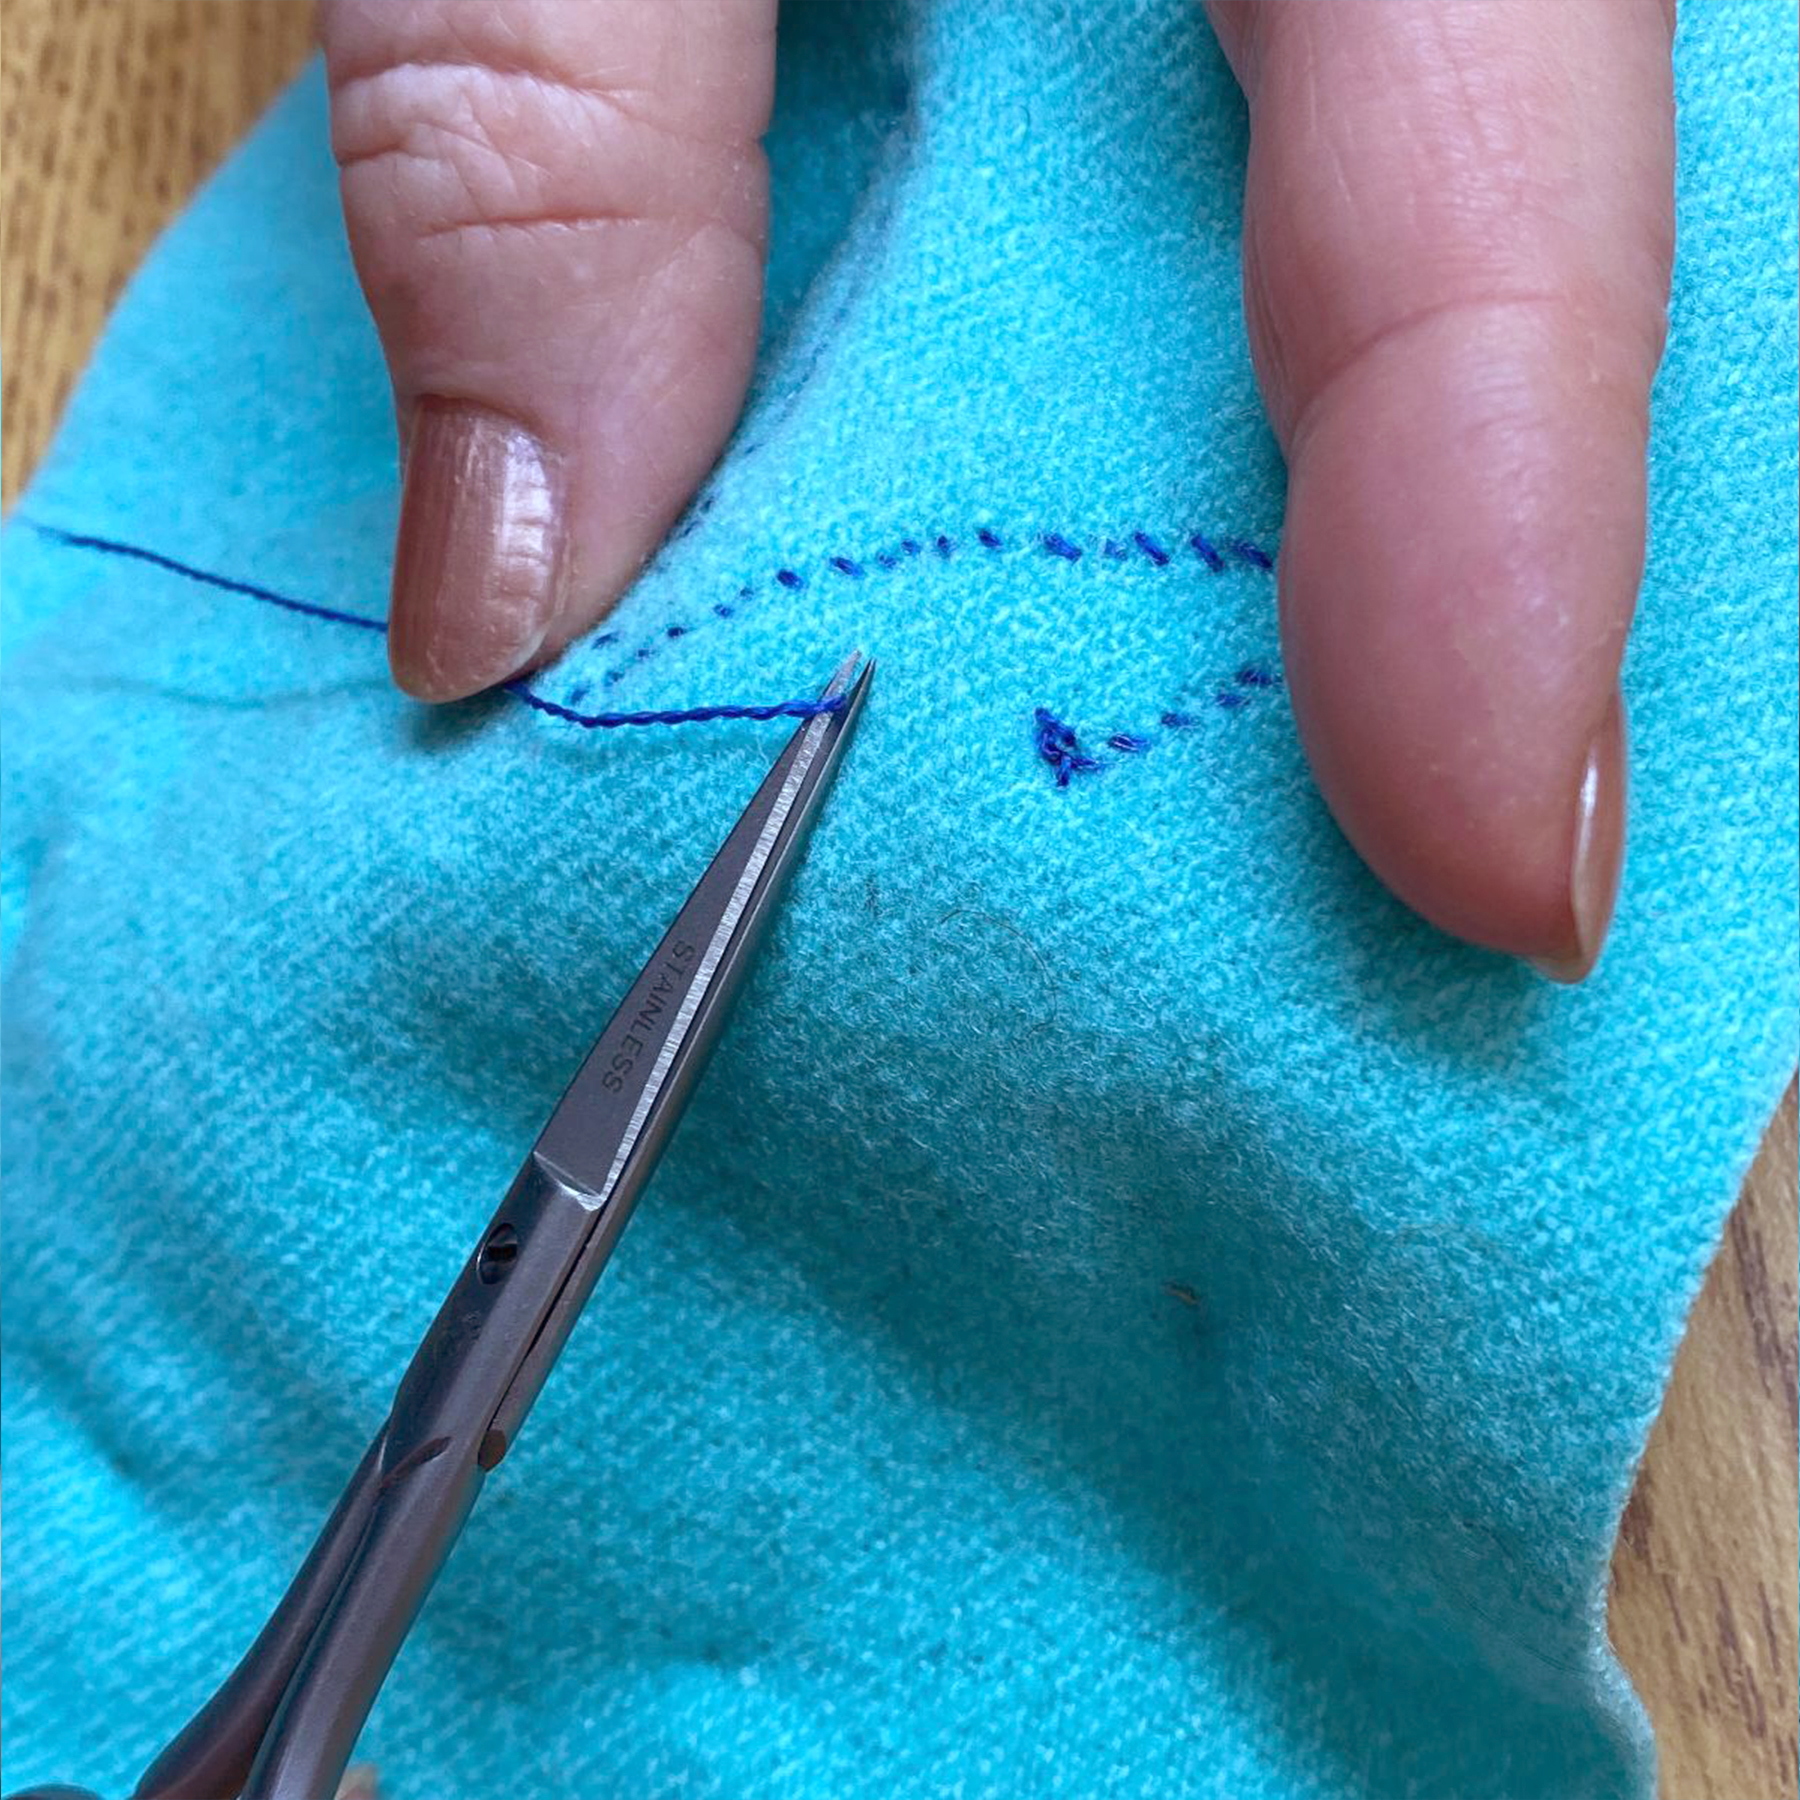
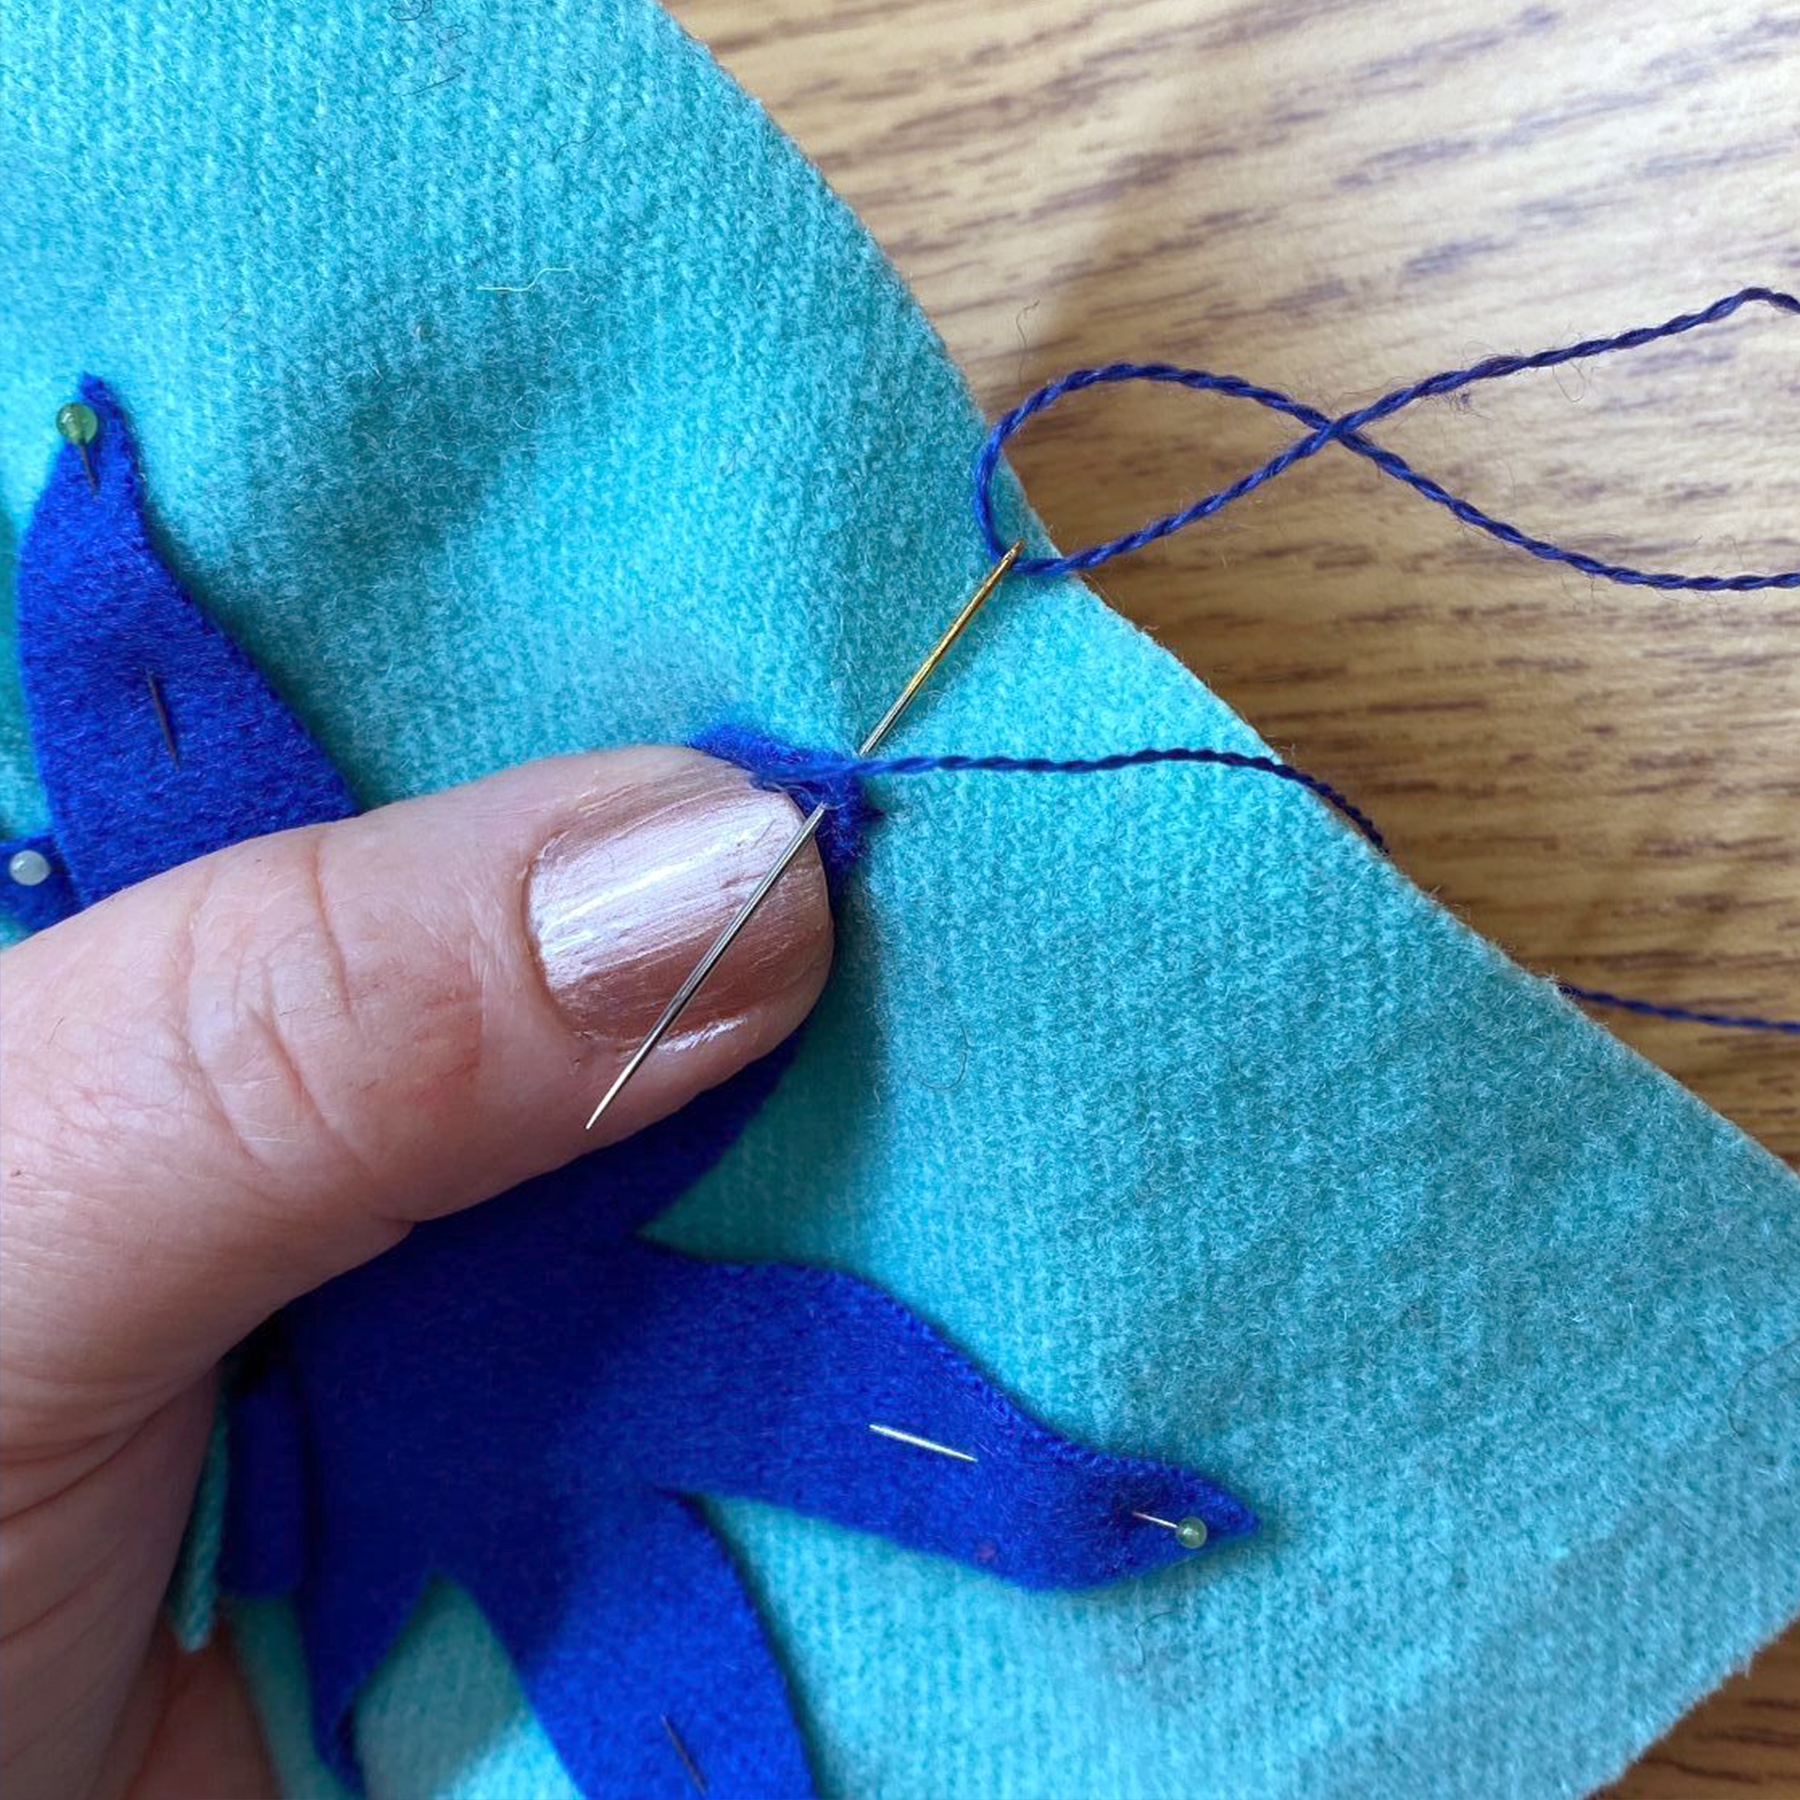
When your length of thread is almost gone, bring your needle to the back of your work. Do about three backstitches between the background wool and applique, run your needle between the layers bringing the thread a 1/2" from your backstitches, snip the thread.

We know starting something new can be intimidating! The best way to try with wool appliqué is to start with a small project, giving you a chance to practice without getting overwhelmed.
Our Pre-Cut Blocks are perfect to get started or practice with both wool appliqué and embellishment. The appliqué pieces are already cut for you so you can skip those steps and get straight to stitching! These little blocks are perfect to make into a pincushion, or sew multiple together to create a wall hanging, bag, pillow, or whatever you're inspired to create.
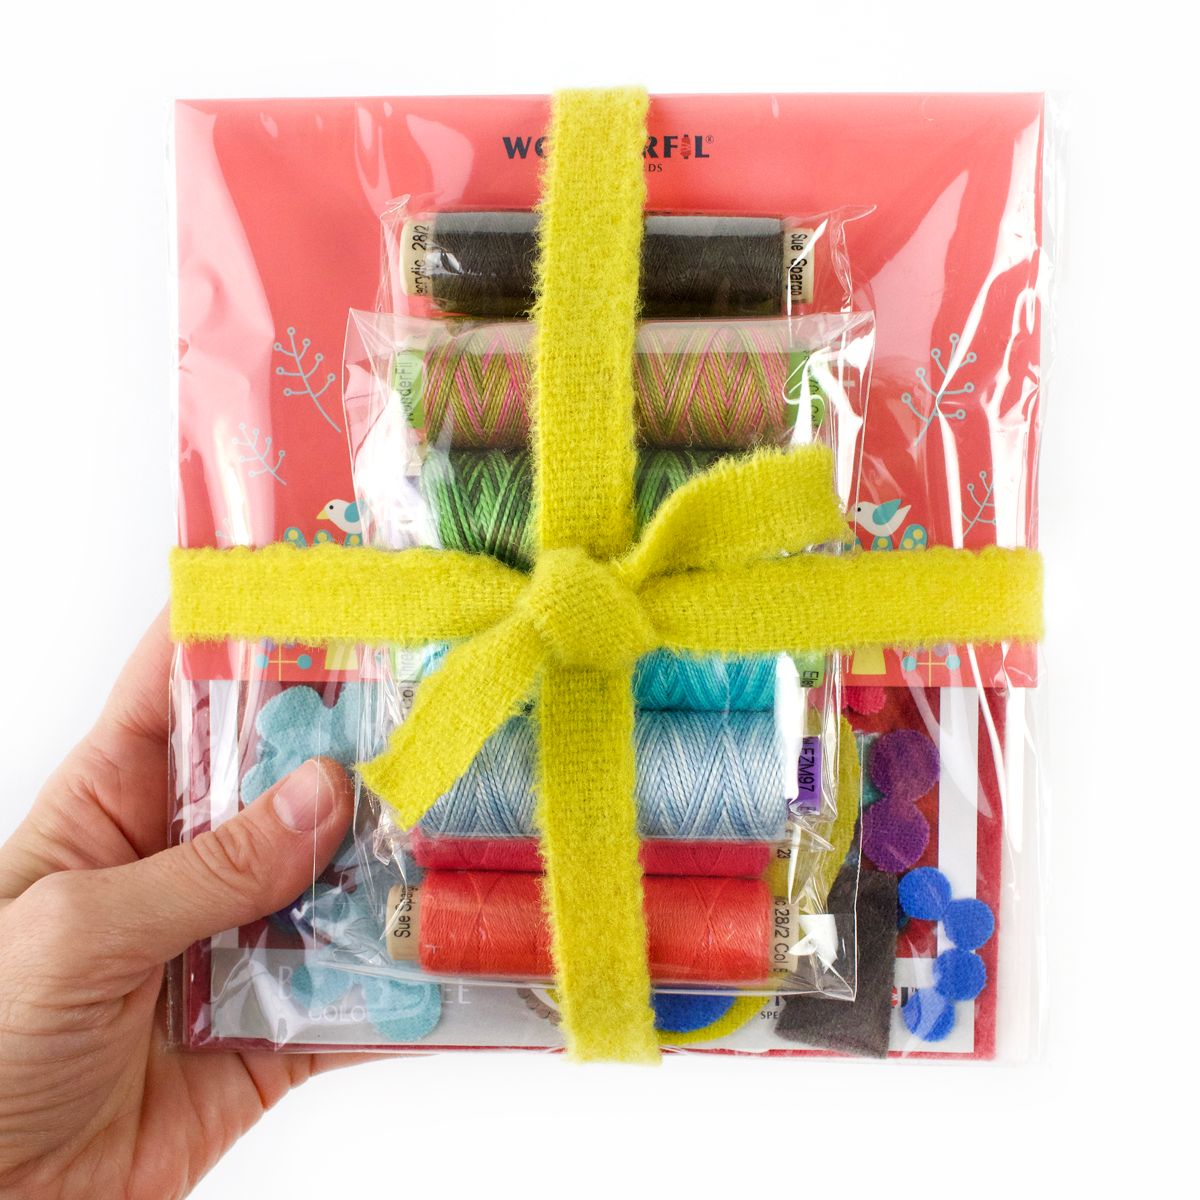
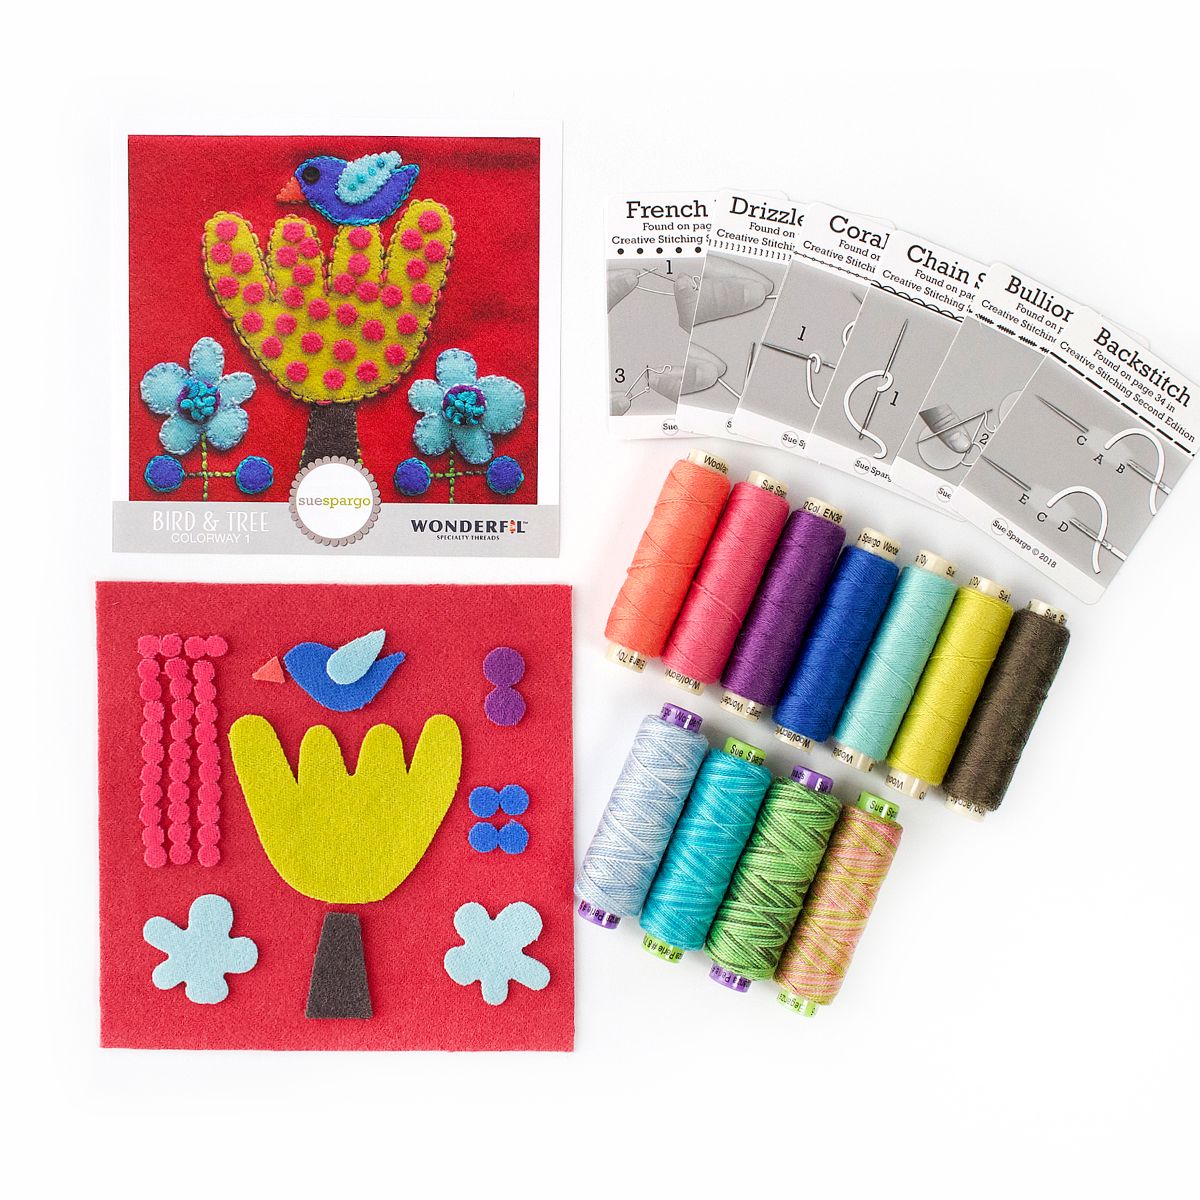
Want a steal of a deal? Save 30% when you Bundle a Pre-Cut Block with its appliqué & embellishment thread pack!
Bundle & Save includes one pre-cut block, Ellana threads to complete the block, Eleganza threads to embroider the block, whipstitch and stitch placement diagrams, and quick reference embroidery stitch cards.