What's the secret to becoming a master stitcher? Practice and patience helps, but knowing the basics is essential! We put together a refresher on what's necessary to know to stitch like a pro.
Choosing the Right Needle
We always preach this, but it's because it's SO true: using the right needle is crucial to your stitching experience!! The right needle makes threading easier, stitching smoother, gives you better results, and prevents hand fatigue.
The three most-loved needles in our stash are:
Chenille Needles
These needles are used for any embroidery stitch other than wrapped and cast-on stitches. We also use a Chenille needle for wool appliqué.
Milliners Needles
These needles are used for all wrapped and cast-on stitches.
Tapestry Needles
These needles have a blunt tip, making them perfect for woven stitches.
Eleganza Color Coding System
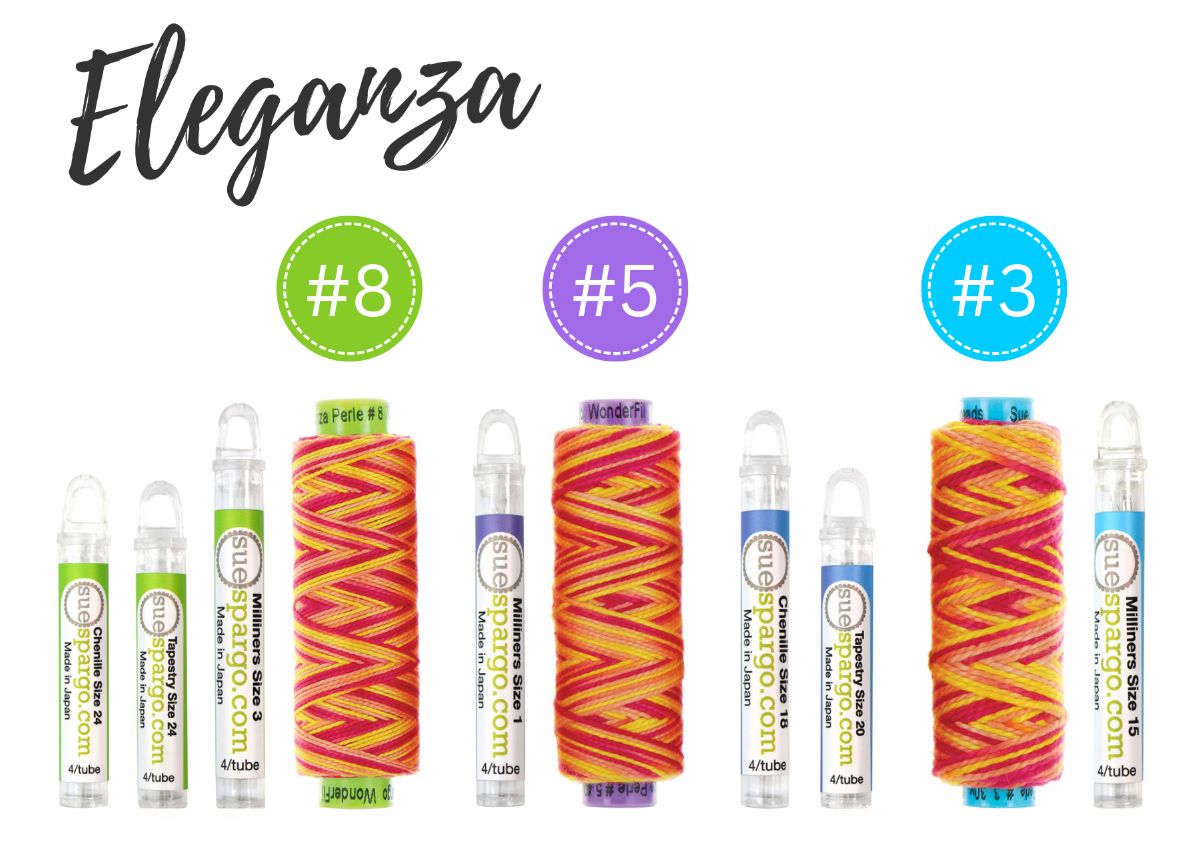
Once you have the uses of each needle down, it's time to choose the correct size for the thread you're using. We've made it super easy to find the right needle for Eleganza with our color coding system!
Sue’s collection of Gold Eye Needles has labels that are carefully designed to help you choose the correct needle each and every time! The matching needle tube and spool color indicates coordinating needles and thread, while the needles in ombre tubes can be used with both thread weights the colors represent.
- Green tube = use with green spool (Eleganza #8)
- Purple tube = use with purple spool (Eleganza #5)
- Ombre tube = use with purple & blue spools (Eleganza #5 & #3)
(ombre tube fades from purple on one side to blue on the other) - Blue tube = use with blue spool (Eleganza #3)
Needles for Other Threads
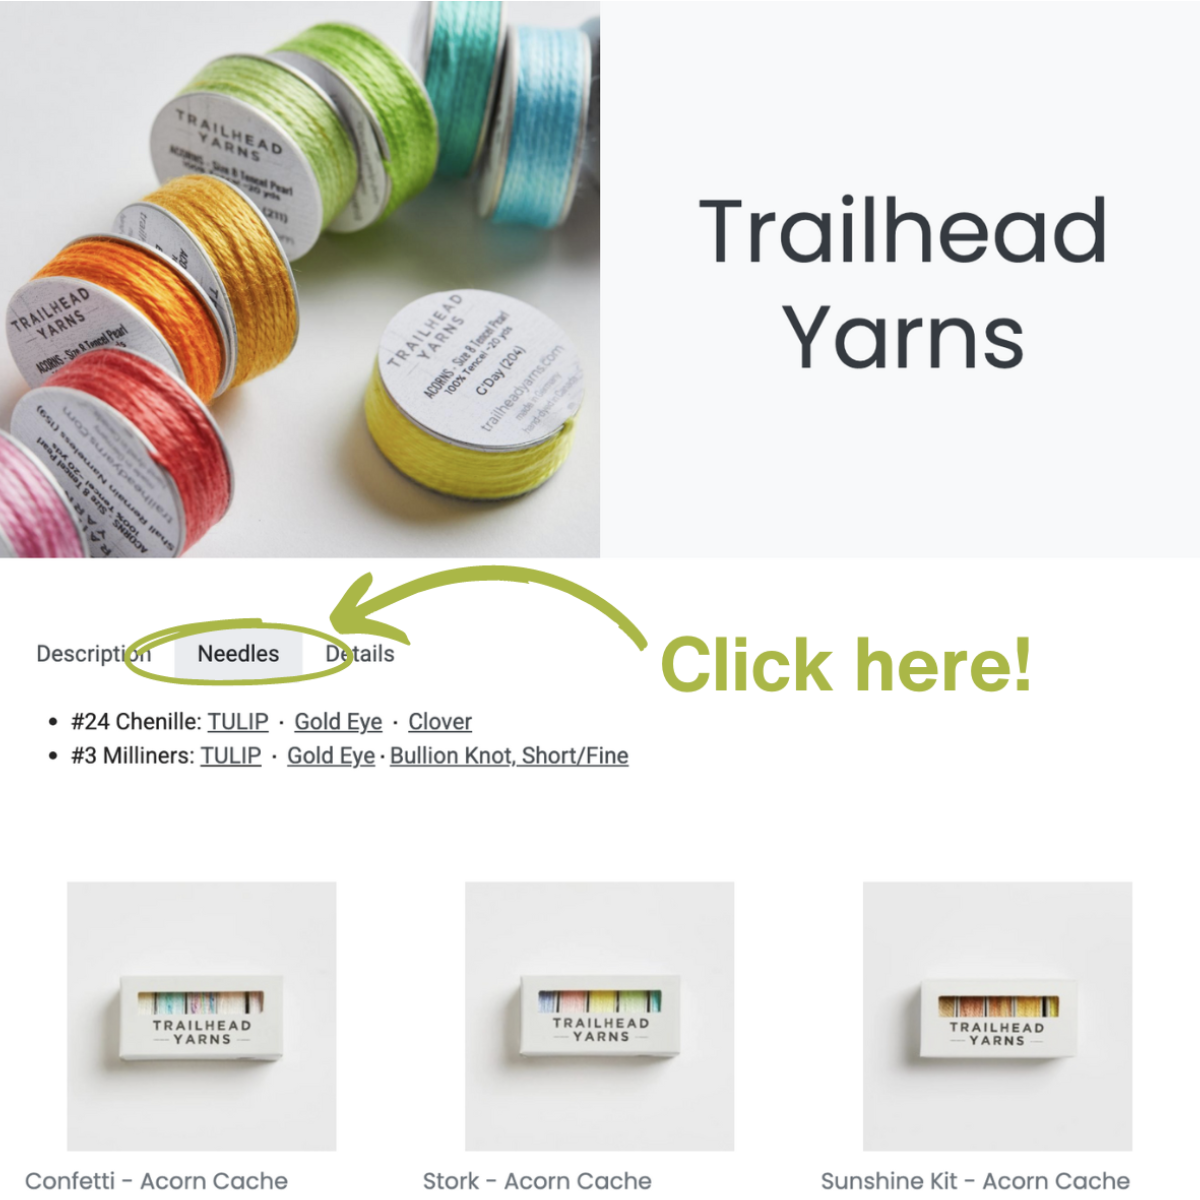
You can use Eleganza as a baseline when finding the right needle size for other threads of the same weight. We also have a tab with the recommended needles for each of the thread pages on our website. To locate them, simply click on "Needles" at the top of each thread page.
Threading the Needle
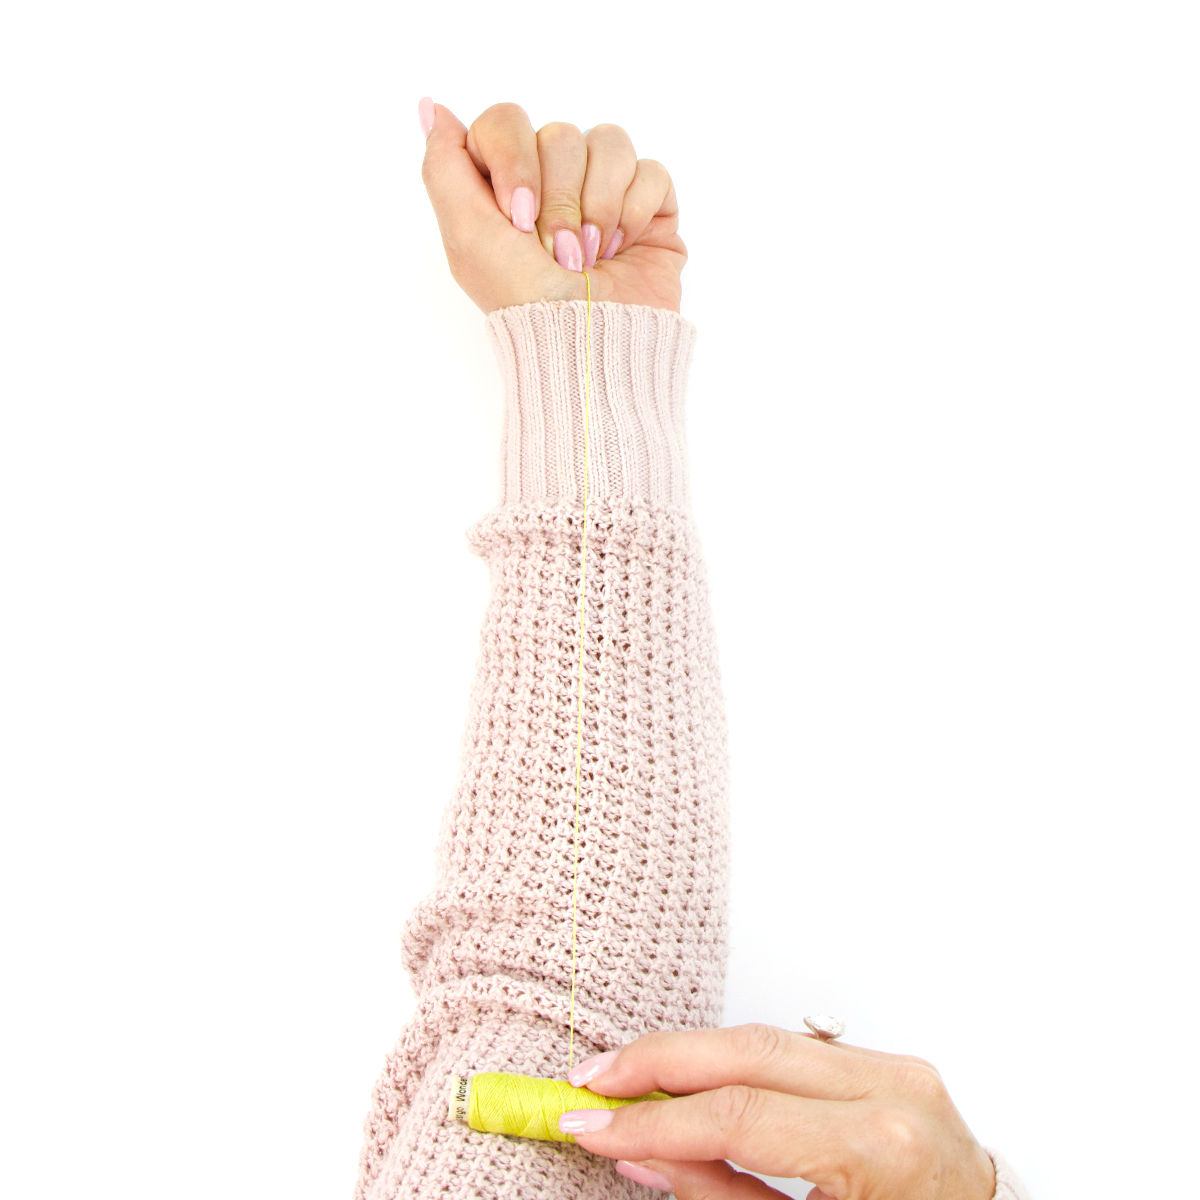
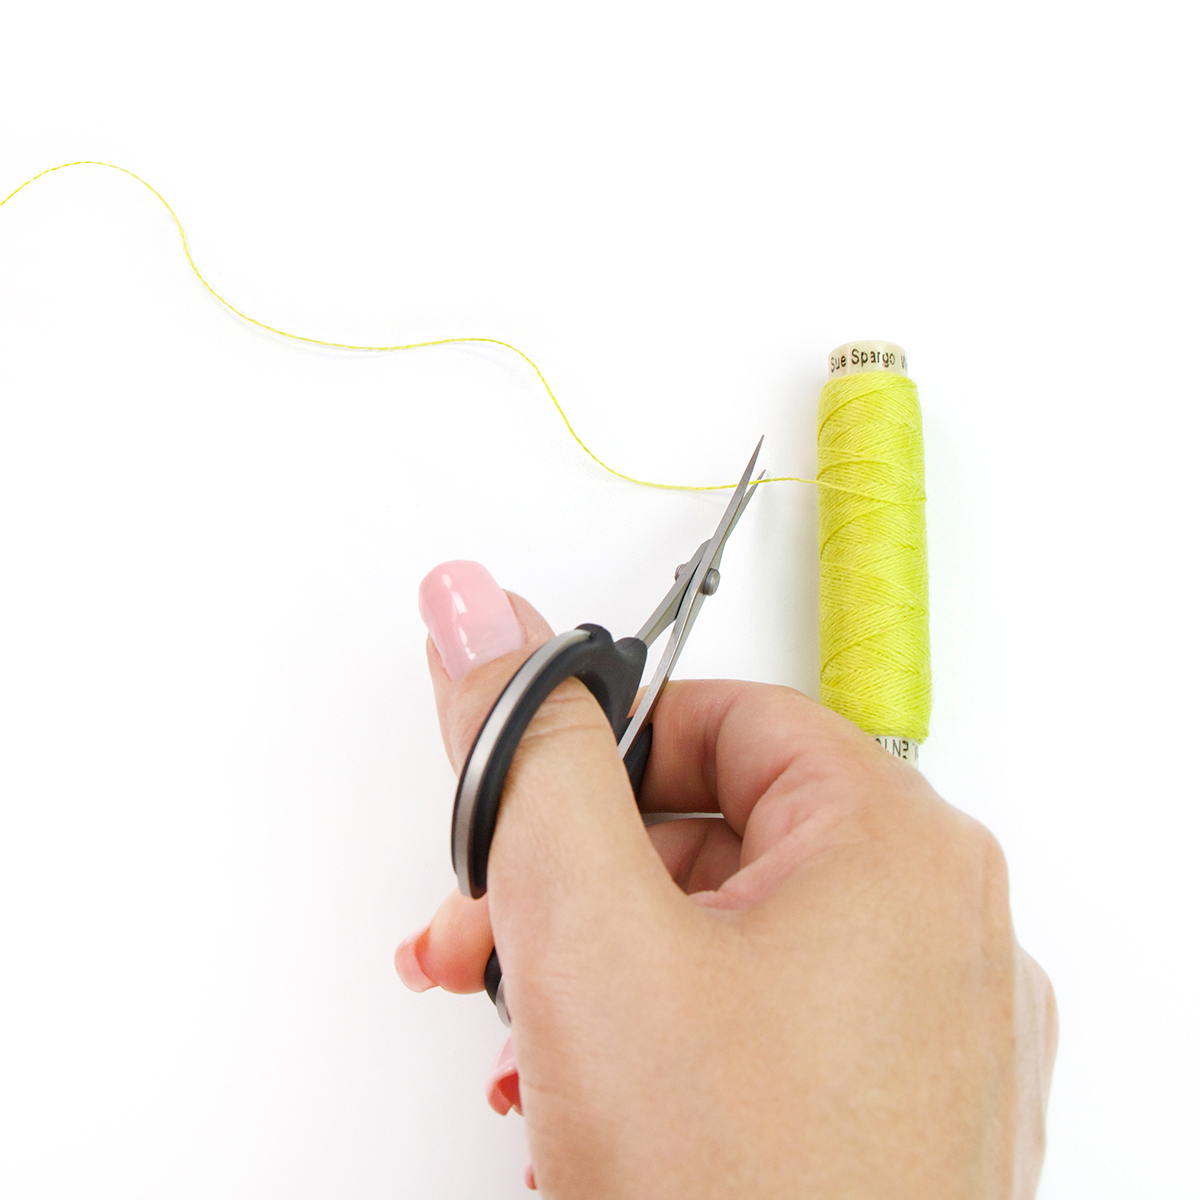
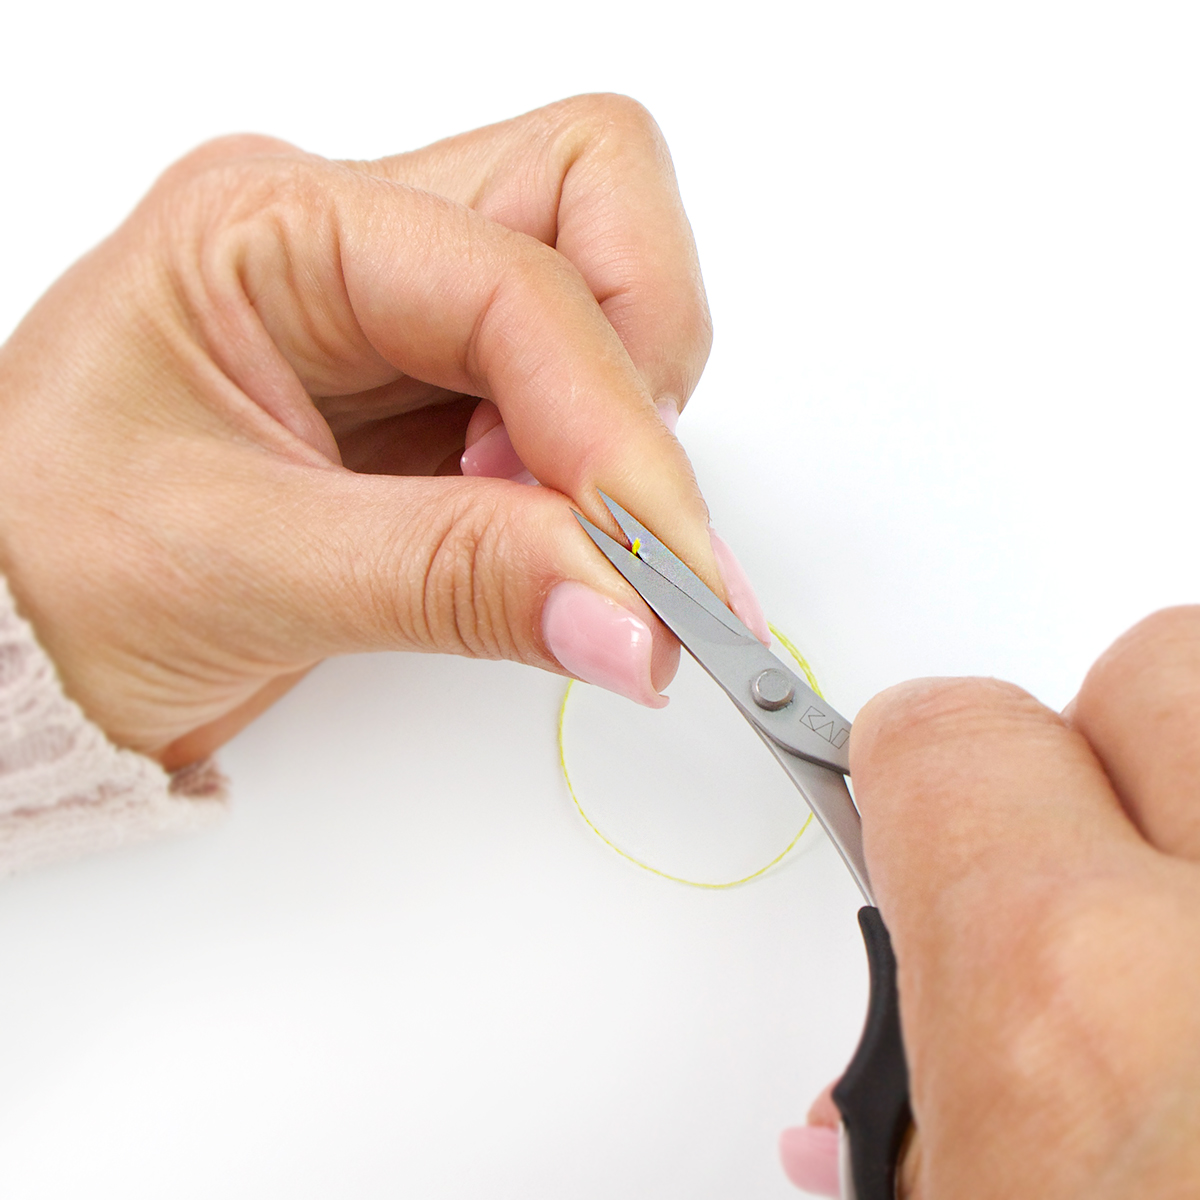
First, you'll want to cut about 18" of thread from the spool, which, on average, tends to be the length from your hand to your mid upper arm. Longer pieces are more likely to knot and twist as you sew.
IMPORTANT: Due to the threads twist, always knot your thread at the end you cut from the spool. You will have much fewer tangles and knots if you remember, "Where you snip is where you knot." Keep reading to learn our favorite way to knot.
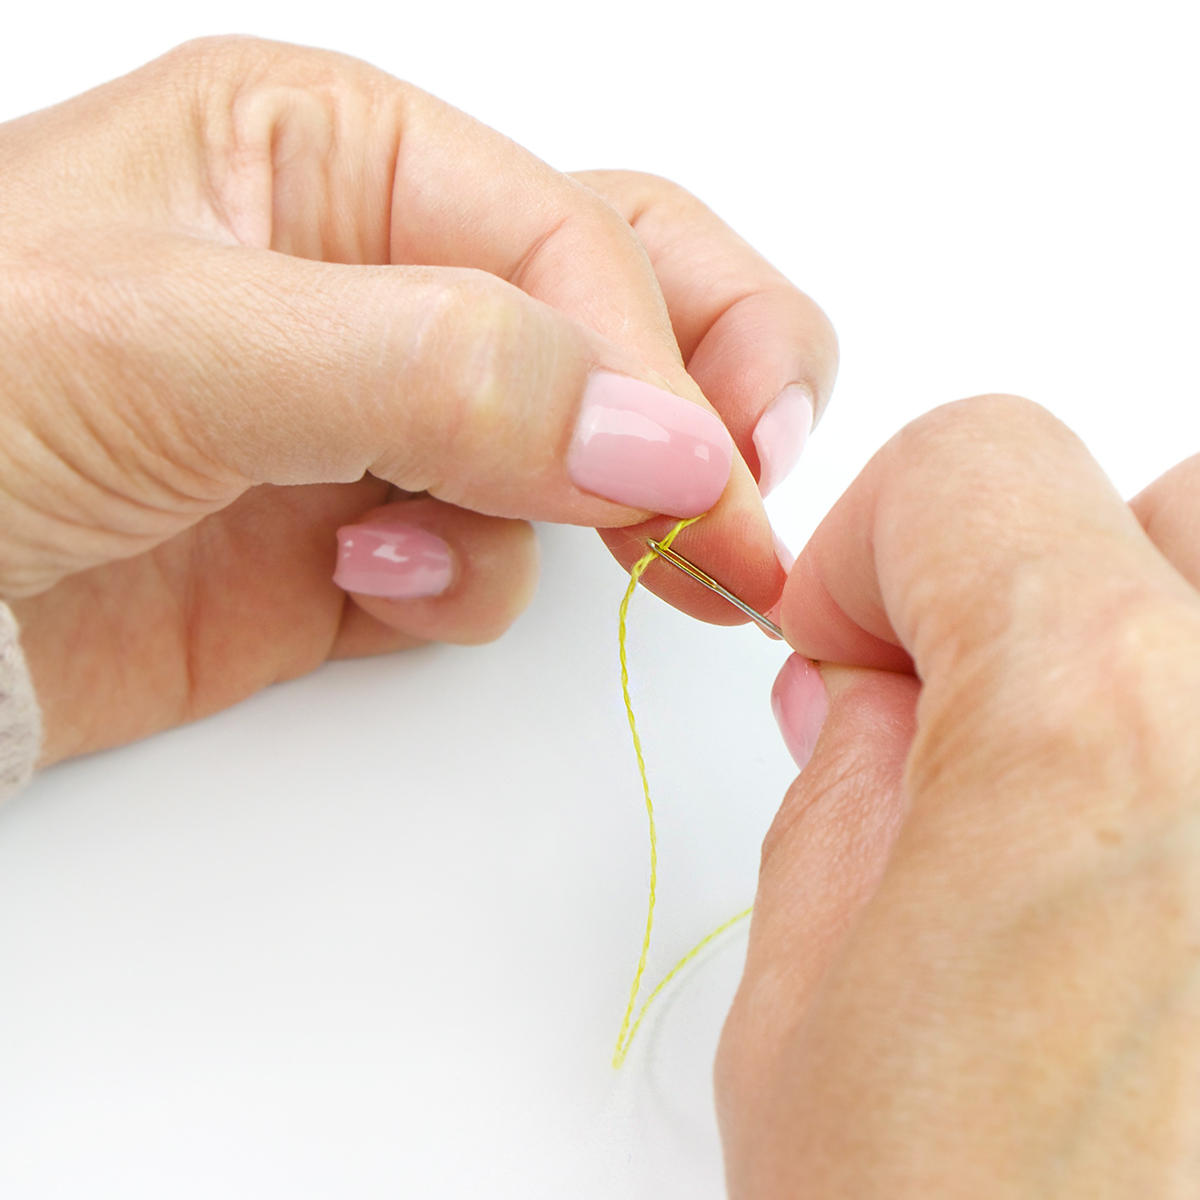
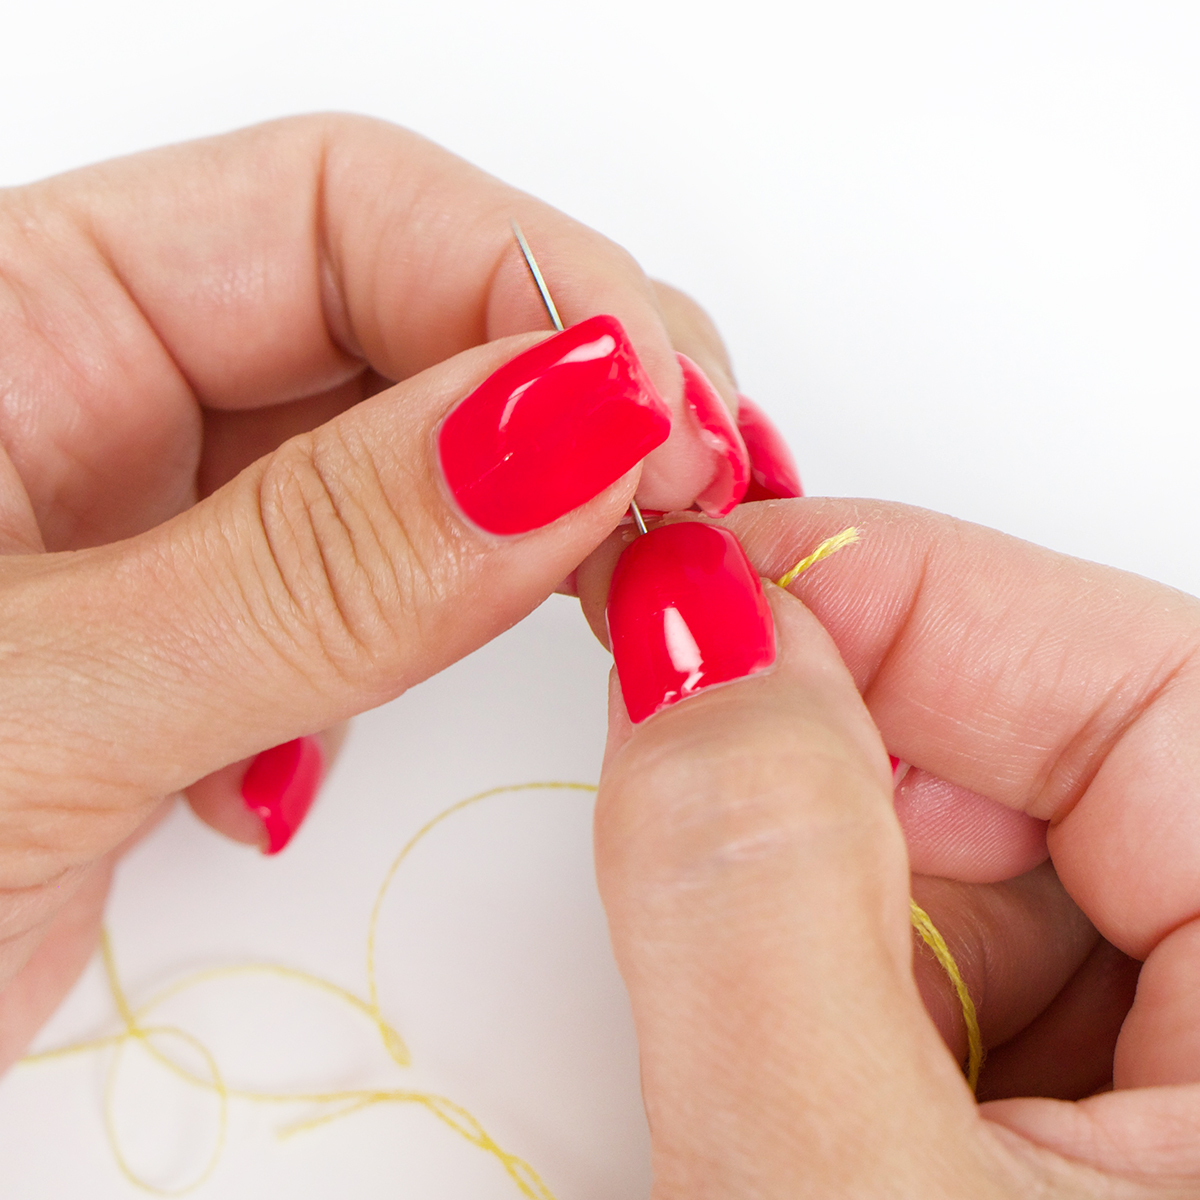
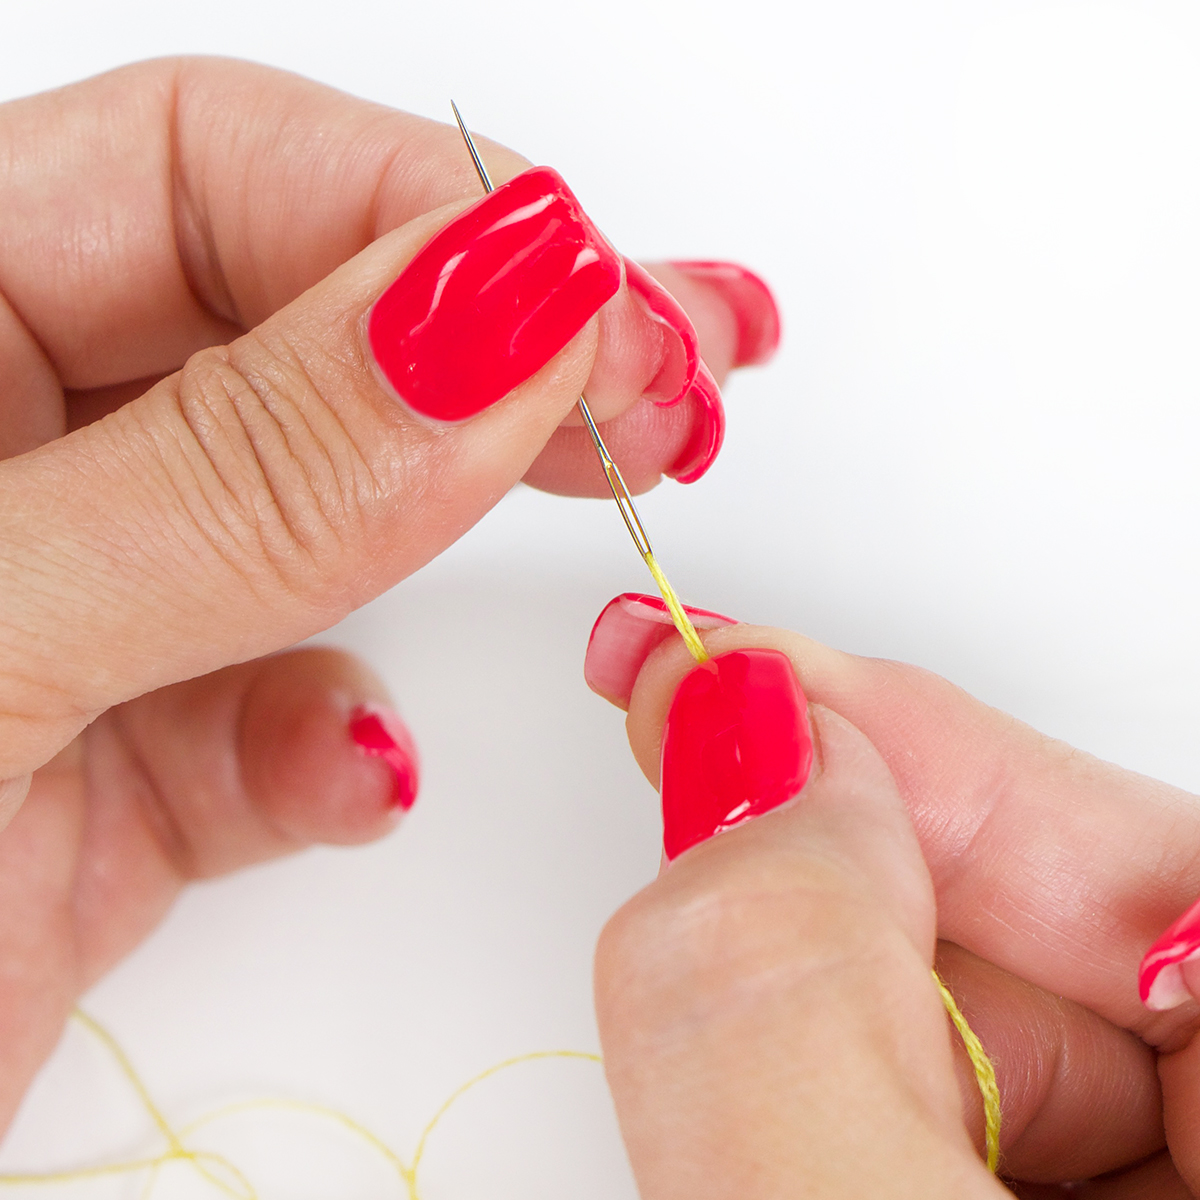
In your other hand, bring the eye of the needle to the pinched thread and guide it through.
It is much easier to control the needle than the thread, so if you've been threading your needle by trying to poke the thread through the eye of the needle, try switching to the method we use. It makes a huge difference!
PRO TIP: While many of us are all too keen to lick the ends of our thread, we recommend licking the eye of your needle. This will help draw the thread more efficiently through the eye.

Once you have the needle threaded, pull the tail through. You are ready to knot the other end.
The Quilter's Knot
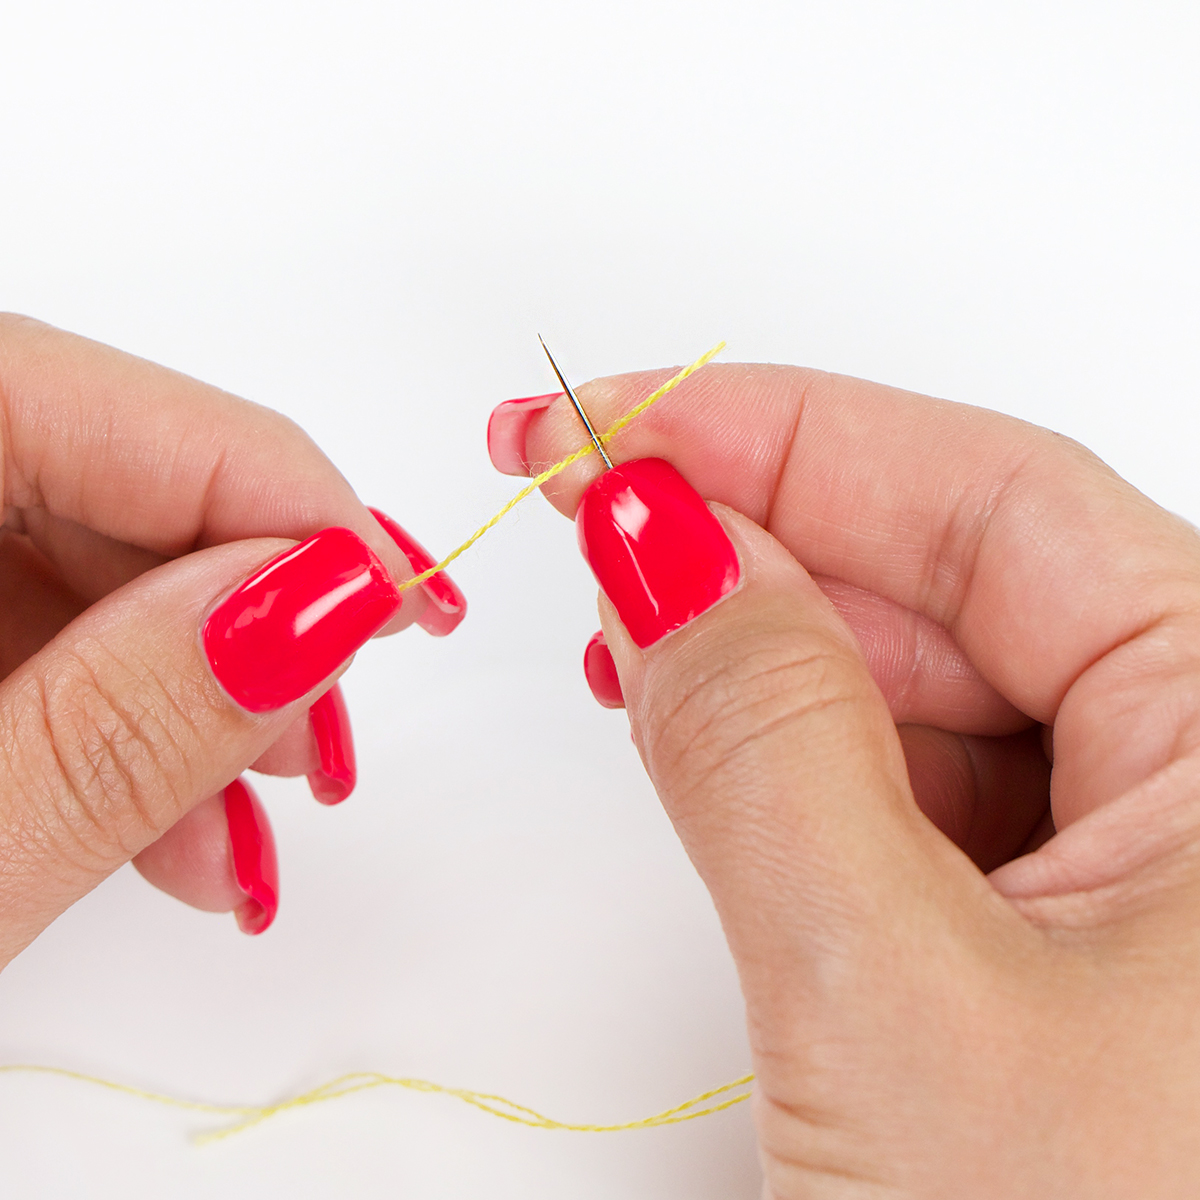
Our favorite way to knot thread is by doing a Quilter's Knot!
Create an 'X' by pinching the thread end between the needle and your right forefinger.
Using your left hand, wrap the thread around the needle 3-4 times, moving towards the tip of the needle.
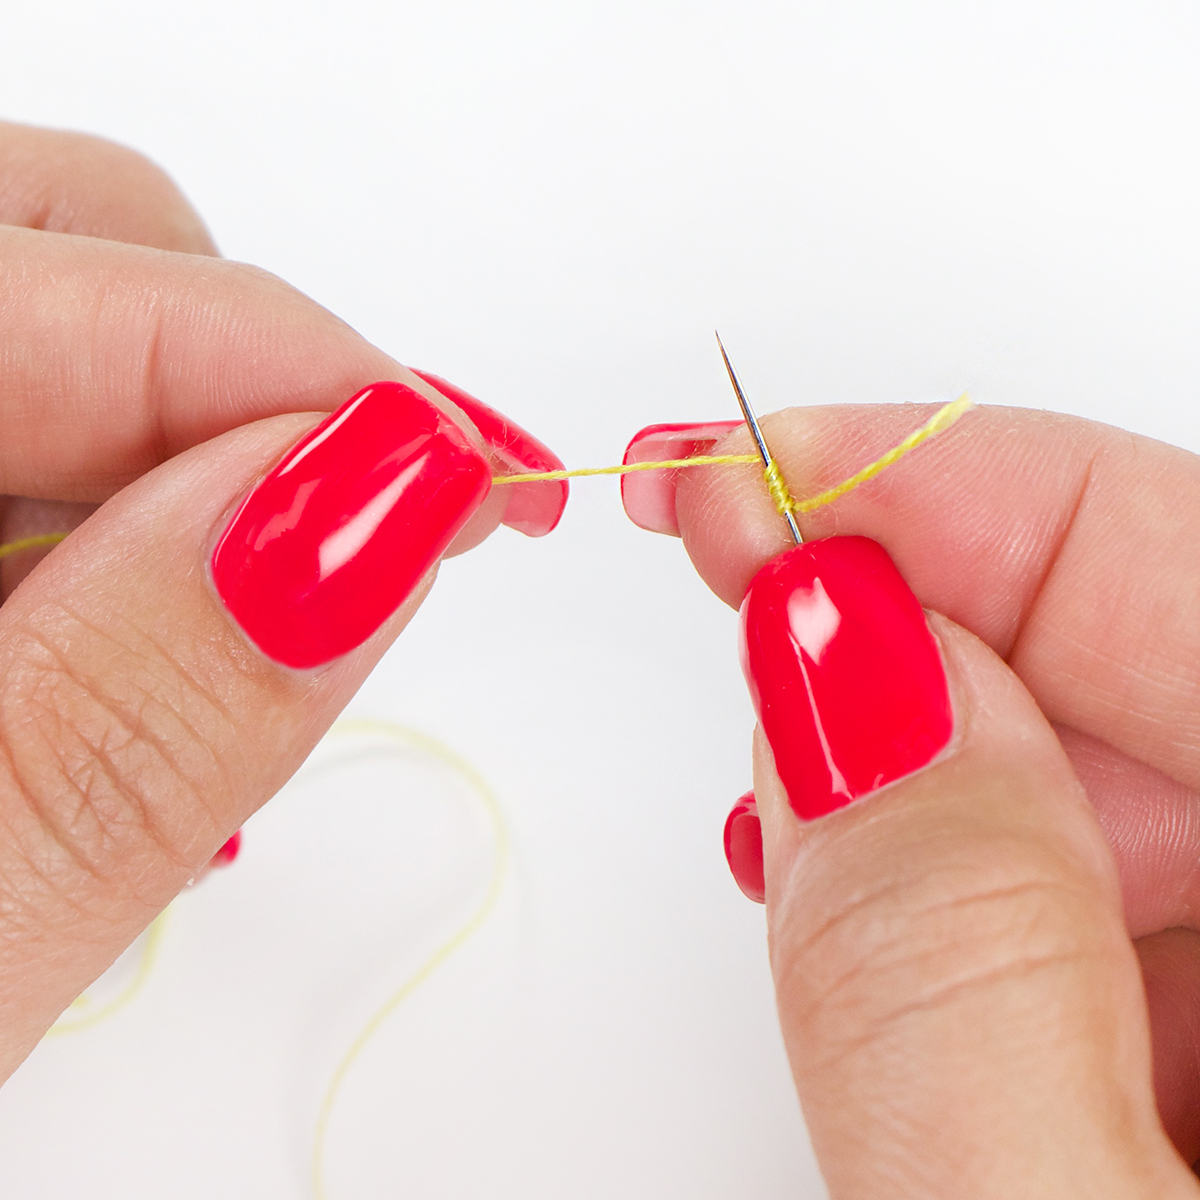
TIP: The more times you wrap, the larger your knot will be; adjust wraps depending on the weight of the thread.
Pinch the wrapped threads between your right thumb and forefinger.
With your left hand, pull the needle through the wraps. Continue pinching the wraps with your right thumb and forefinger as you do this.
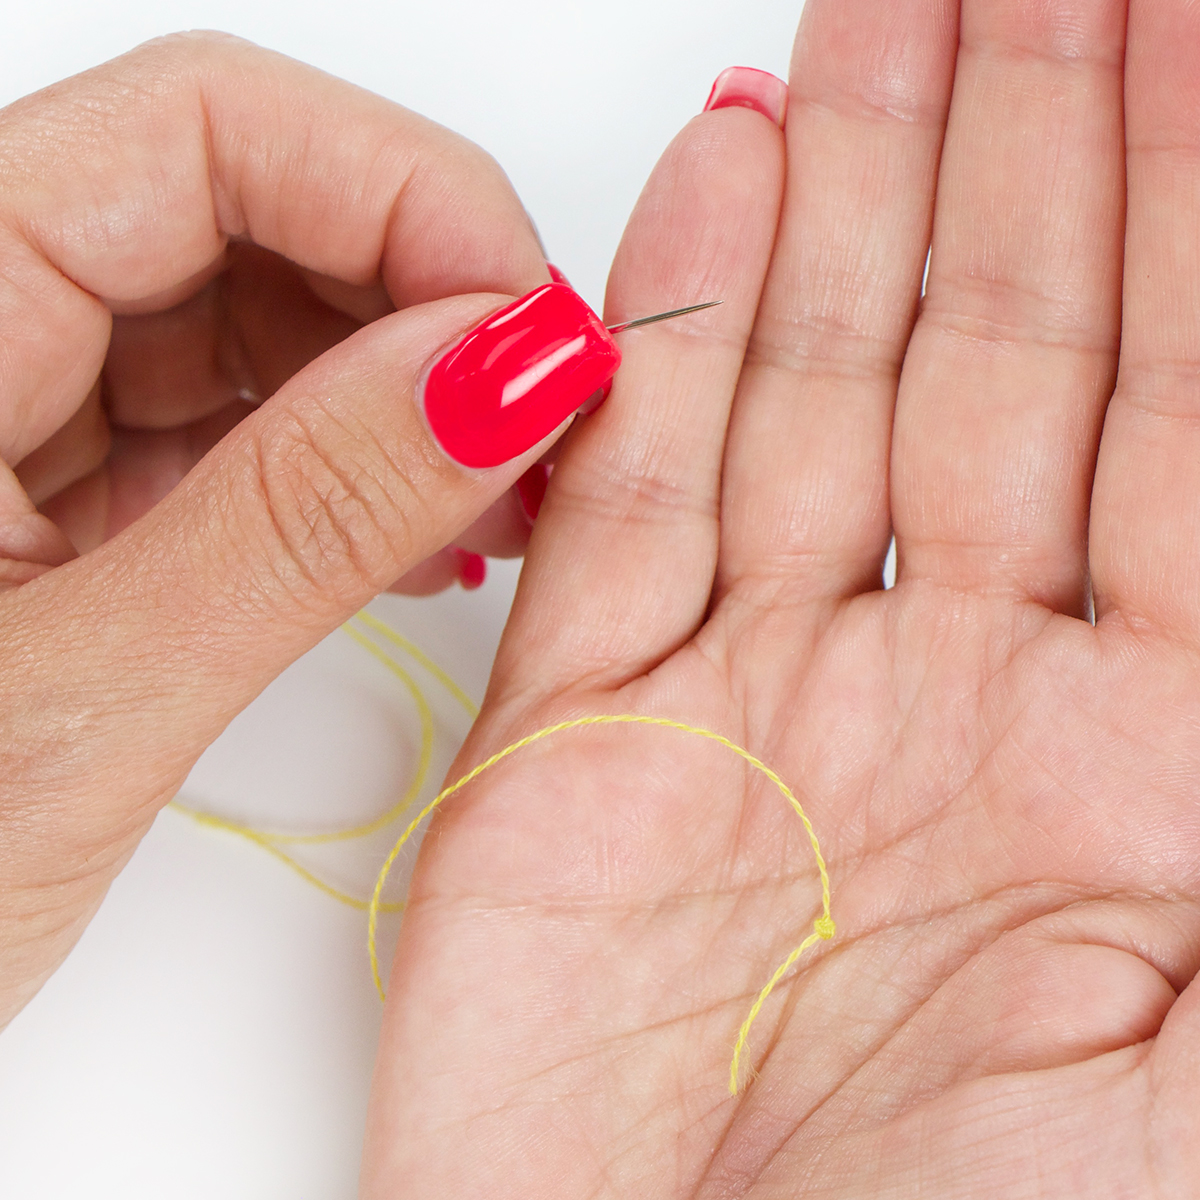
As the wraps reach the end of the thread, you will feel a knot form. Give it a good pull, and ta-da! A perfect quilter's knot!
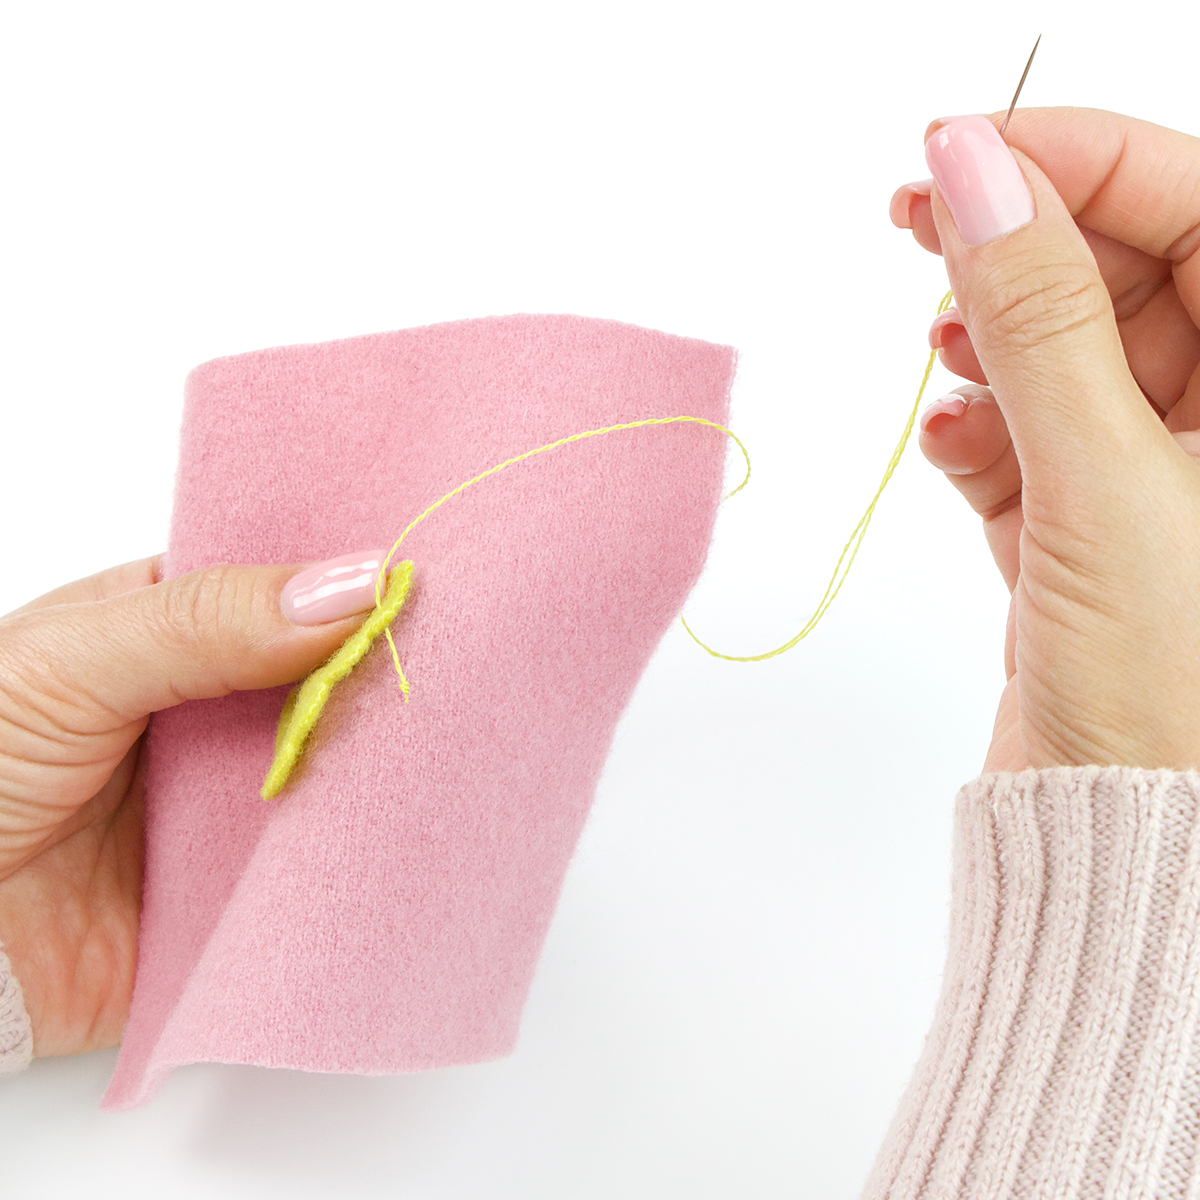
We are often asked how to start and end threads and to show the back of our work. There is really no "right" or "wrong" way to start or end a thread, but here are a few methods we use.
When it comes to wool appliqué, hiding knots is so easy! Bring the newly threaded needle to the front of your work through the appliqué piece only (photographed above). Knots are masterfully hidden between the background and appliqué in this method.
When embellishing, one way to start a stitch is to simply knot your thread and bring the needle to the front of your work, hiding the knot on the back.
Another starting method is to thread your needle without knotting the end. On the back of your work, do a small stitch between the appliqué and background layers, leaving a short tail. Flip the tail up and do one or two backstitches over it to secure it in place. This works great for chunky threads like gimp. For extra thick fibers like yarn or rick rack, do the same steps but complete the backstitches in a finer thread like Ellana or Efina to minimize the bulk.
Ending a Stitch
When ending a stitch, bring the needle to the back of your work and stitch two to three tiny backstitches. Run your needle between the layers and bring it out about half an inch away from the backstitches. Snip the thread. This prevents bulky knots and tails on the back of your work.
Essential Notions
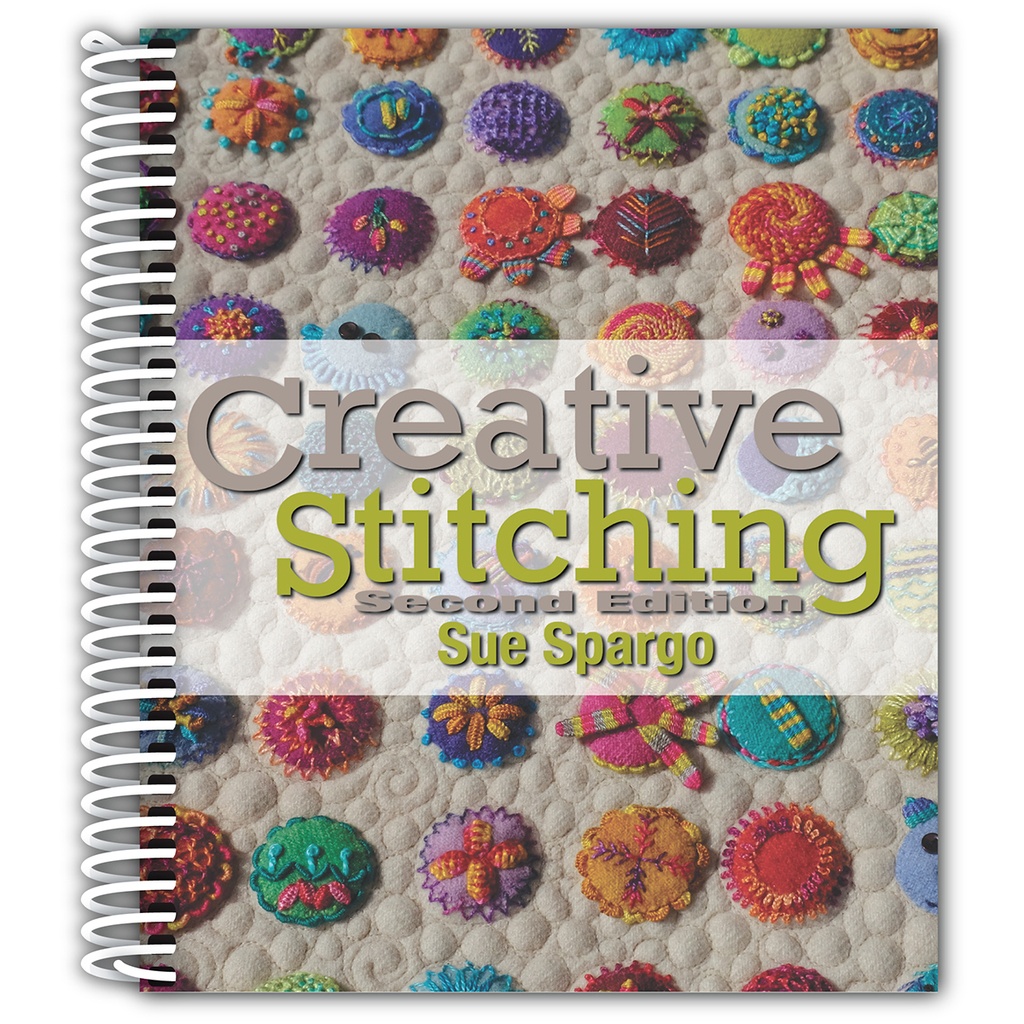
Creative Stitching Second Edition
The stitcher's holy grail! Creative Stitching features full-color, detailed diagrams for 50 of Sue's favorite stitches! This is the reference tool utilized in conjunction with all Sue Spargo patterns for stitch instruction.
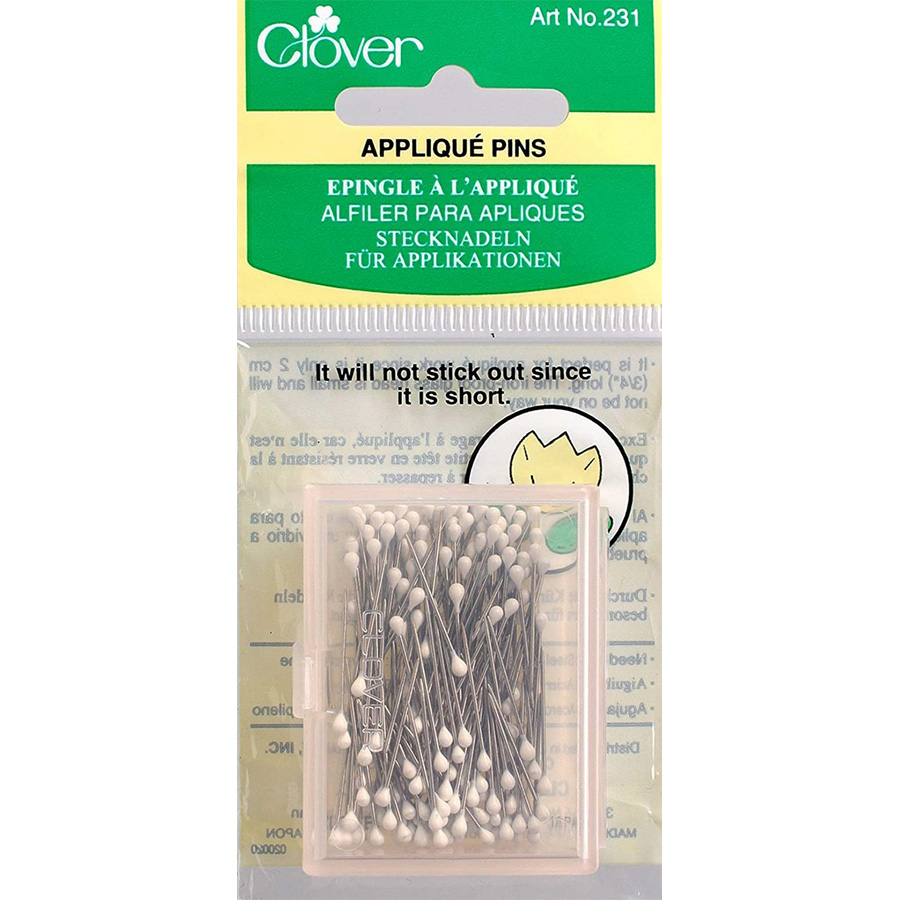
Clover Appliqué Pins
These no-budge appliqué pins are Sue Spargo favorite for wool appliqué. These small, stocky pins hold wool pieces secure, in place, and flat, creating a flush, easy surface to stitch around.
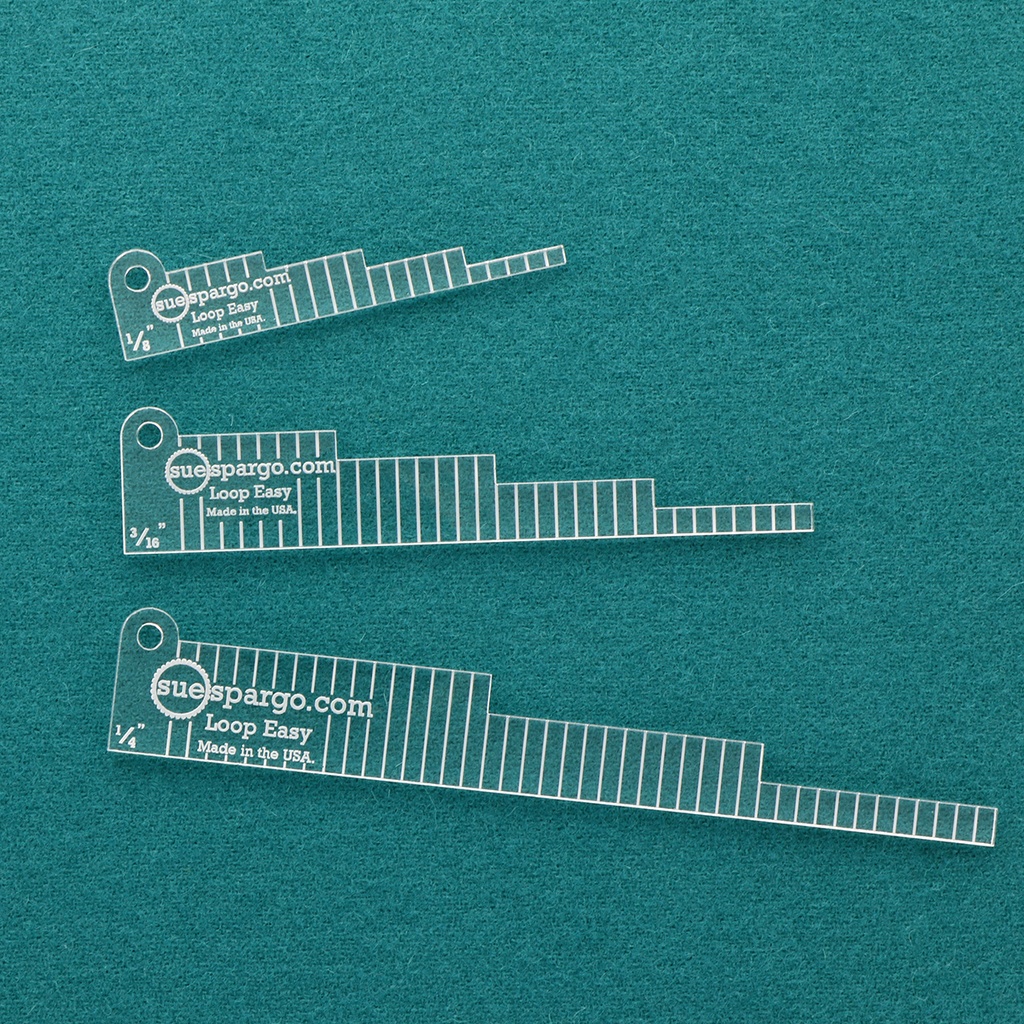
Loop Easy Templates
Designed in our studio, the Loop Easy gives you perfectly spaced and sized loops every time! These templates also work as tiny rulers for stitch placement. Read the Creative Classroom for the Loop Easy HERE for more info!
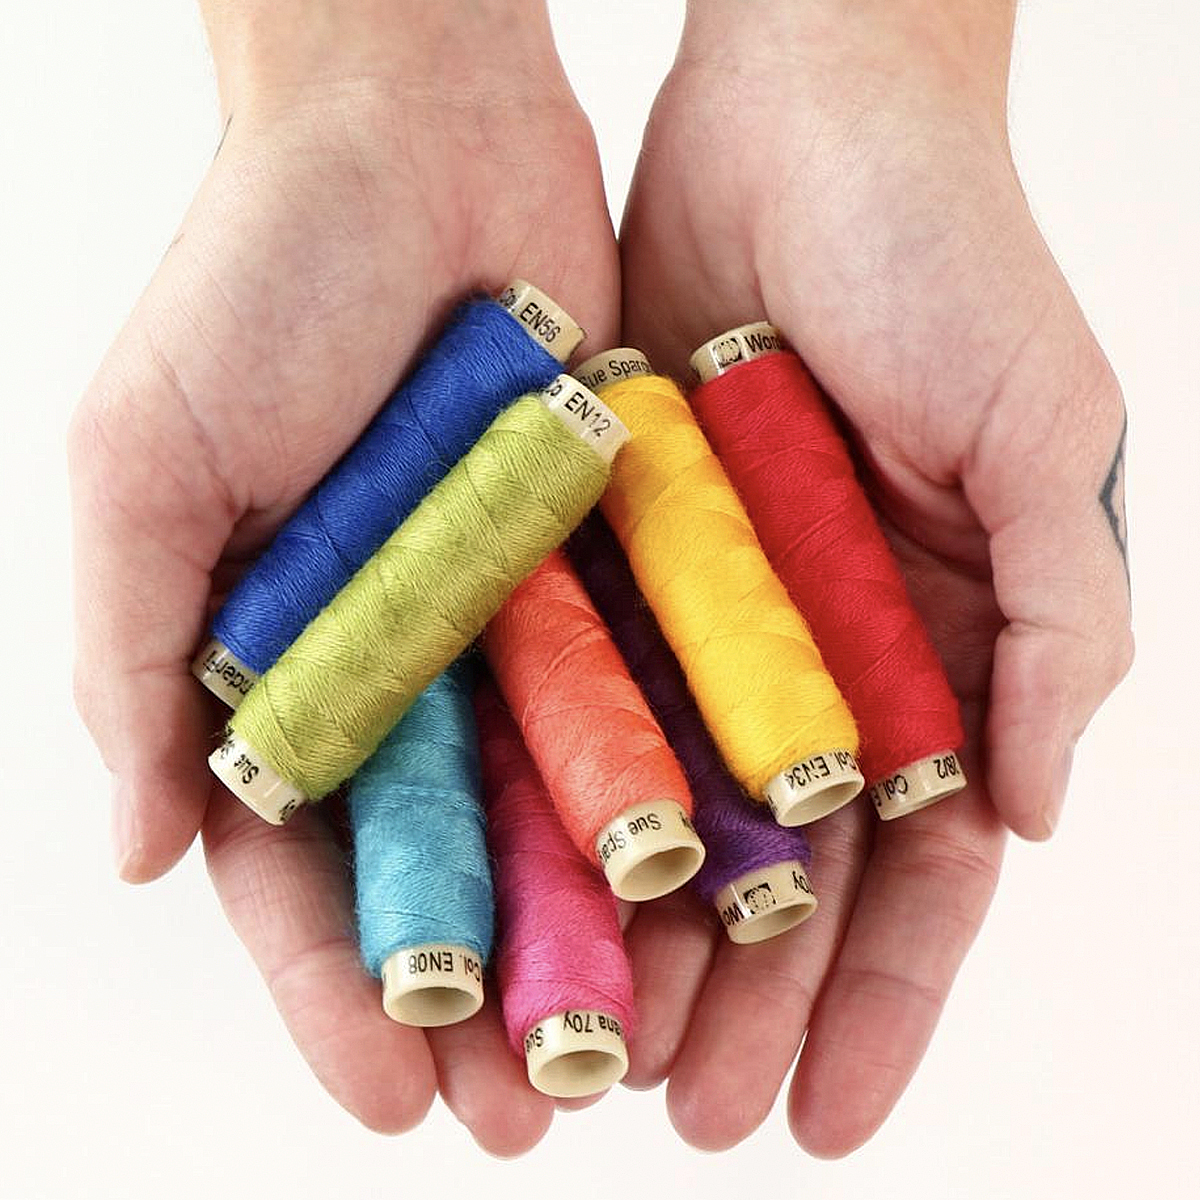
Ellana Wool Thread &
Ellana Wool Thread Packs
The finest wool appliqué thread available on the market today! Ellana is dyed to match our hand dyed wools. It has a soft twist that melts into the wool, producing an almost invisible whipstitch.
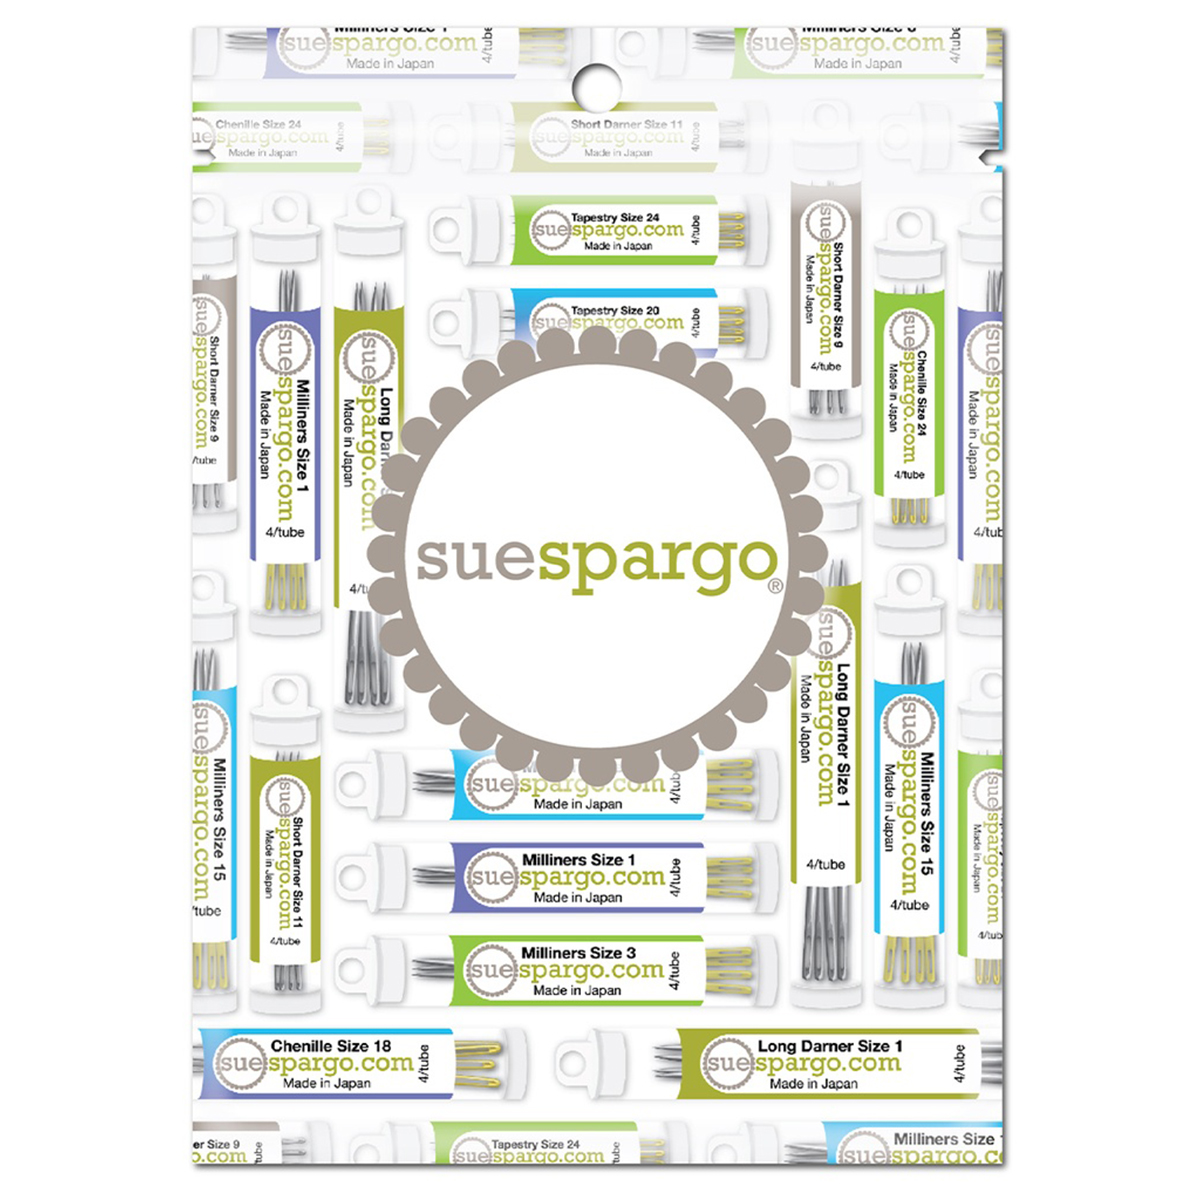
Creative Stitching Needle Pack
Our specially curated pack includes all Sue Spargo Gold Eye needles to complete the stitches in Creative Stitching and more. The color coded tubes make choosing the right needle foolproof!
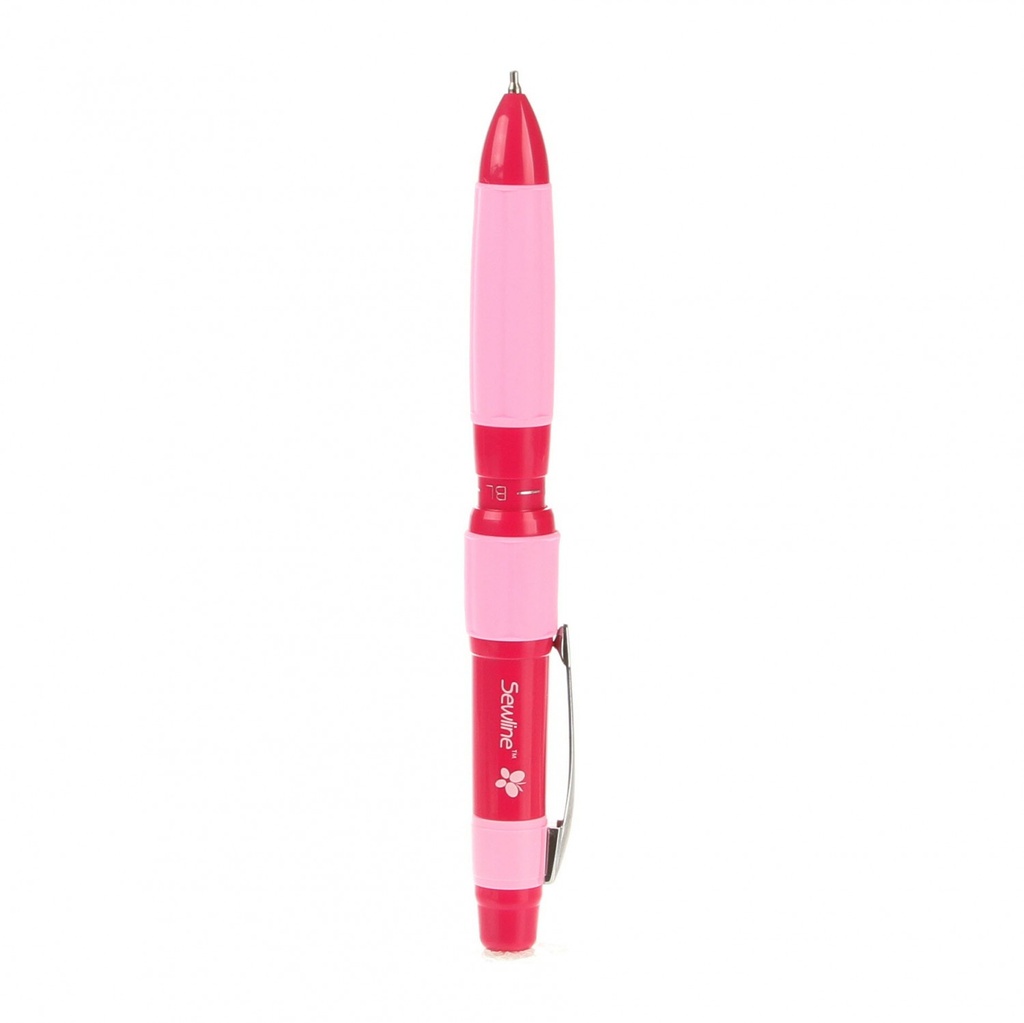
Sewline Trio Chalk Pencil
We love using a chalk pencil to mark out perfectly lined up stitches. The Sewline Trio has three lead pencil points for chalk that works on any color. It's also compatible with our Spoke Easy + Template!
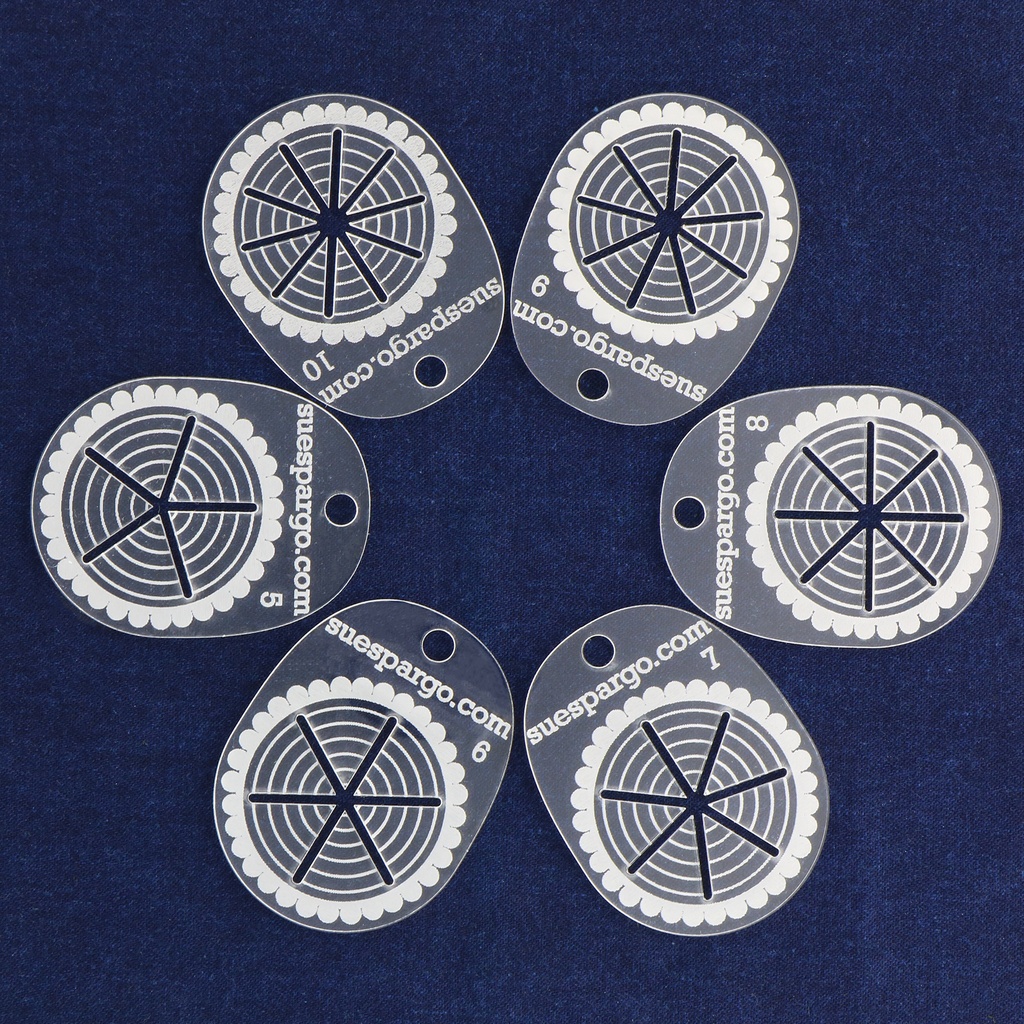
Spoke Easy + Templates
Designed exclusively in our studio for accurate placement and length of spokes, these templates help you achieve perfectly symmetrical woven stitches! Read the Creative Classroom on Spoke Easy HERE for more info!
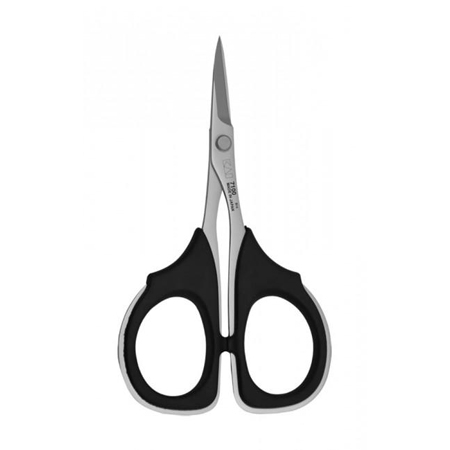
Kai 4" Professional Scissors
These exceptional Japanese scissors boast sharp serrated blades that grip onto wool and other fabrics making them ideal for cutting out small pieces of applique and right into corners, all the way to the scissors tip.