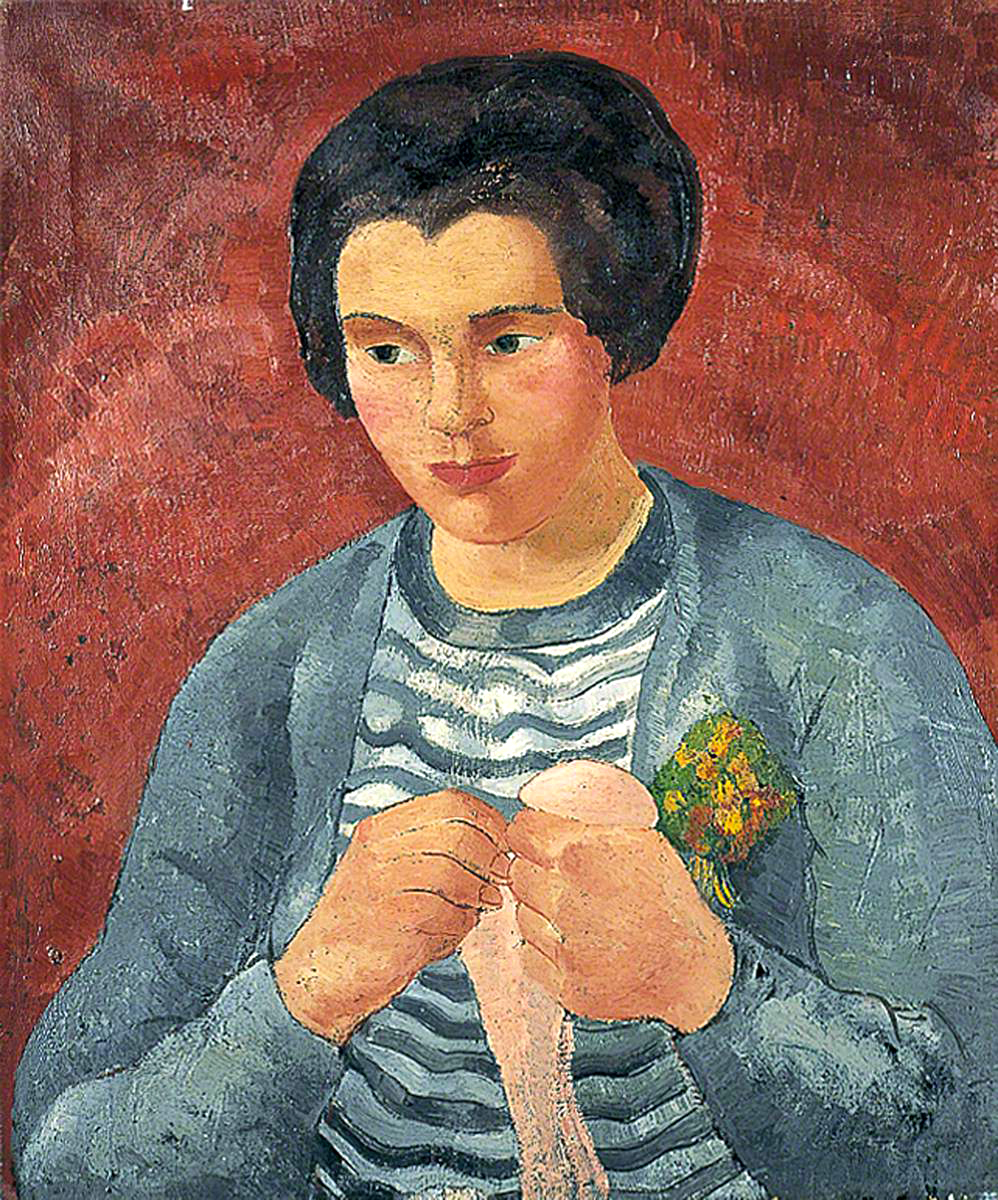
"Girl Darning" by Christopher Wood, oil on canvas, c.1925-30
The History Behind the Craft
Throughout history all over the world, people have been mending clothing and other textiles to extend their utility and enhance their beauty for both practical and artistic reasons. The Japanese used "boro", a piece of layered patchwork, to make clothing warmer and longer lasting. Caribbean women participated in Dorcas Societies, which were sewing circles that taught girls how to mend amongst other skills. Enslaved Africans used mending to incorporate slaveholders' unwanted fabrics and notions into their own garments as a way of displaying social status. With the "fast fashion" industry taking off after the late 1990s and early 2000s, clothing became more disposable and wasteful than in the past. In an effort to reduce the amount of waste and pollution created by the industry, mending is making a comeback in traditional and reinvented ways.
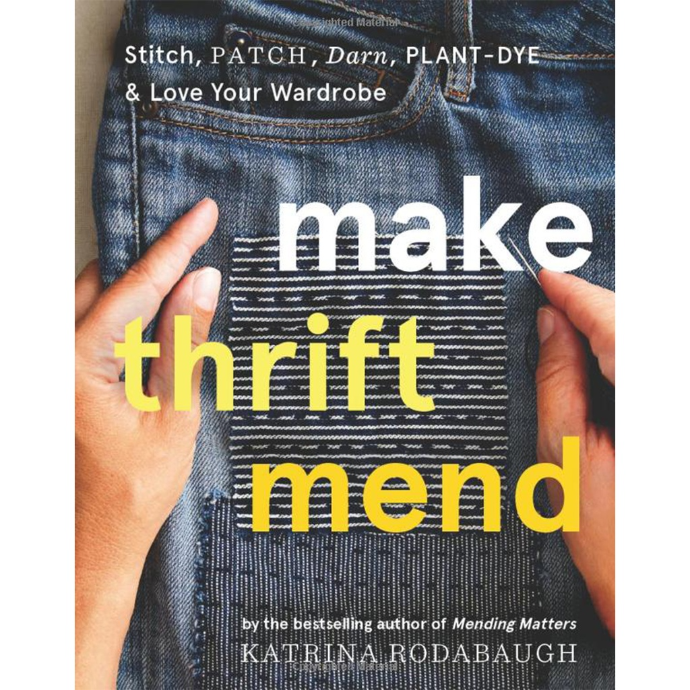
Visible mending is one of those reinvented ways. Visible mending is meant to be seen and noticed, rather than blending in perfectly with the textile. It can be seen as a combination of utility and art. With it, you can add fun little features to worn out clothes. You might even consider using the techniques to add special details to an appliqué or embroidery project.
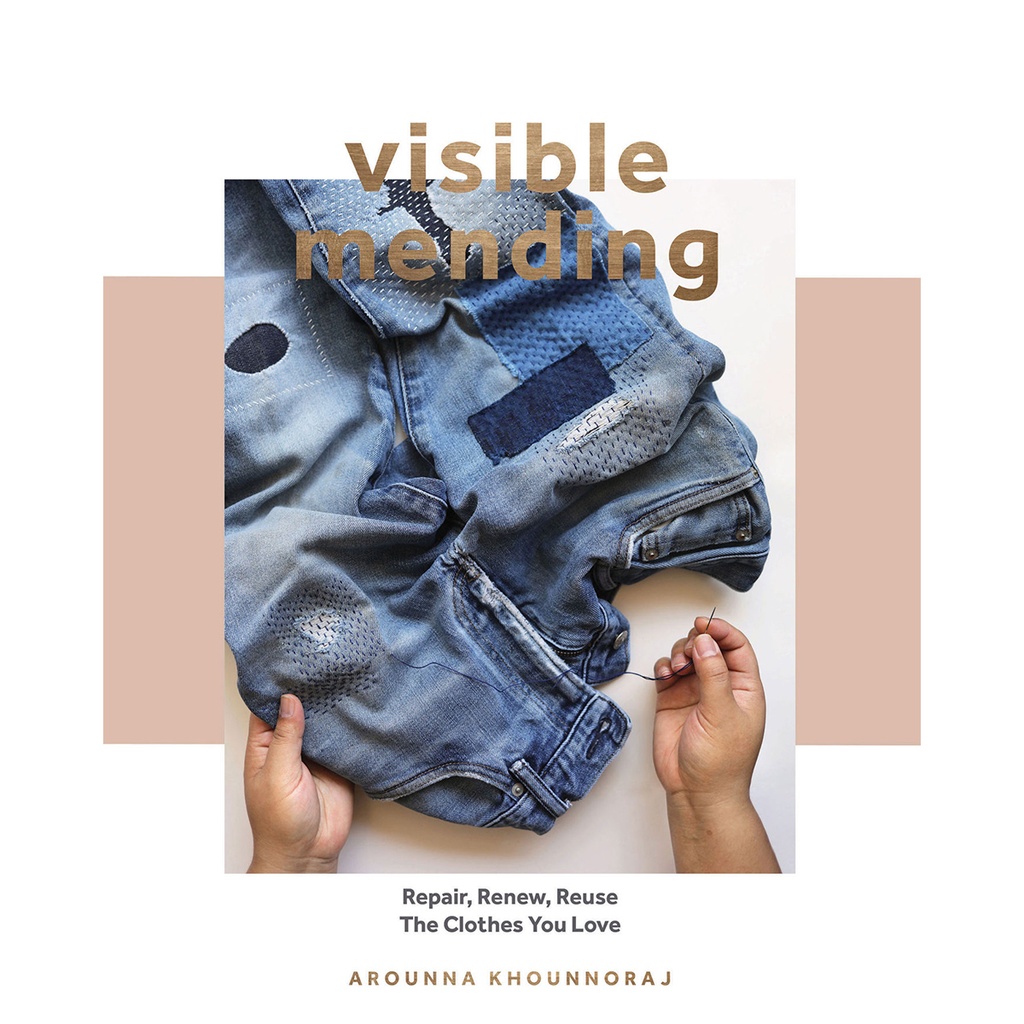
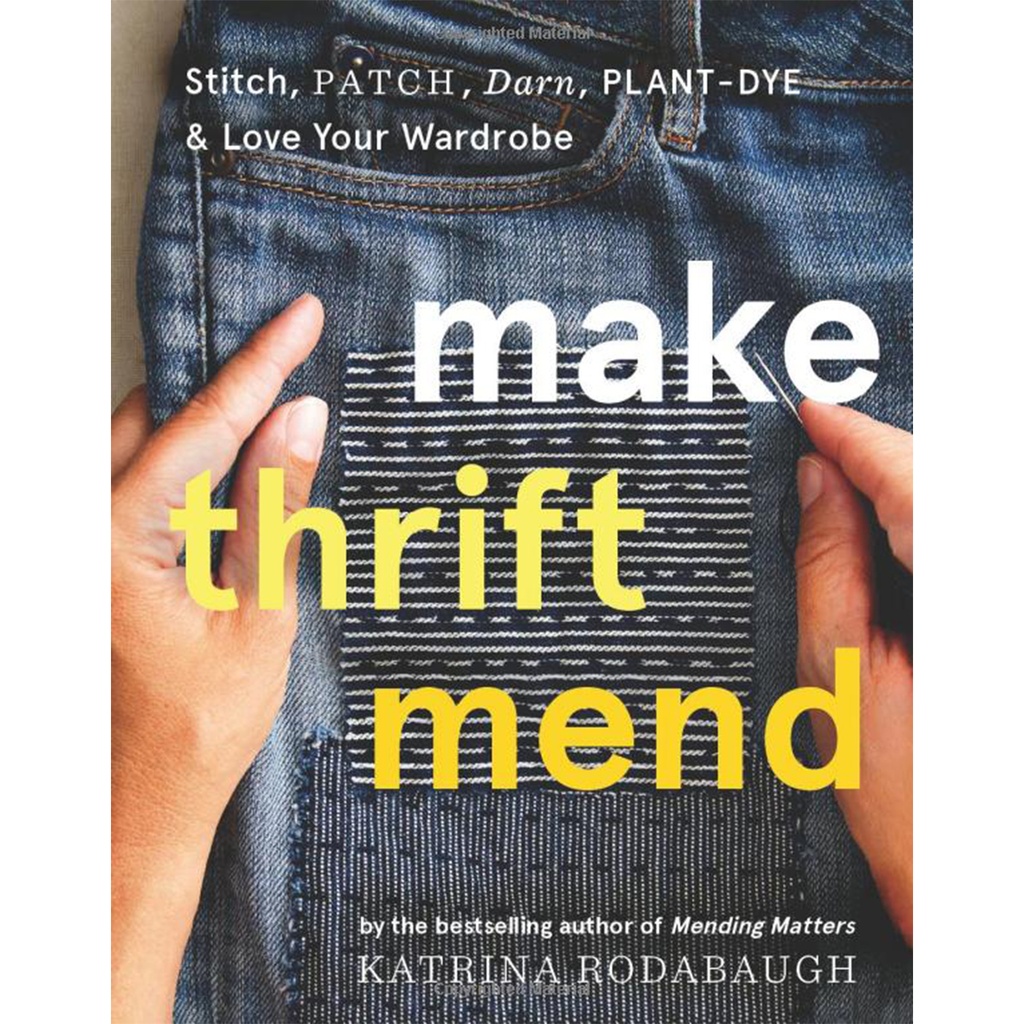
To learn more about mending, check out Arounna Khounnoraj's Visible Mending Book, and Katrina Rodabaugh's Make Thrift Mend. Both books are great resources that cover different methods of mending in detail!
What is Darning?
Mending is a broad term that refers to repairing damaged clothing or textiles. Darning, on the other hand, is a specific mending technique used to fix holes or thin areas in fabric—typically by weaving new thread into the damaged spot. You can think of darning as a subset of mending, focused on reinforcing worn areas with a woven-style stitch.
Grab your worn-out jeans, torn t-shirts, and holey sweaters, and follow along as we walk through the tools and techniques you'll need to bring them back to life!
Supplies
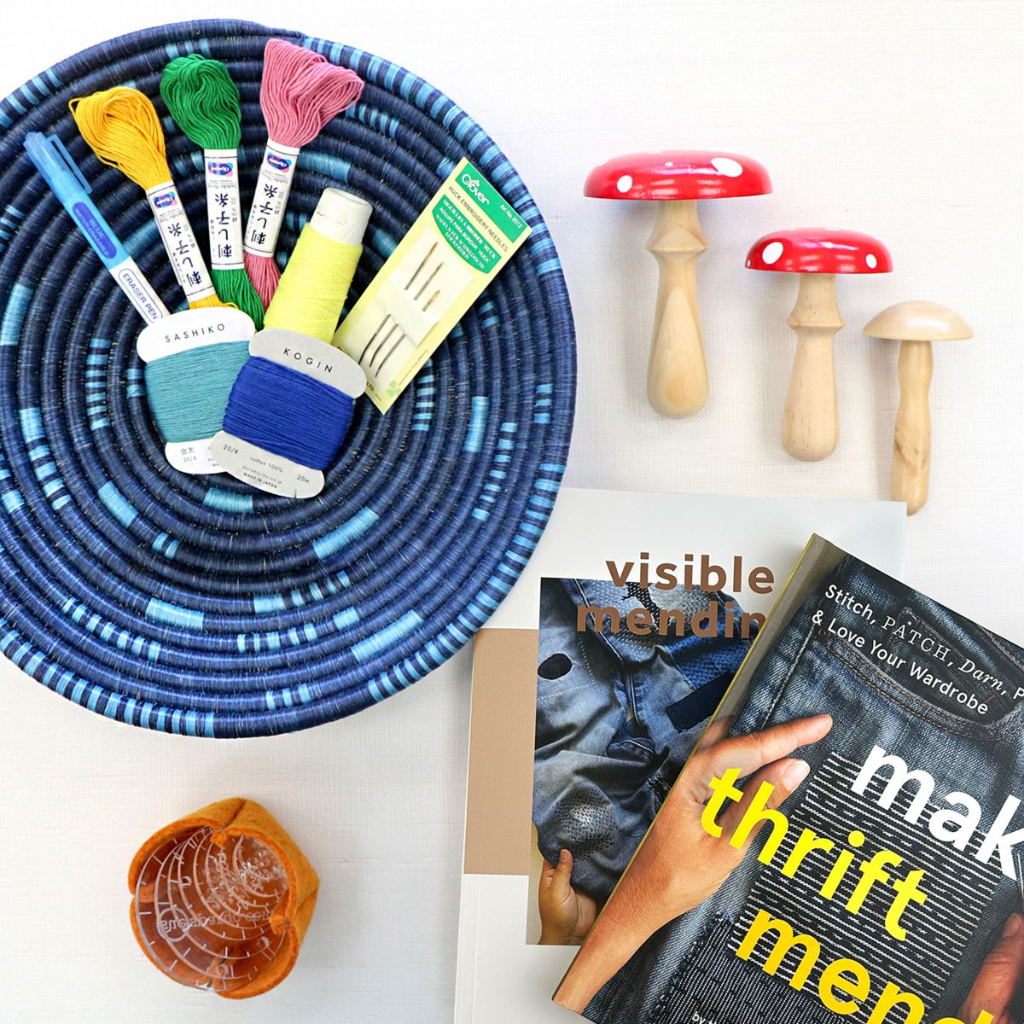
Darning is generally achieved with three main items:
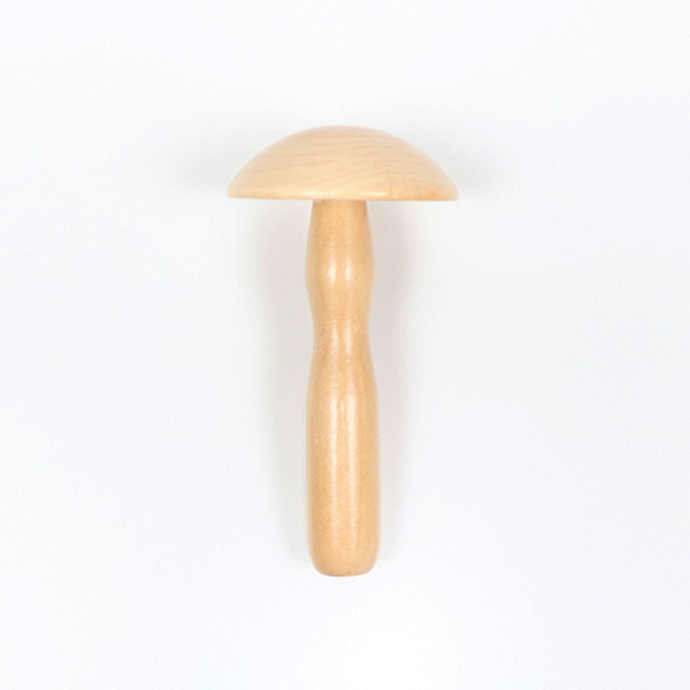
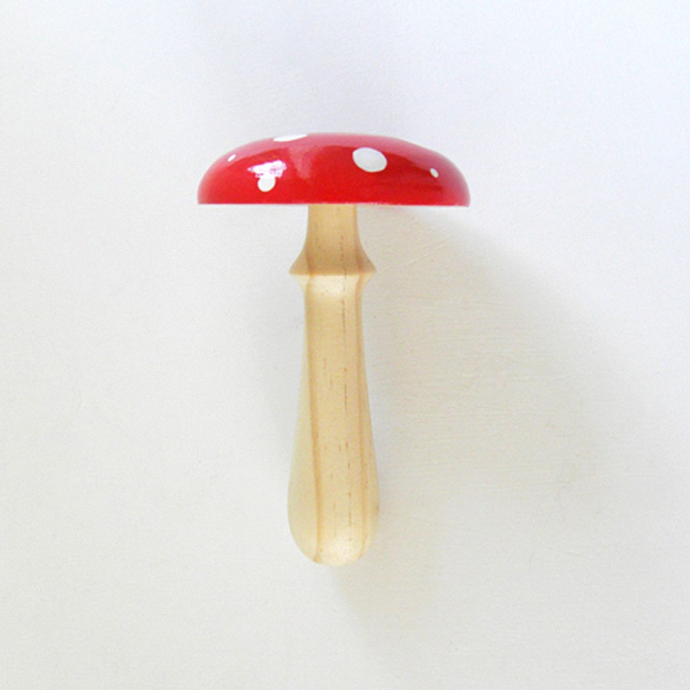
- Darning Mushroom
- Thread/Yarn
- Needle
If you are new to darning, you might be thinking, "What in the world is a Darning Mushroom?" Darning mushrooms resemble the shape of a mushroom, with their dome-shaped top and attached handle. When your fabric is secured, the dome of the mushroom provides a taut and stable surface on which to darn, and prevents you from poking your fingers repeatedly. The handle allows you to easily grip the project while you are stitching.
Here are the supplies we're starting with:
- Basic Wood Darning Mushroom or Handmade Darning Mushroom
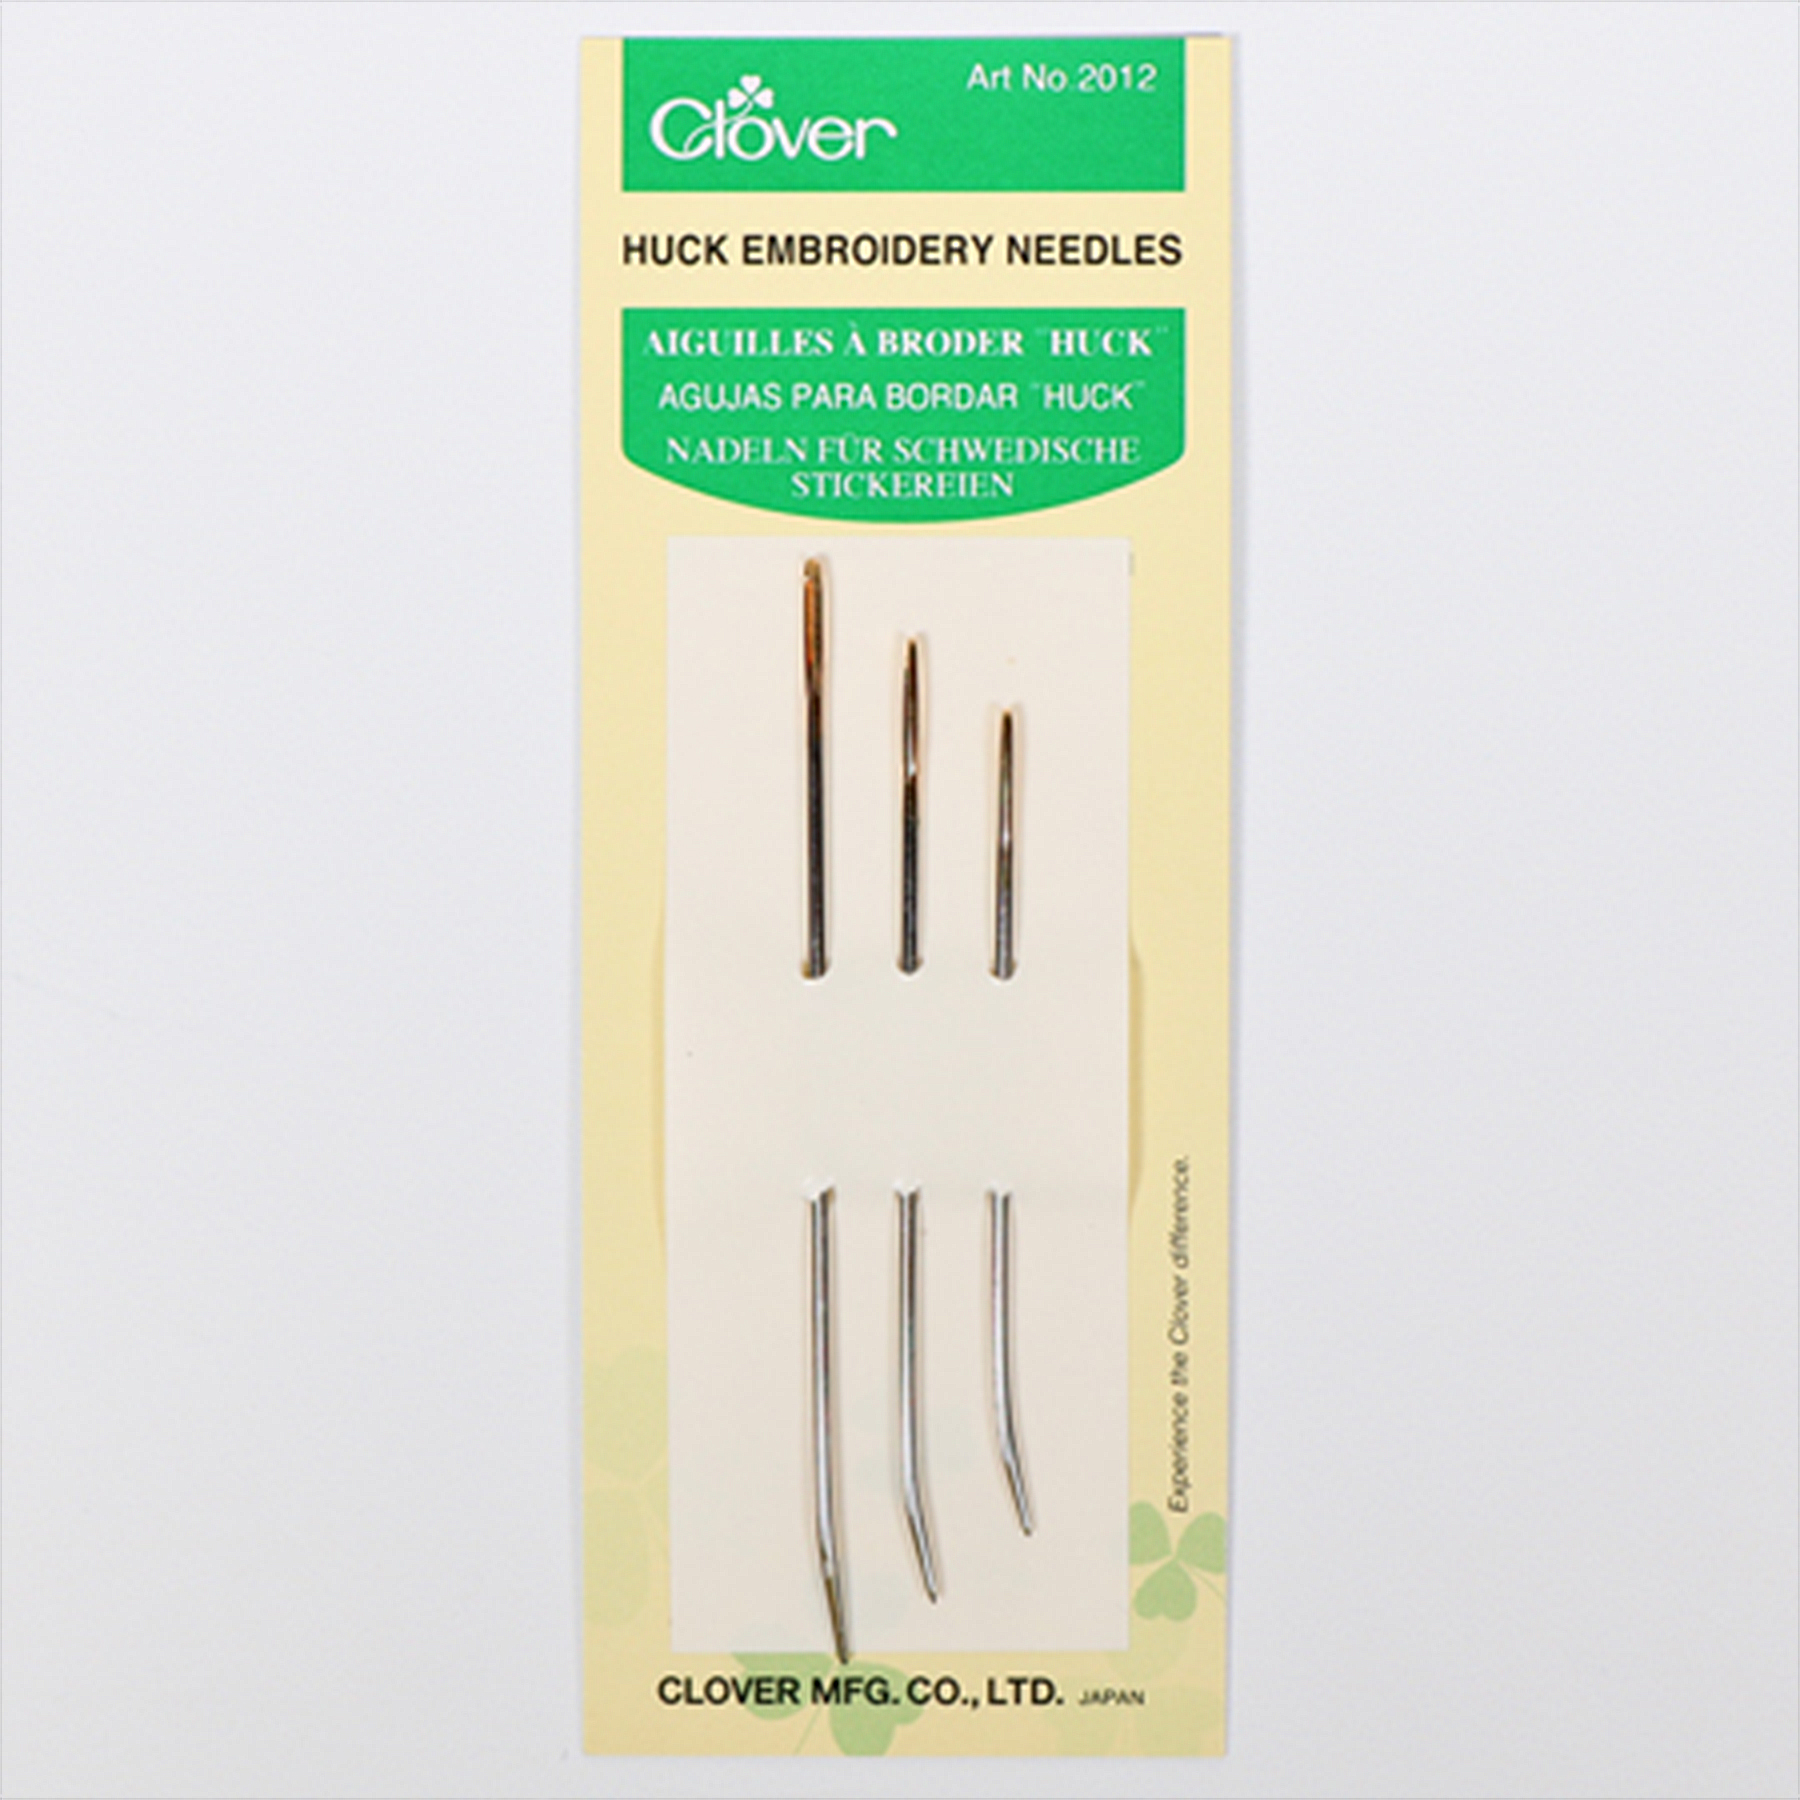
- Clover Huck Embroidery Needles
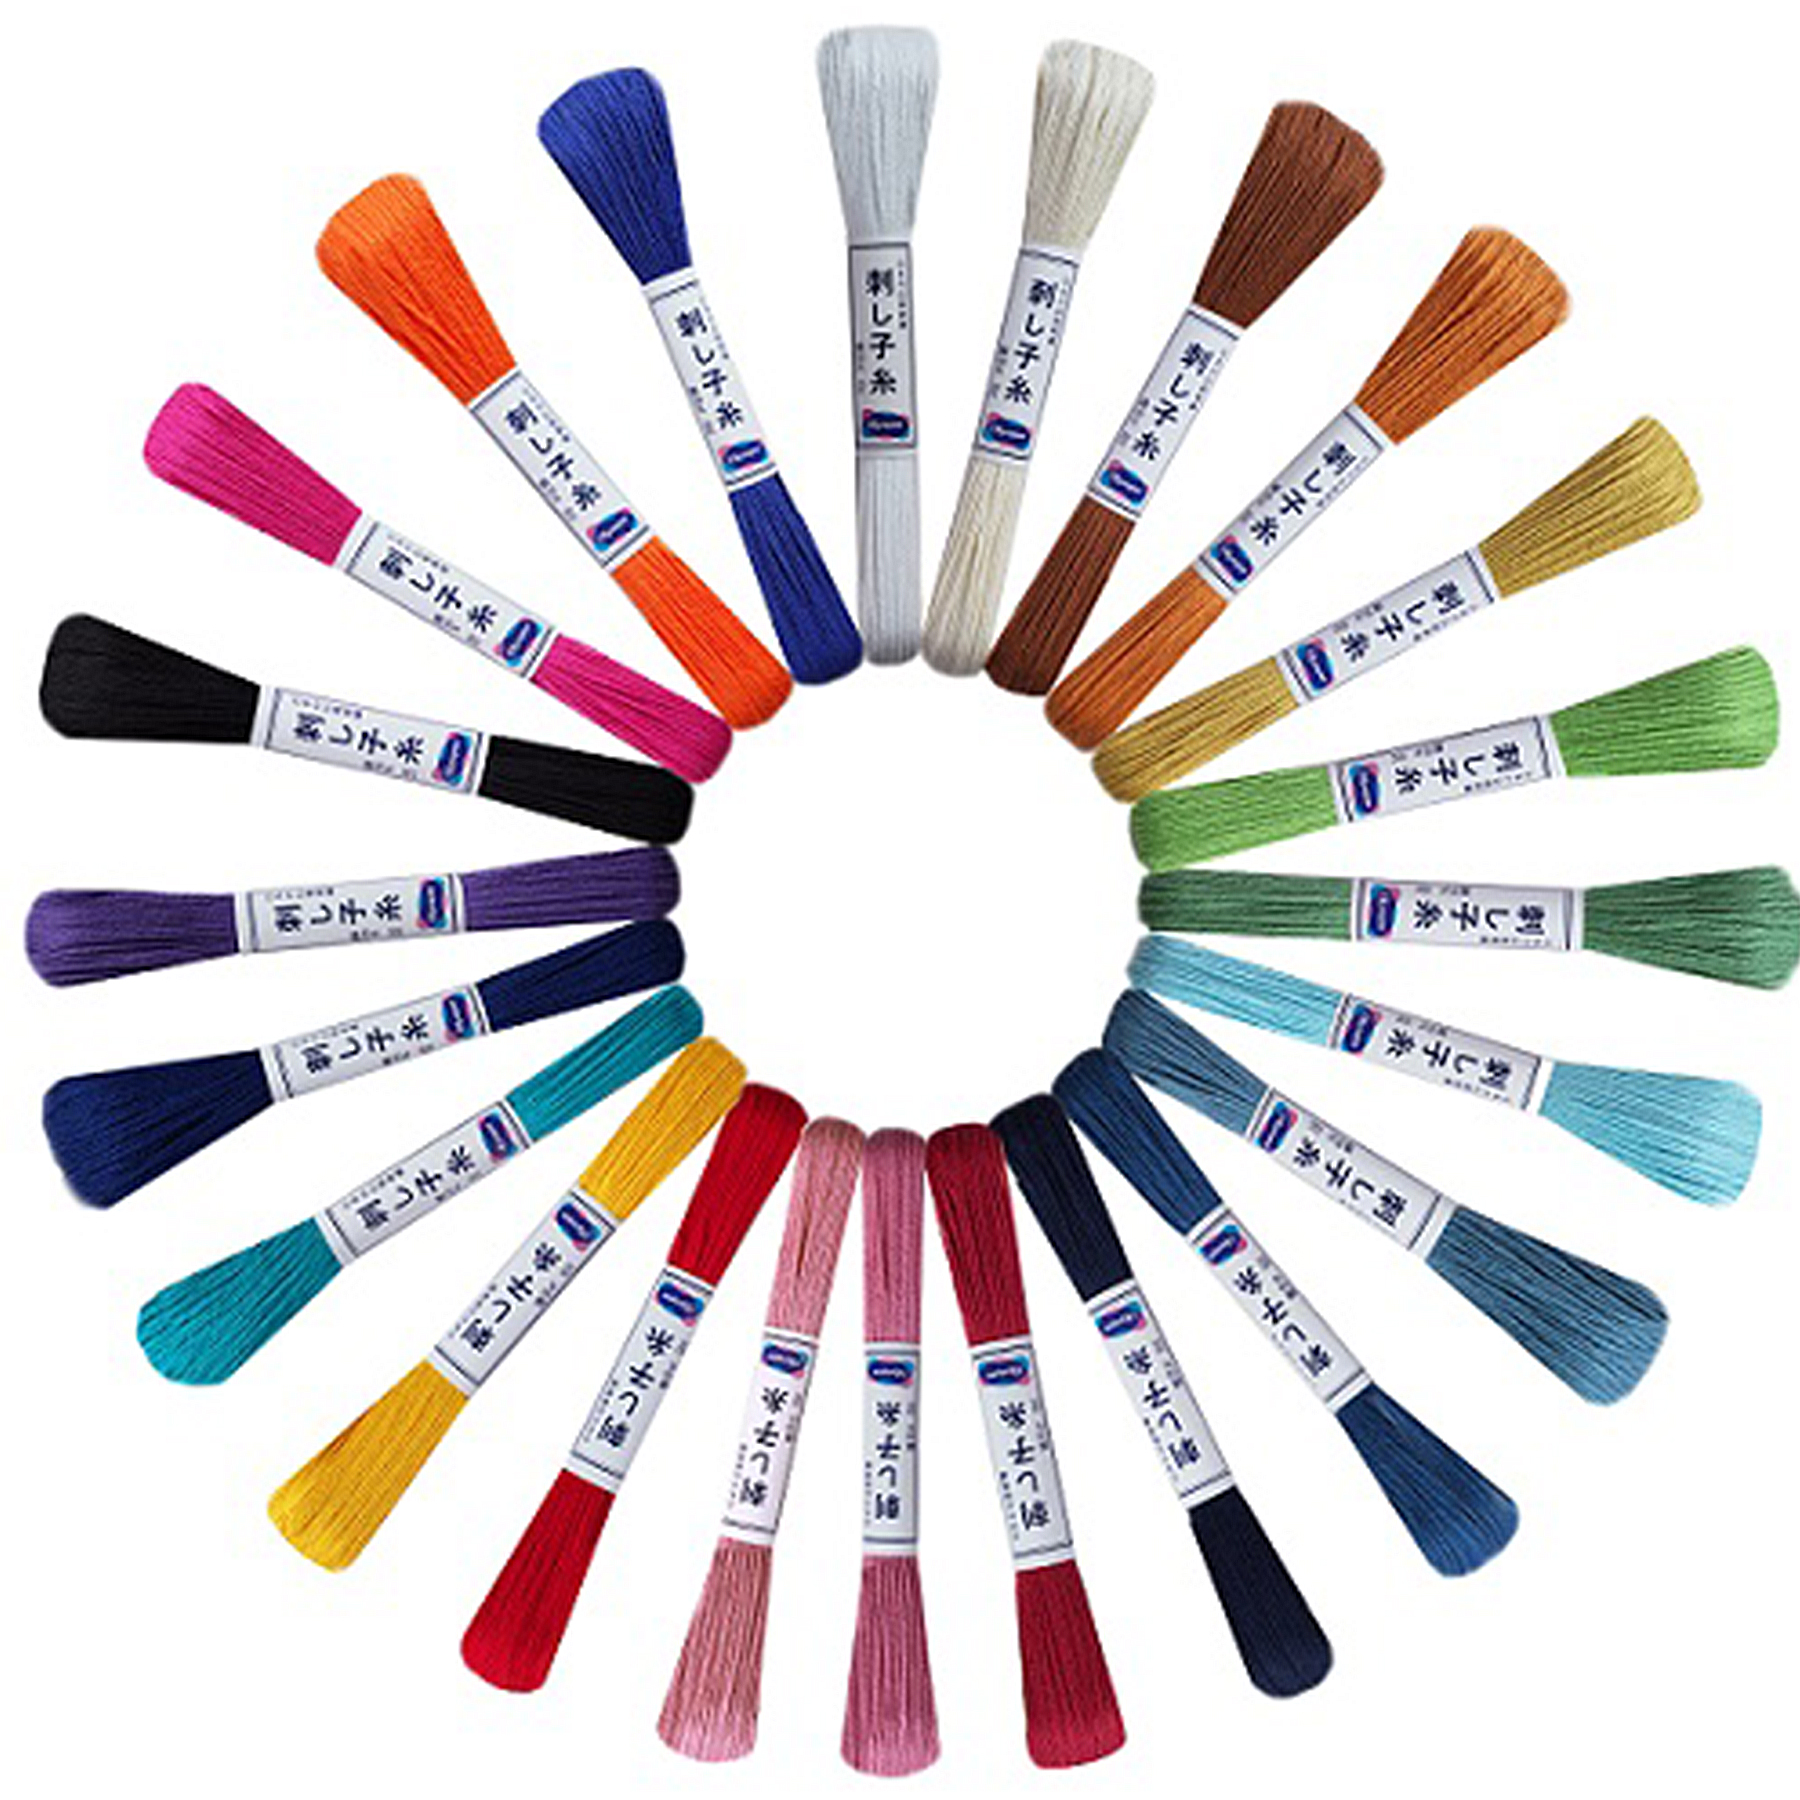
- Sashiko Thread
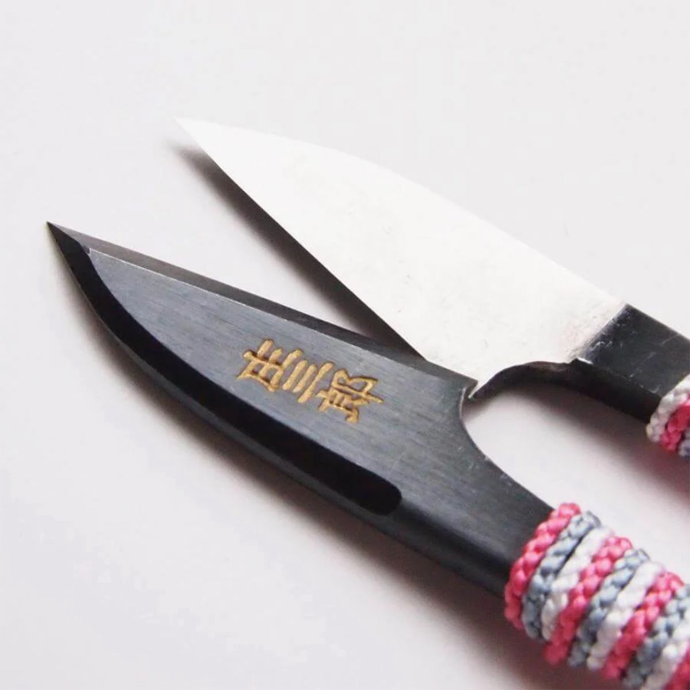
Olympus, Daruma, Hidamari, Plant Dyed - Thread Snips
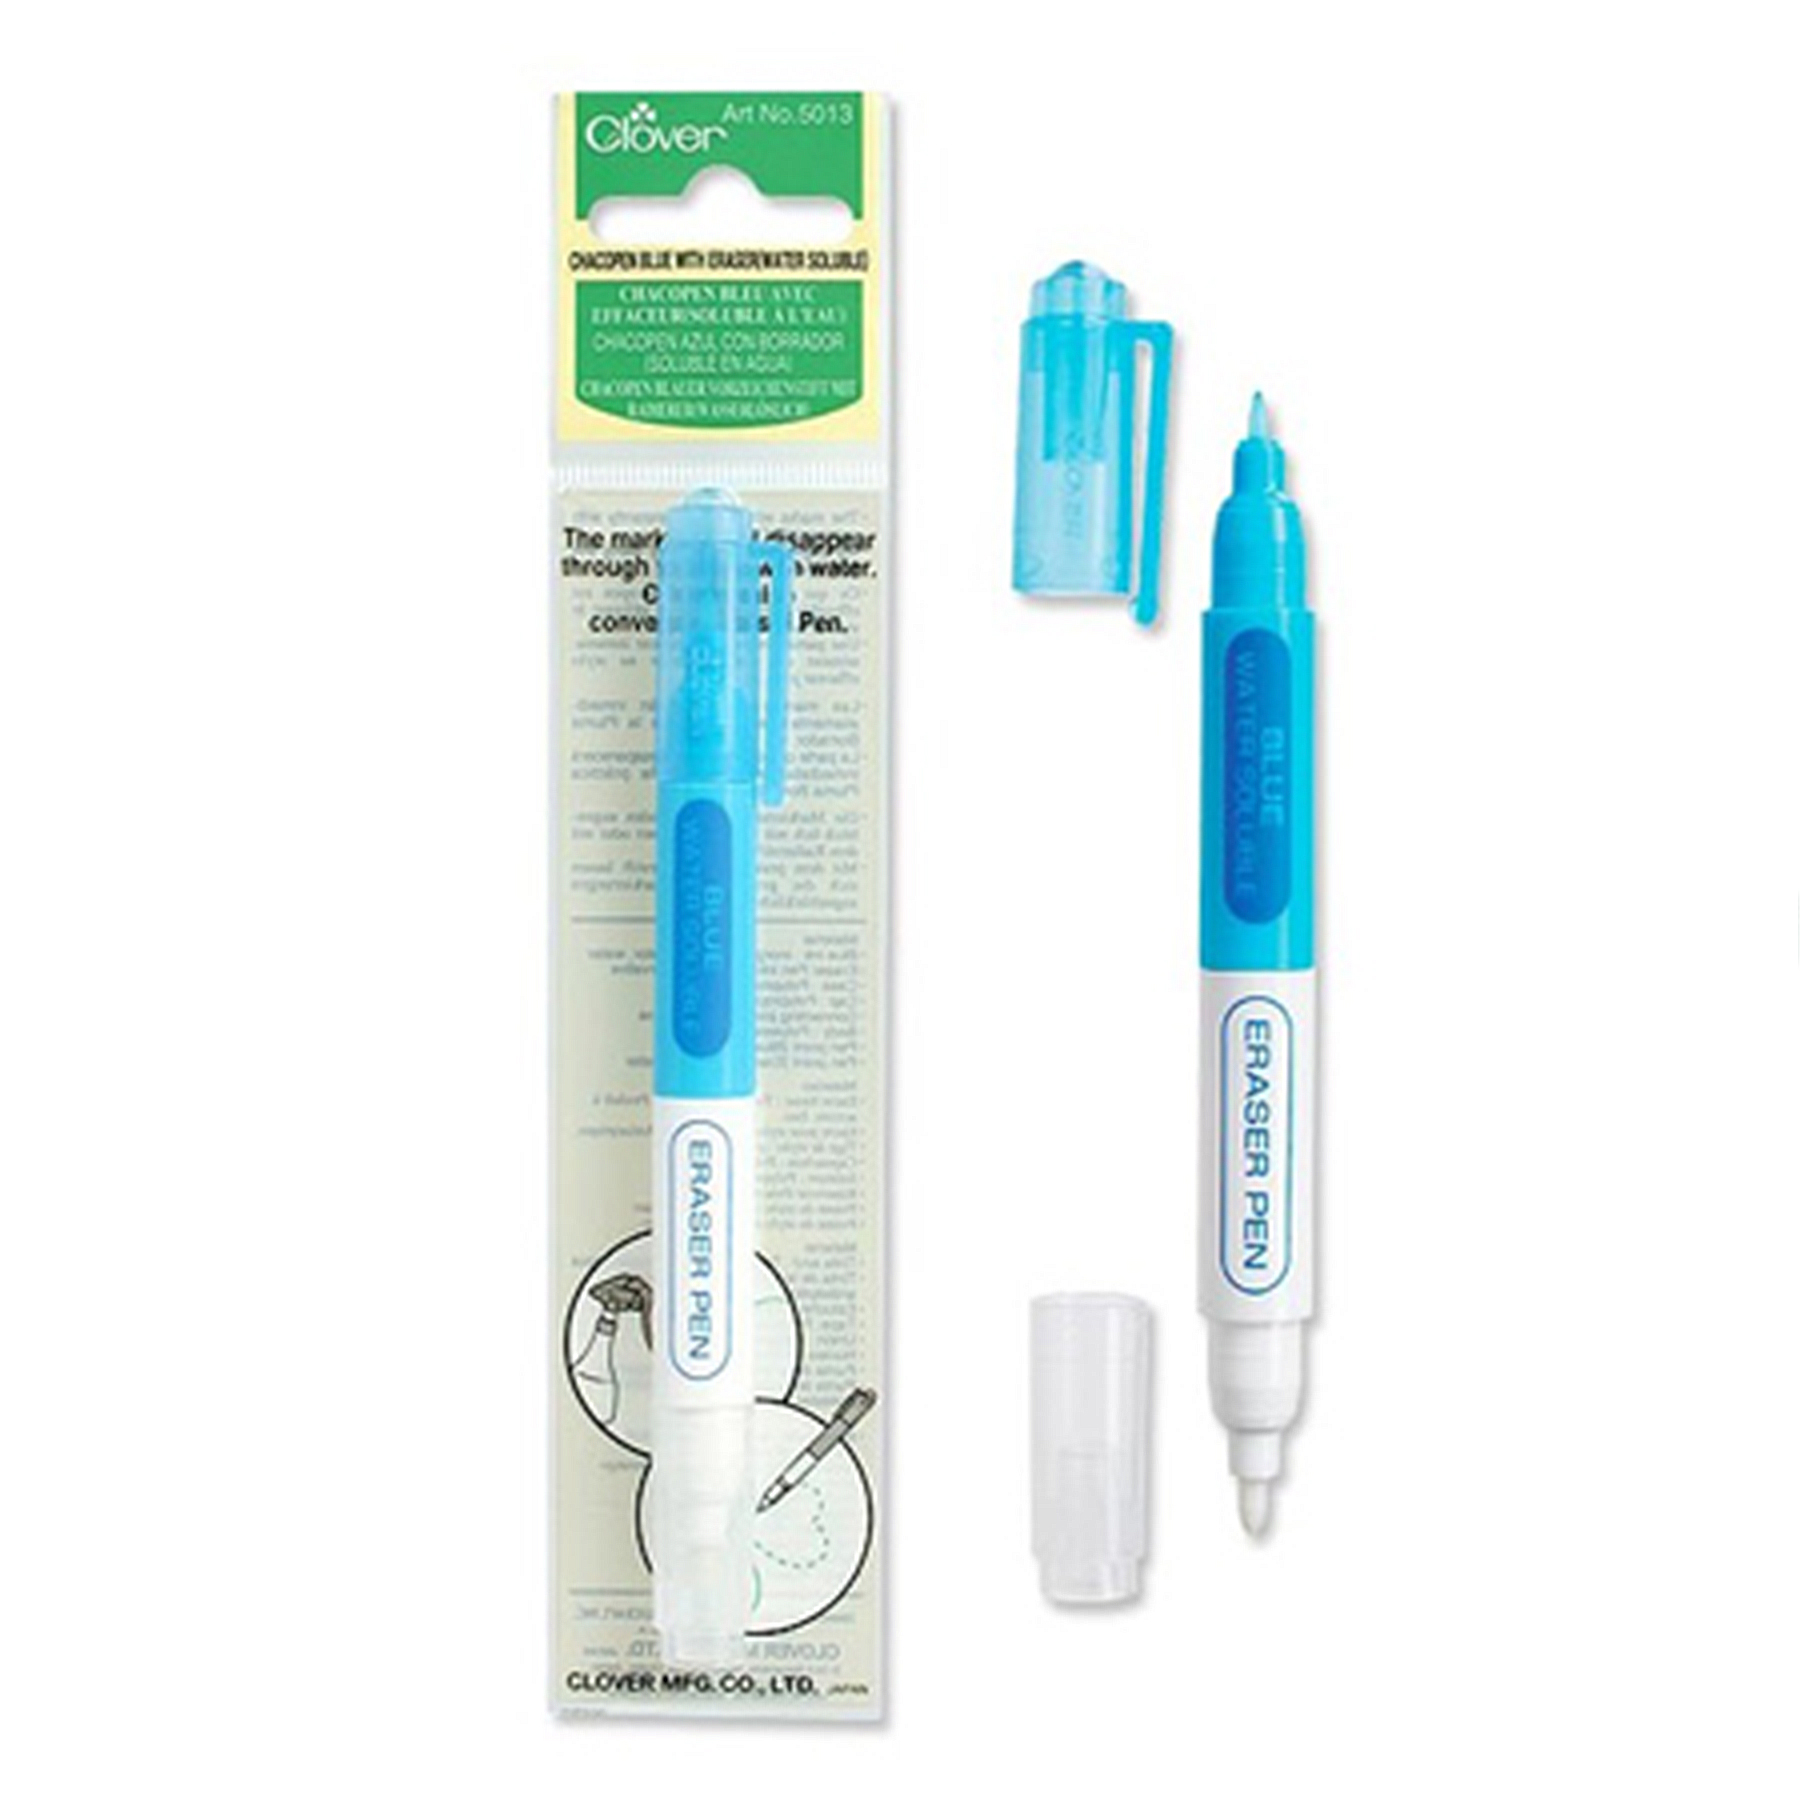
- Clover Chacopen Blue with Eraser
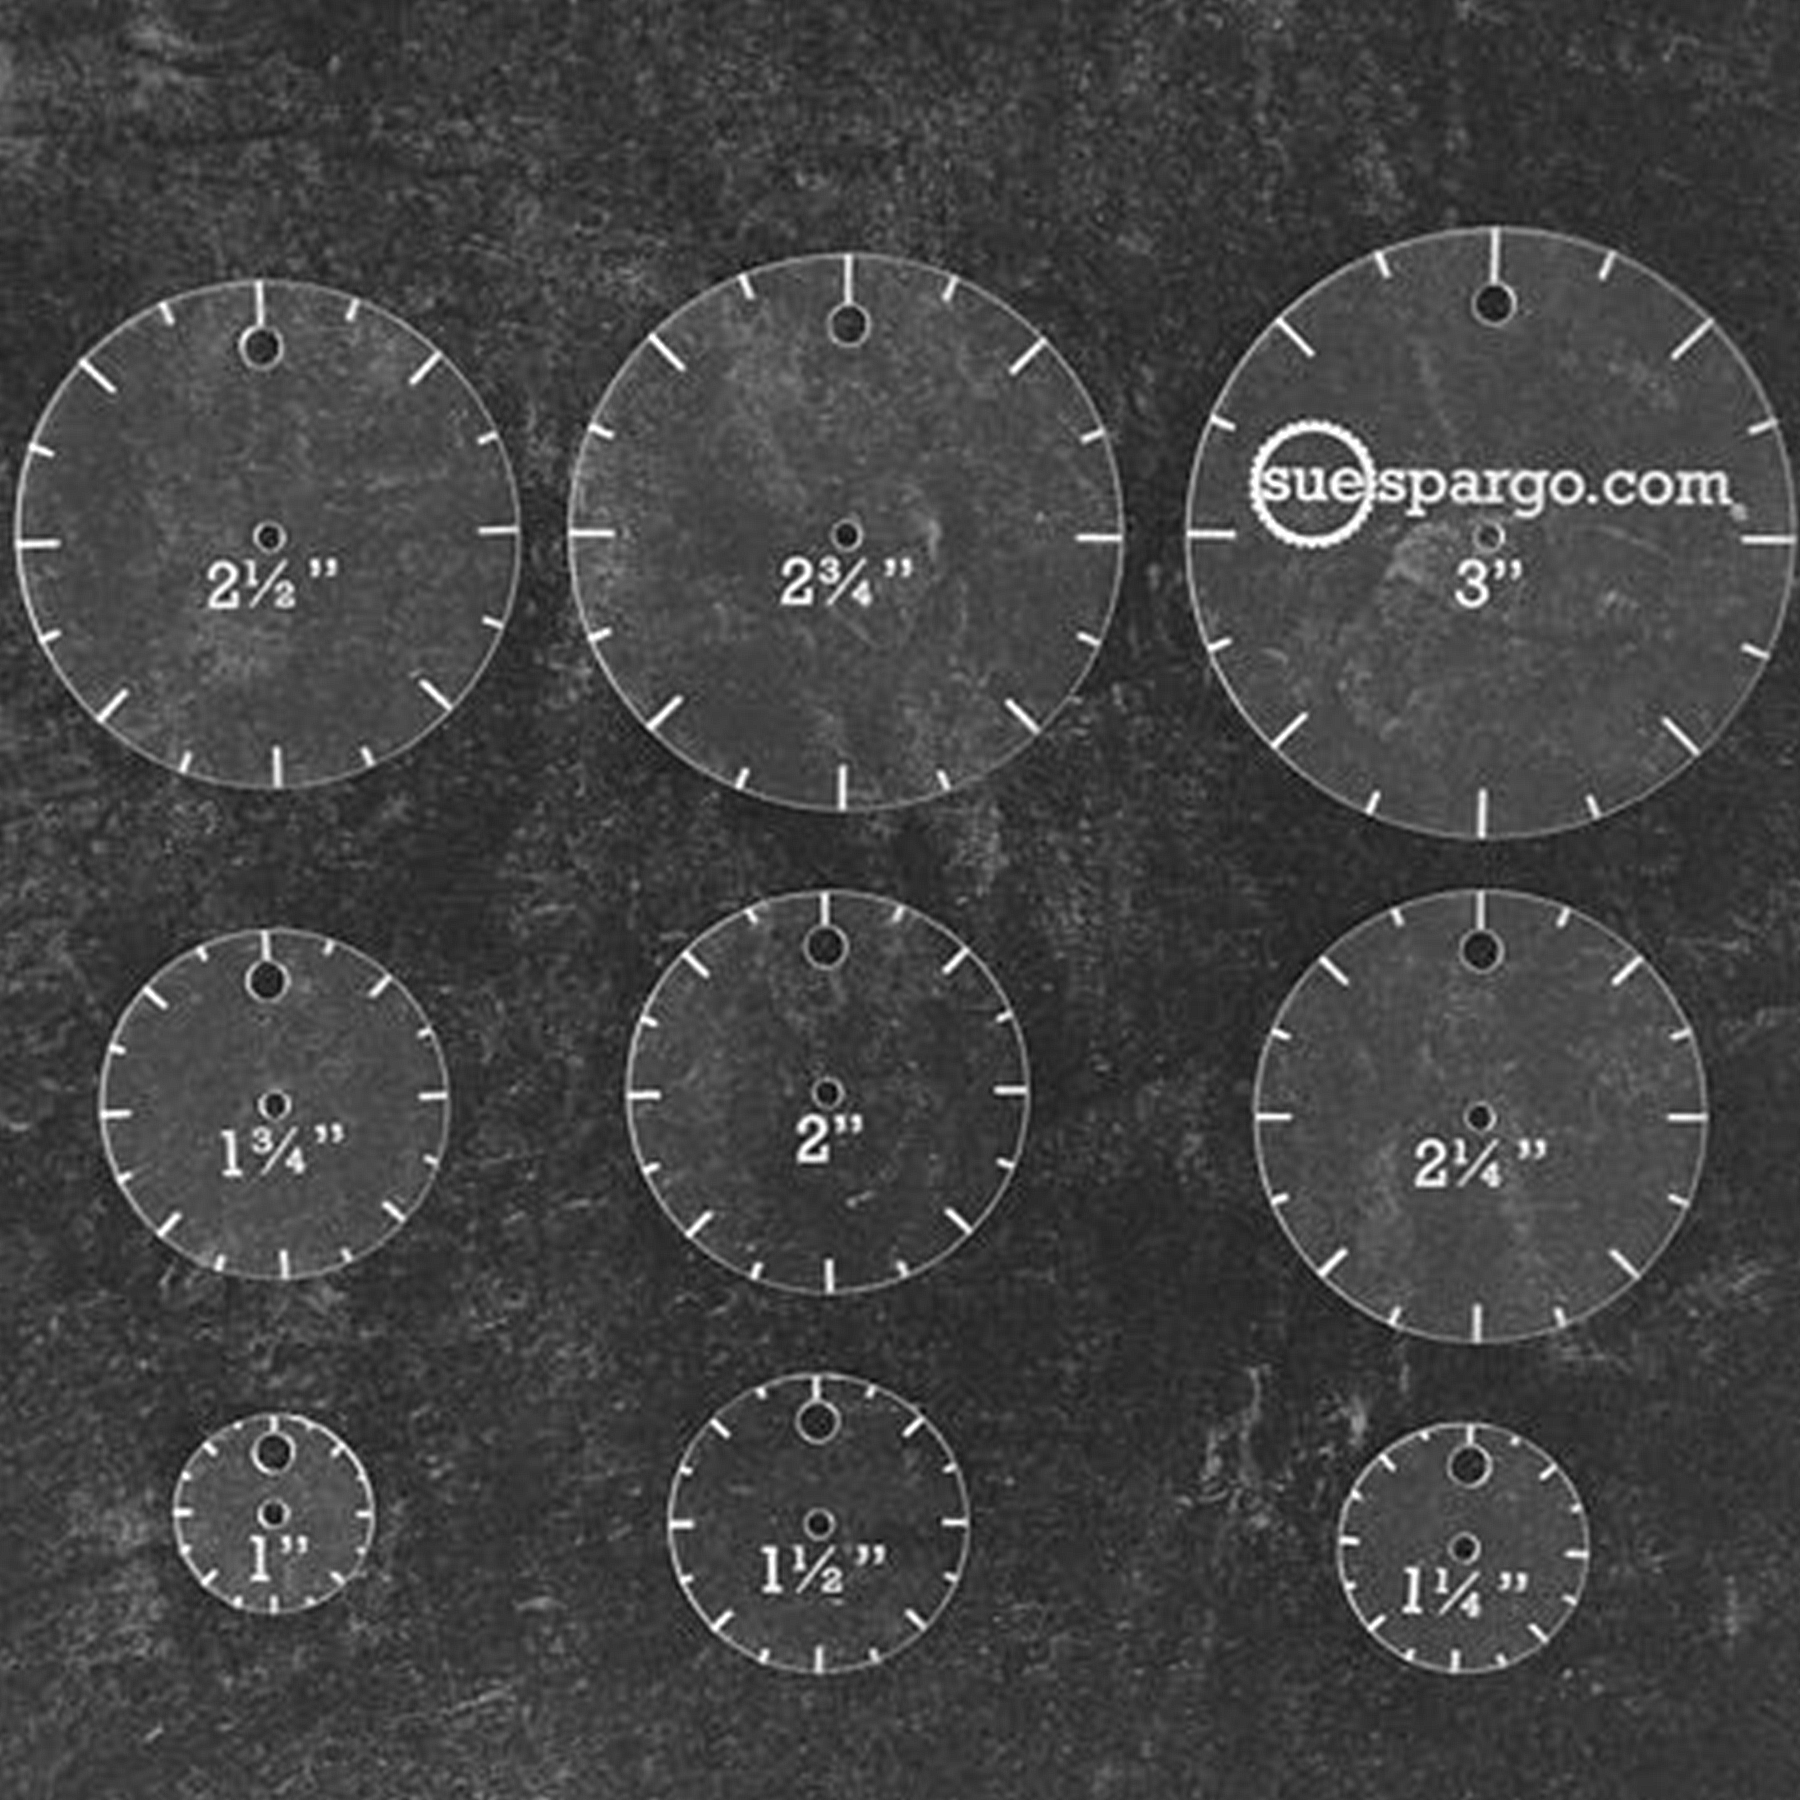
- Circles Easy Template Set
Basic Darning
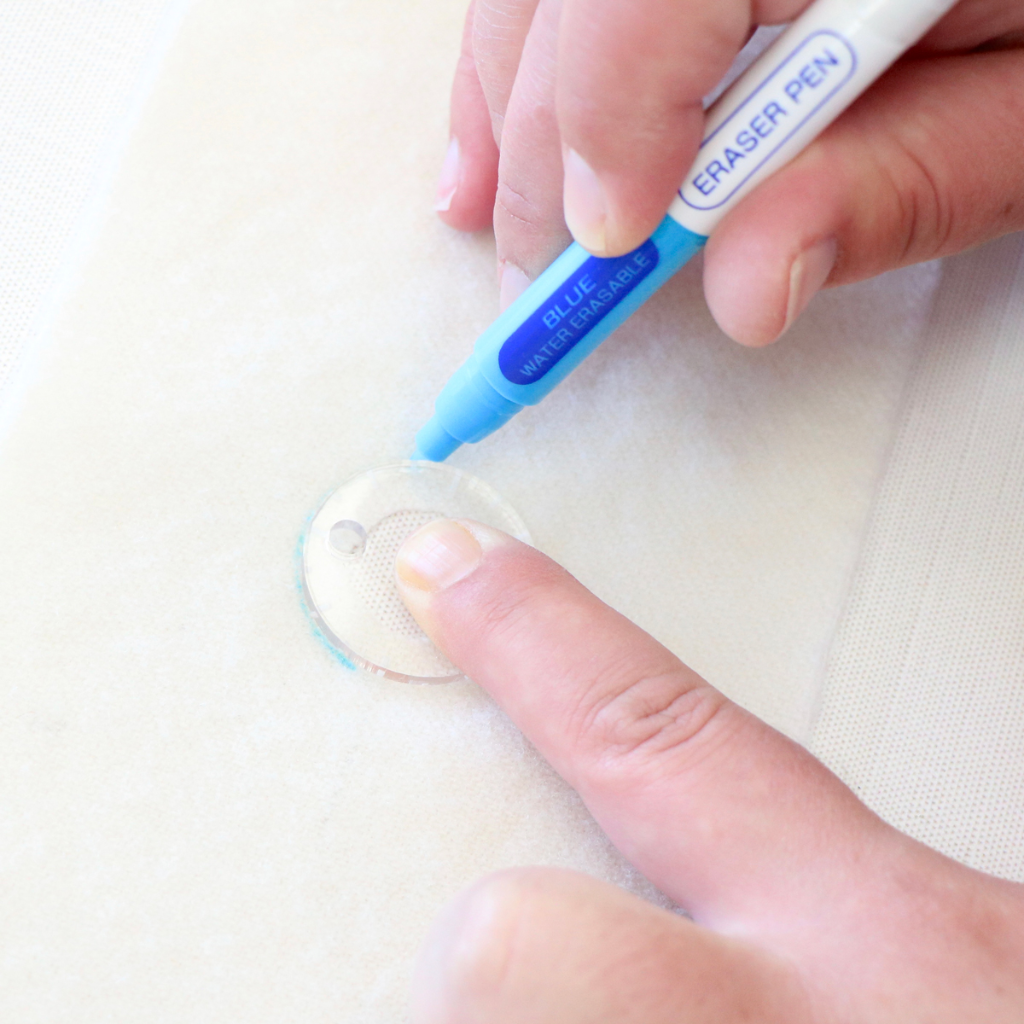
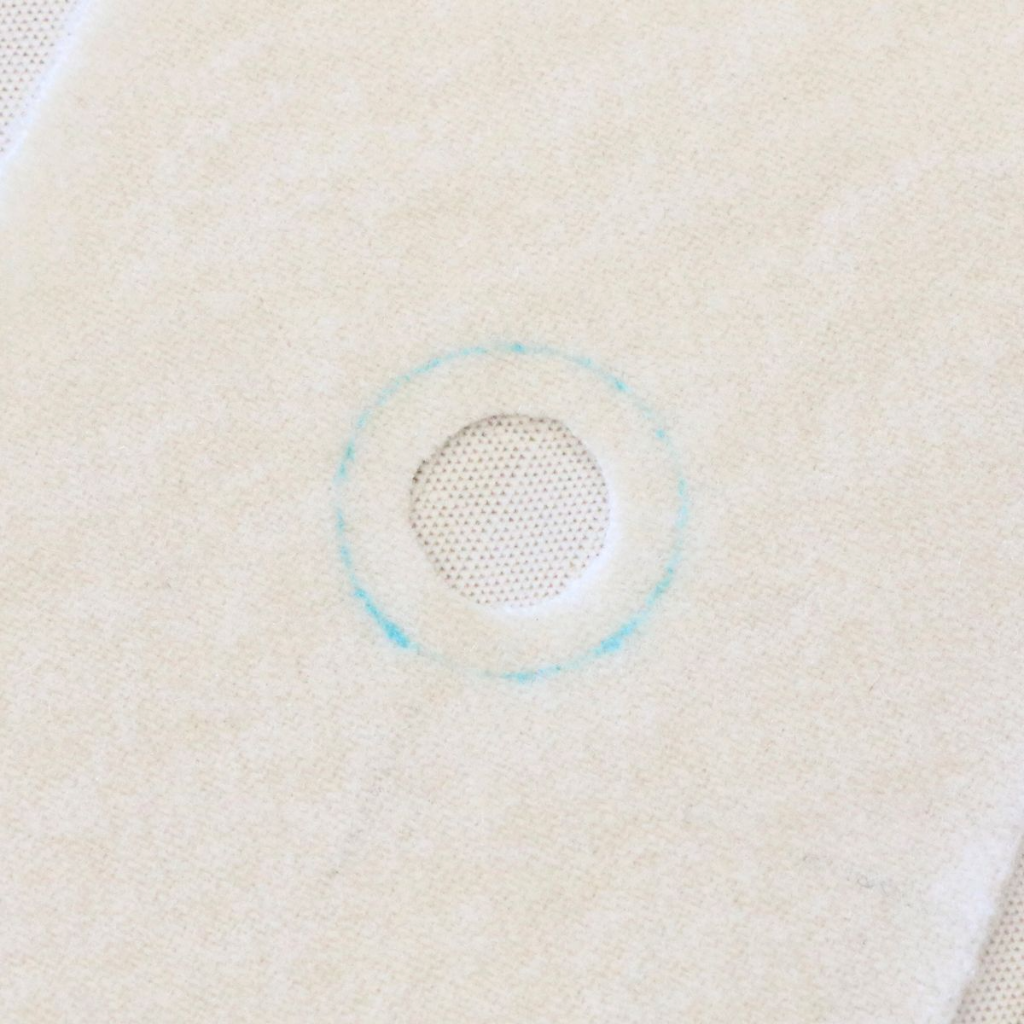
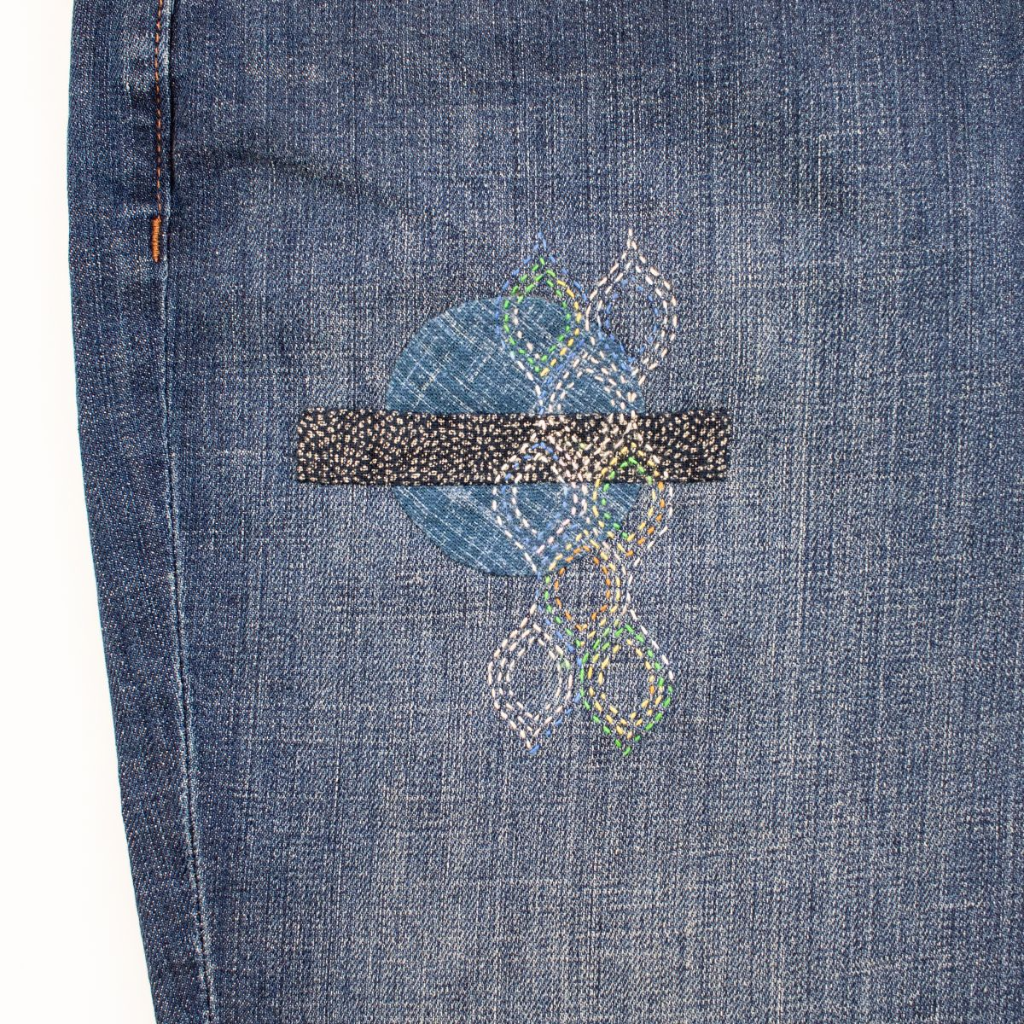
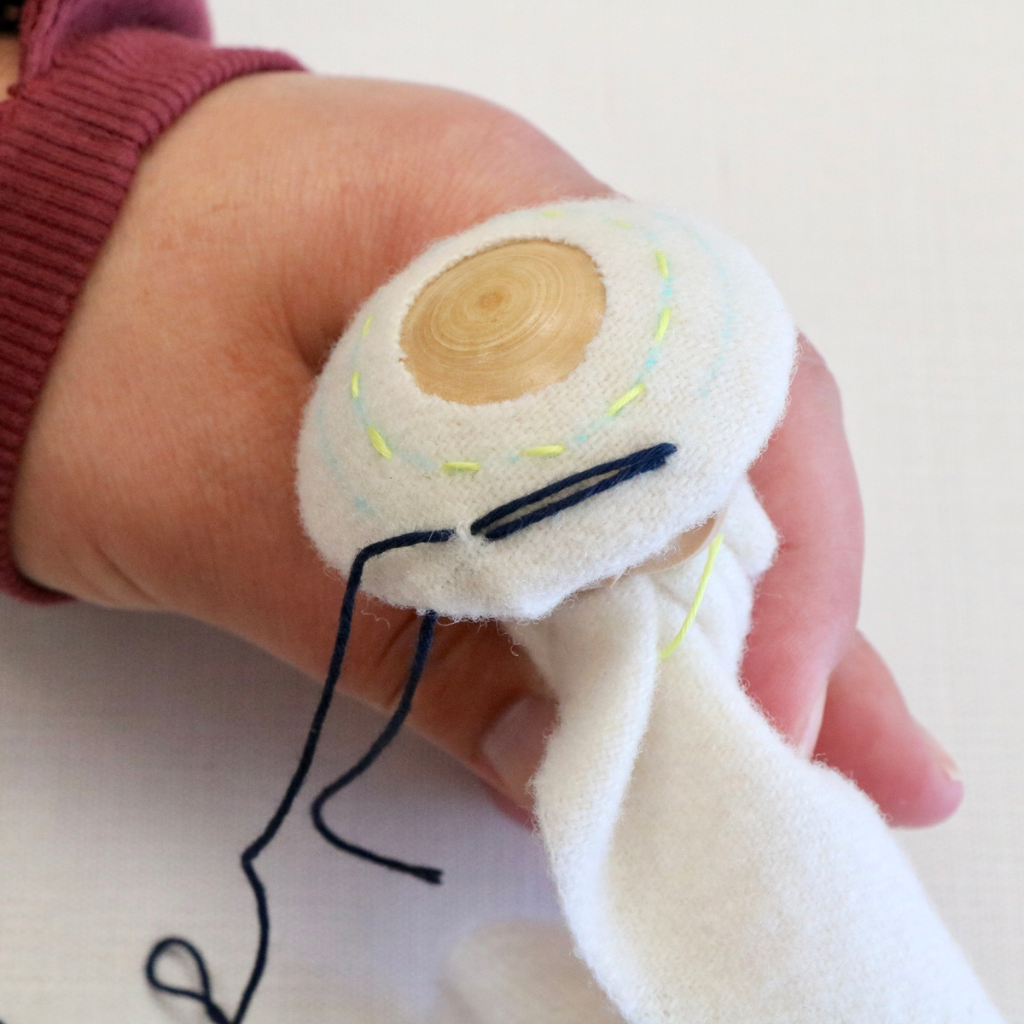
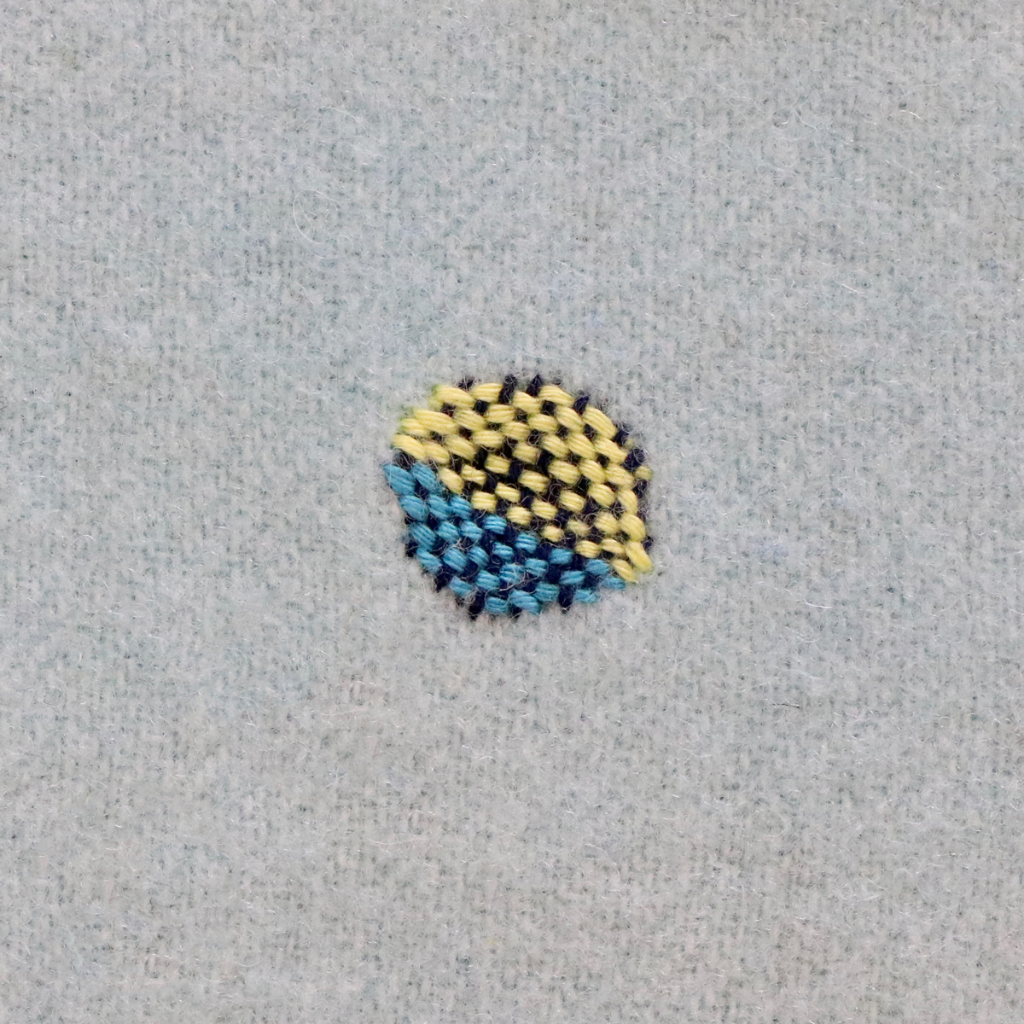
Now that we have all of our supplies, let's start darning! First, pick your textile and the area that you would like to darn. We are using a piece of wool with a hole for our example, but you can use any textile you'd like! Start by marking a circle large enough to cover your hole plus at least 1/4-3/8".
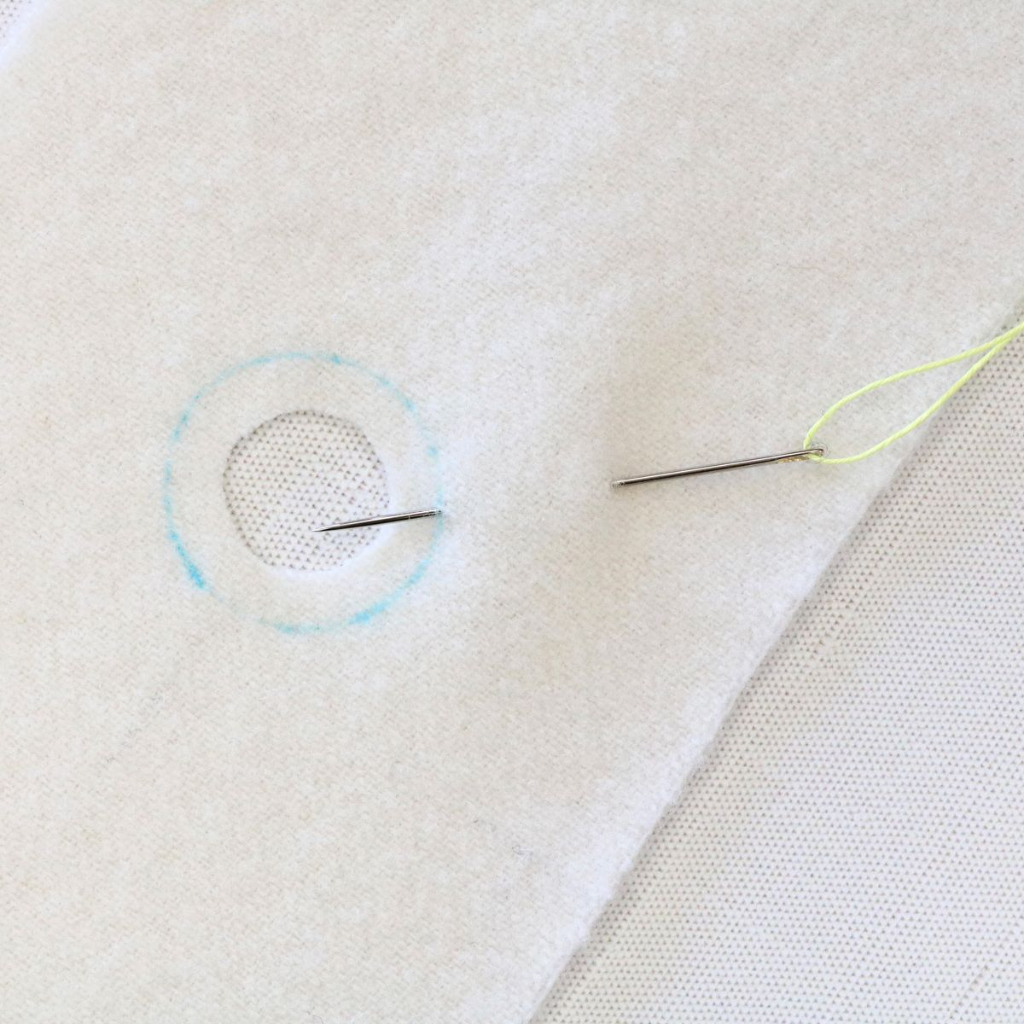
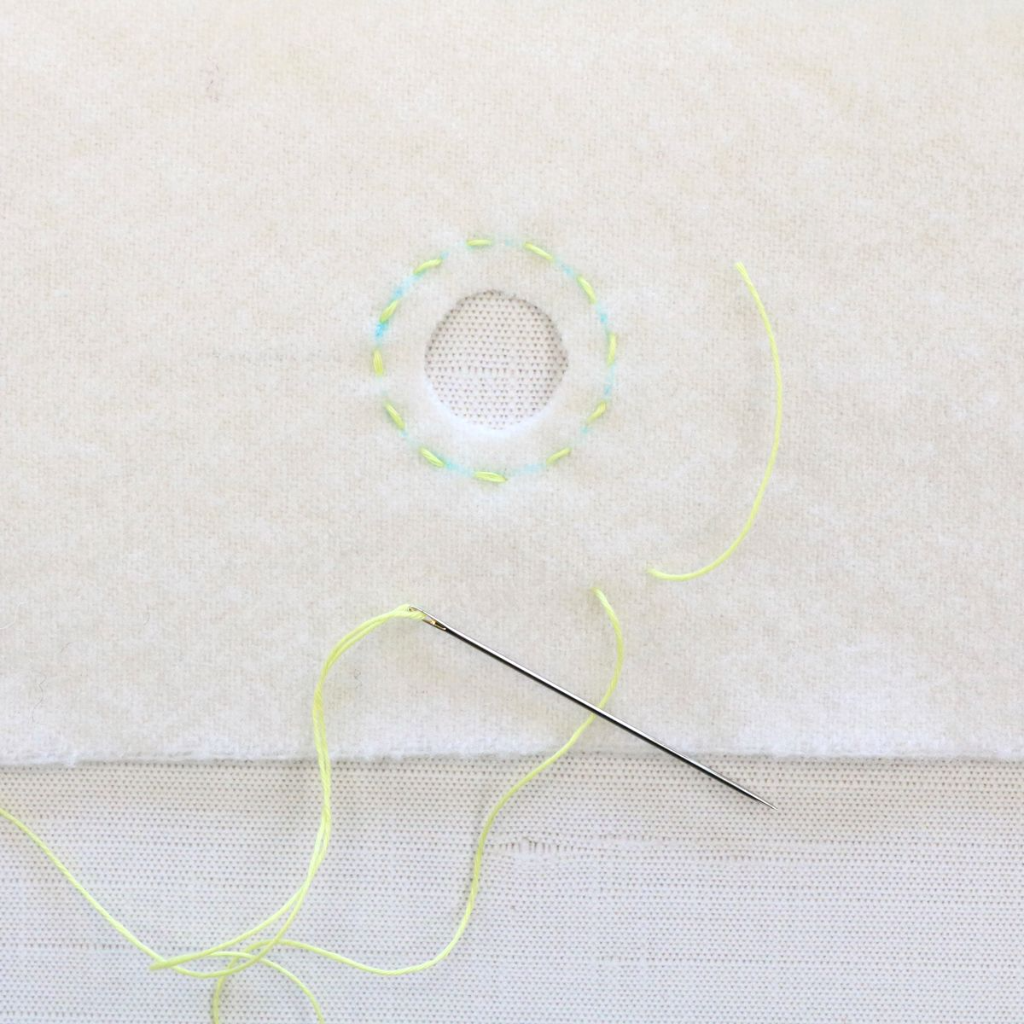
Thread your needle, and insert the tip from the top of your fabric at least 1 inch away from your marked circle, bringing the tip back up through your marked circle. Sew a running stitch along your marking, leaving approximately a 4 inch tail at your starting point. The running stitch is meant to add extra reinforcement around the hole and prevent it from becoming larger. If you'd like, you can choose to mark a larger circle outside of your running stitch as a guide for the later steps.
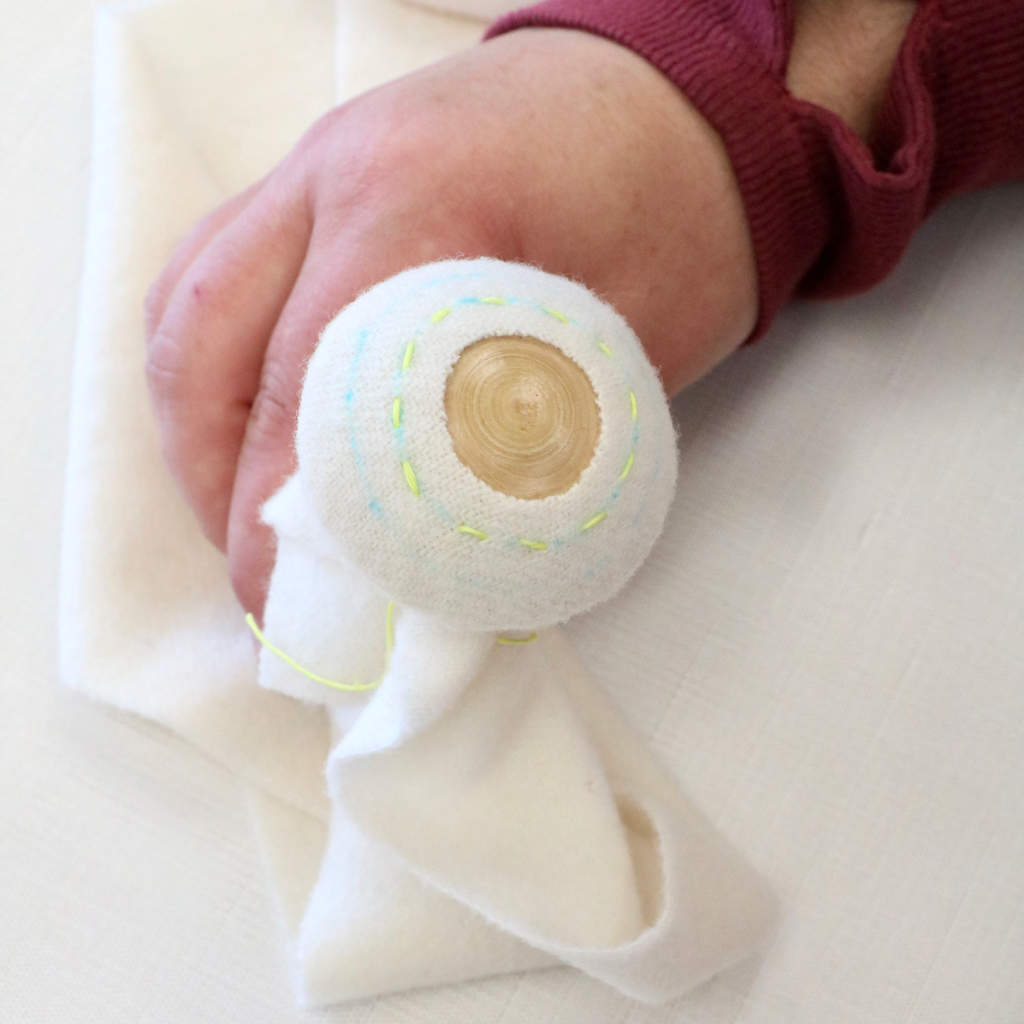
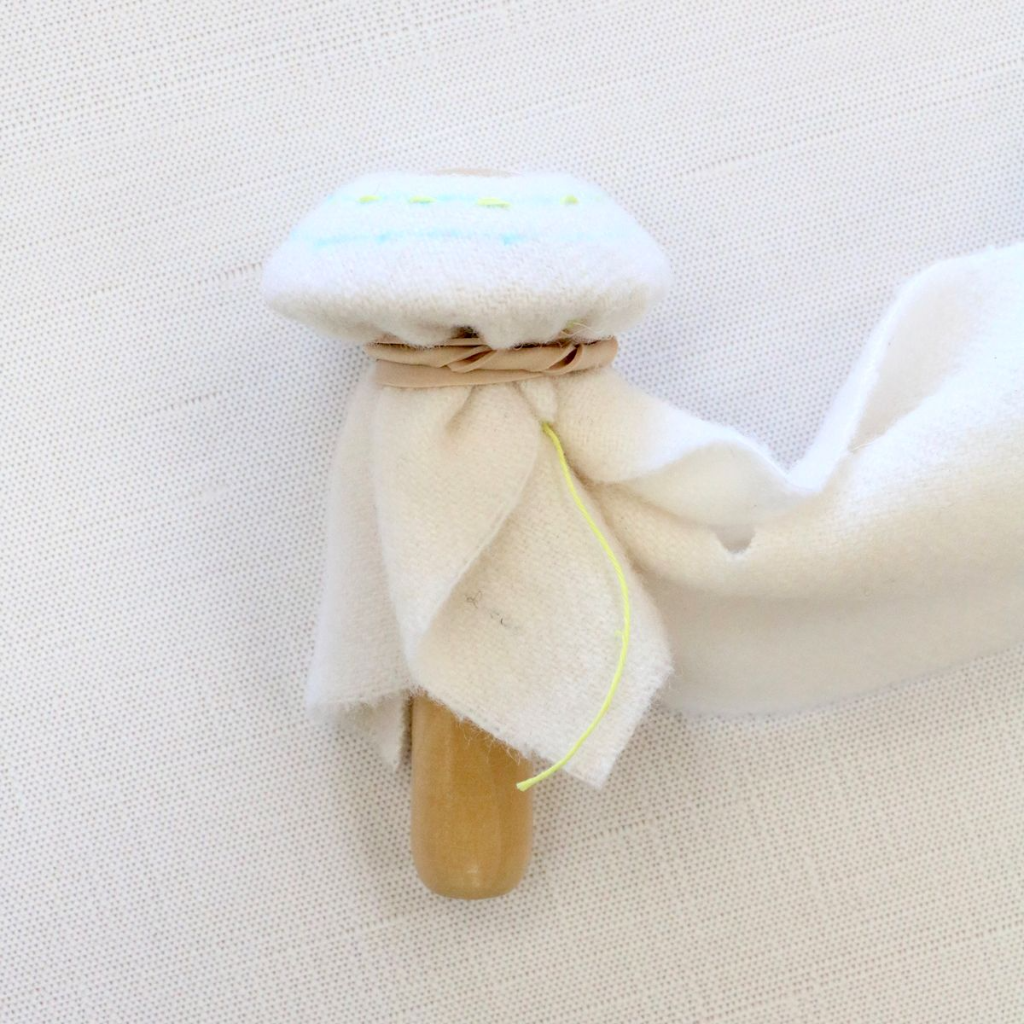
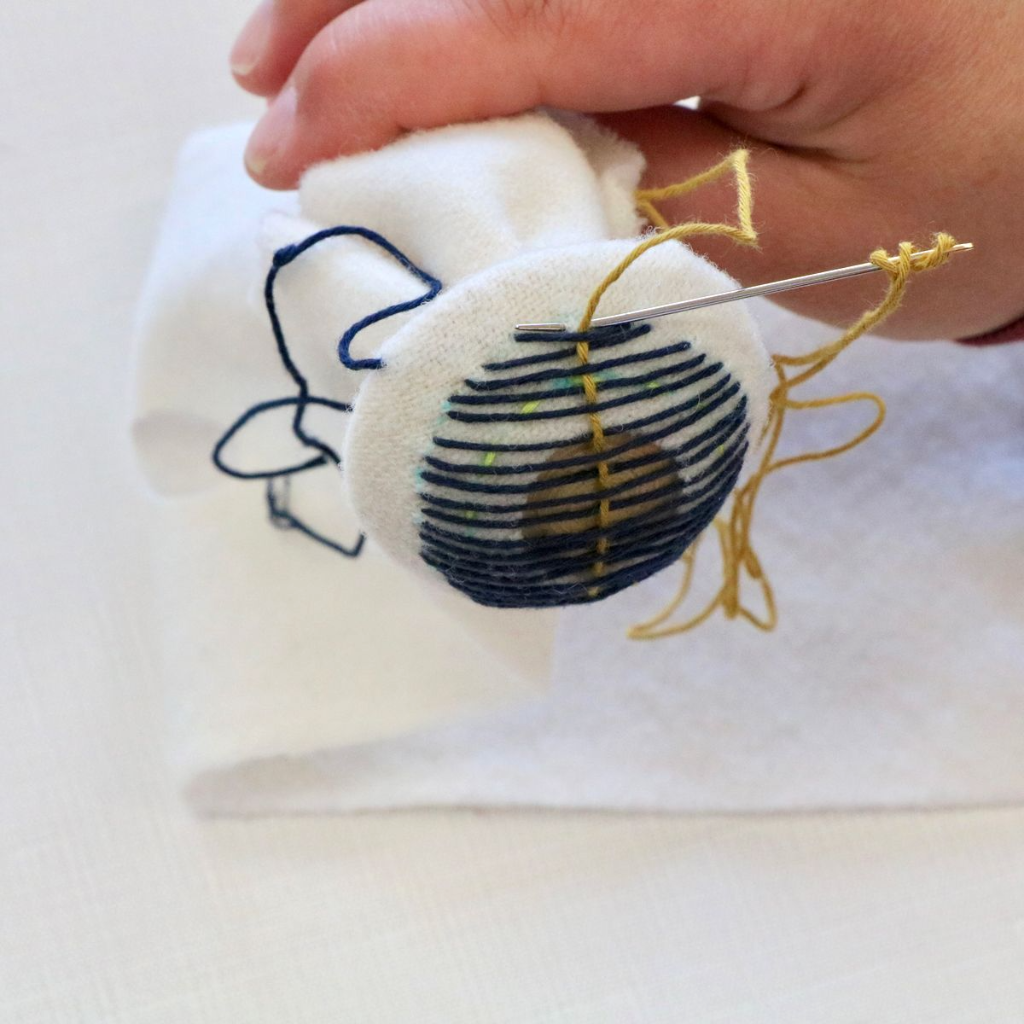
Now, secure your fabric to your mushroom using a rubber band. You will want your hole to be centered on the dome of your mushroom and pulled taut, but make sure the tension is even on all sides to prevent distortion.
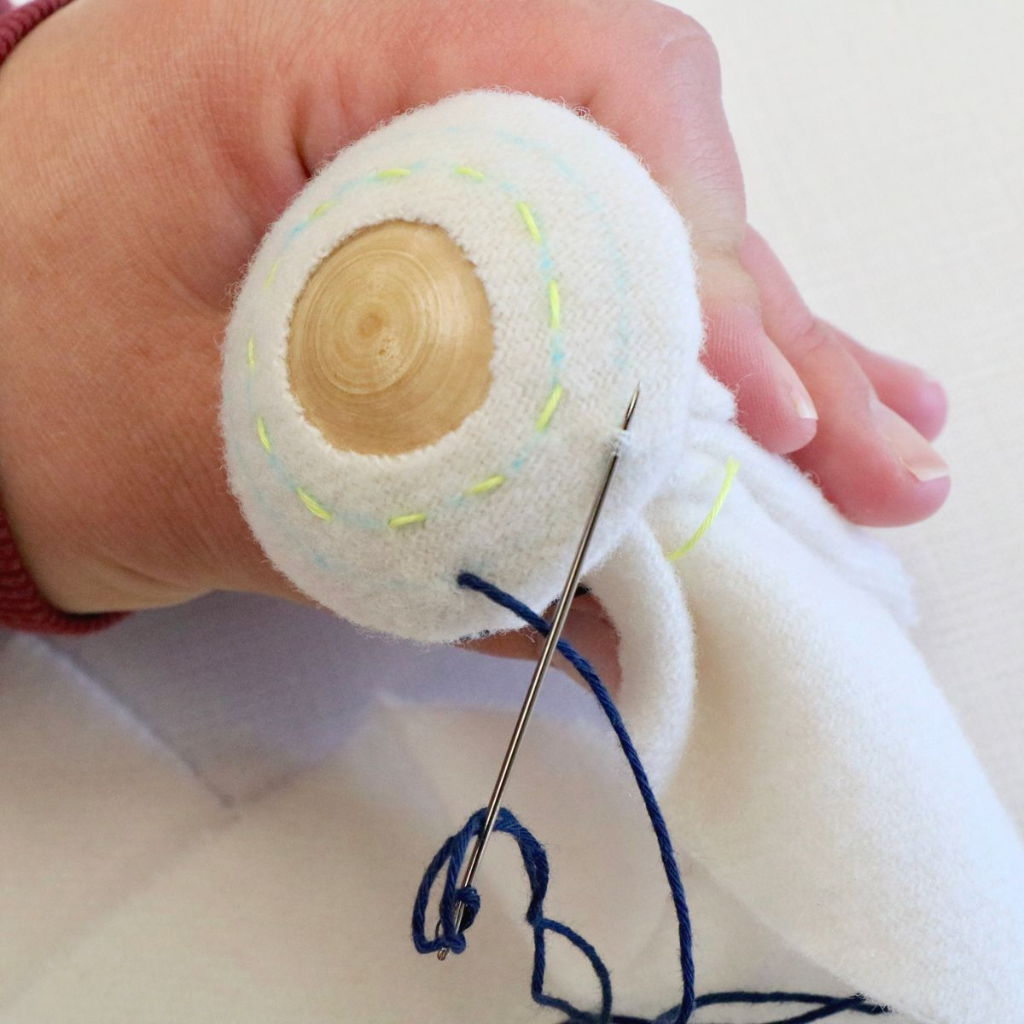
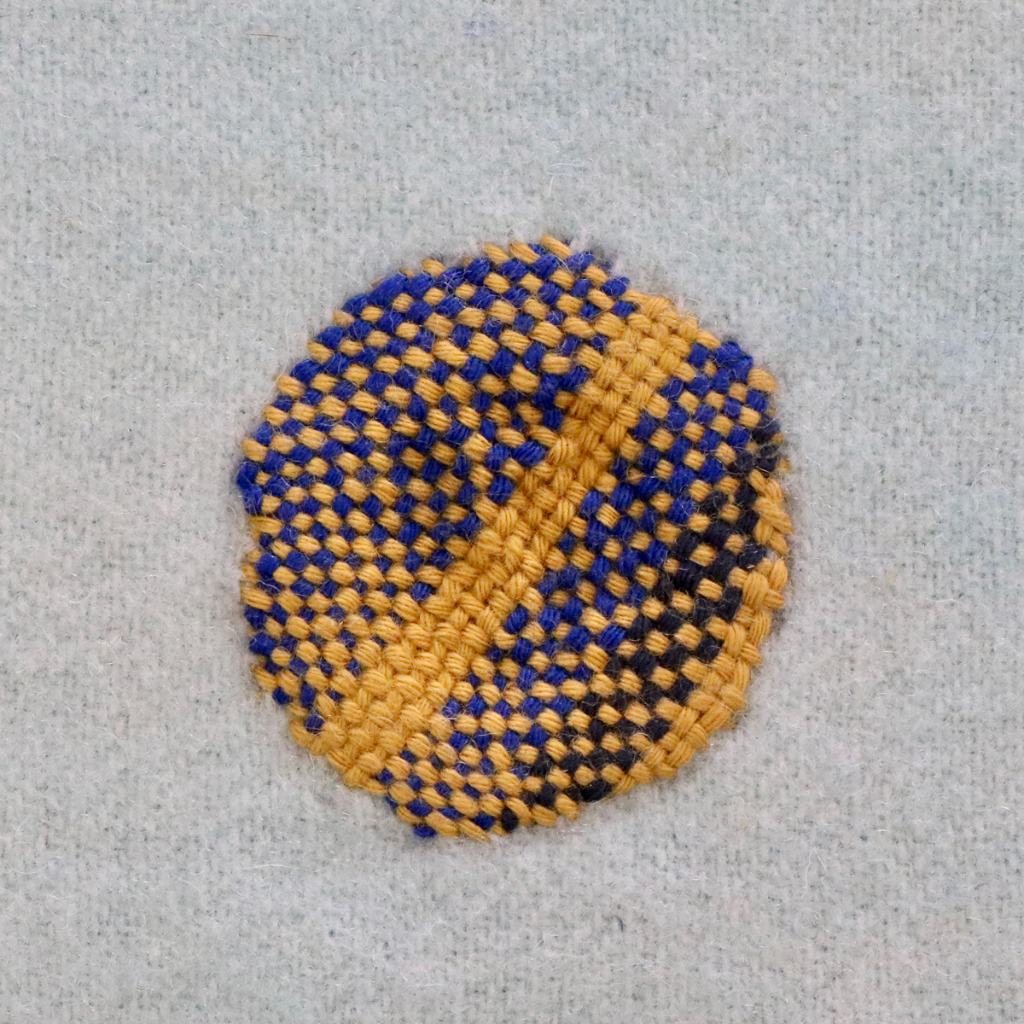
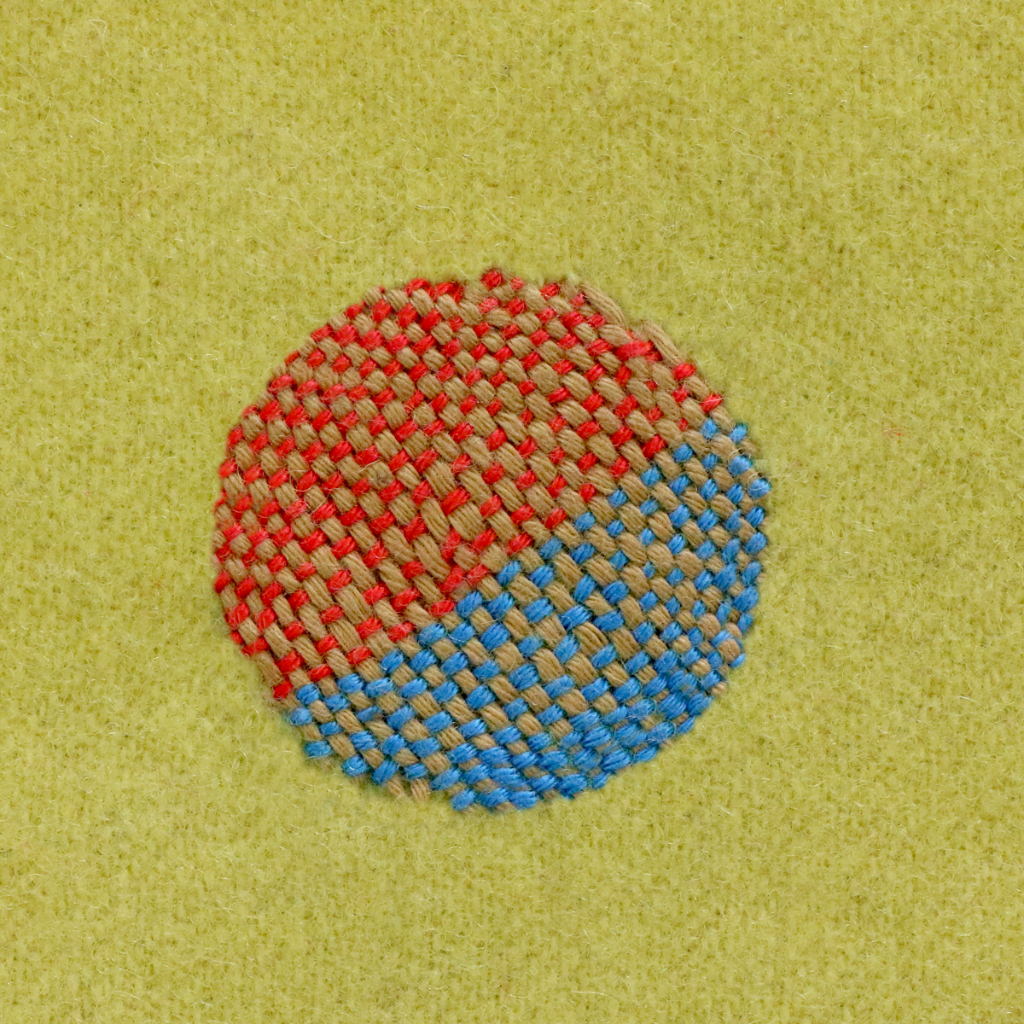
With the running stitch completed and the fabric secured, we can start stitching our "warp" thread. Just like we started the running stitch, start by running your needle through from the edge of your mushroom cap to the beginning of your first warp stitch. Now, stitch back and forth on the top and bottom of your circle, scooping a stitch each time. "Scooping a stitch" is demonstrated in the second photo. Make sure to scoop your stitch on the outside of your running stitch to hide it. Repeat until you have filled your circle completely. Then, pull your thread out toward the edge of the mushroom cap, leaving approximately a 4 inch tail.
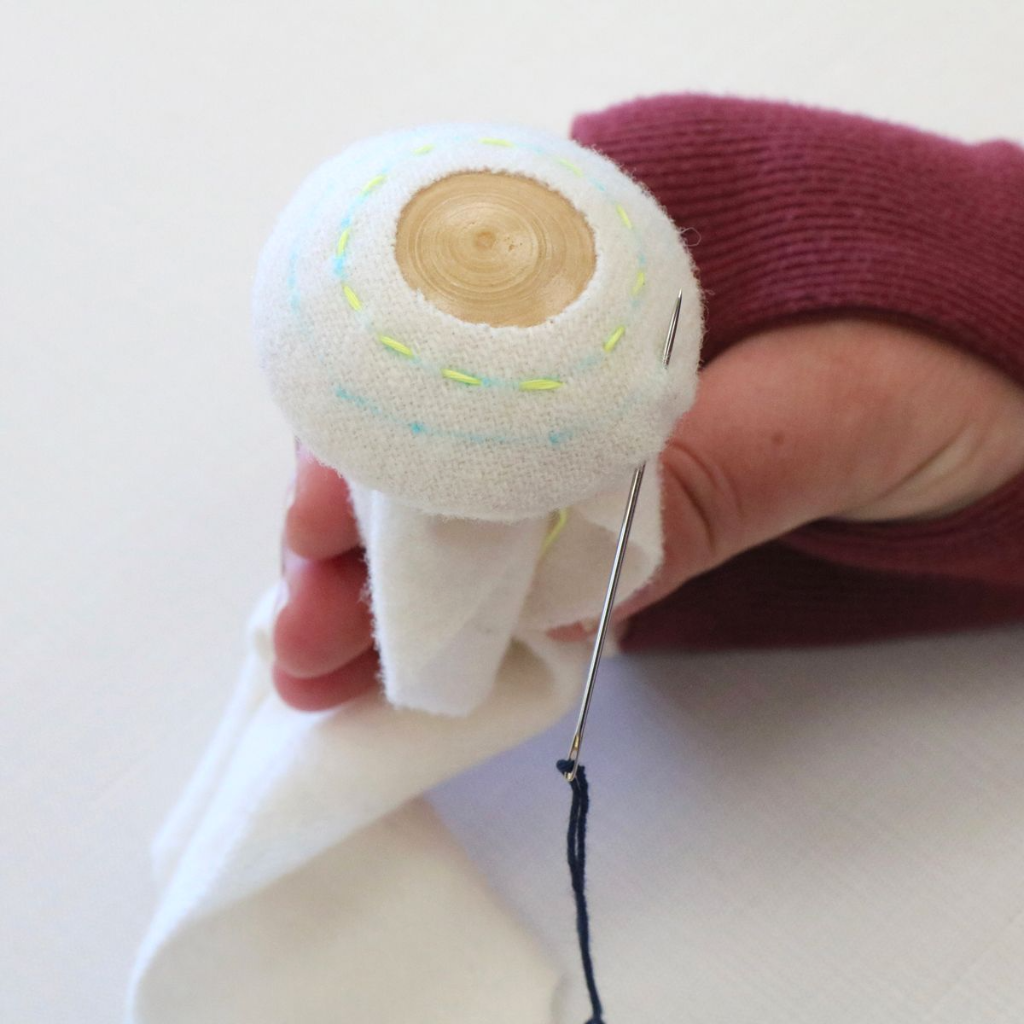
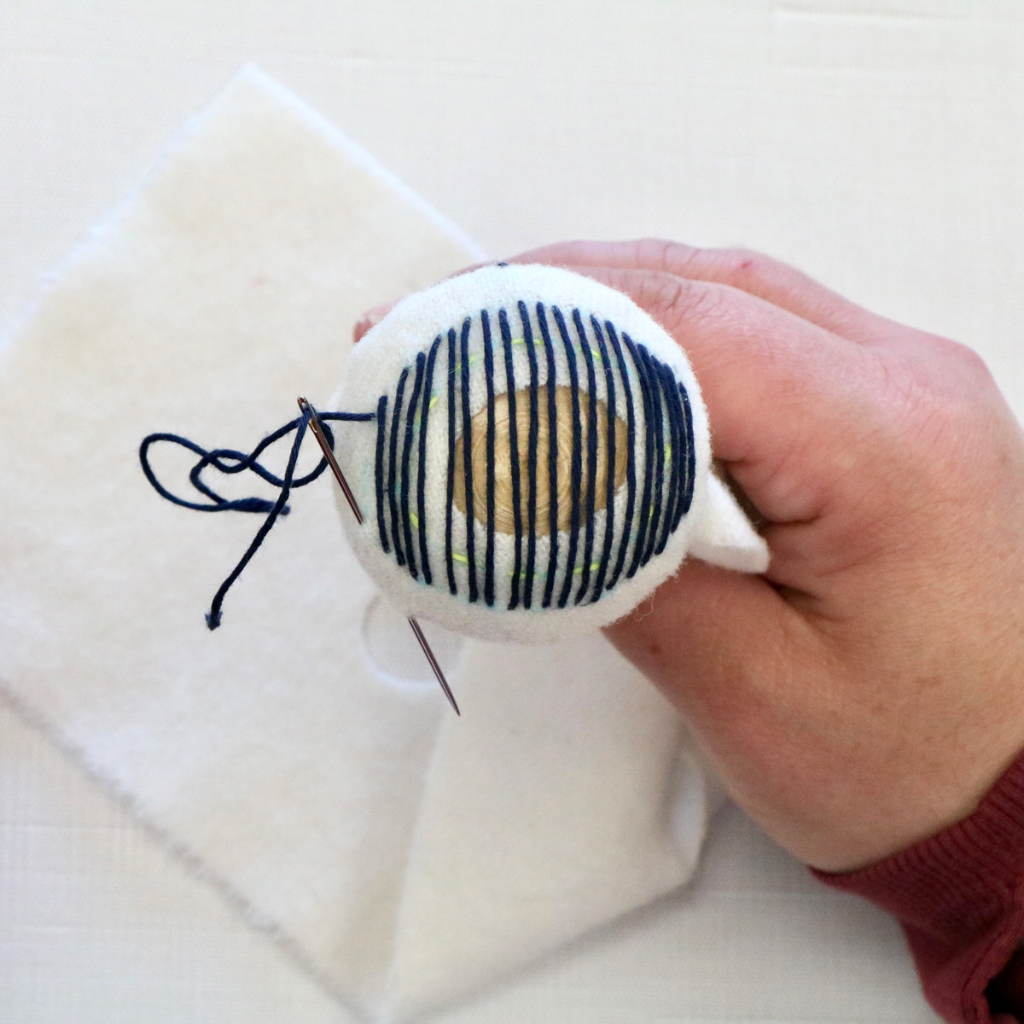
Now, it's time to start the "weft" of our circle. Thread your needle again with a new piece of thread. This thread can be the same color as the first, or you can choose a different color to add some contrast. Insert the tip at the edge of the mushroom cap, coming back up next to the middle of your circle.
TIP: Don't worry if you run out of thread in the middle of your weaving! Simply start a new strand of thread at the point you left off the same way you started the first weft thread.
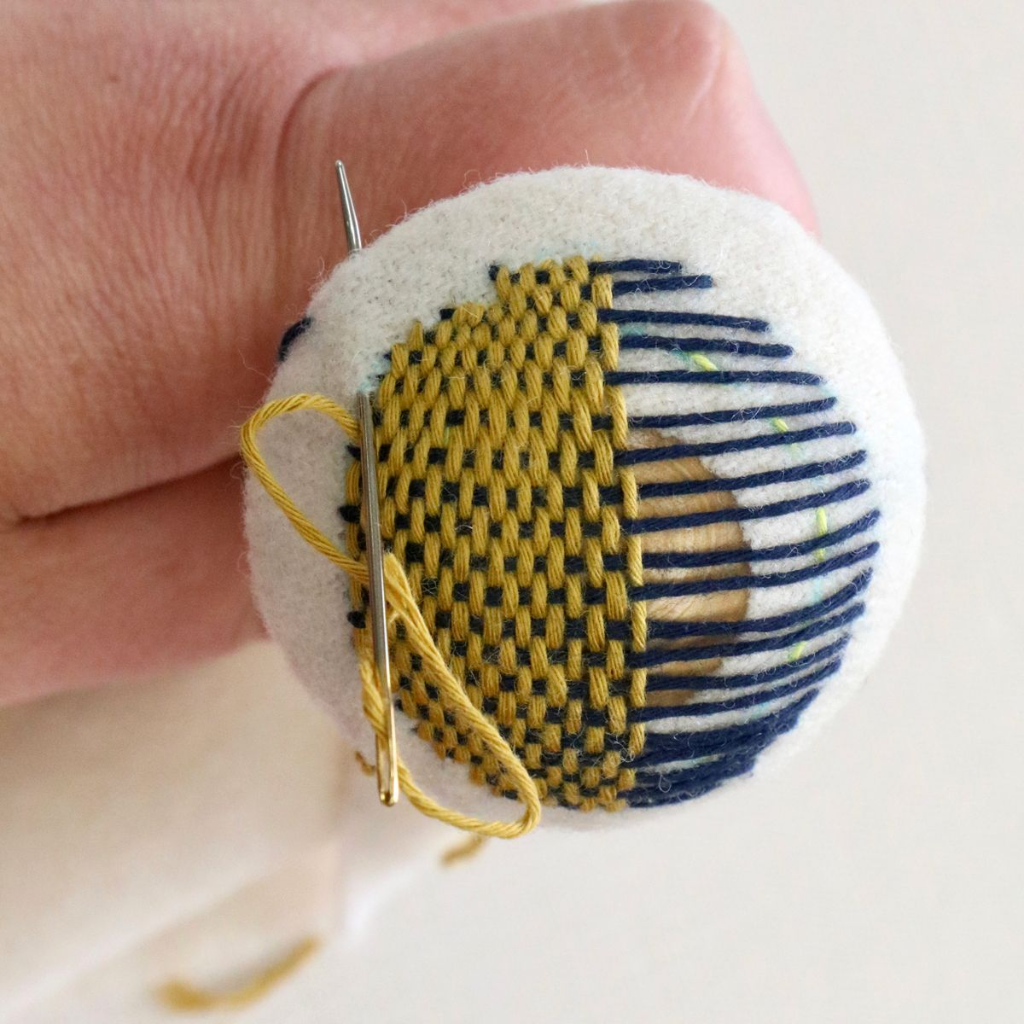
Begin to weave under and over each warp thread until you reach the other side. Then, scoop a stitch the same way you did for the warp threads. Weave in the opposite direction, and repeat these steps until you reach one side of your circle. Then, pull your thread out towards the edge of the mushroom cap, leaving approximately a 4 inch tail.
Threading your needle again, repeat the same steps for the other half of your circle until you have filled it entirely.

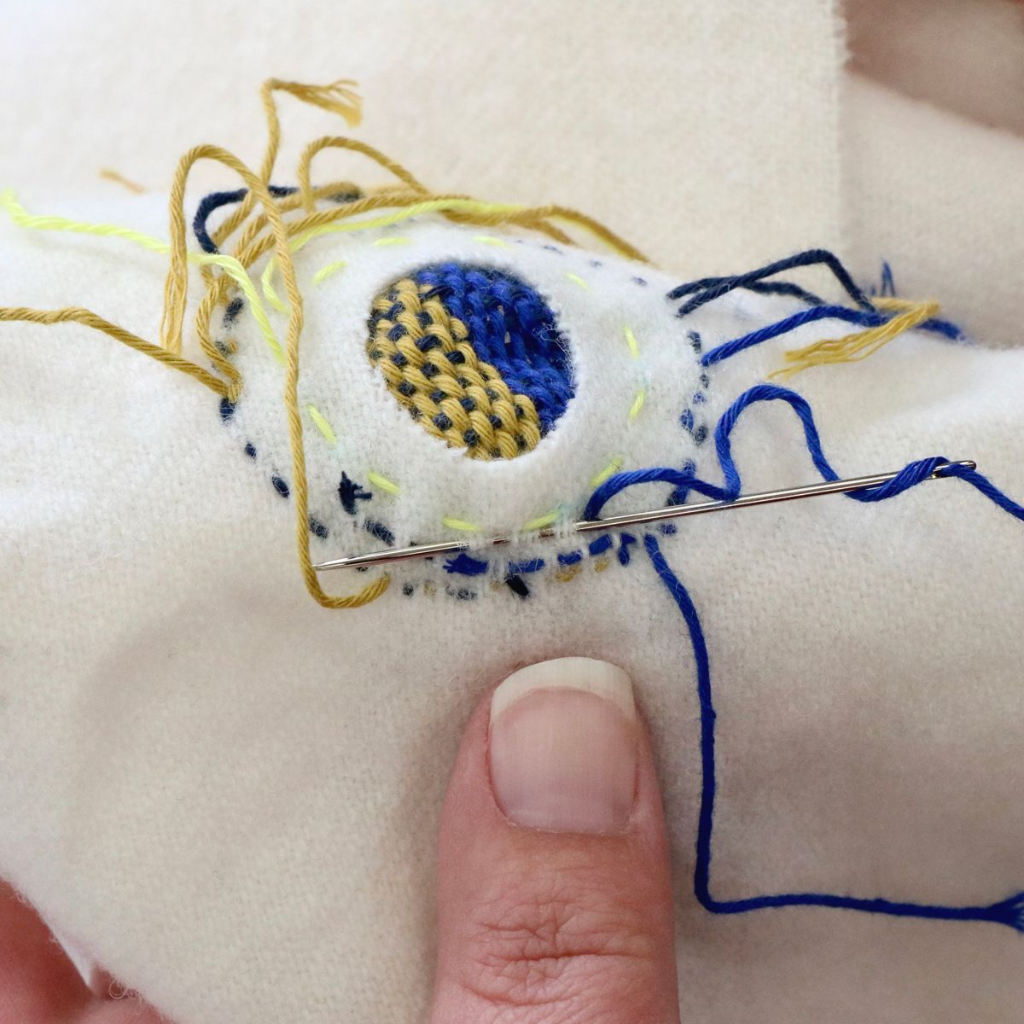
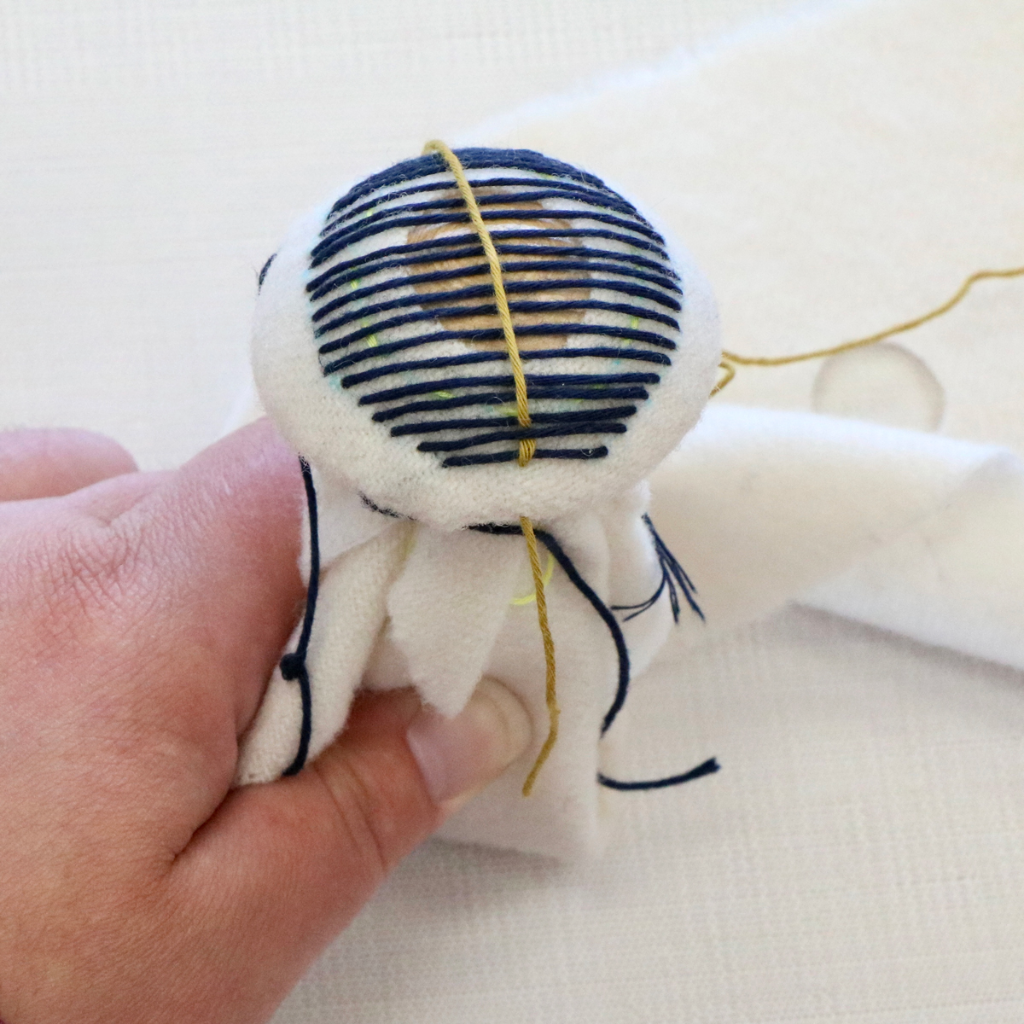
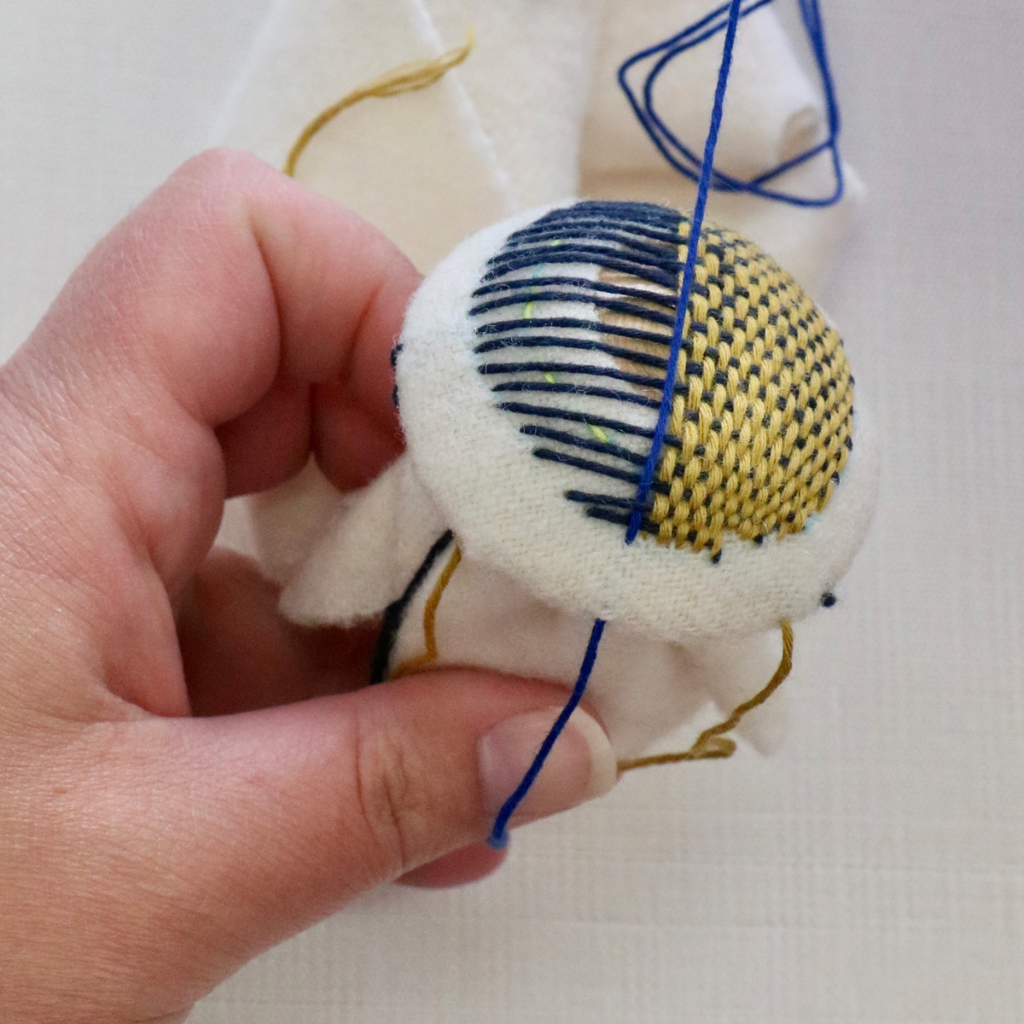
Once your circle is fully woven and your last thread is pulled out towards the edge of your mushroom cap with a 4 inch tail, it's time to take your fabric off of the mushroom. Flip your fabric over, and pull all of your tails of thread to the back side. One by one, thread each tail into your needle and sew a few running stitches on the inside of your running stitch circle. Make sure to stitch them through your fabric only, rather than stitching through both your fabric and your weaving. Trim off any excess.
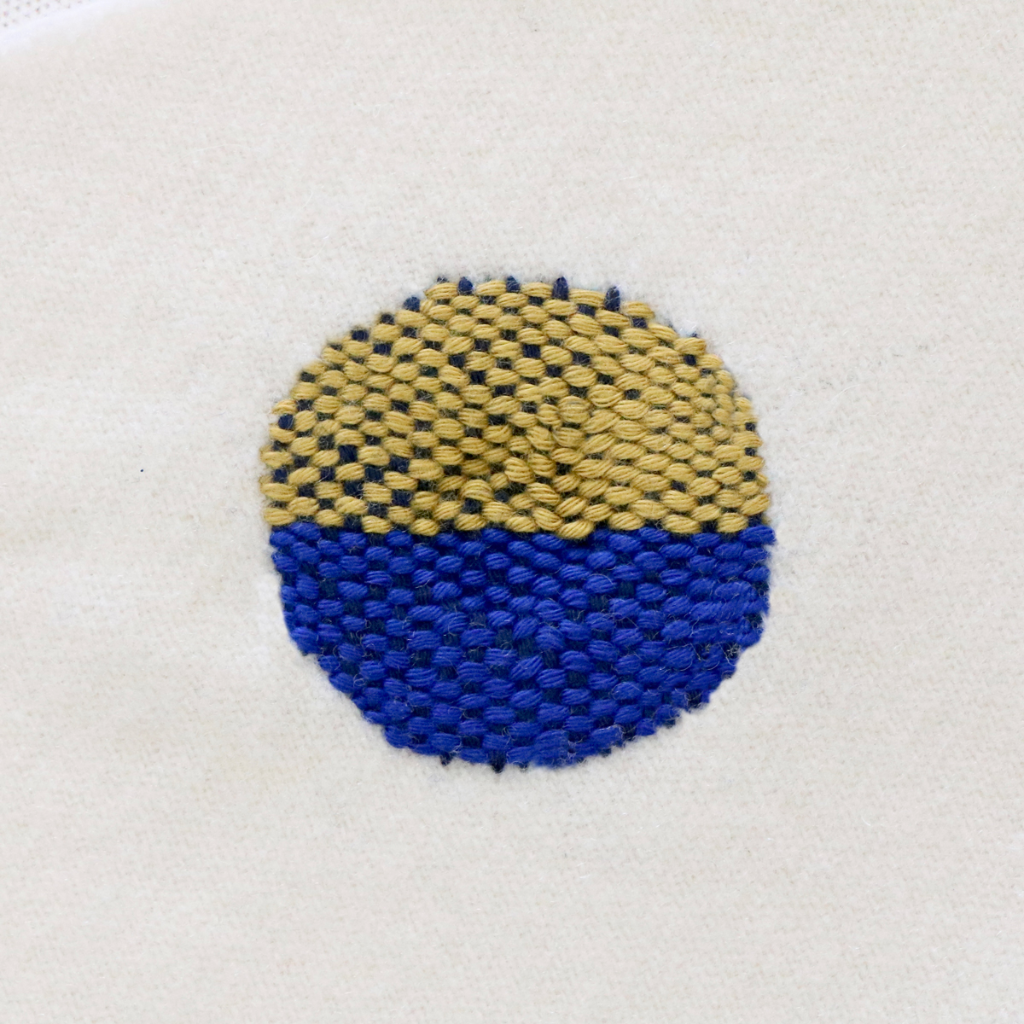
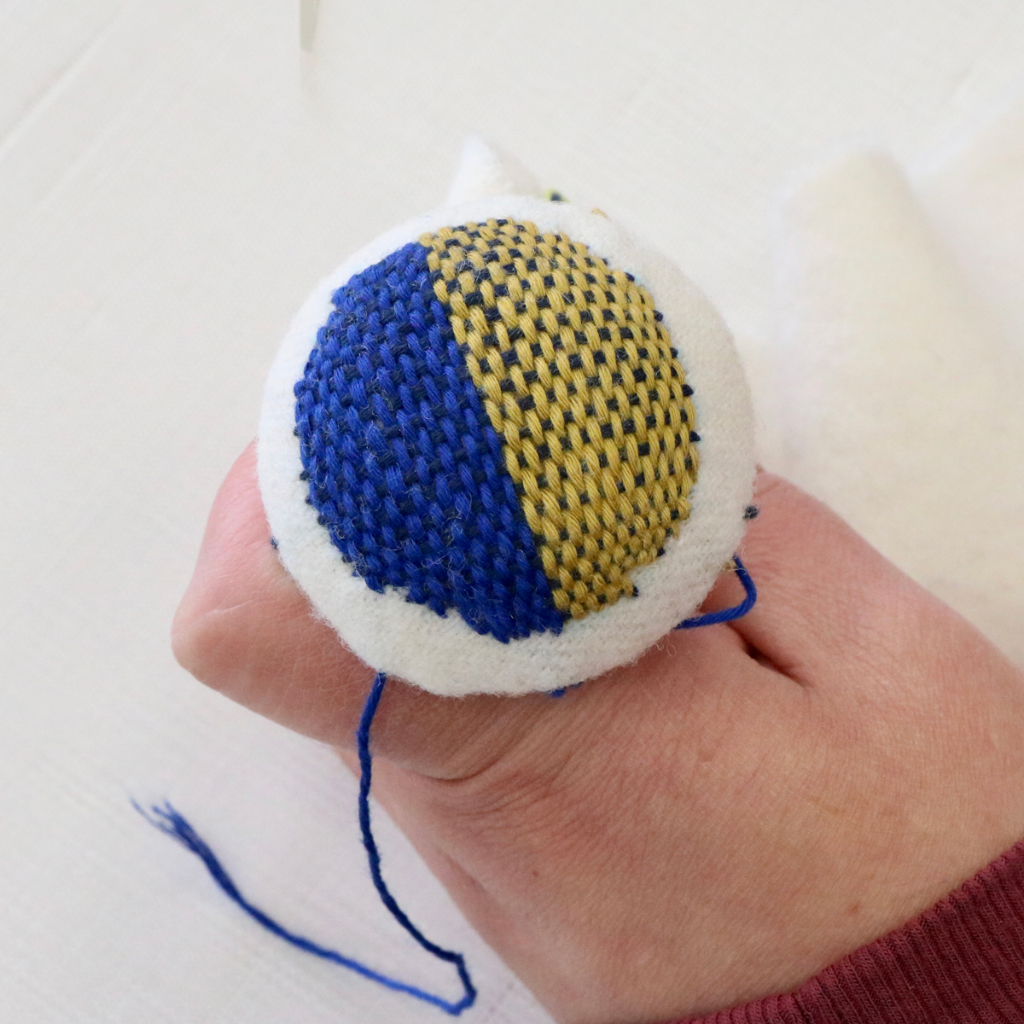
Front
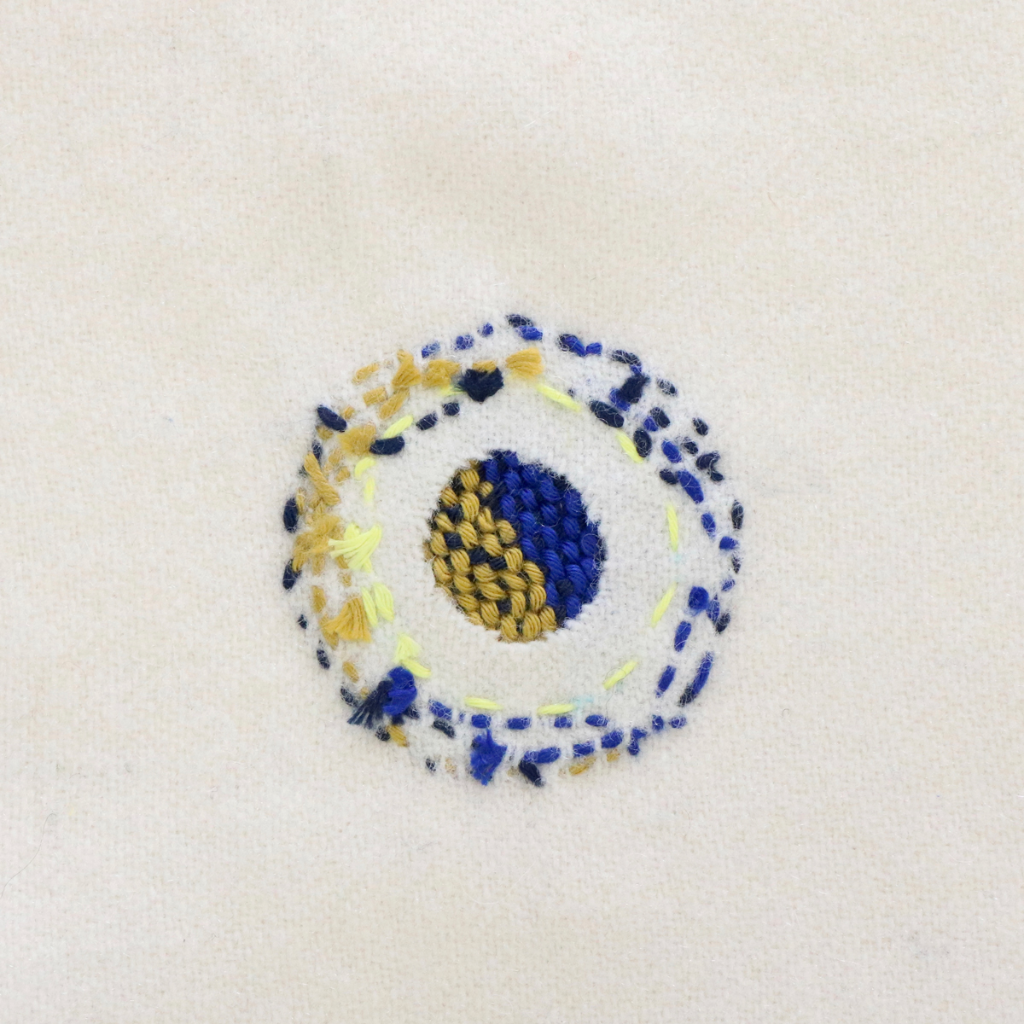
Back
Now, all that's left to do is iron your circle and enjoy your rejuvenated textile—just like new!
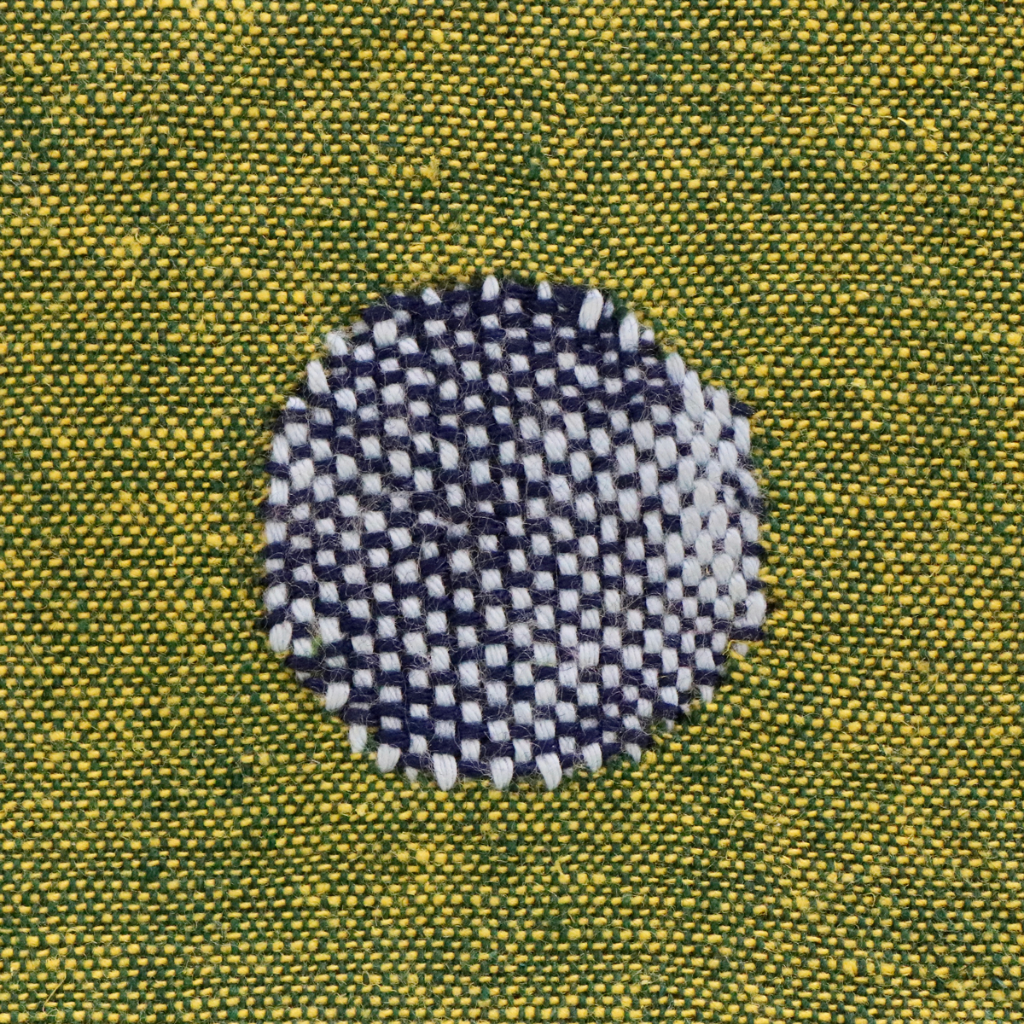
More Examples
Next week, we will dive further into Darning, exploring different threads, shapes, techniques, and uses! We will be discussing ways to use darning in wool appliqué and other projects, so make sure to stay tuned!
Create