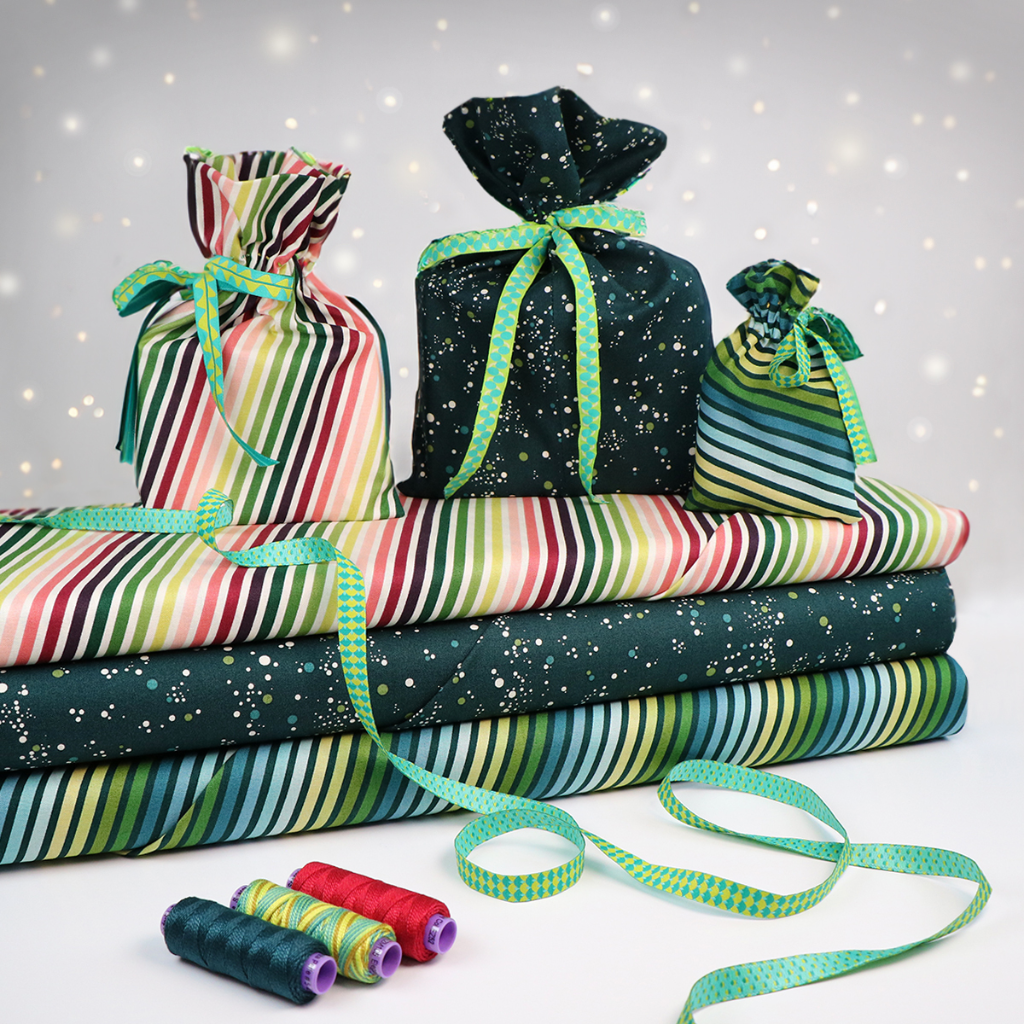
Handmade bags are the perfect scrap buster project that will make all of your gifts extra special. Not only are they reusable and eco-friendly, but they are so fun and easy to make using this simple step-by-step design!
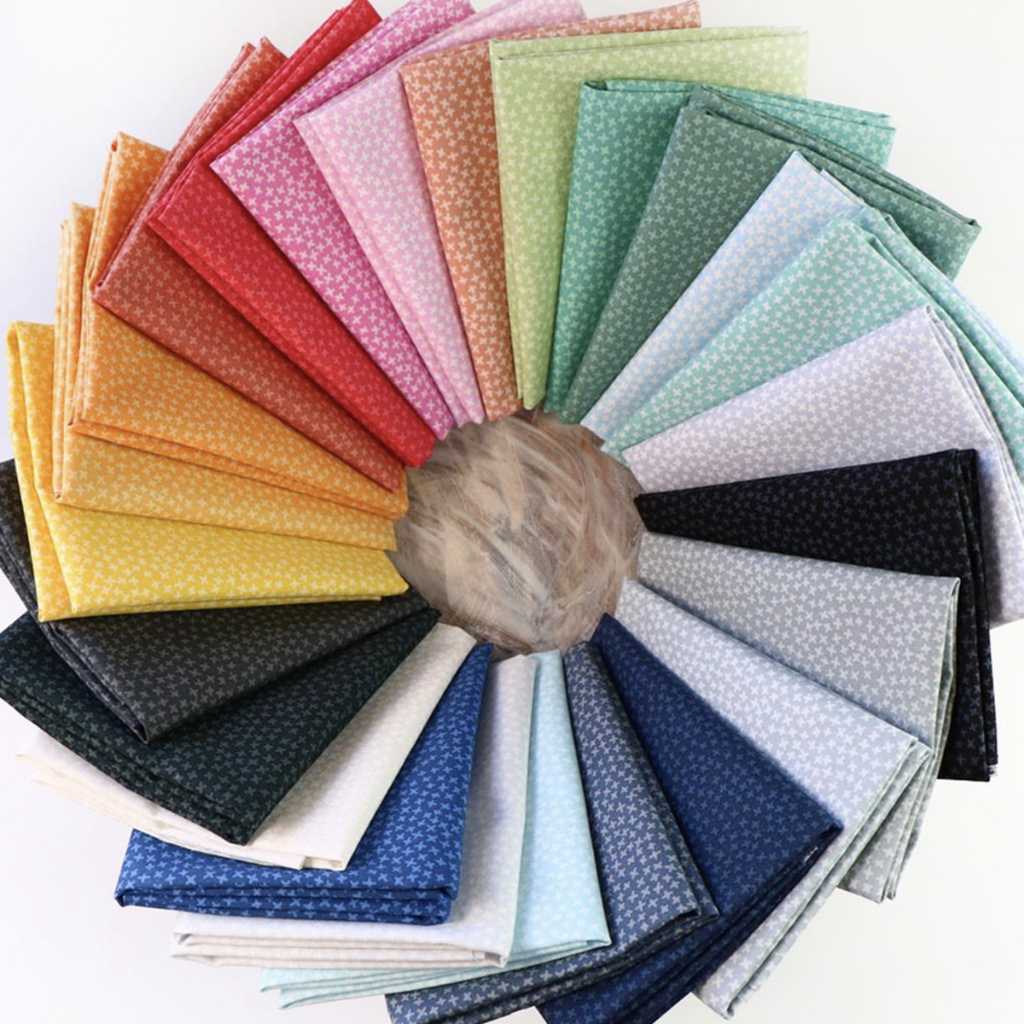
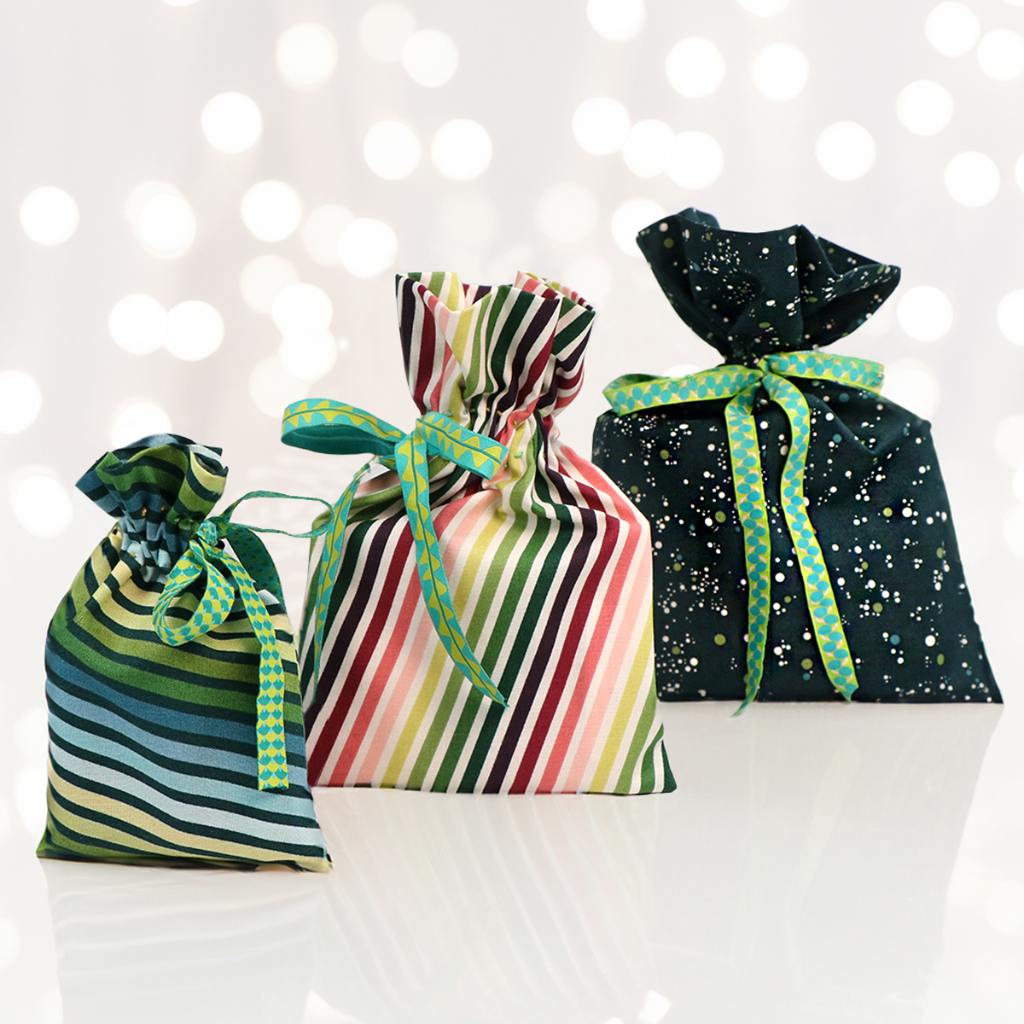
We whipped up three sizes in coordinating fabrics and ribbon. Pair wintery fabrics with Sue's Stems ribbon yardage or ribbon pack.
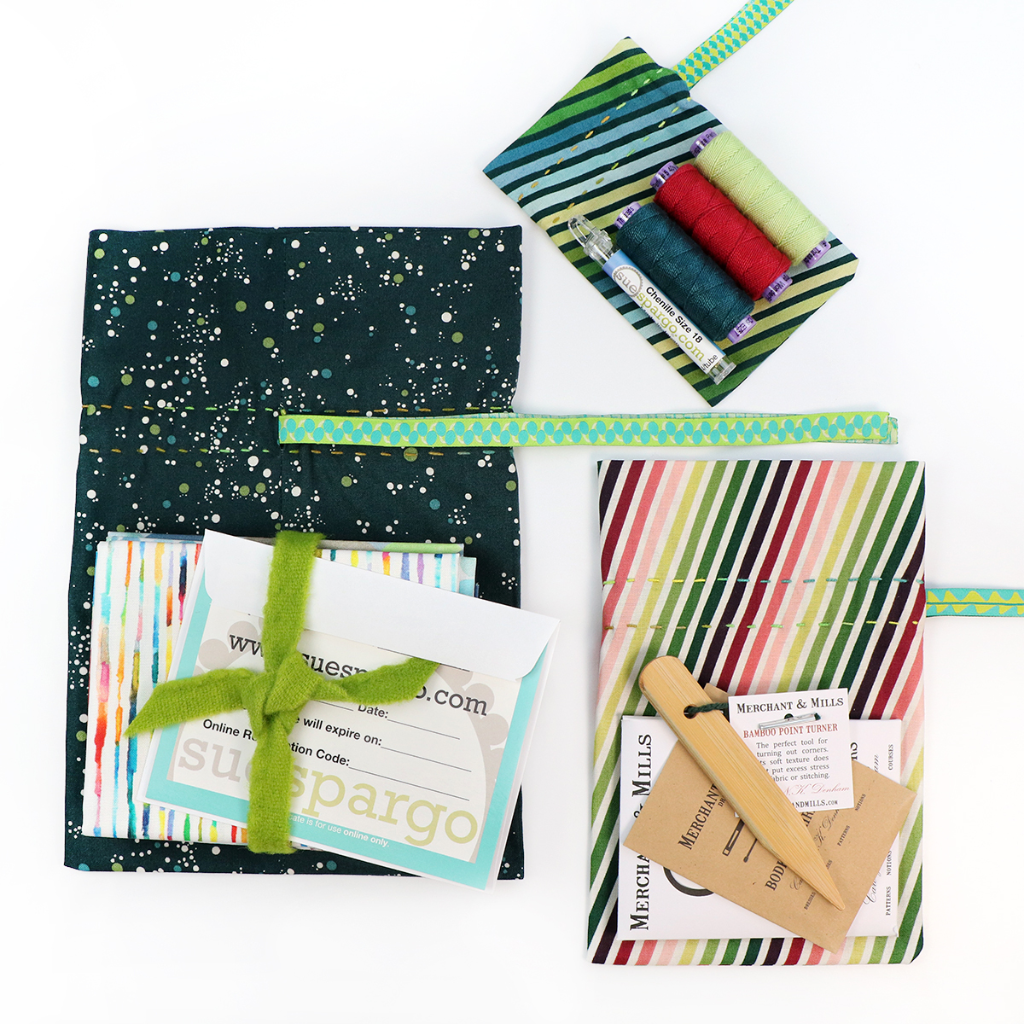
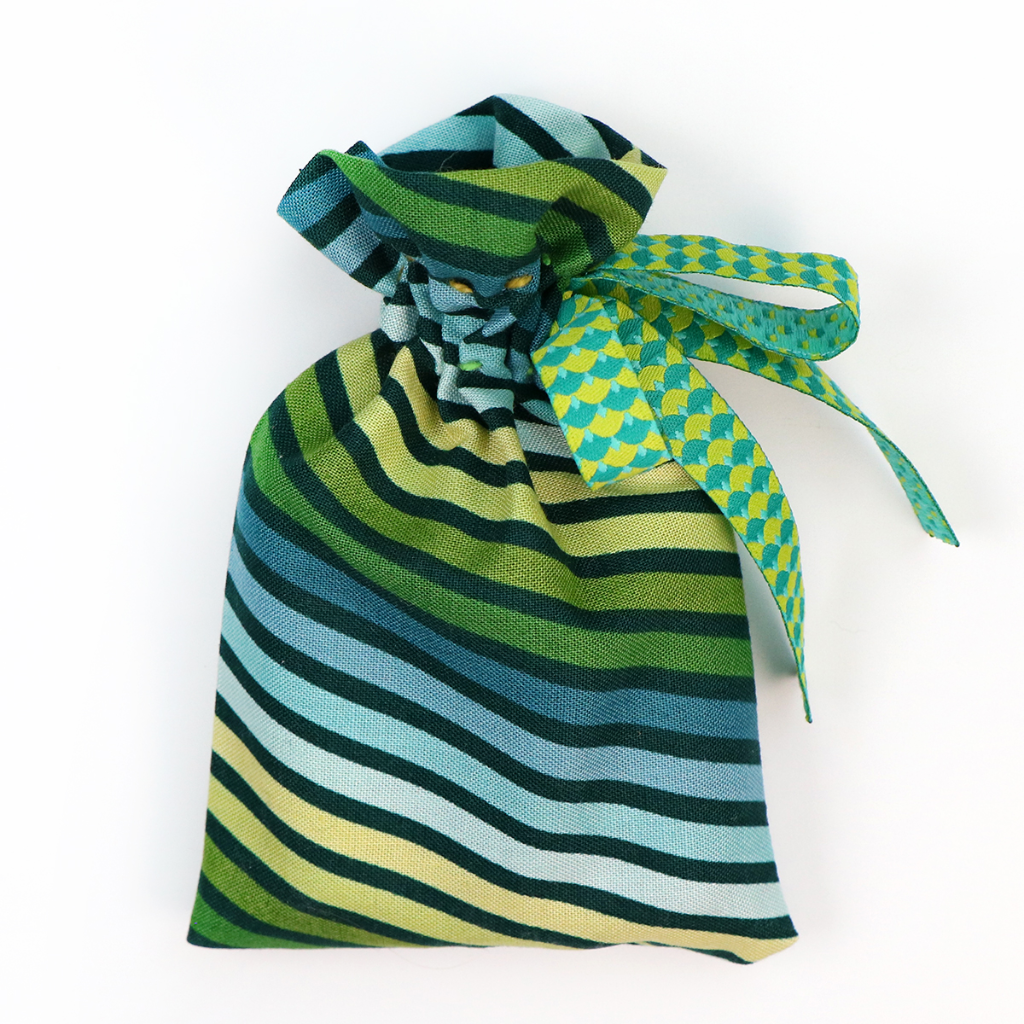
We made a small, medium, and large gift bag trio that can perfectly hold everything a maker friend would need to get stitching!
Small: Starting with 8" x 8" fabric, the gift area of the finished bag will be approximately 3-3/4" x 4". It can hold a set of Gold Eye Needles and 2-3 spools of Eleganza.
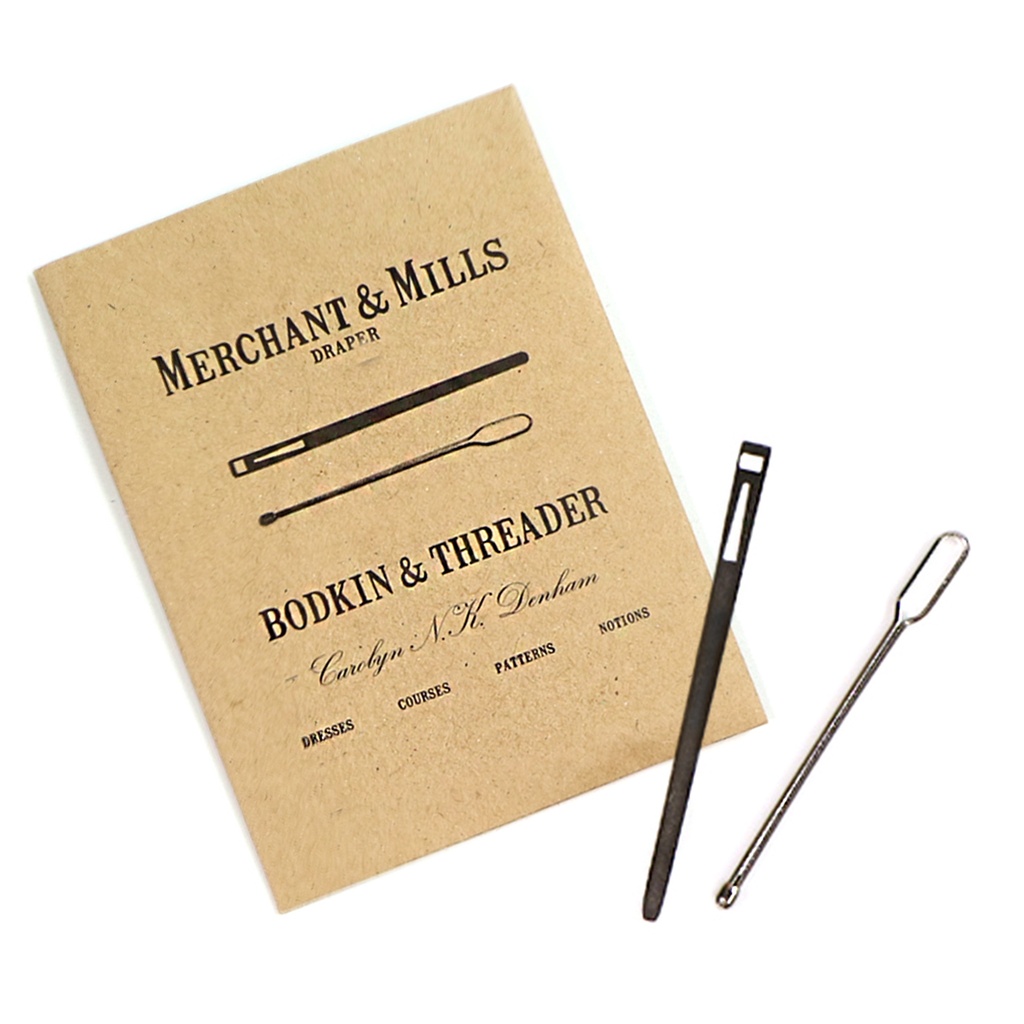
Medium: Starting with 12" x 12" fabric, the gift area of the finished bag will be approximately 5-1/2" x 5-3/4". It can hold Merchant & Mills Wide Bow Scissors, a Bodkin & Threader and a Bamboo Point Turner.
Large: Starting with 16" x 16" fabric, the gift area of the finished bag will be approximately 7-3/4" x 7". It can hold a smaller Fat Quarter Bundle of Fabric (up to about 10 cuts of fabric) and a printed Sue Spargo Gift card.
*You can easily modify the measurements of a gift bag to suit your needs!
Getting Started
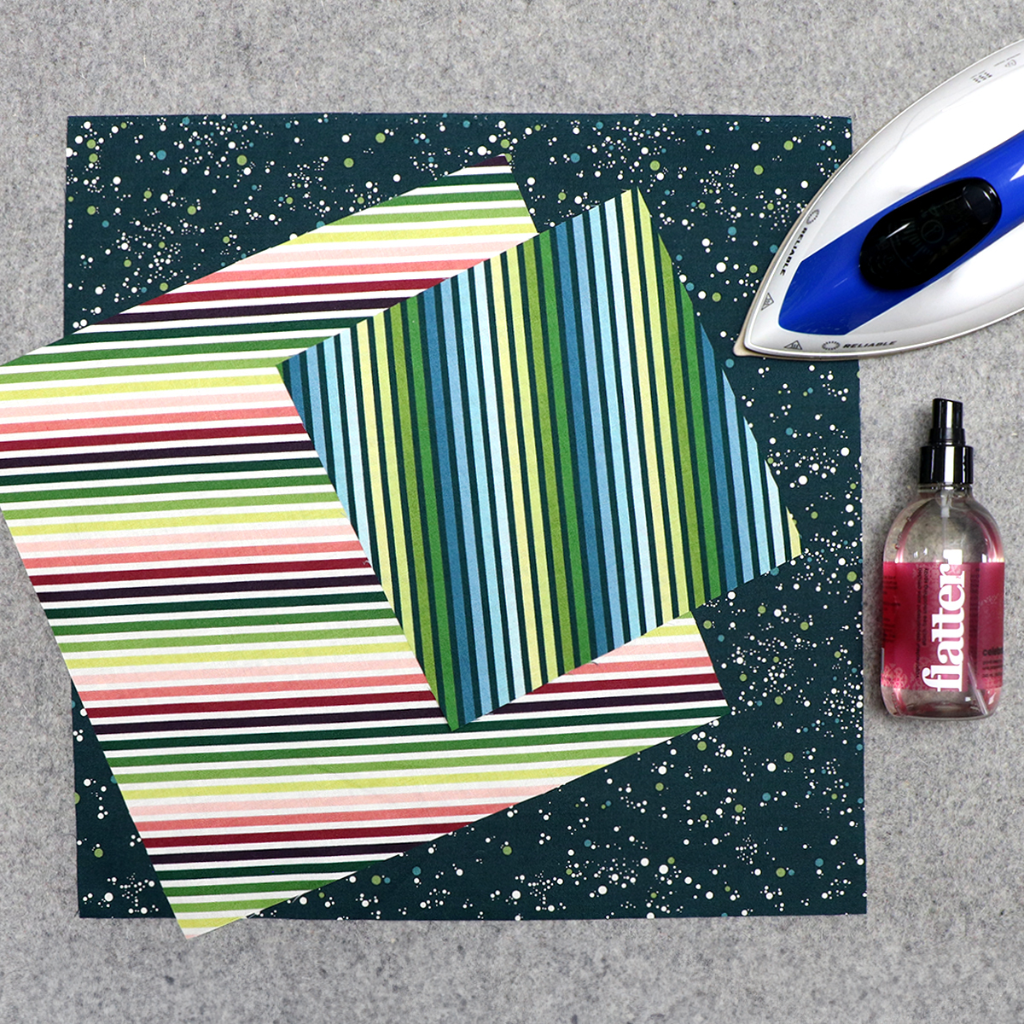
Cut your square of fabric (8" x 8", 12" x 12", 16" x 16", or any other square dimensions) and press with an iron. For an interesting spin on this project, try piecing together multiple fabrics to create a square.
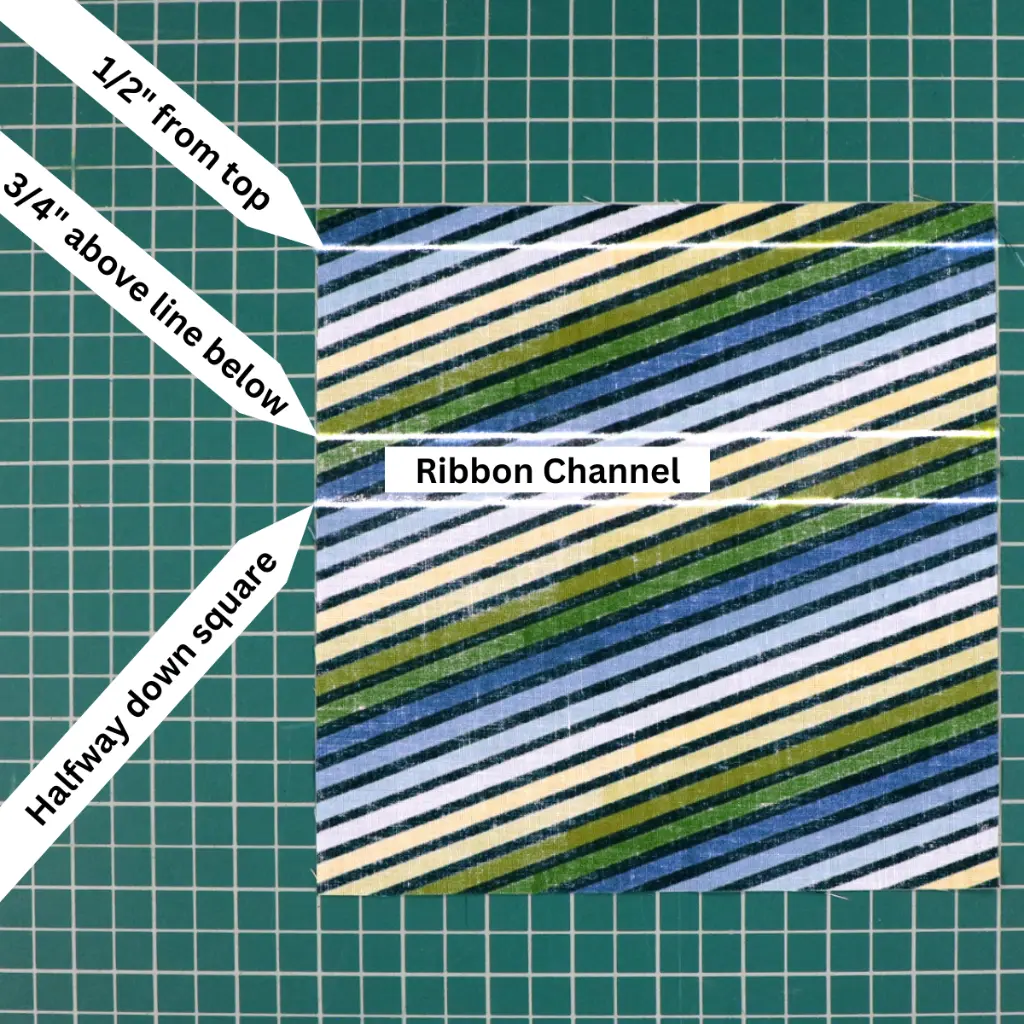
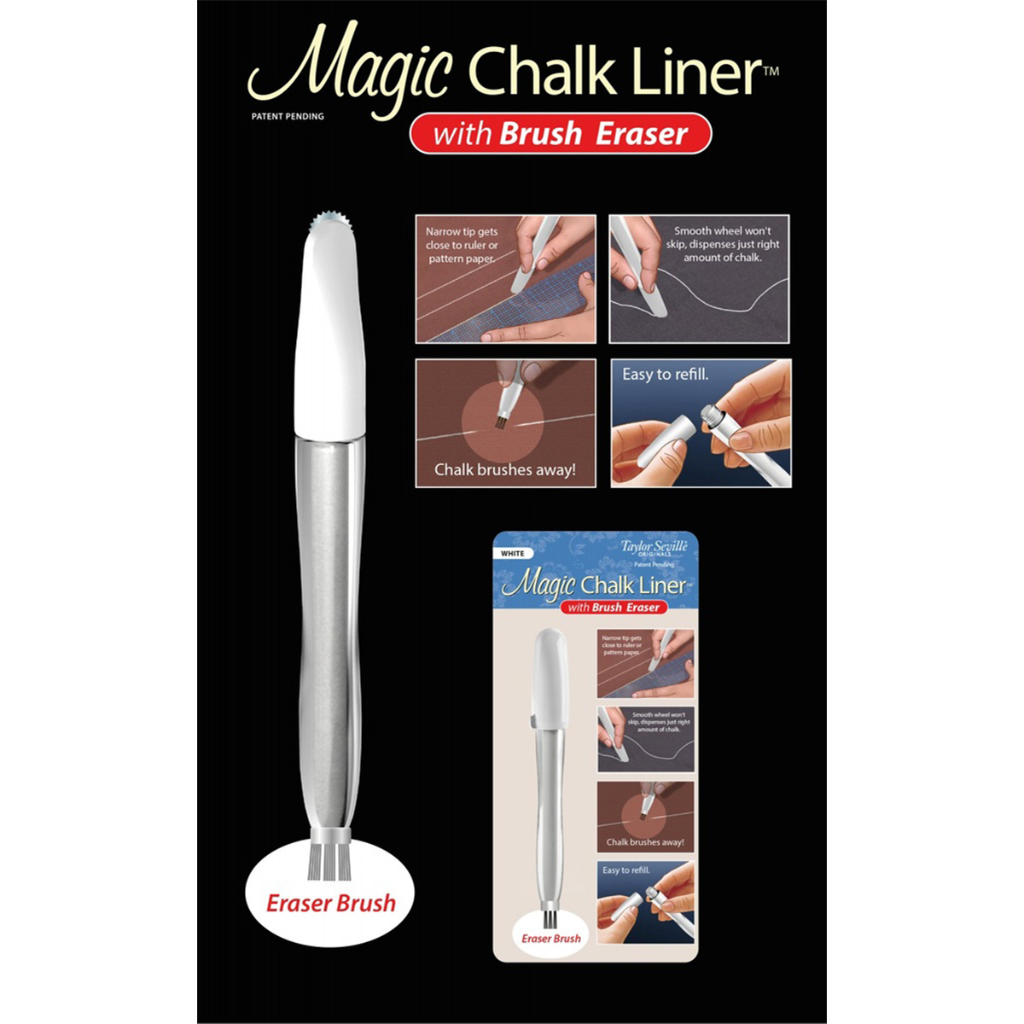
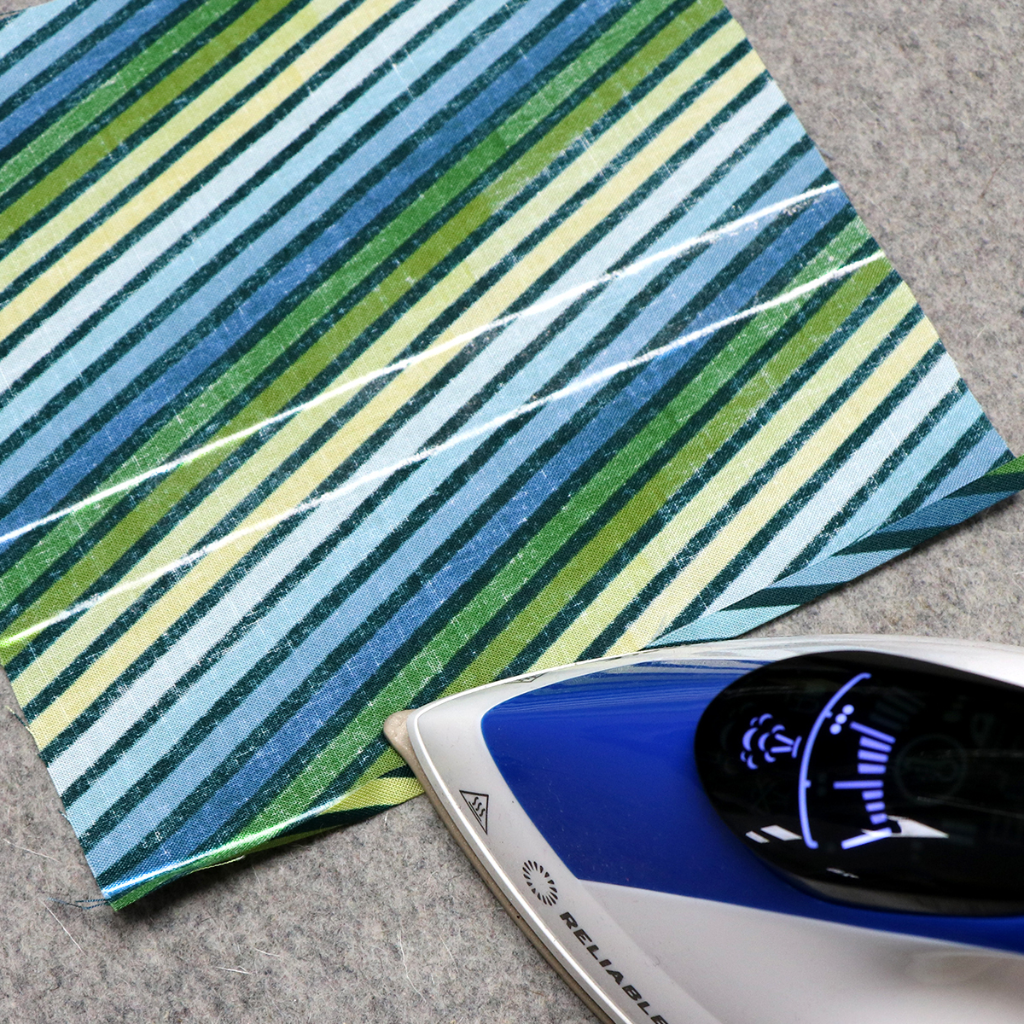
On the backside of the fabric square, chalk three horizontal lines: one 1/2" from the top edge, another halfway down the square, and one 3/4" above the halfway line to mark the ribbon channel for 1/2" ribbon. We used the Magic Chalk Liner with Brush Eraser for this task. It glides easily along a ruler for fast and accurate marking.
Fold the top edge over to line up with the 1/2" chalked line, and press. This will give the top edge a nice 1/4" fold.
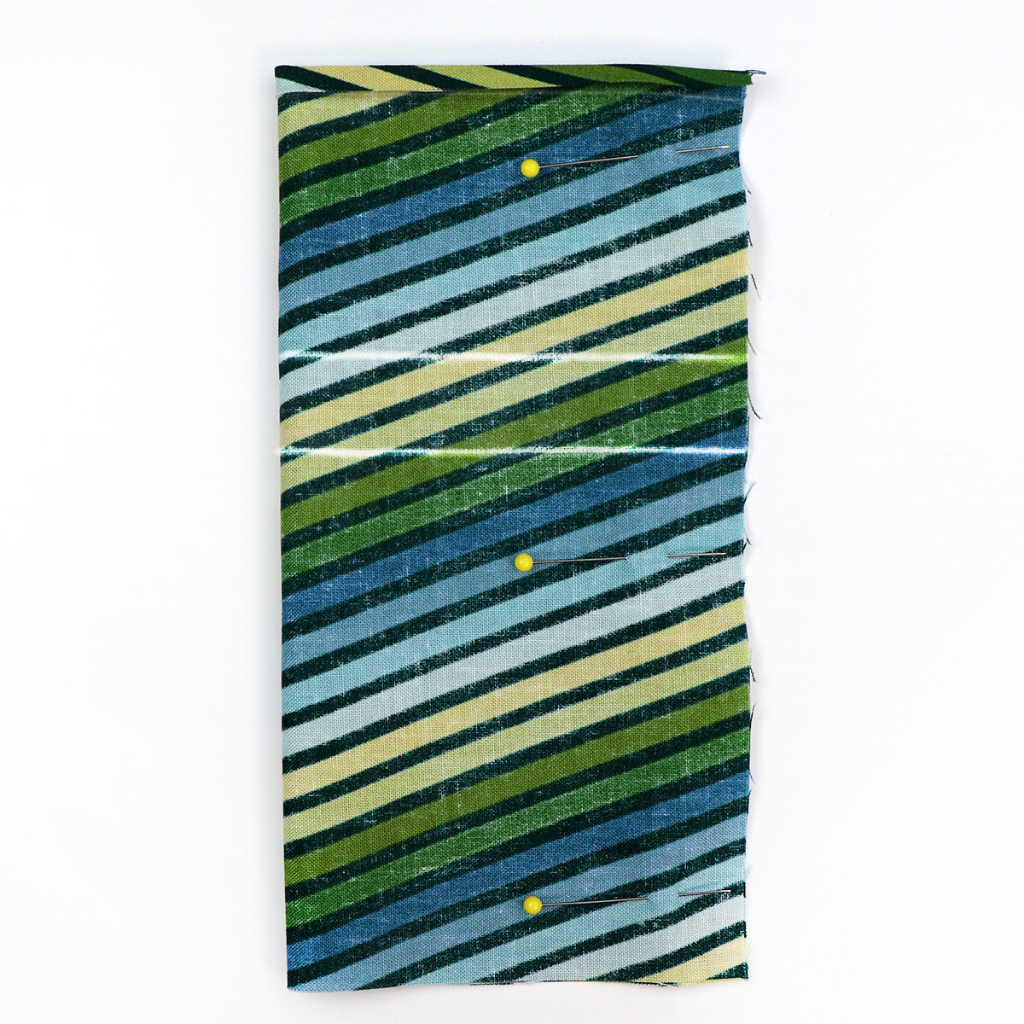
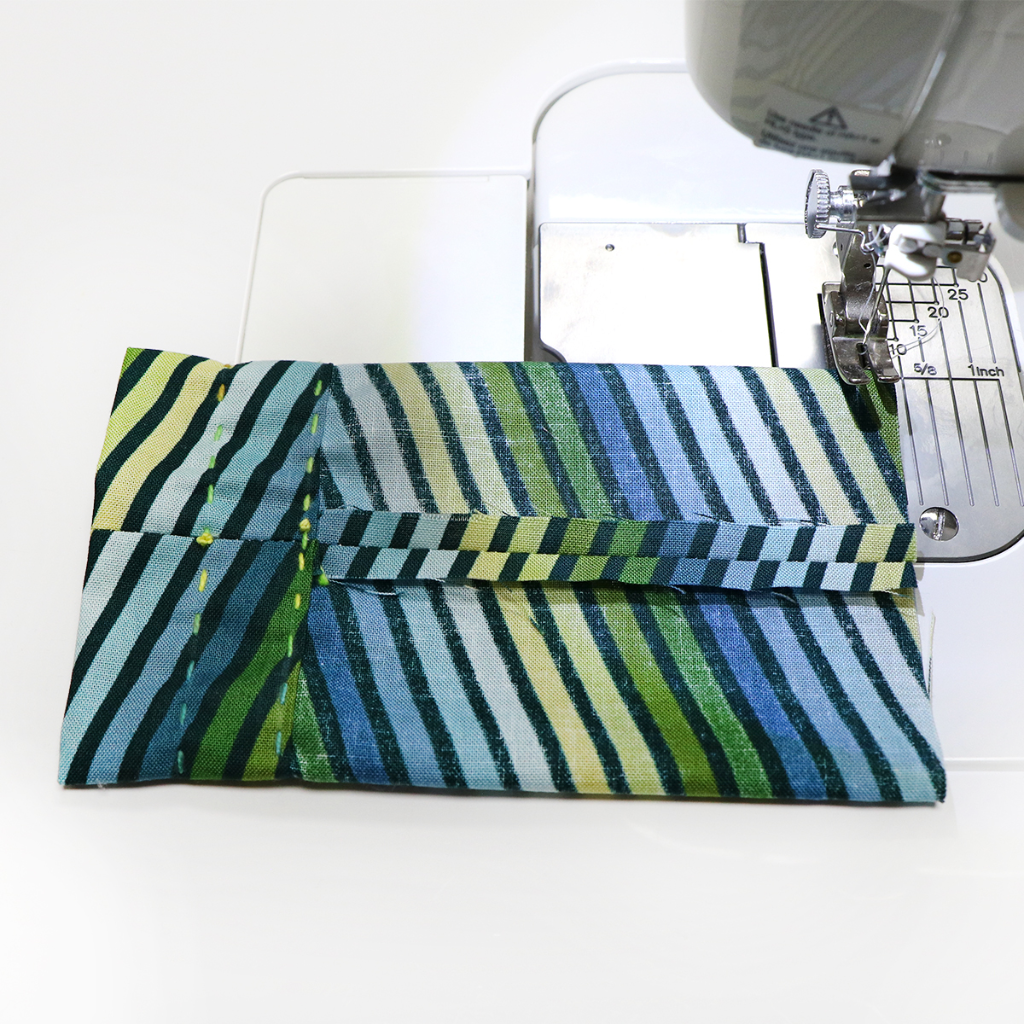
Fold the square in half (right sides facing) as shown, and pin in place.
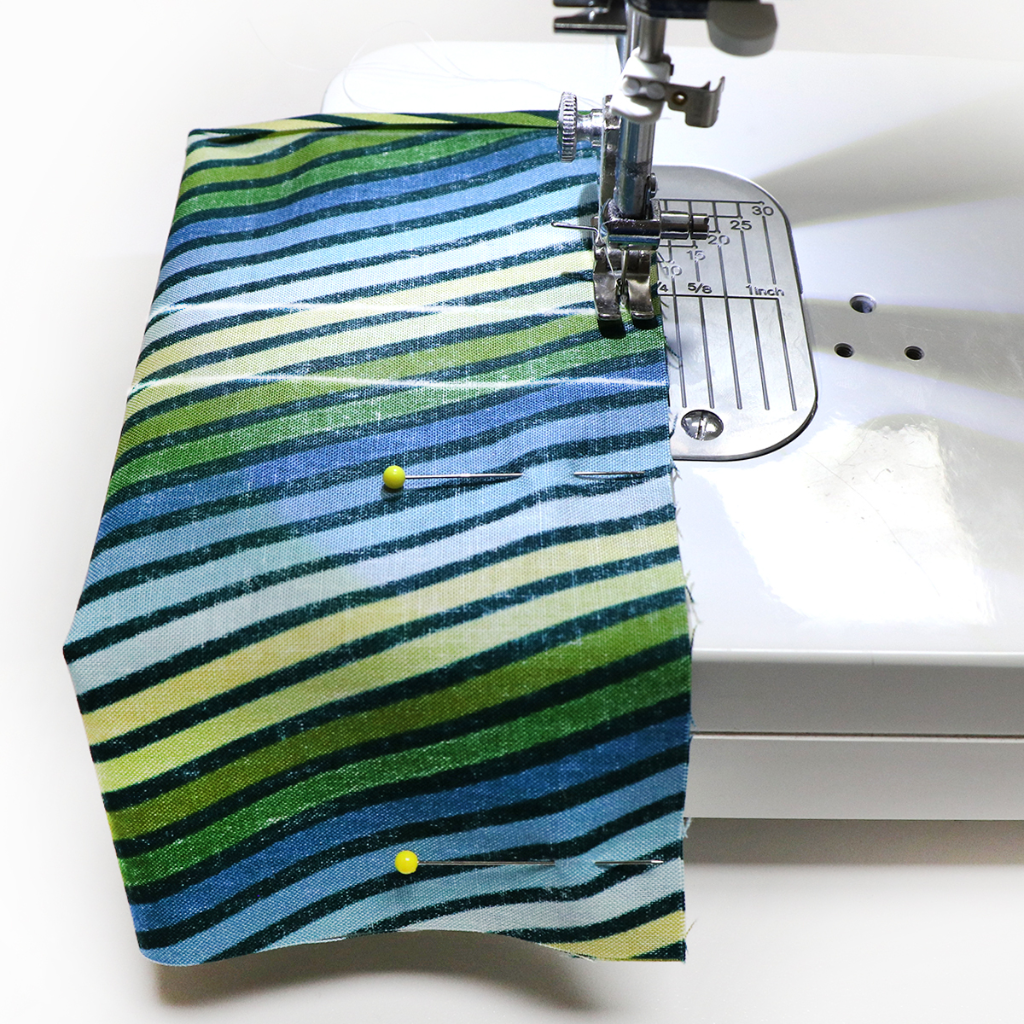
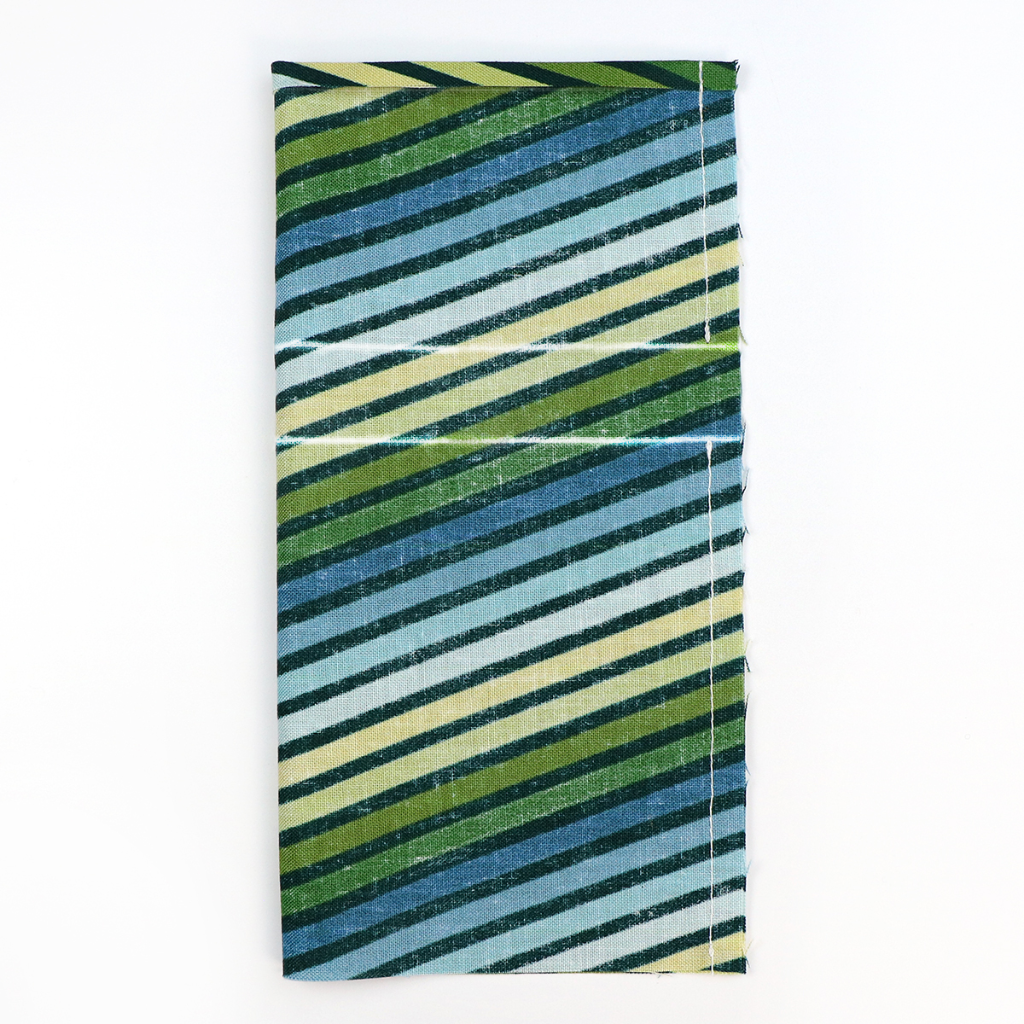
Sew a 1/4" seam down the long, open side. Skip over the 3/4" ribbon channel, and be sure to backstitch at each stop and start.
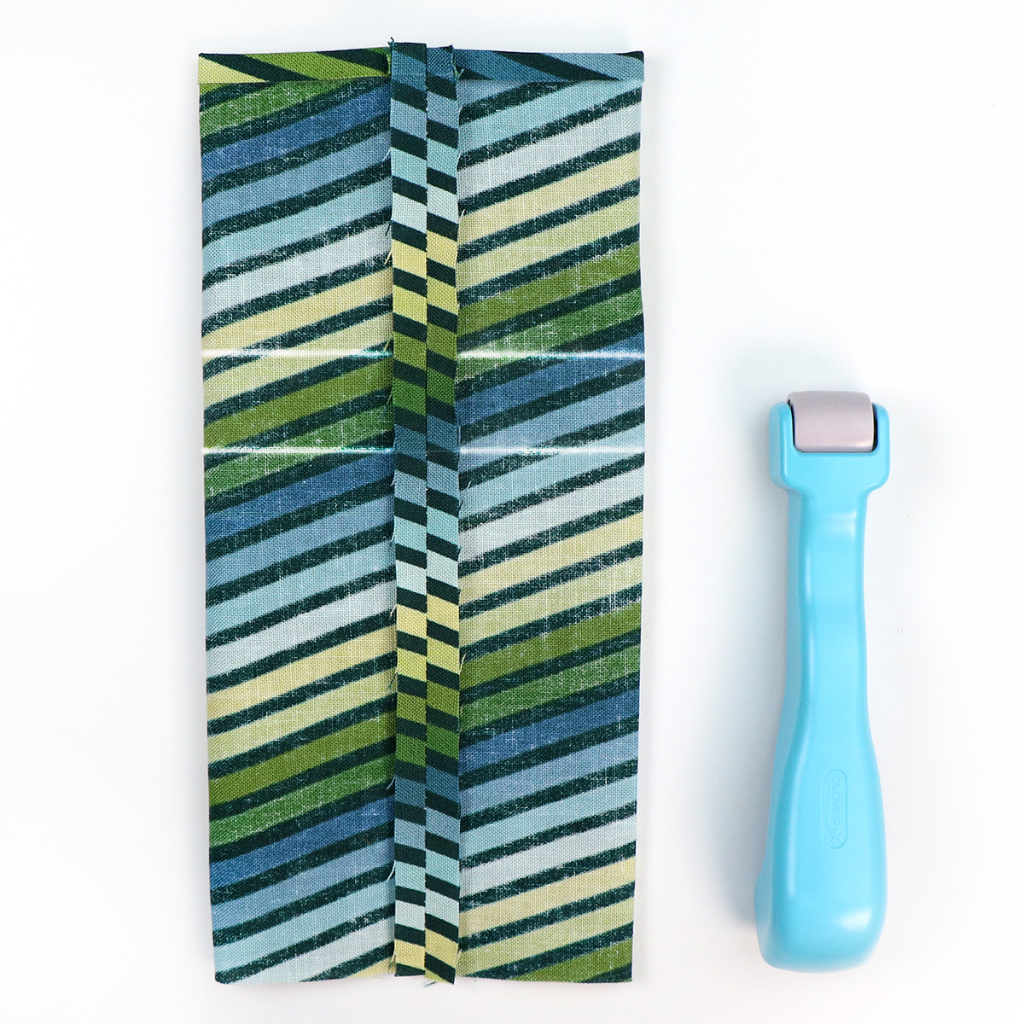
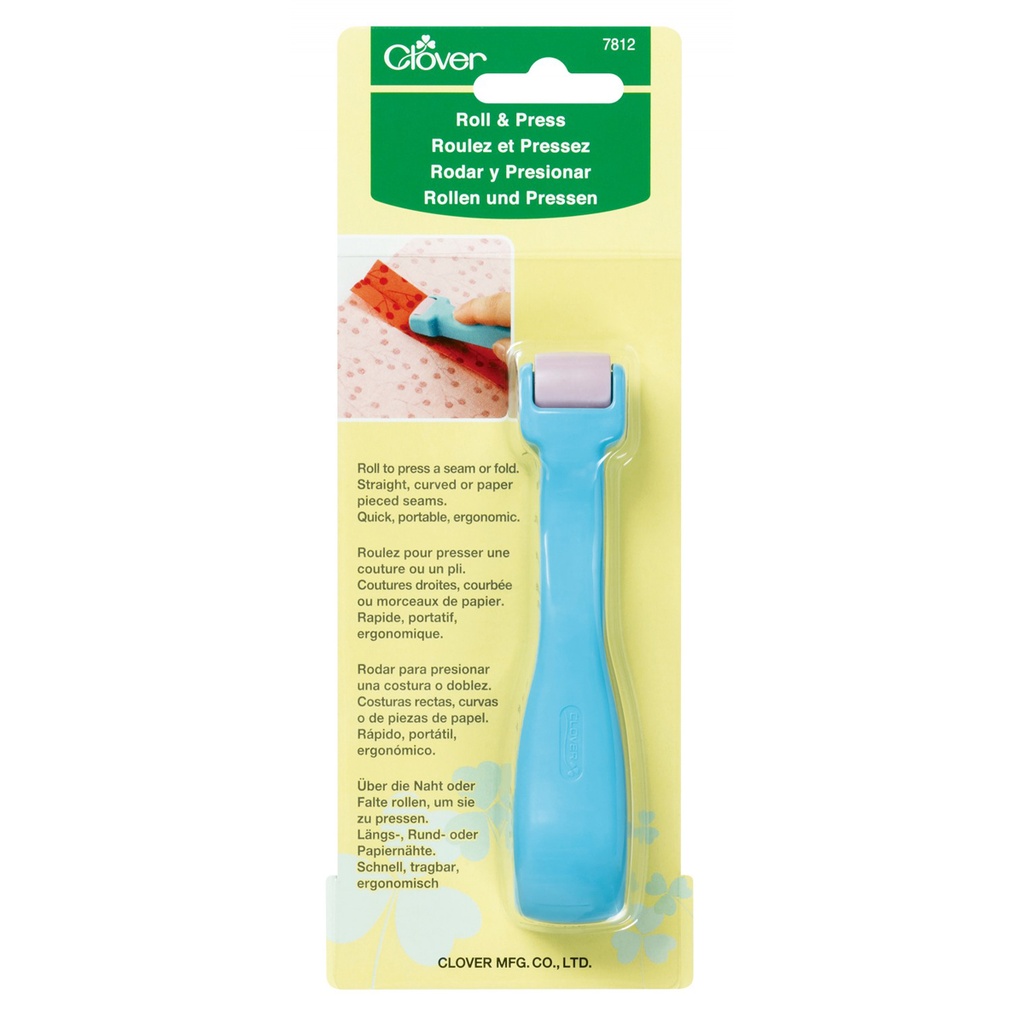
Press the seam open with an iron or a handy Roll and Press.
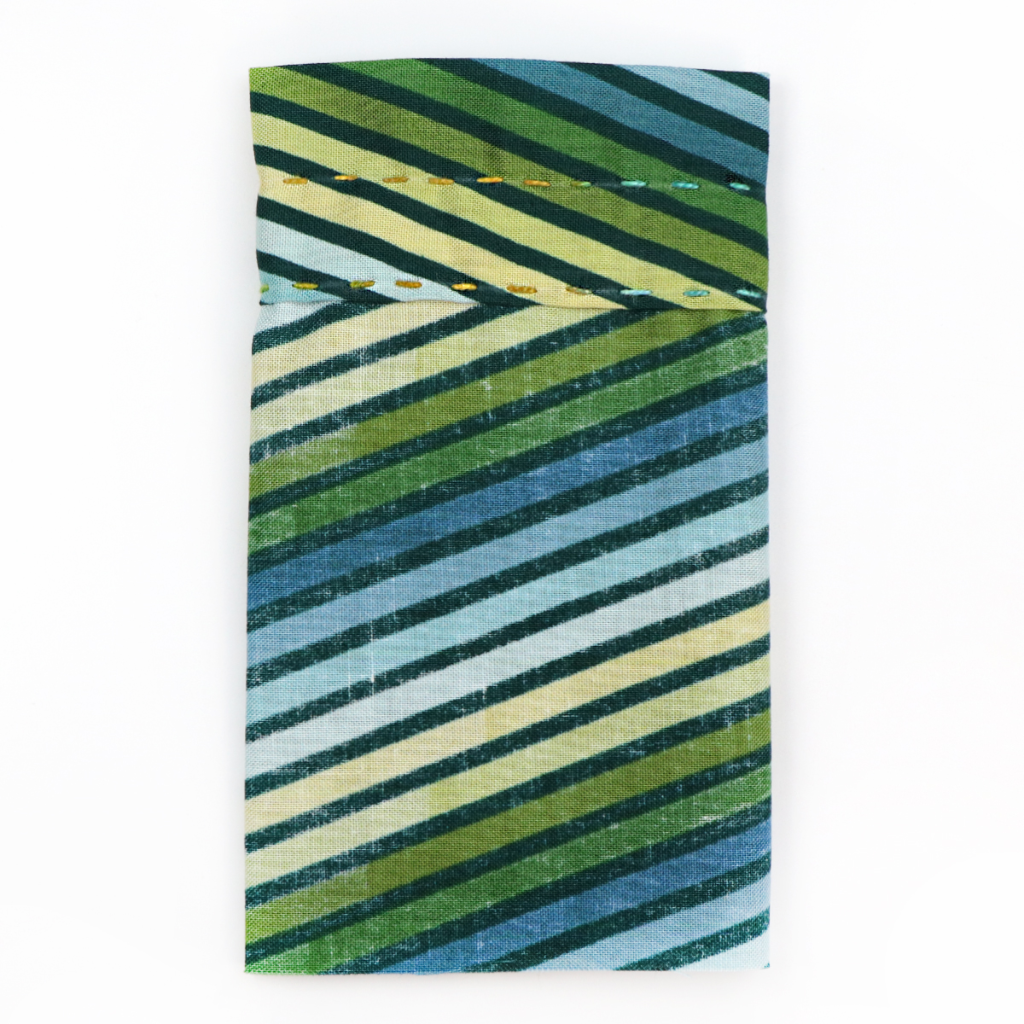
Fold the top edge over until it just covers the halfway line.

Press the top edge with an iron or the Roll and Press.
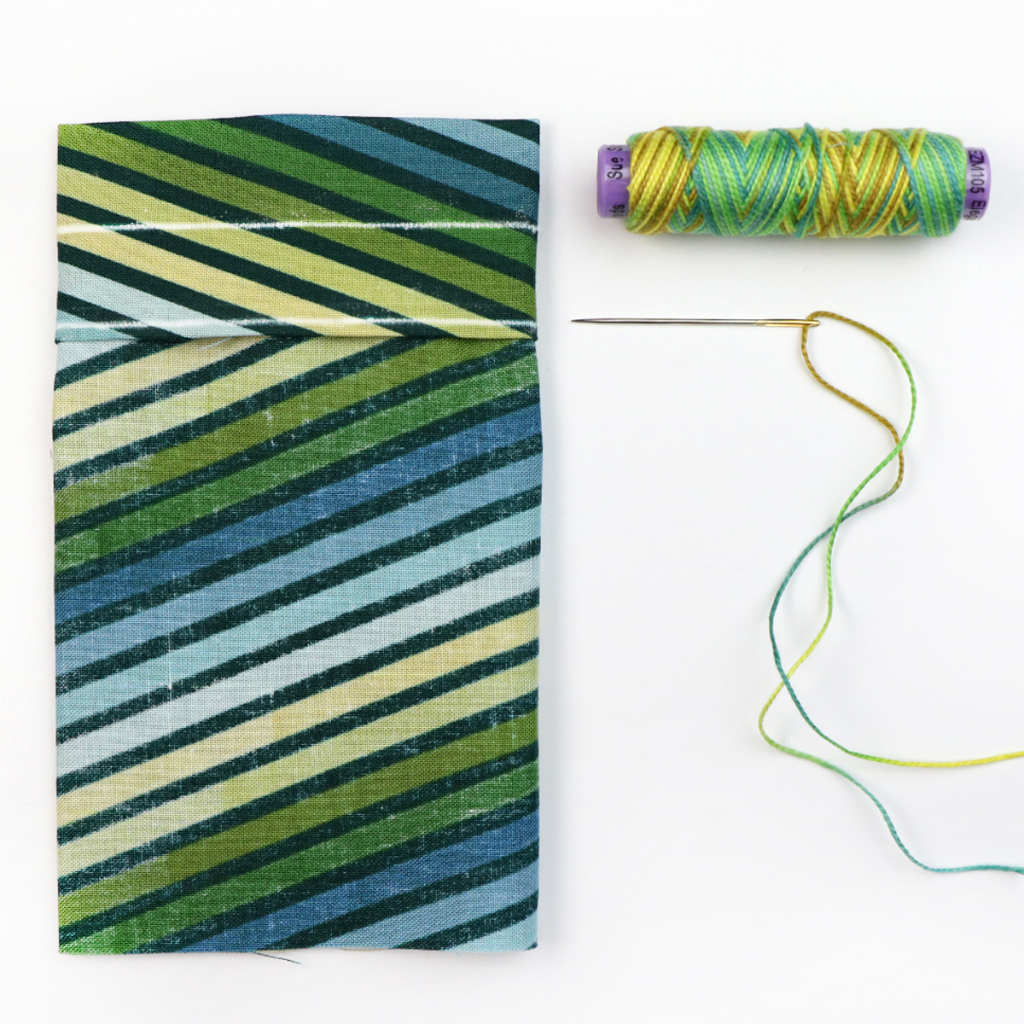
Next, chalk a line 1/8" above the bottom edge of the folded-over section and another line 3/4" above that line to mark where the ribbon channel is. Flip the bag over to continue the chalk lines. Choose a coordinating #5 Eleganza thread to hand stitch a running stitch along the ribbon channel. We used a Gold Eye #18 Chenille Needle with #5 EZM105 Laguna Beach.
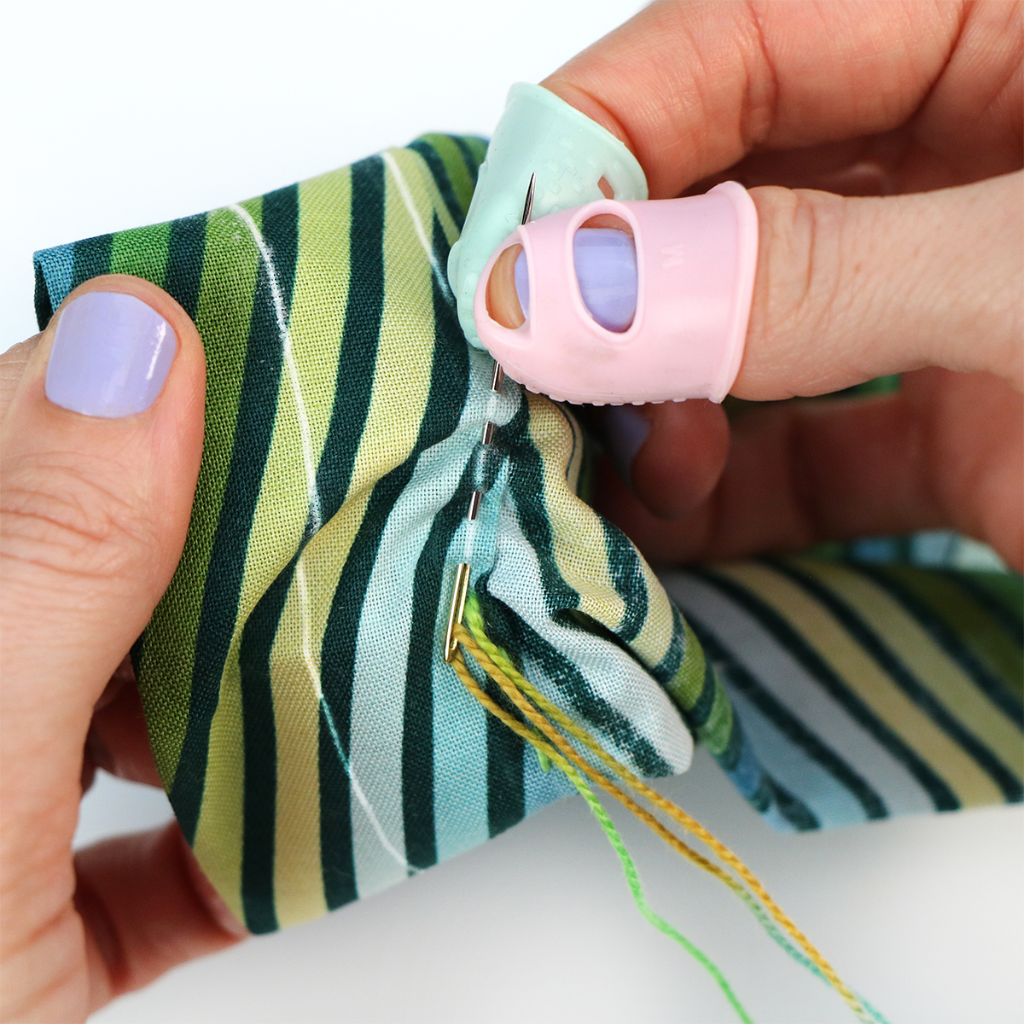
To hide the knot, slide the needle between the bag and the folded-over section. Bring it through on the chalked line, and then begin a running stitch that goes through both layers. Stitch all the way around the circumference of the bag on both chalked lines. It can be very helpful to wear Silicone Needle Pullers on your fingertips as you hand stitch.
Almost done! It's now time to sew the bottom closed, but first you will need to decide whether you would like the ribbon to tie on the front or the side of the gift bag.

For a front-tying ribbon, center the seam before sewing a 1/4" seam along the bottom edge.
For a side-tying ribbon, move the seam to the side of the bag before sewing a 1/4" seam along the bottom edge.

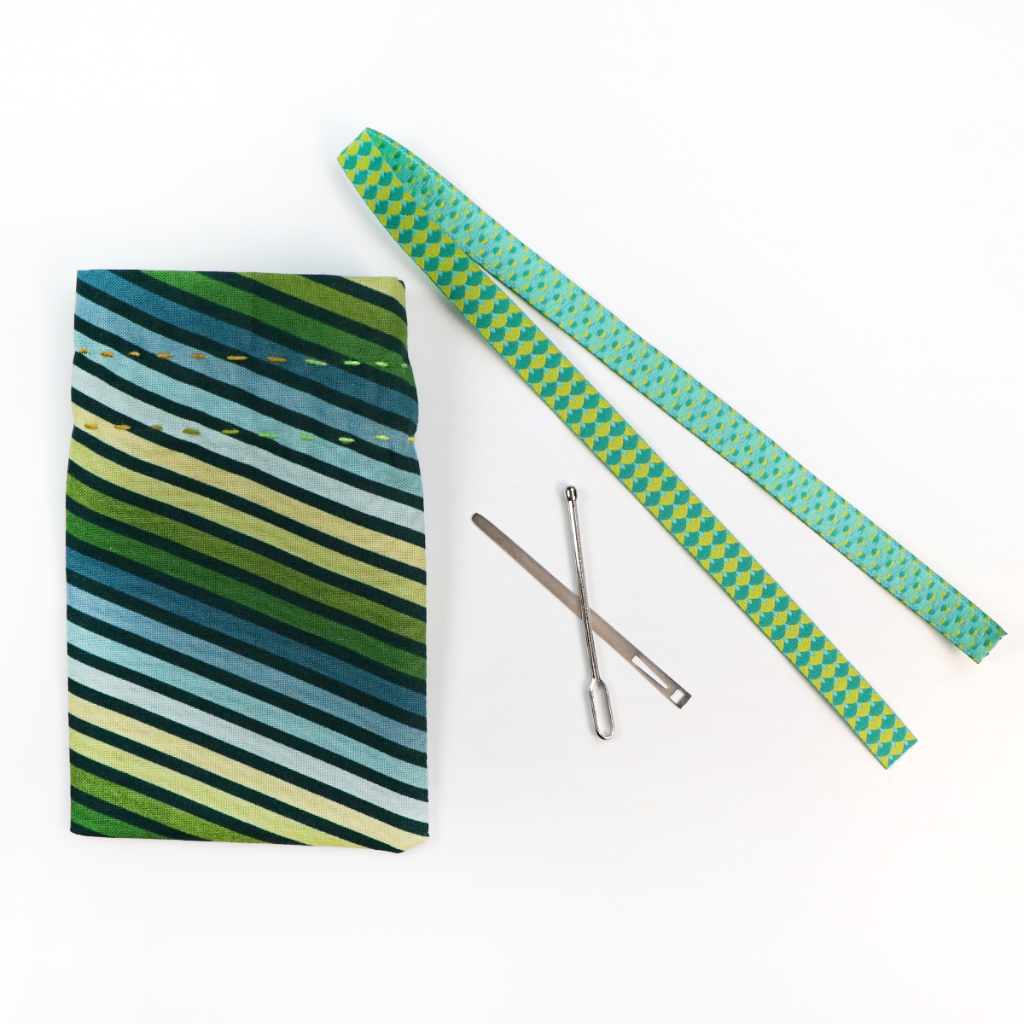
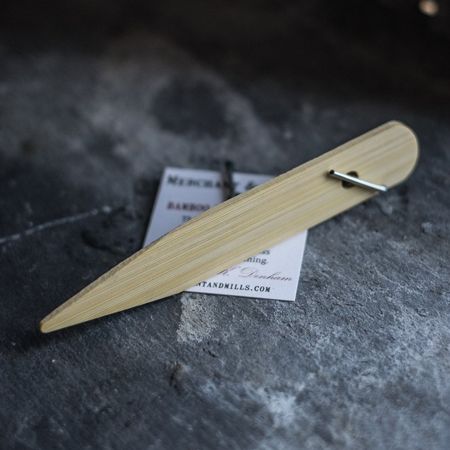
Flip the gift bag right side out. The Bamboo Point Turner is great to have on hand and use in the corners.
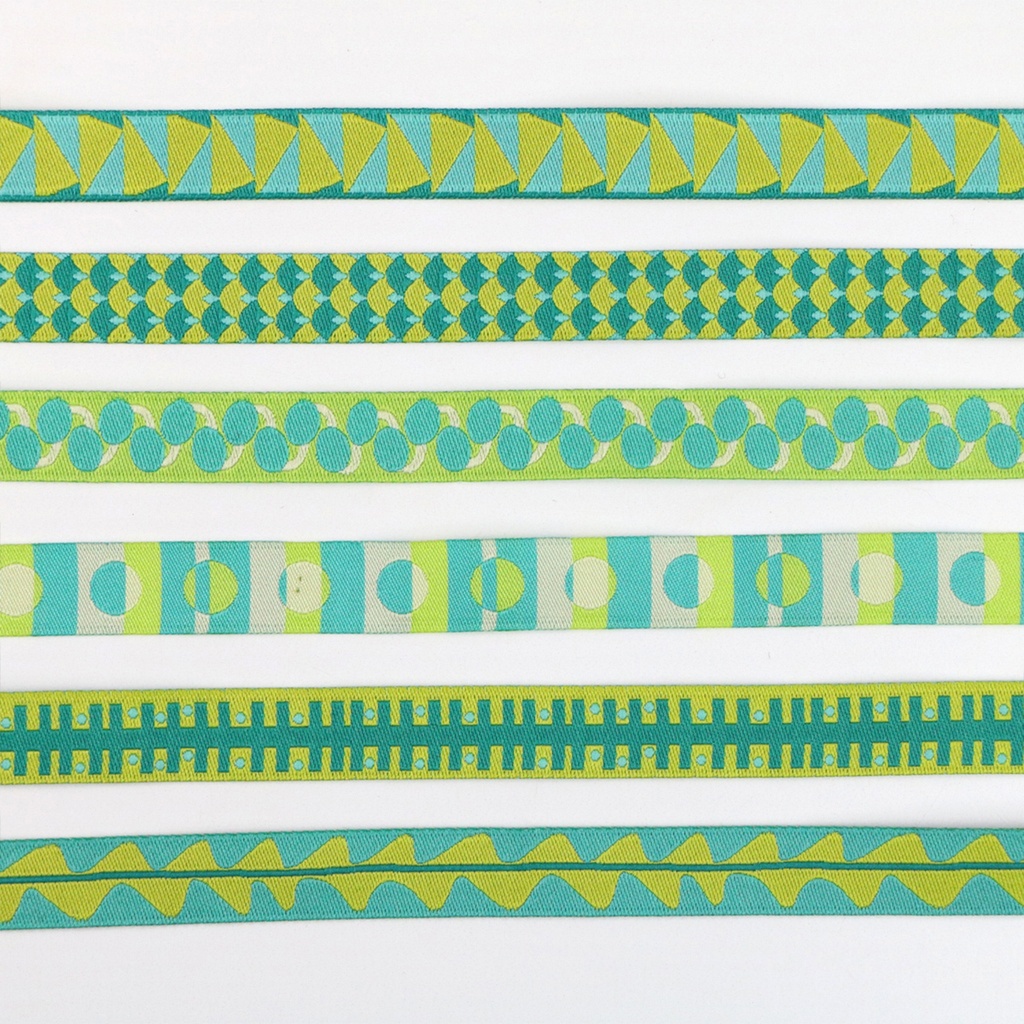
Choose a coordinating 1/2" ribbon for your bag.
Small bag (made out of an 8" x 8" fabric square) = 1/2 yard of ribbon.
Medium bag (made out of a 12" x 12" fabric square) = 3/4 yard of ribbon.
Large bag (made out of a 16" x 16" fabric square) = 1 yard of ribbon.
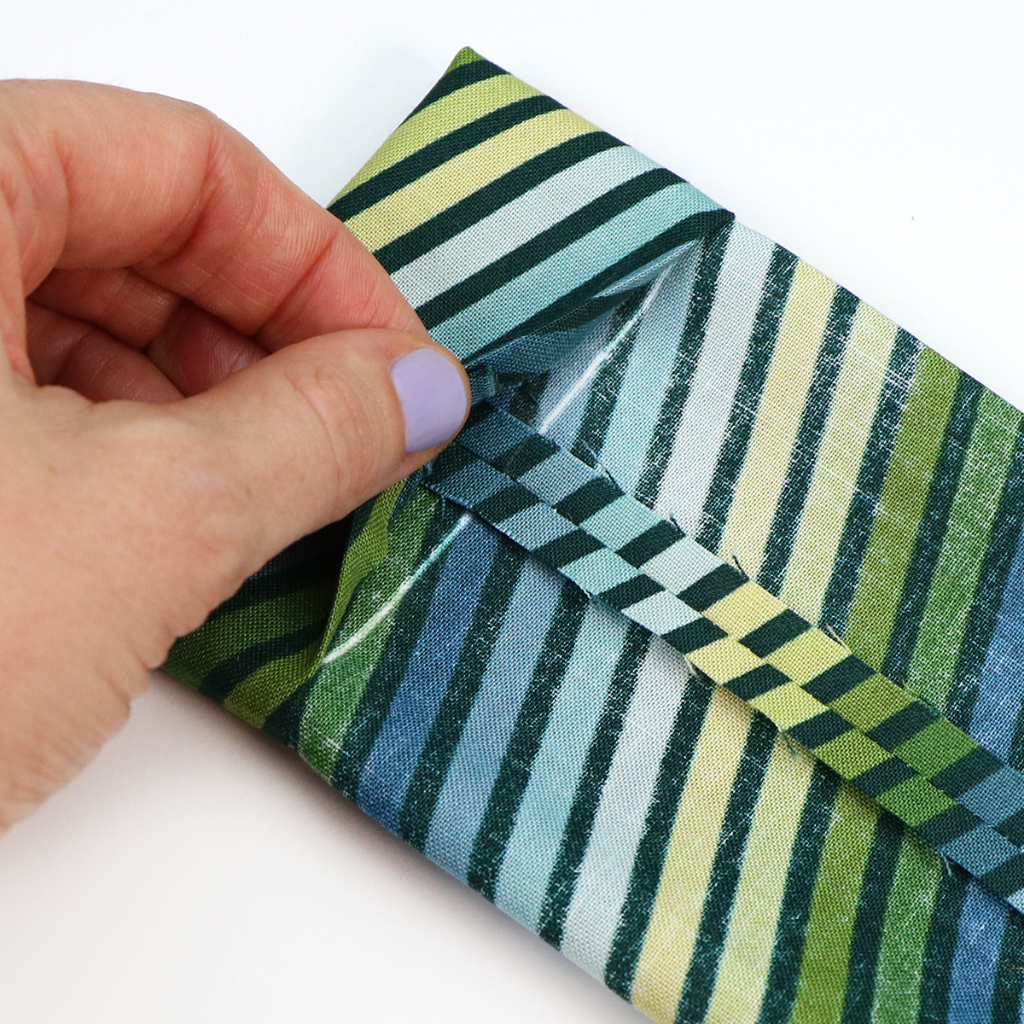
A Bodkin & Threader will make pulling the ribbon through the channel a piece of cake.

With the ribbon looped through the bodkin, insert it into the opening of the ribbon channel and work it through to the other end.
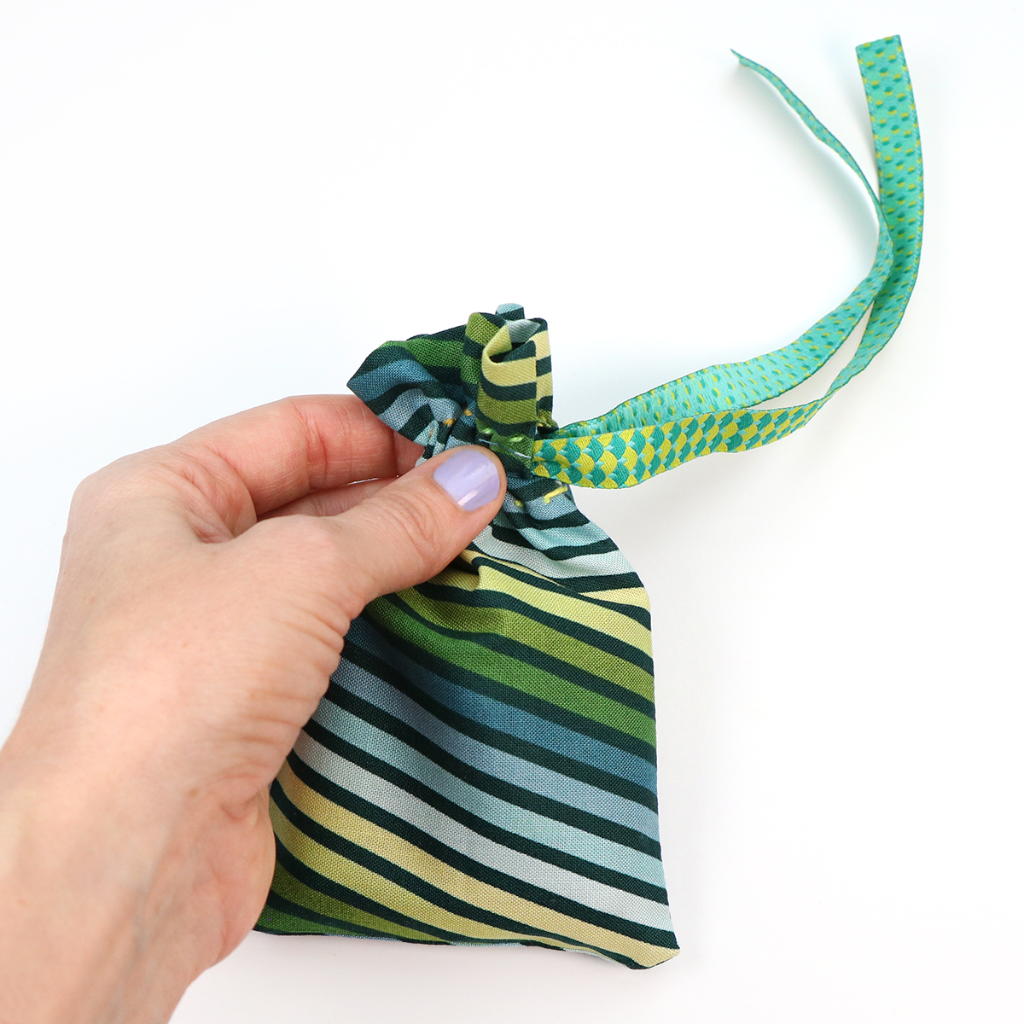
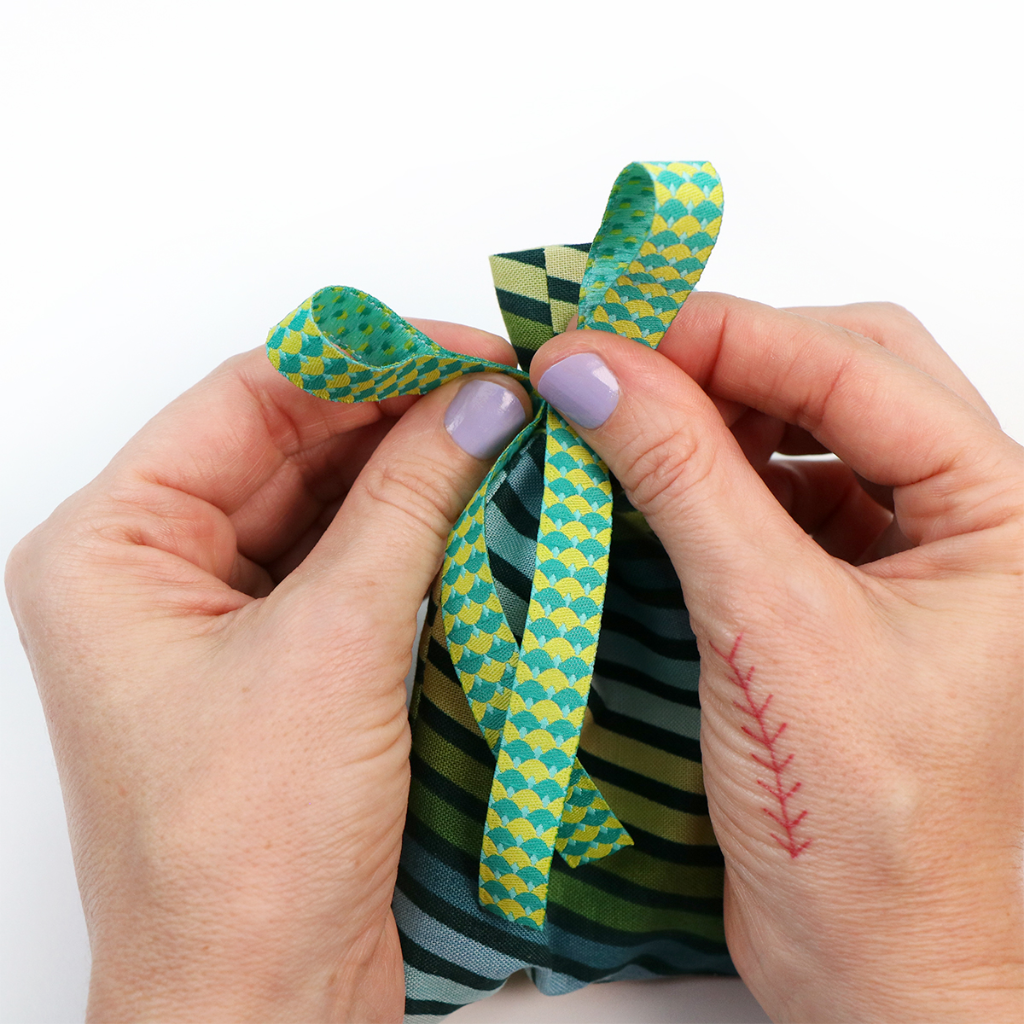
Fill your gift bag with goodies, and then match up the ends of the ribbon and cinch the bag closed. Use the bunny-ear method to tie a cute bow.
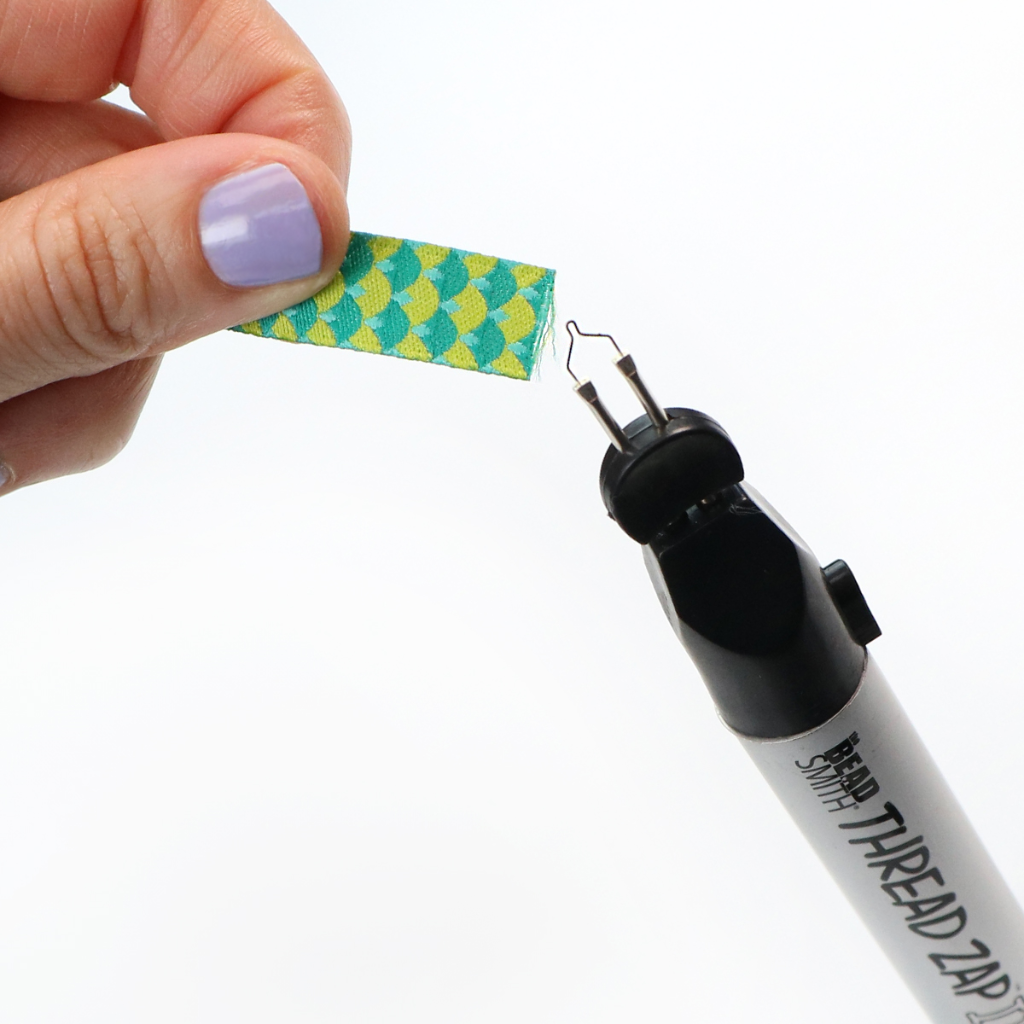
To finish off your adorable little bag, use a Thread Zap to quickly clean up any frayed ribbon ends.
Create