Dorset buttons are not a new craft, but one that has been around for hundreds of years. In the early 1600s, Abraham Case introduced the "buttony trade" to Dorset, England, which employed a great number of the country's local women and children for generations to come. These delicate, soft buttons were made with a ring of horn and tufts of wool from Dorset sheep. At one point, Dorset buttons were widely known and exported abroad to the United States, Canada, Australia, and Europe. However, the Industrial Revolution introduced us to the buttons that we are more familiar with today: mass-produced plastic, metal, and ceramic buttons.
Although many of today's buttons are great in their own way, there is something special about a handwoven Dorset button. The intricacies and variations make them great additions to projects. One of Sue's favorite applications of Dorset buttons is to utilize them as flowers; however, the possibilities are endless! Follow along as we go through the steps of how to create one style of these gorgeous buttons.
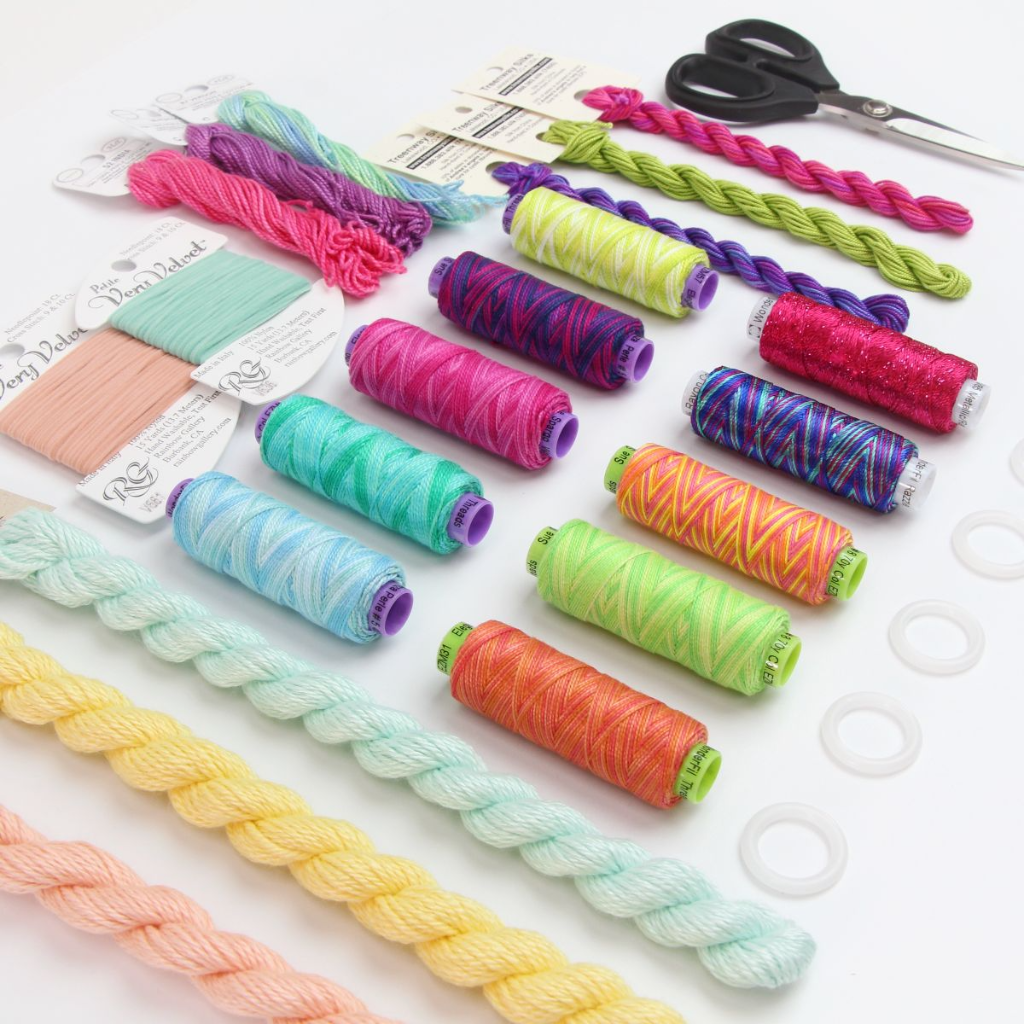
To make our Blandford Cartwheel Dorset button, we used:
- Plastic Bone Rings
- #24 Tapestry Needle
- #20 Tapestry Needle
- 5-1/2" Kai Scissors
- Thread - We used #3 Eleganza Fuchsia Fever (EZ22). Experiment with different types, textures and weights of thread. Dazzle adds a little sparkle, Petite Very Velvet makes a smooth, "posh" button, and Eleganza variegates make a beautiful striped pattern due to their extra short variegation.
To begin, cut the length of thread that you will be using. This will vary based on the weight of the thread.
Eleganza #3, we cut approx. 2 yards per button
Eleganza #5, we cut approx. 2.5 yards per button
Eleganza #8, we cut approx. 3.5 yards per button
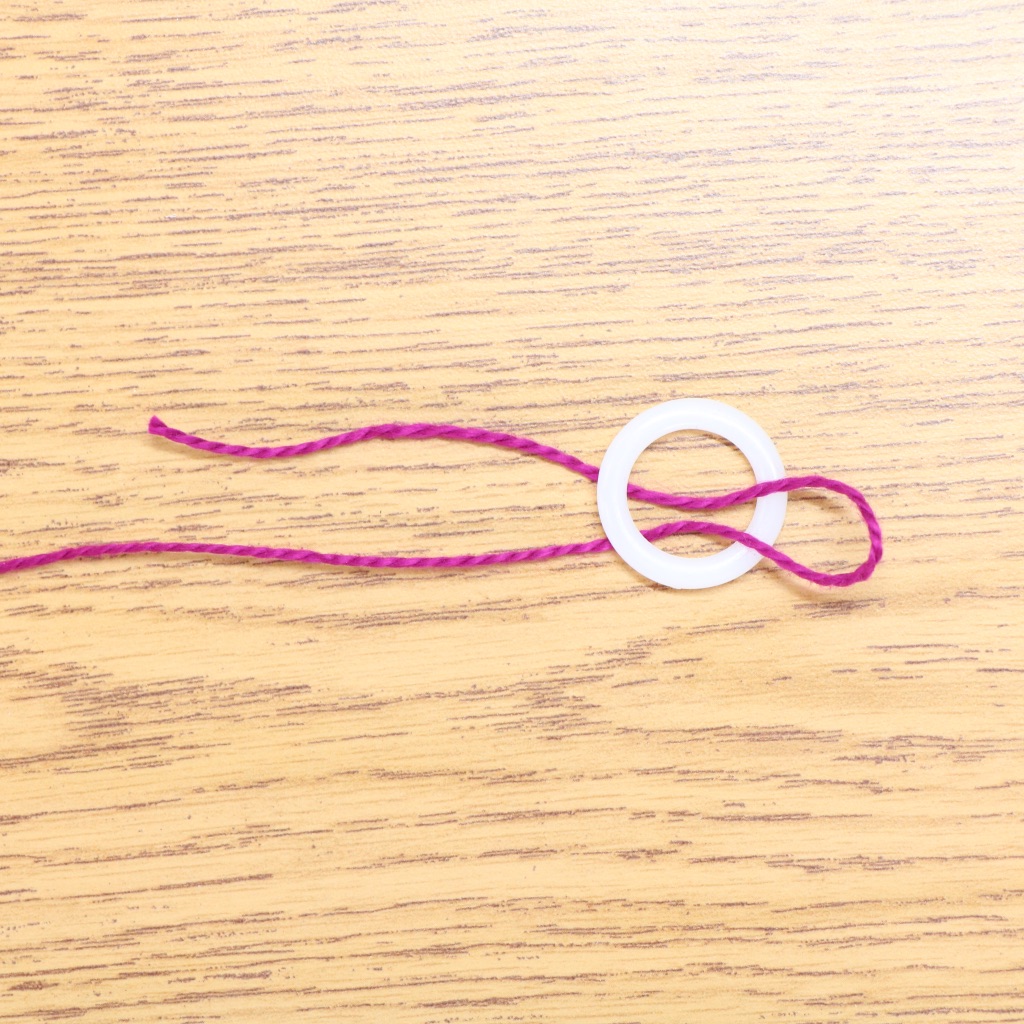
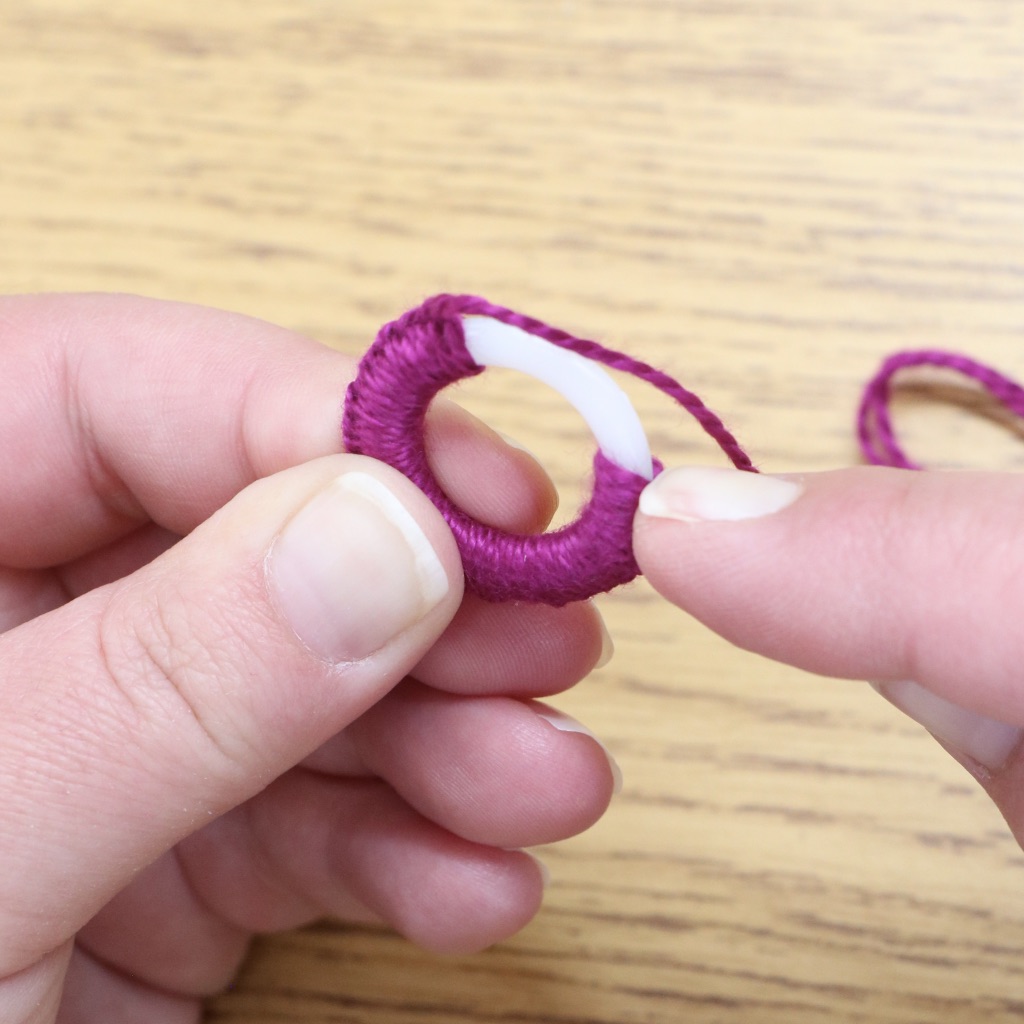
Make a loop toward one end of your thread. You will want one end to be only a few inches long, as we will be trimming it off a few steps later.
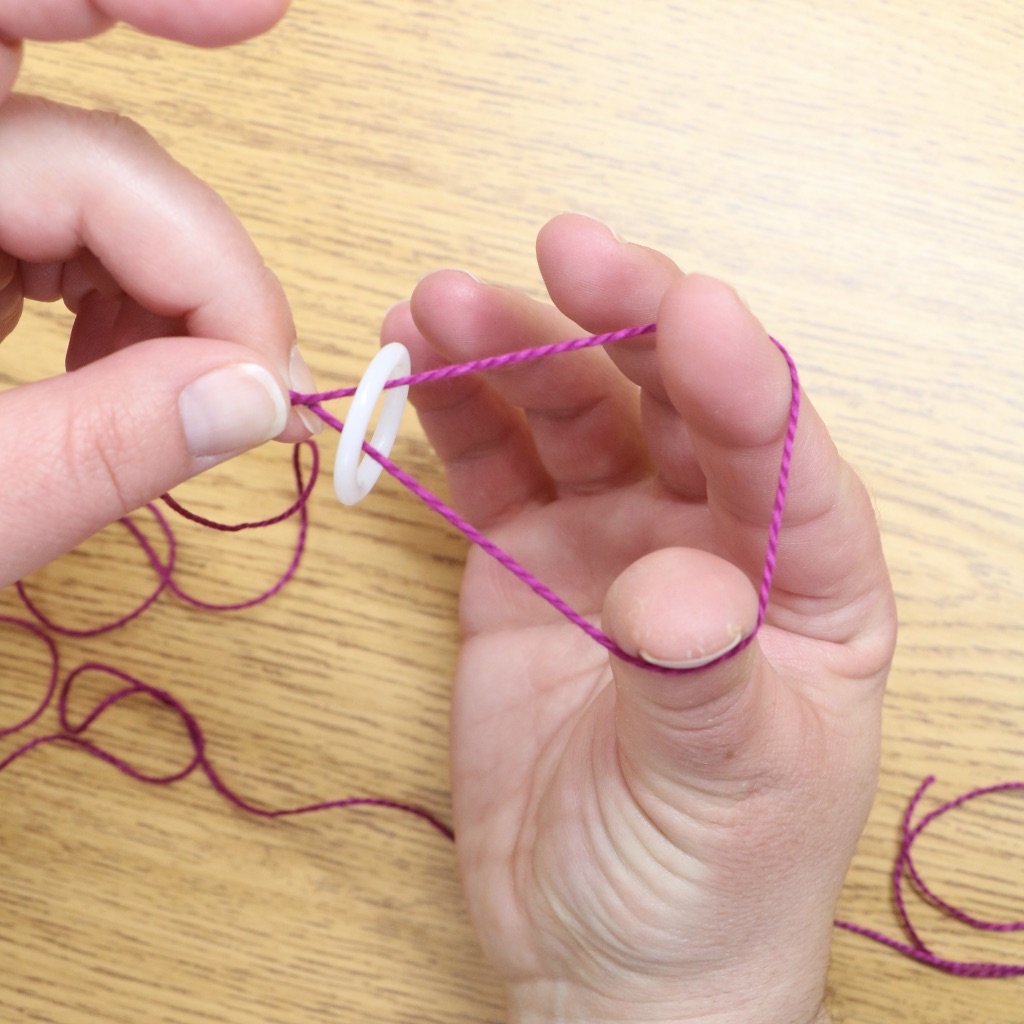
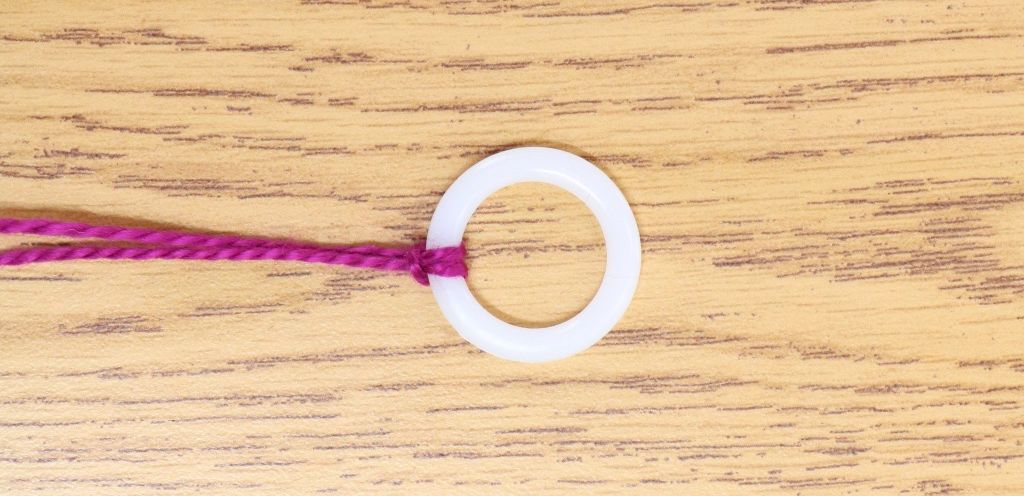
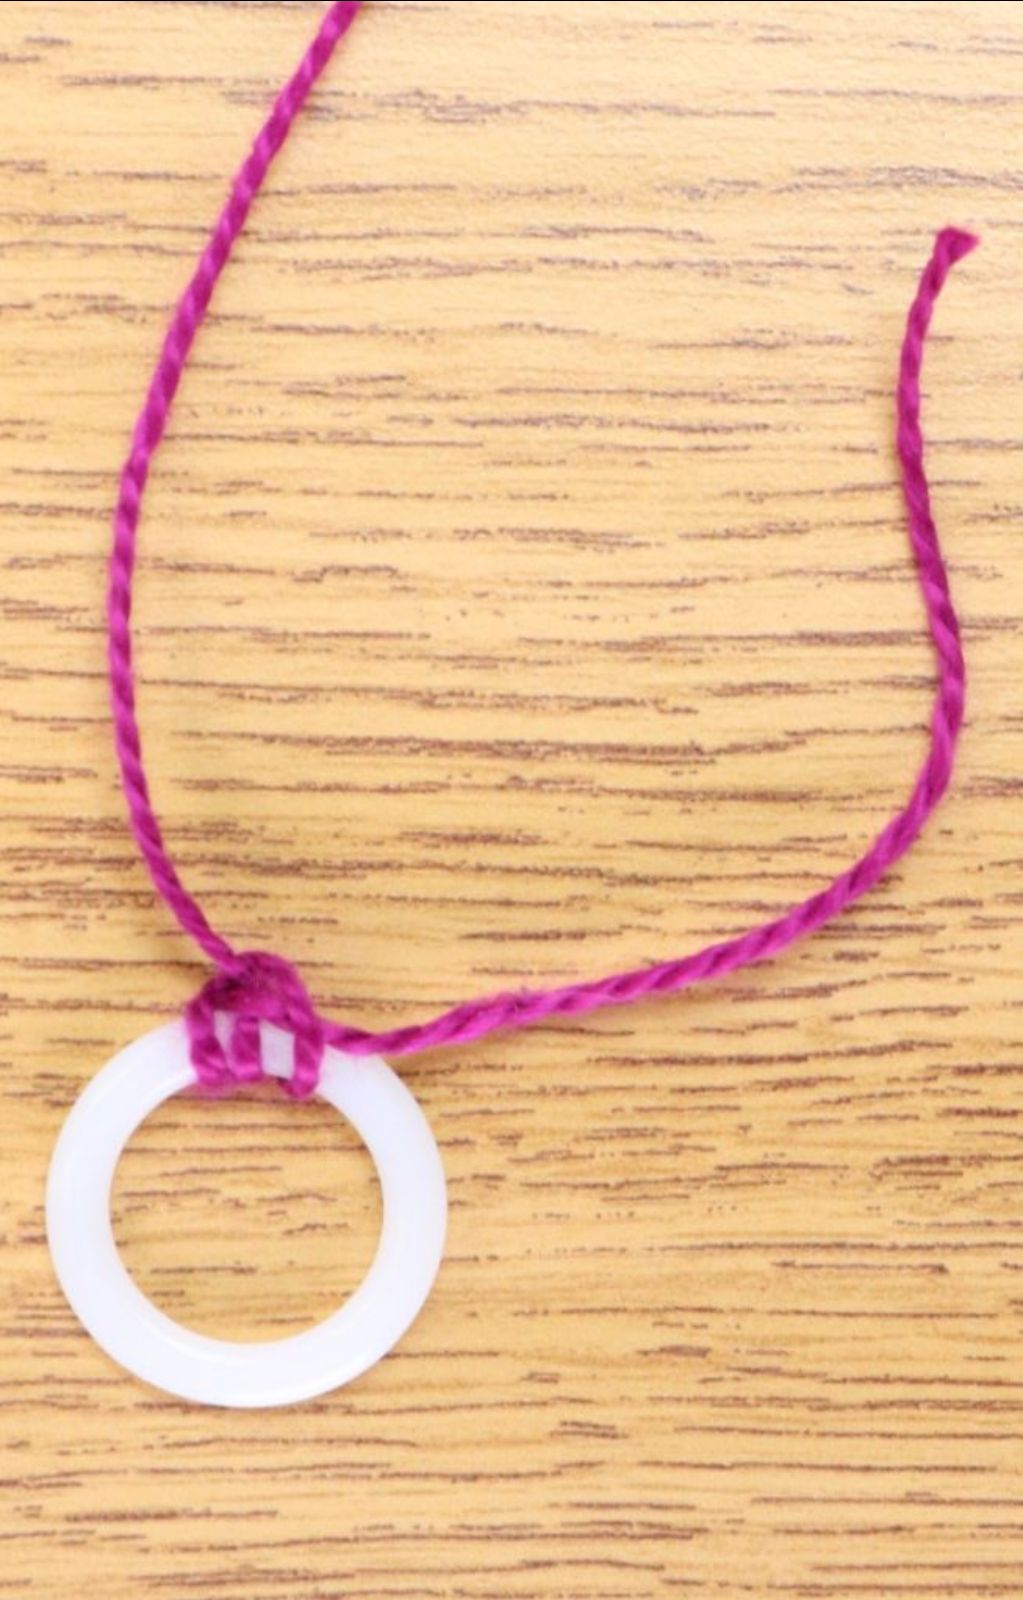
Then, finish securing your thread by making a Lark's Head Knot around the plastic bone ring.
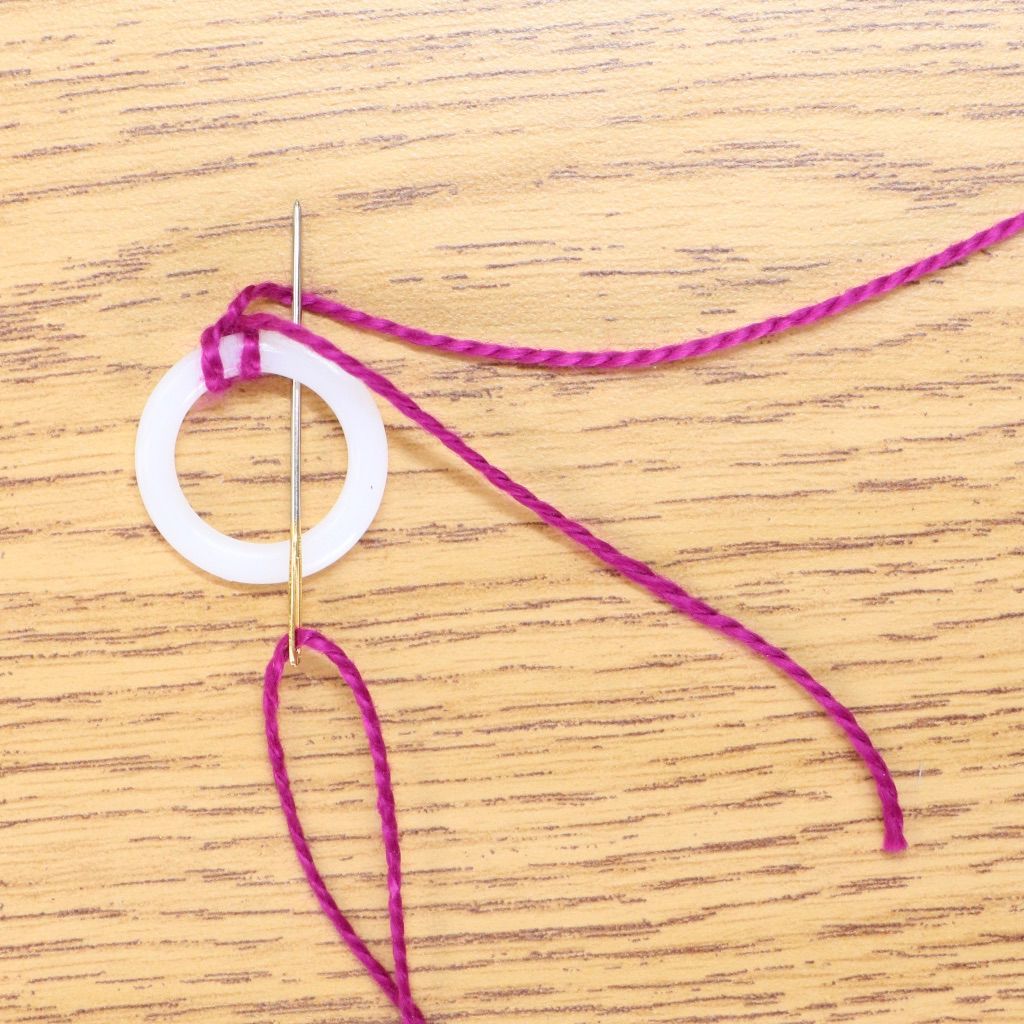
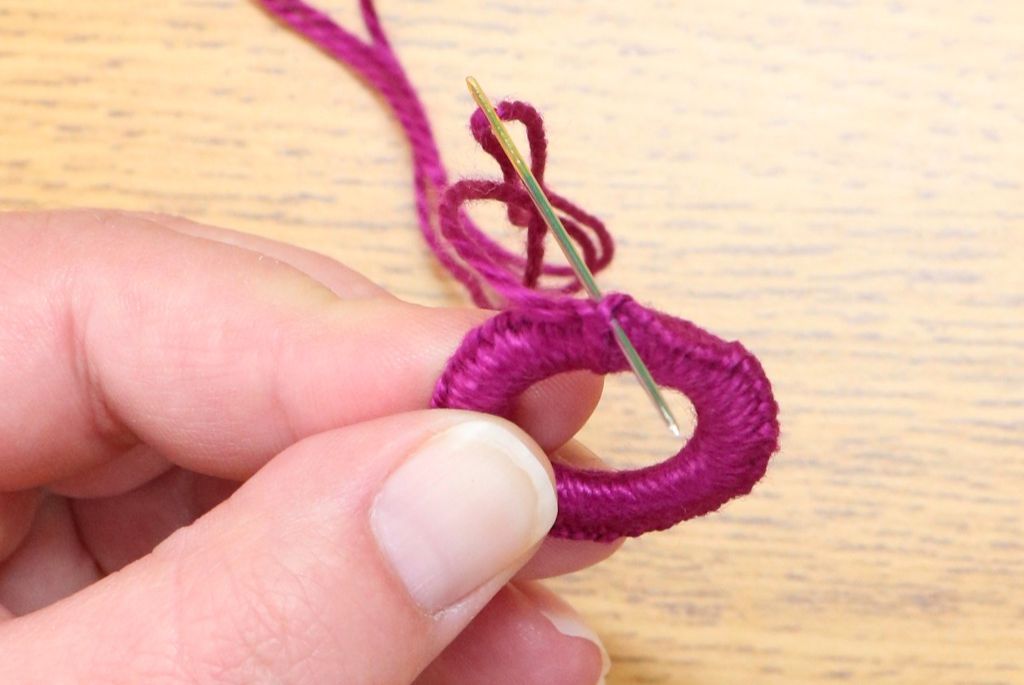
Thread your tapestry needle. Making sure your tail is to the right of the Lark's Head Knot, begin working the blanket stitch by taking your needle through the center of the ring, then over the emerging thread. Making sure to catch your tail beneath the stitch, pull the needle through, keeping your stitch taut.
TIP: Make sure the tail of thread is covered by the blanket stitch. The easiest way to do this is to hold the tail down to the surface of your plastic bone ring while you are stitching, causing the blanket stitch to loop around both the tail and the ring. The photo above demonstrates the way the first stitch should look before pulling it tight.

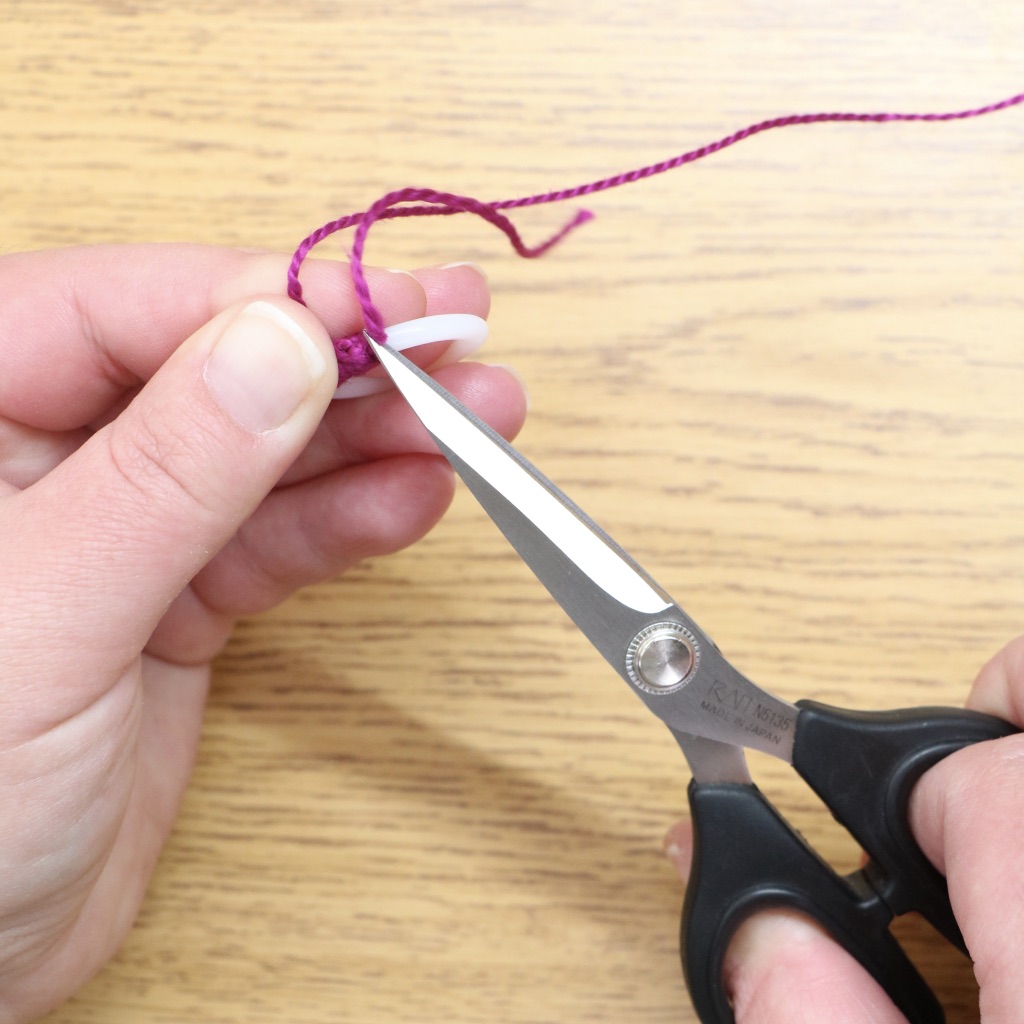
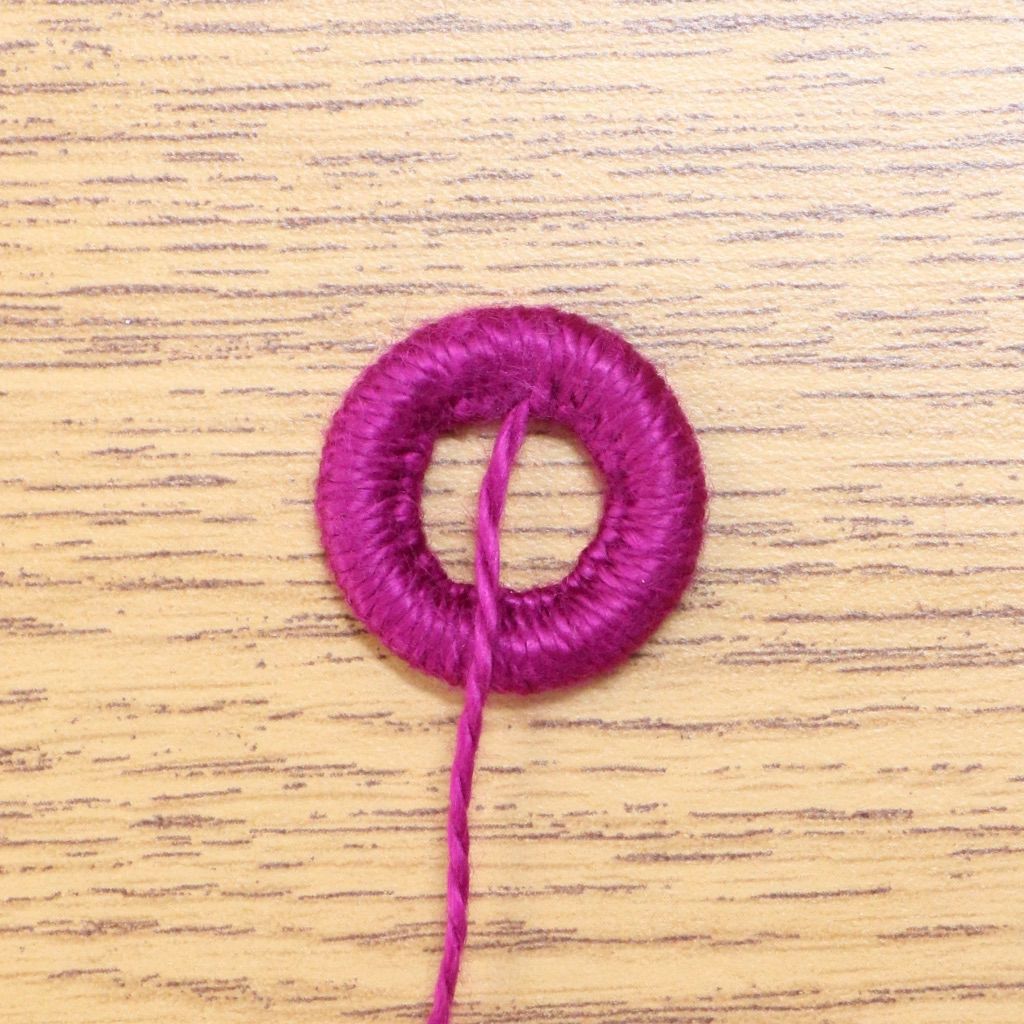
Repeat the blanket stitch until approximately 1/2" of the tail is covered and secured. Trim the excess tail and continue with the blanket stitch all the way around the ring.
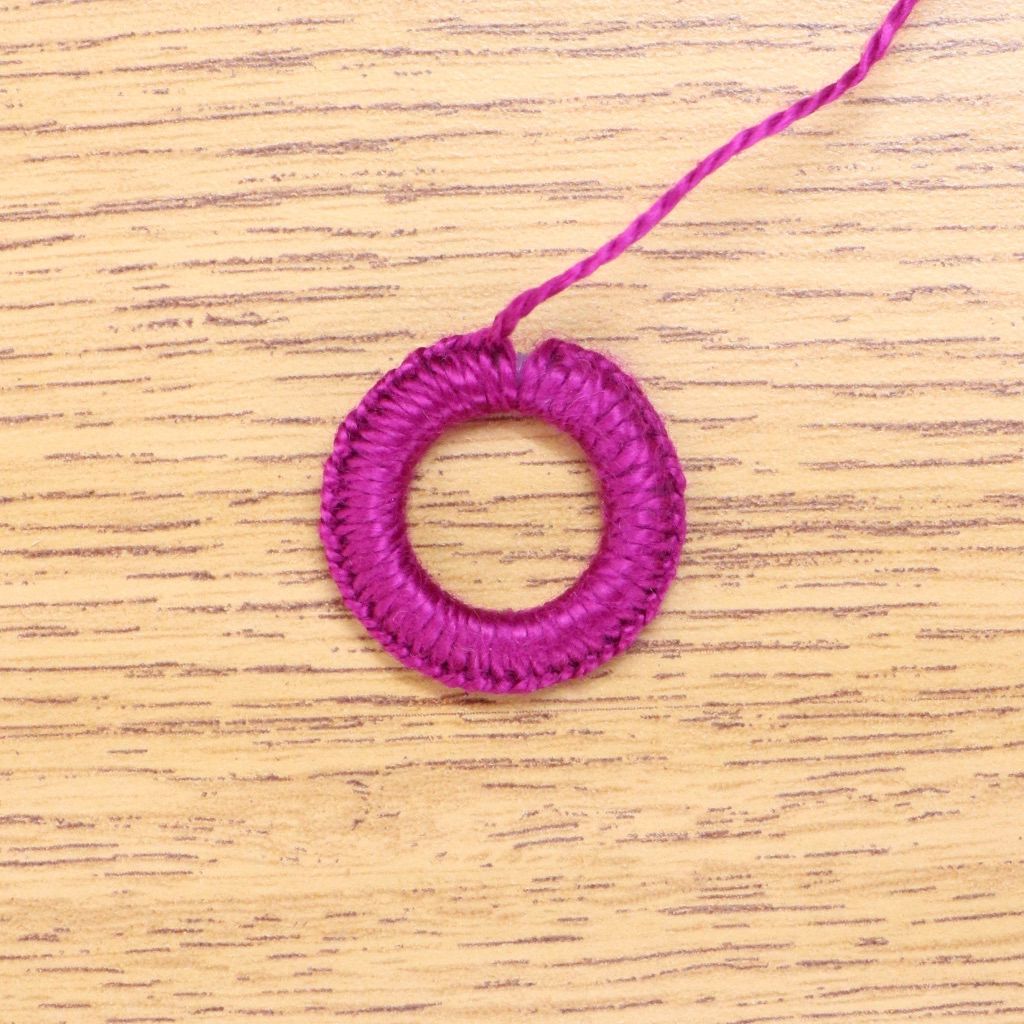
It may seem like you're done with this step once you reach the beginning of your blanket stitches, but not quite! Condense your threads by pushing your first and last blanket stitches apart from each other. Fill in this new area with more blanket stitches, and repeat until you can no longer push the two ends apart. This will make sure that you are tightly filling the ring, preventing the spokes from separating the stitches and any of the plastic from showing through.
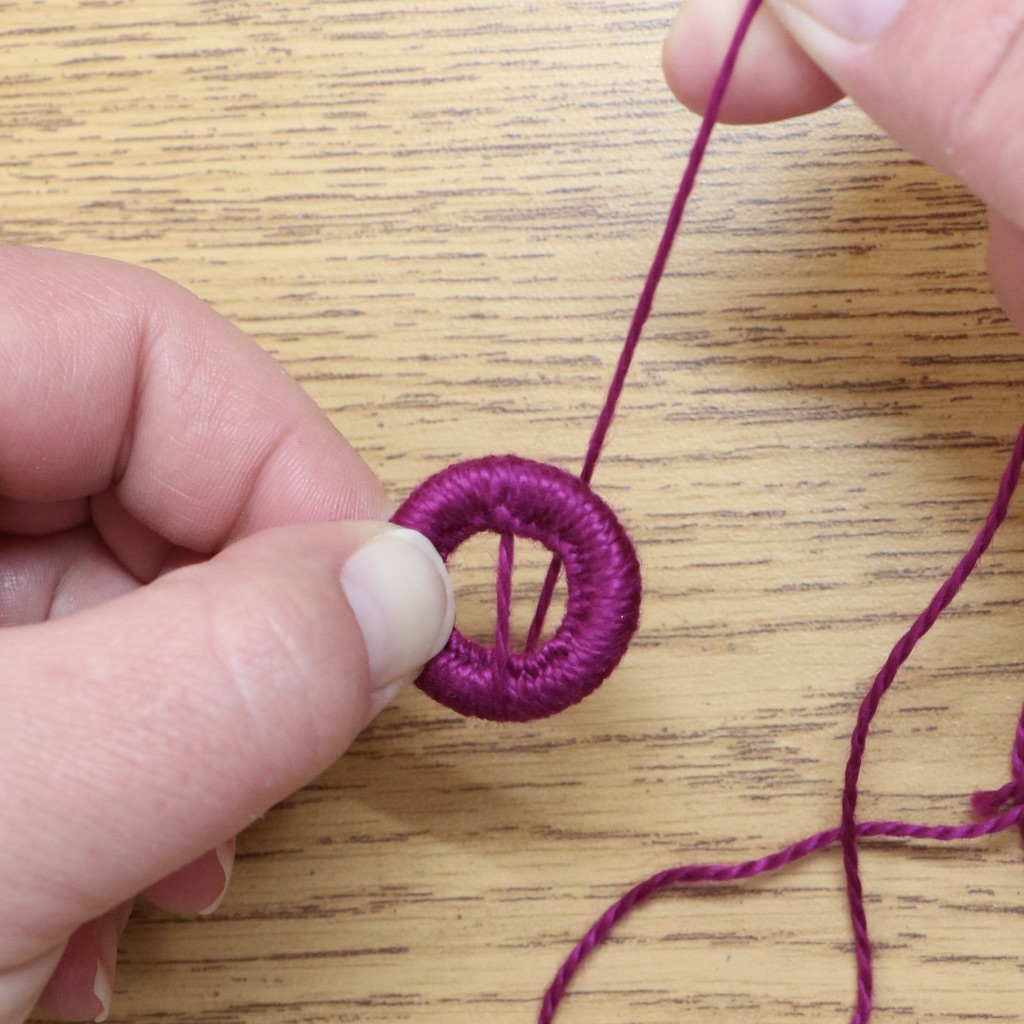
Once you have squeezed on that very last blanket stitch, connect the two ends by passing your needle under the first stitch and pulling it through.
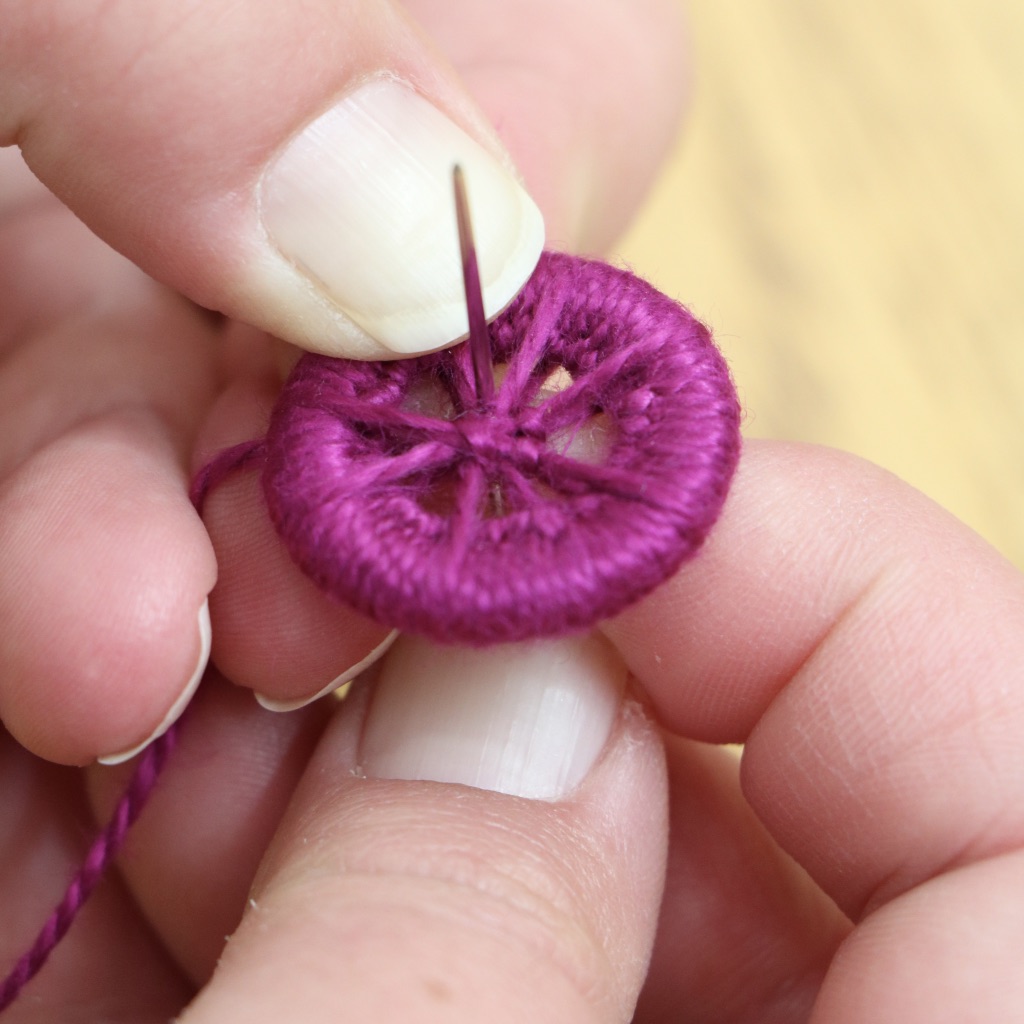
Now, we will do what is called "slicking." This involves rotating the ridges of the blanket stitch from the outer edge to the inner edge. The thread should rotate fairly easily, but you can use your thumbnail to help push if needed.
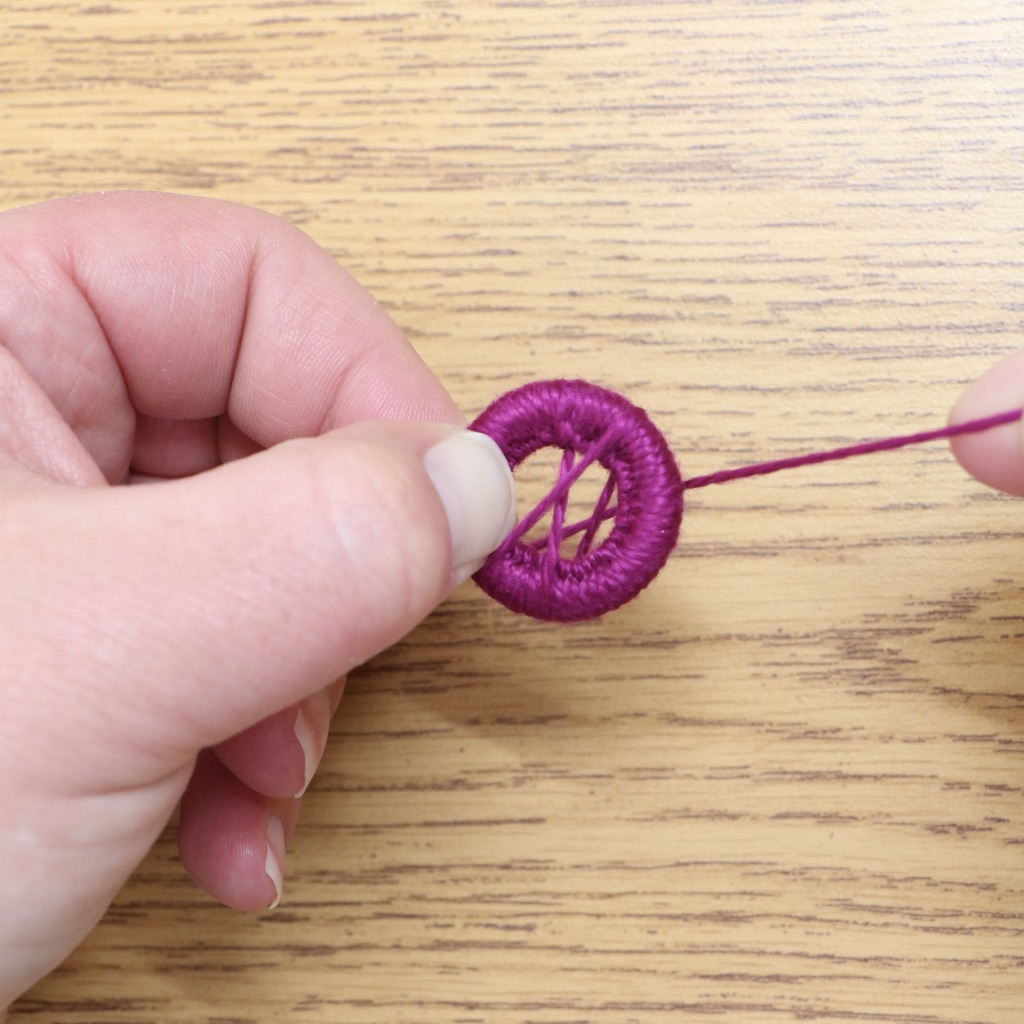

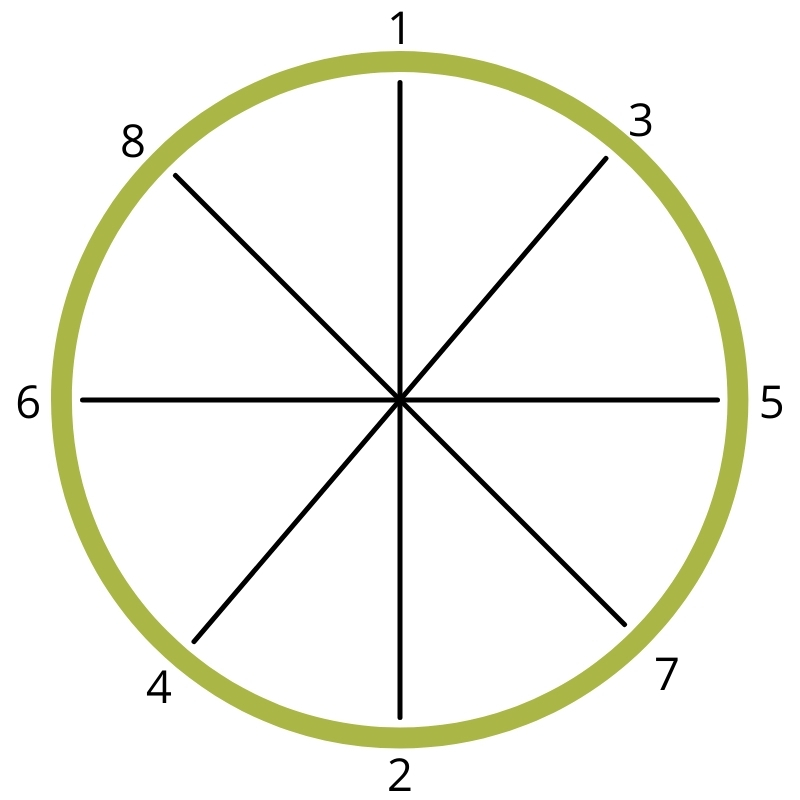
Once all of the ridges are on the inner edge, we can start to lay the spokes with the length of thread we have left. Begin wrapping the spokes around the front and back of the ring, following the order in the diagram below. This diagram details the steps to take in order to create a Dorset button with 8 spokes.
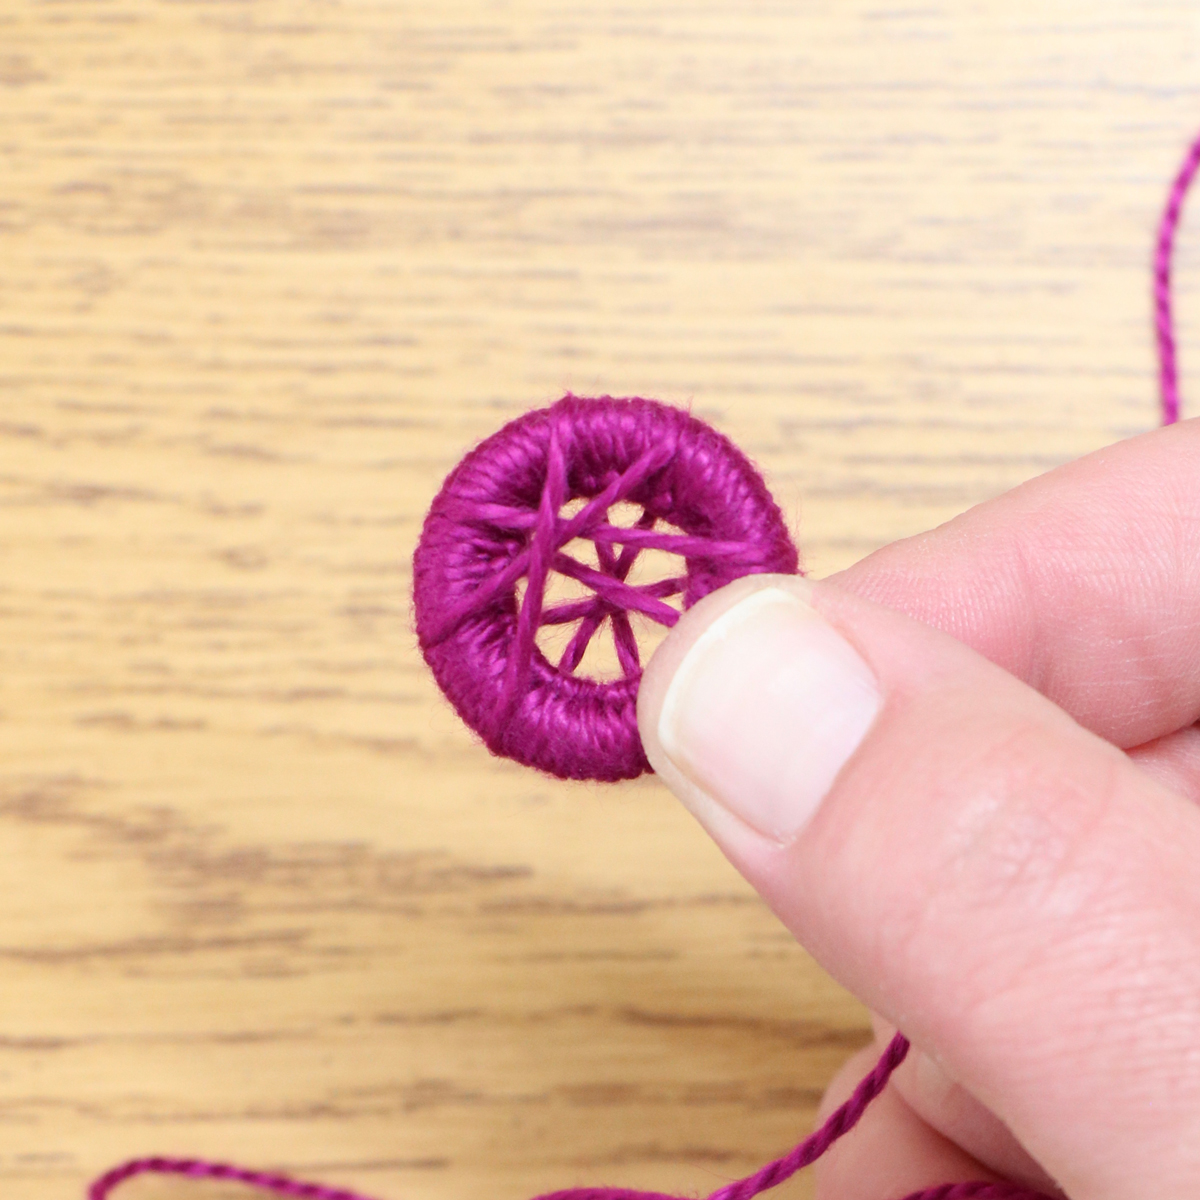
Here is the back view of the spokes. At this point, the front and back spokes will not be aligned, but not to worry, we are going to correct that in the following steps!
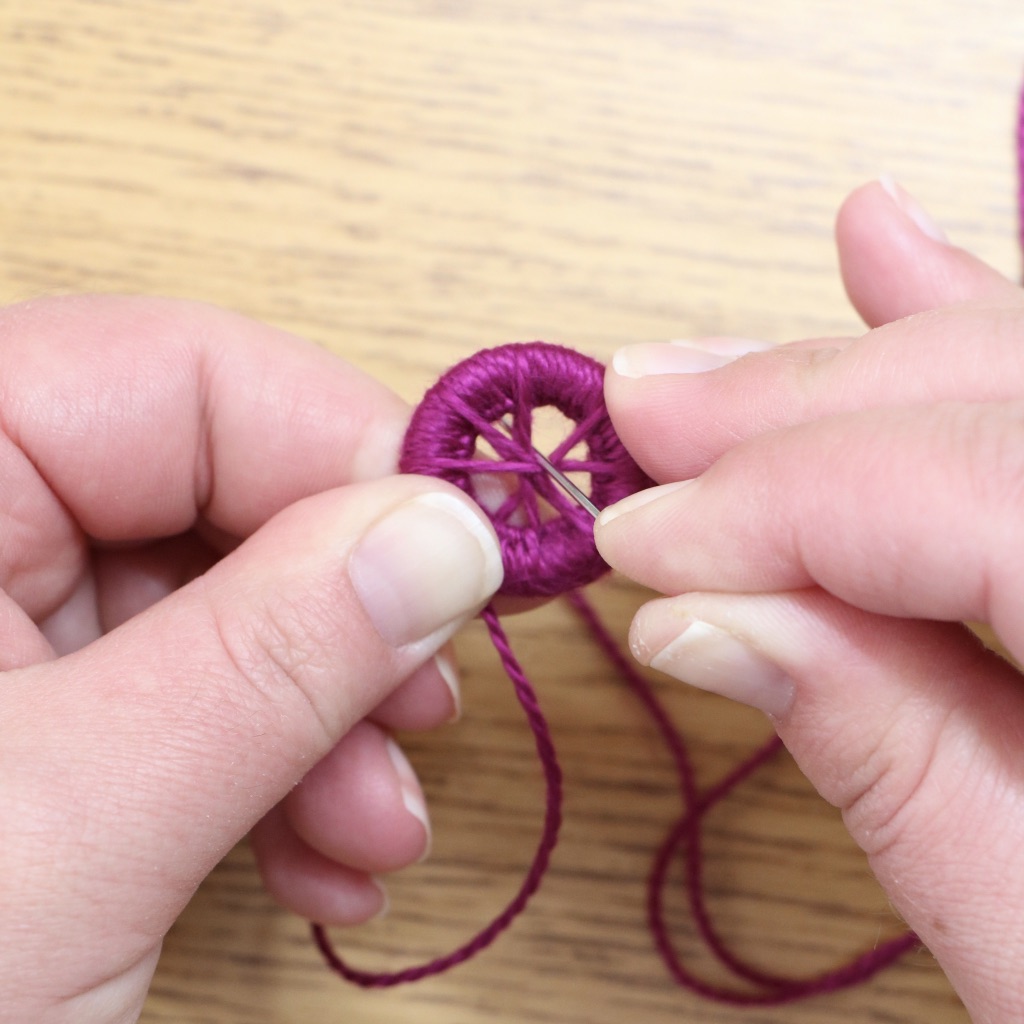
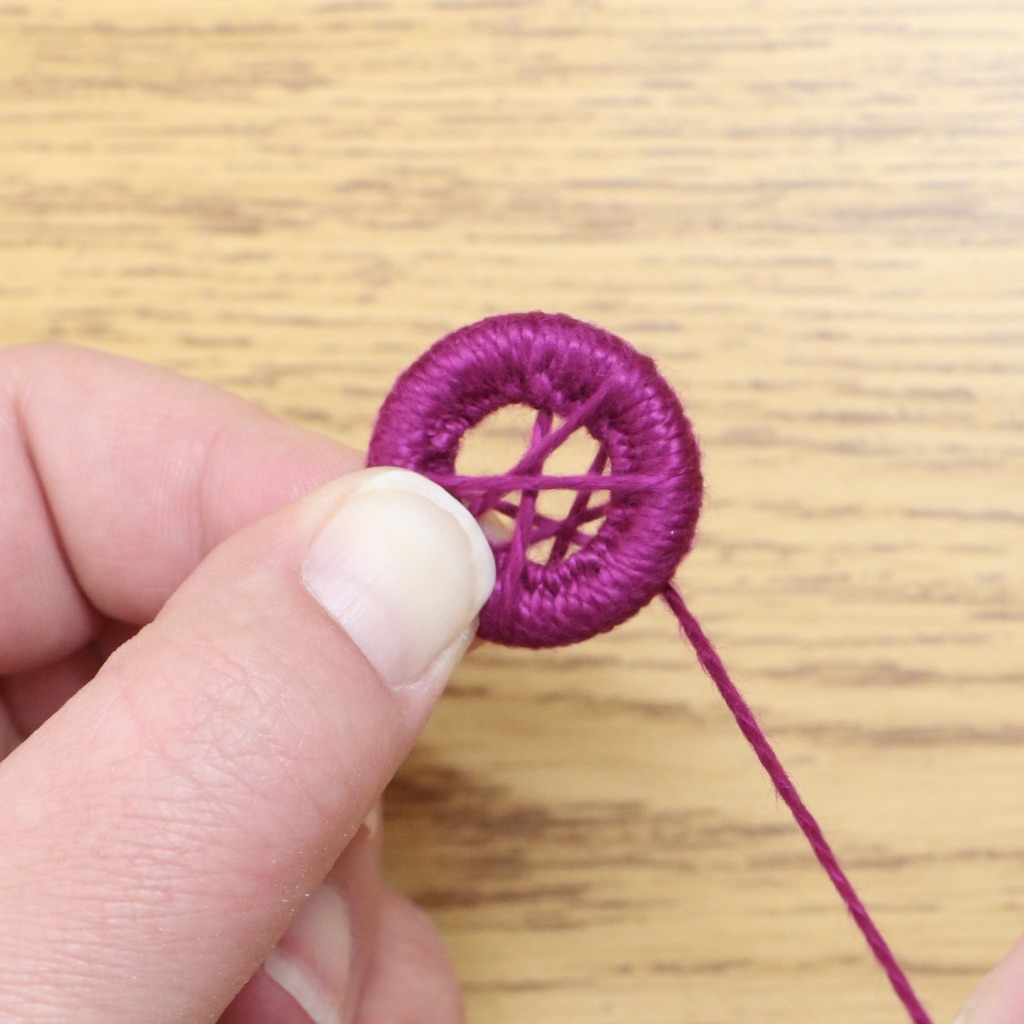
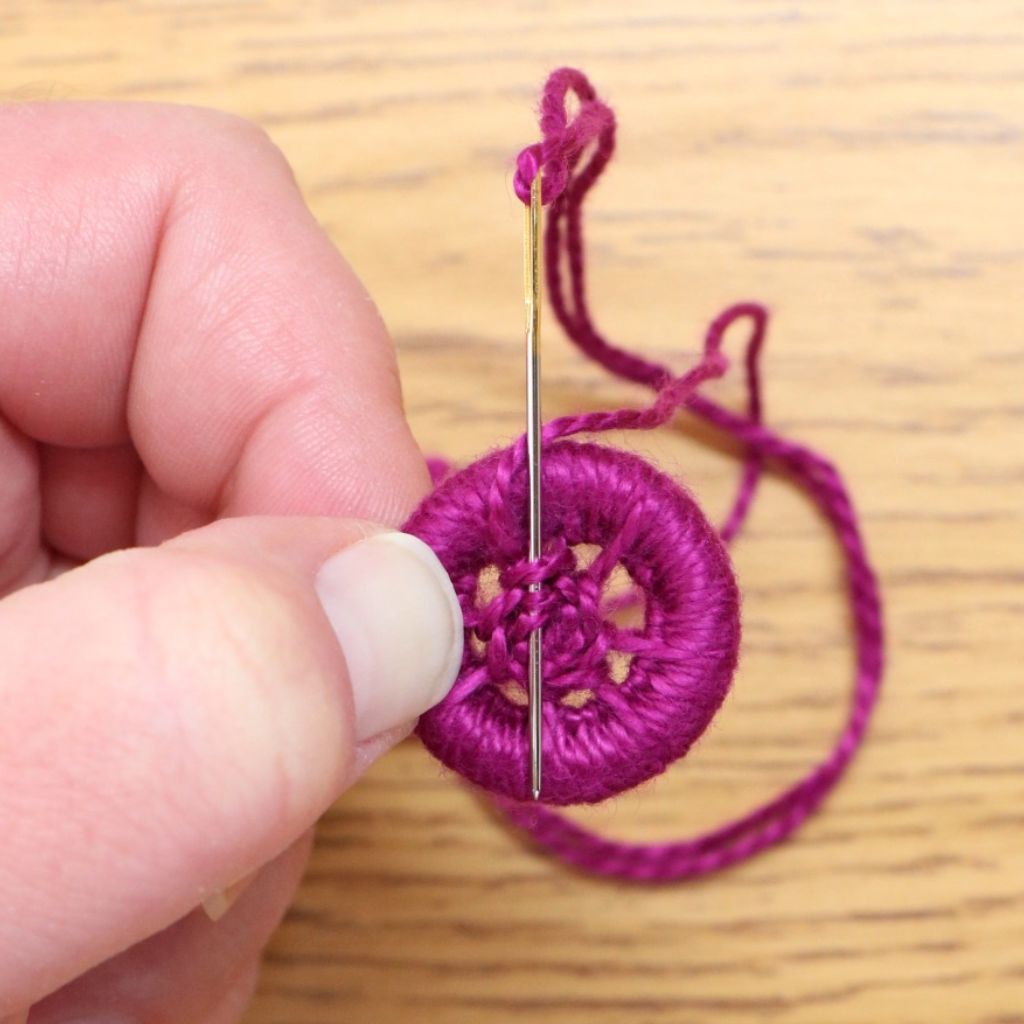
To align the front and back spokes, with the right side facing you, pass your needle between the unaligned spokes, creating a small stitch, and draw them towards the center of the spoke. Repeat as many times as it takes for the spokes to align. This can be done in as few as one or two stitches, but it may take a few more. Although getting everything perfectly centered is difficult, the off-centered ("folky") buttons are just as adorable! We love to use them for flowers because the imperfections add to the organic and natural feel!


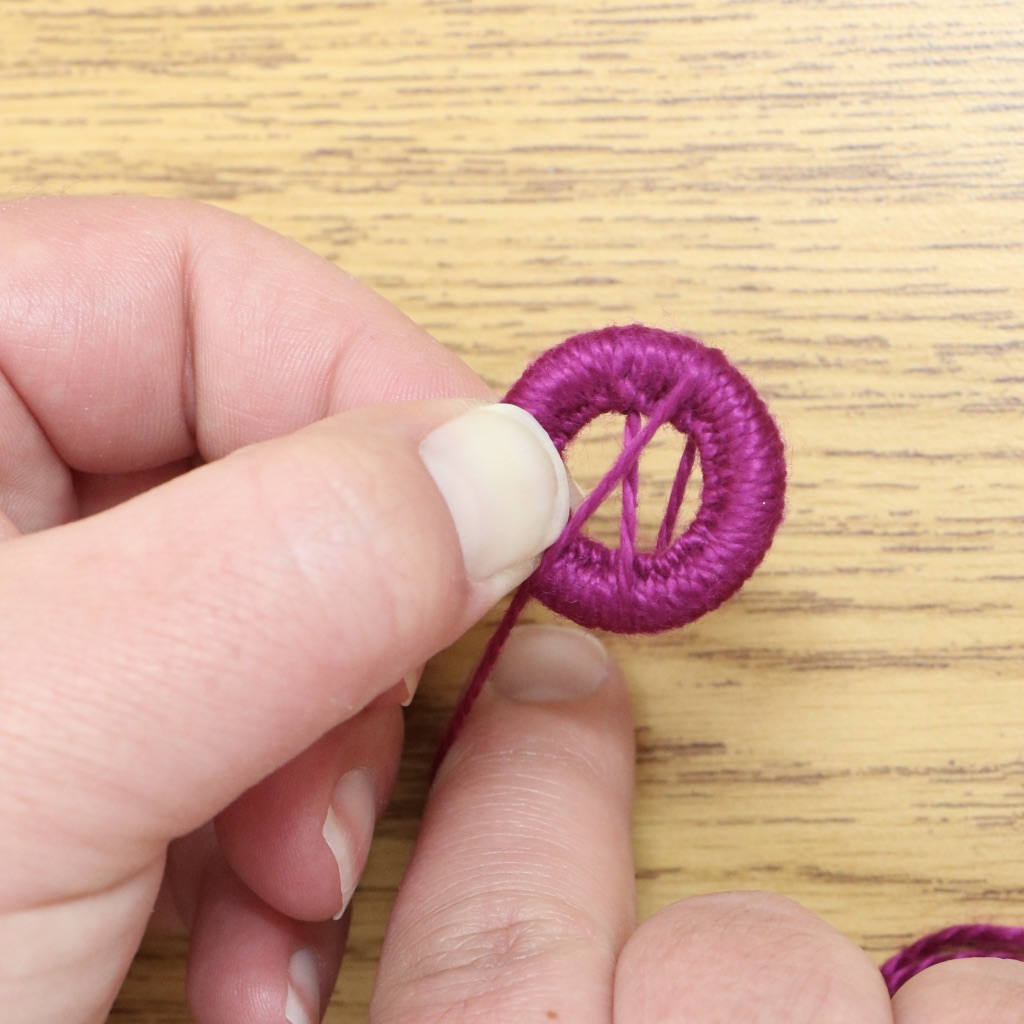
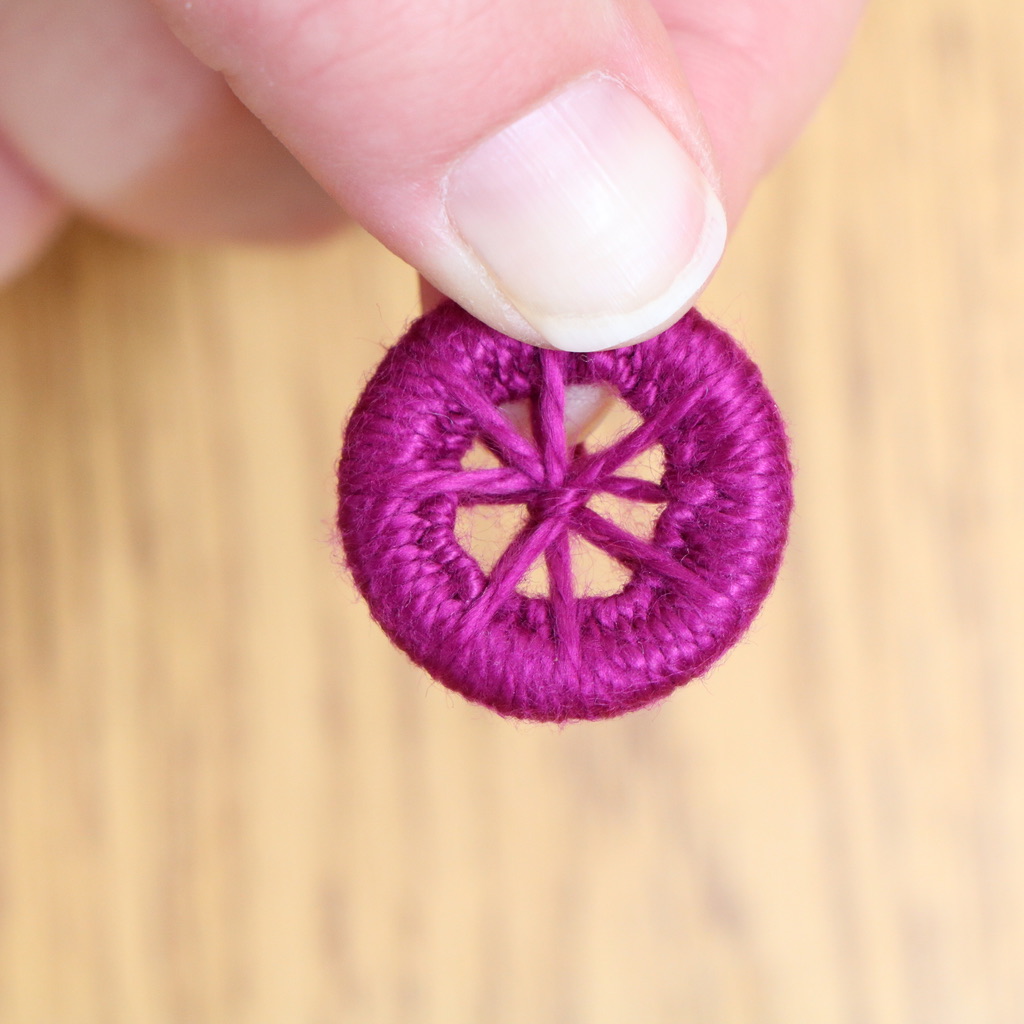
Now that the centers and two sides of spokes are aligned, we can start rounding. We will be using the Whipped Woven Circle, (pg. 120 of Creative Stitching details this stitch step-by-step).
Referring to the diagram above, and with your working thread on the right between 2 and 7:
Take your needle down between 7 and 5
Bring up between 4 and 2
Down between 2 and 7
Bring up between 6 and 4
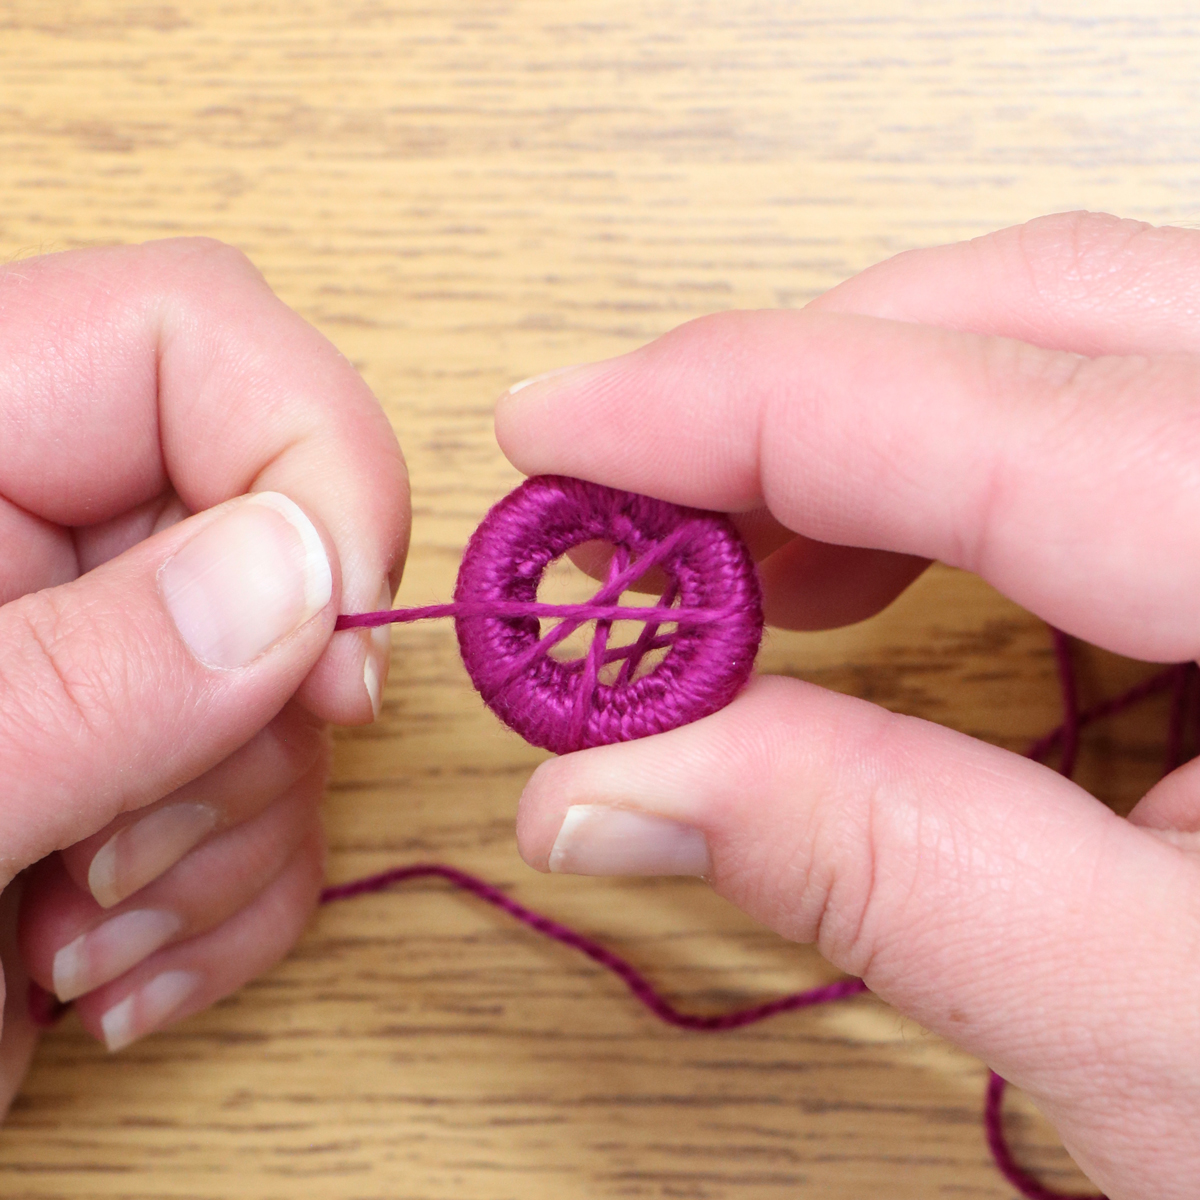
Repeat by taking your needle down in the quadrant to the right, then up two quadrants to the left, until complete.
To secure, weave the thread through the backside of the stitches. We like to leave a tail with the remaining thread that can later be used to attach the button to a project!
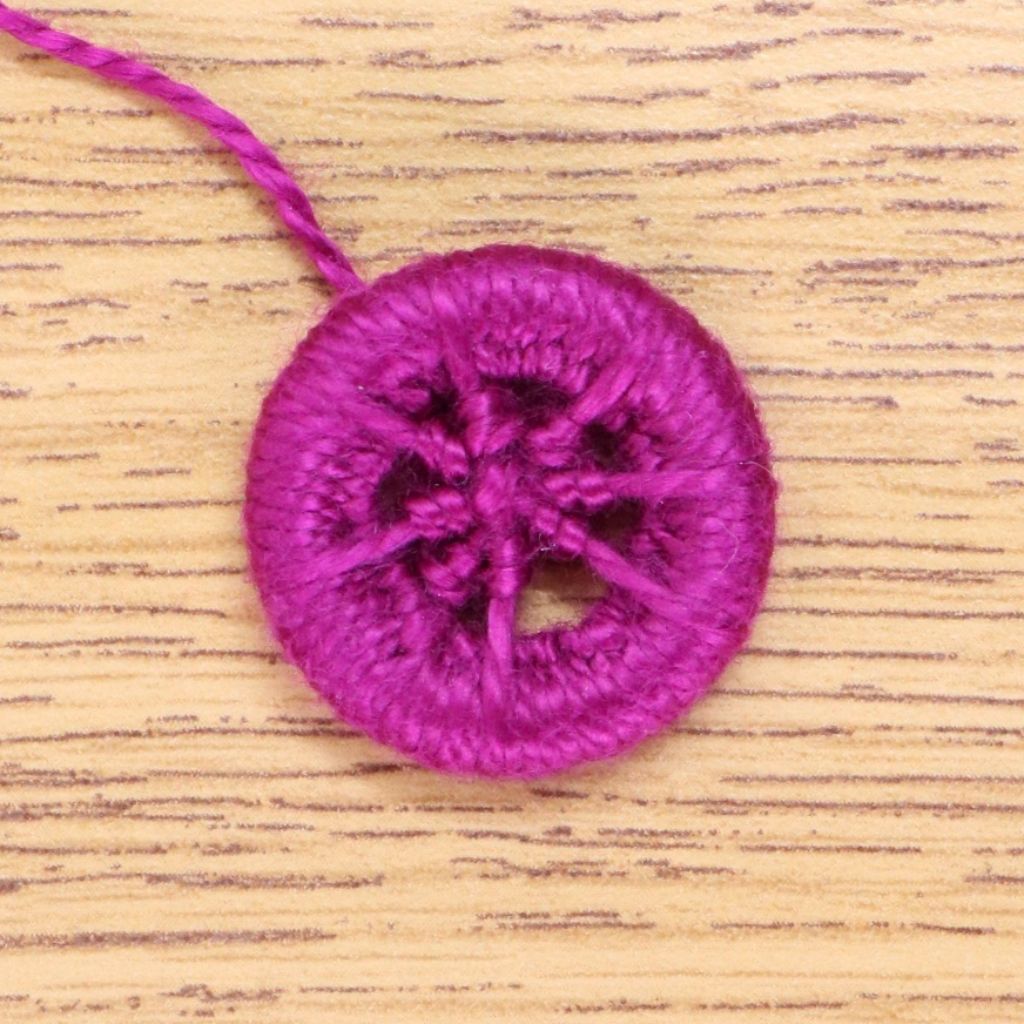
All done! Now, you have a cute little handwoven button to add to appliqué projects, clothing, and so much more!
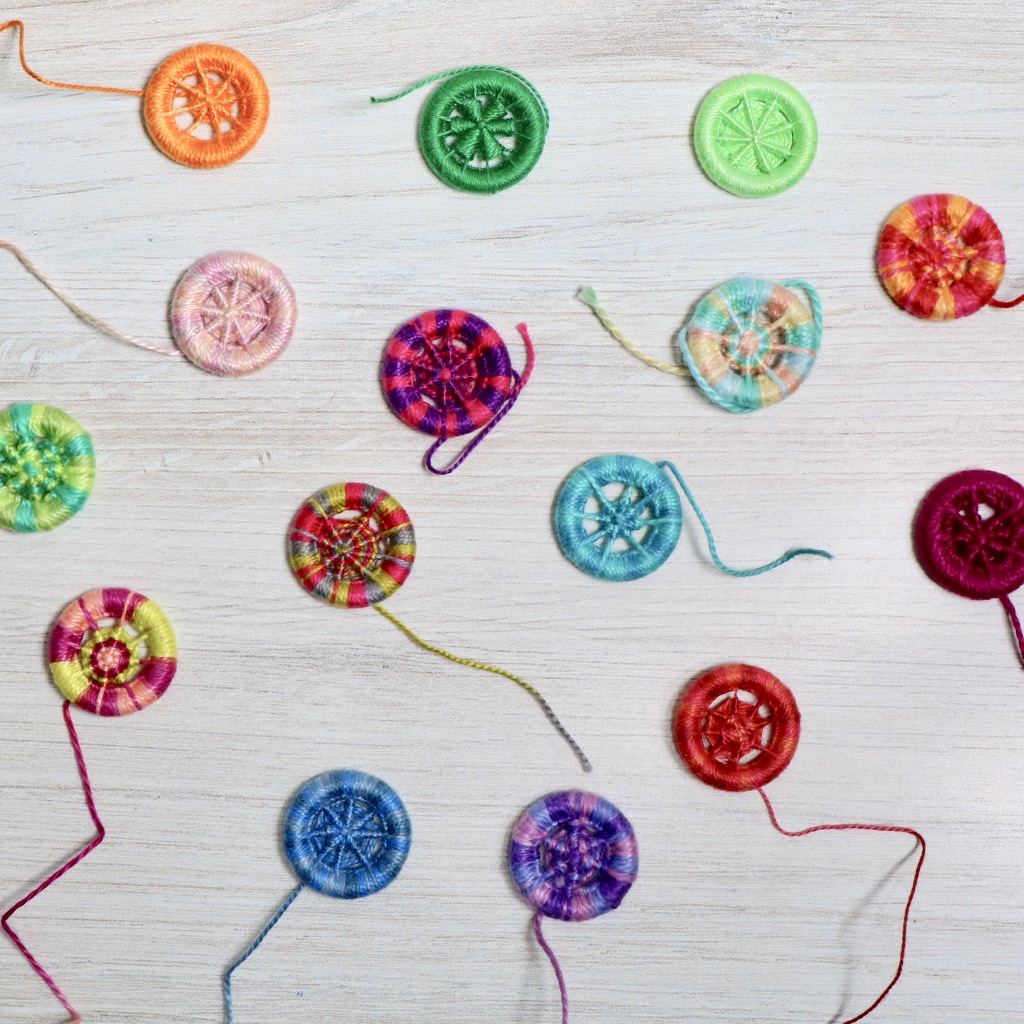
Take a look at some of our samples and ways to use them!
Experiment with threads that differ in type and weight, rings of various sizes and the number of spokes!
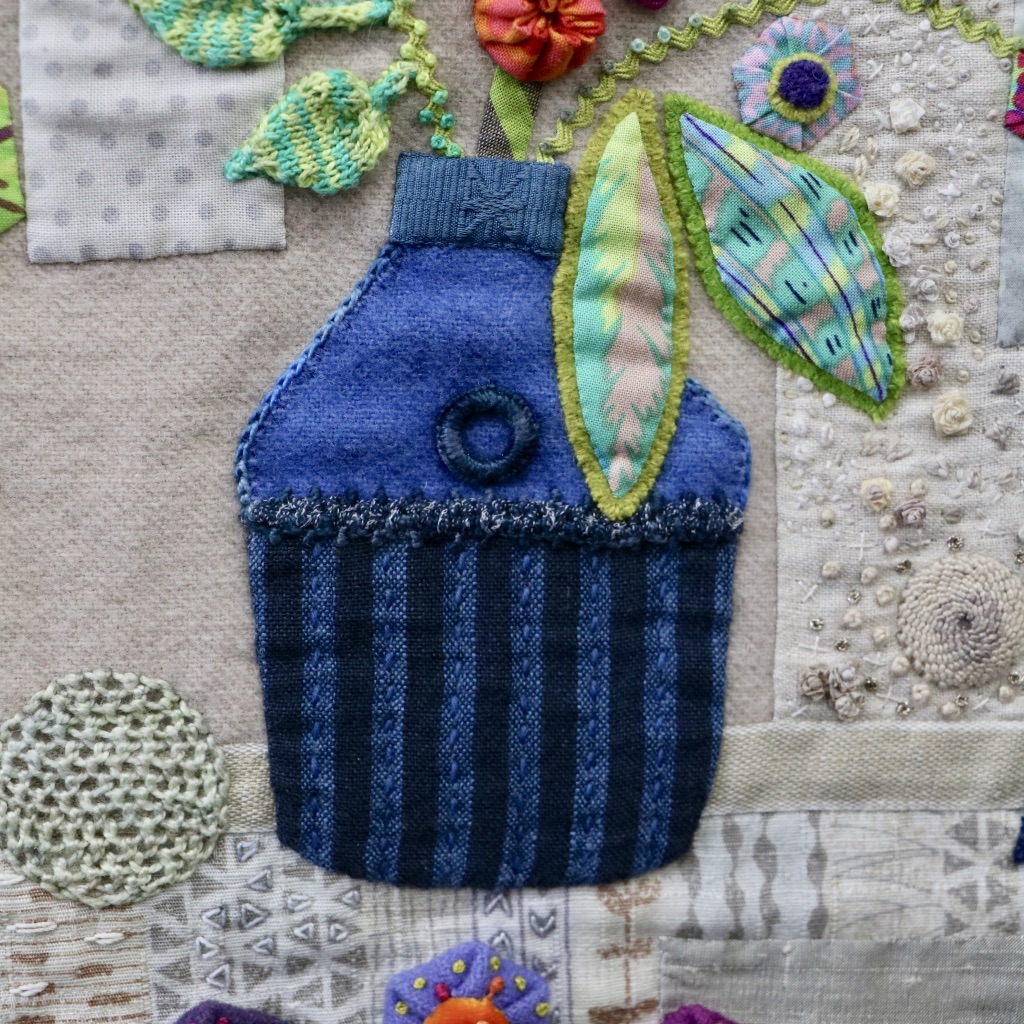
Here, Sue used #5 Eleganza Inked (EZM17) to embellish a flower vase. This button is unique as Sue decided to finish it after the blanket stitch rather than adding spokes.
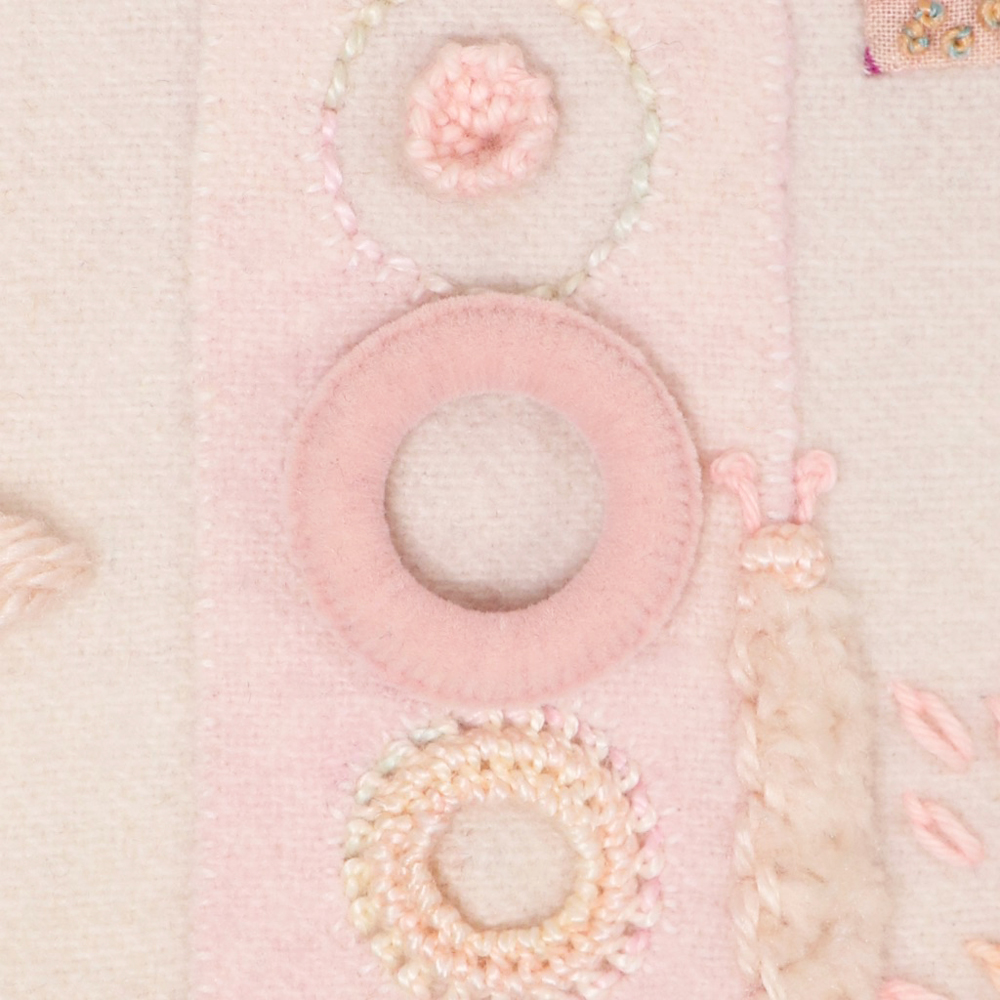
This example shows another button that Sue finished without adding spokes. She used Petite Very Velvet - Peach Flesh for this one, which makes it look so smooth and soft!
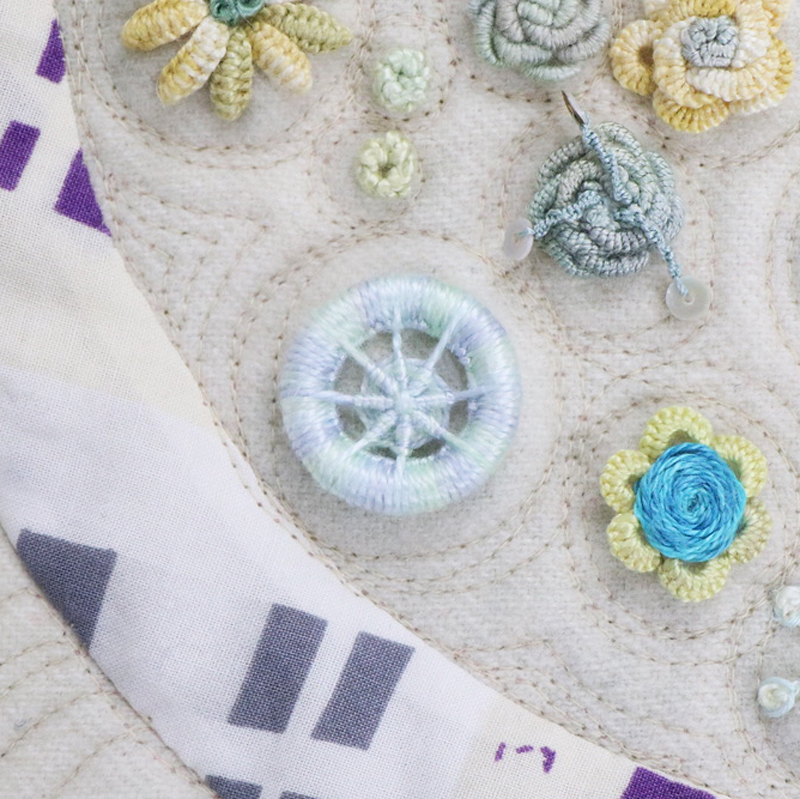
Sue used HOB Perle Cotton - #5 Waterlily (70C), for this button that was later quilted around for more fun circular effects and added depth!
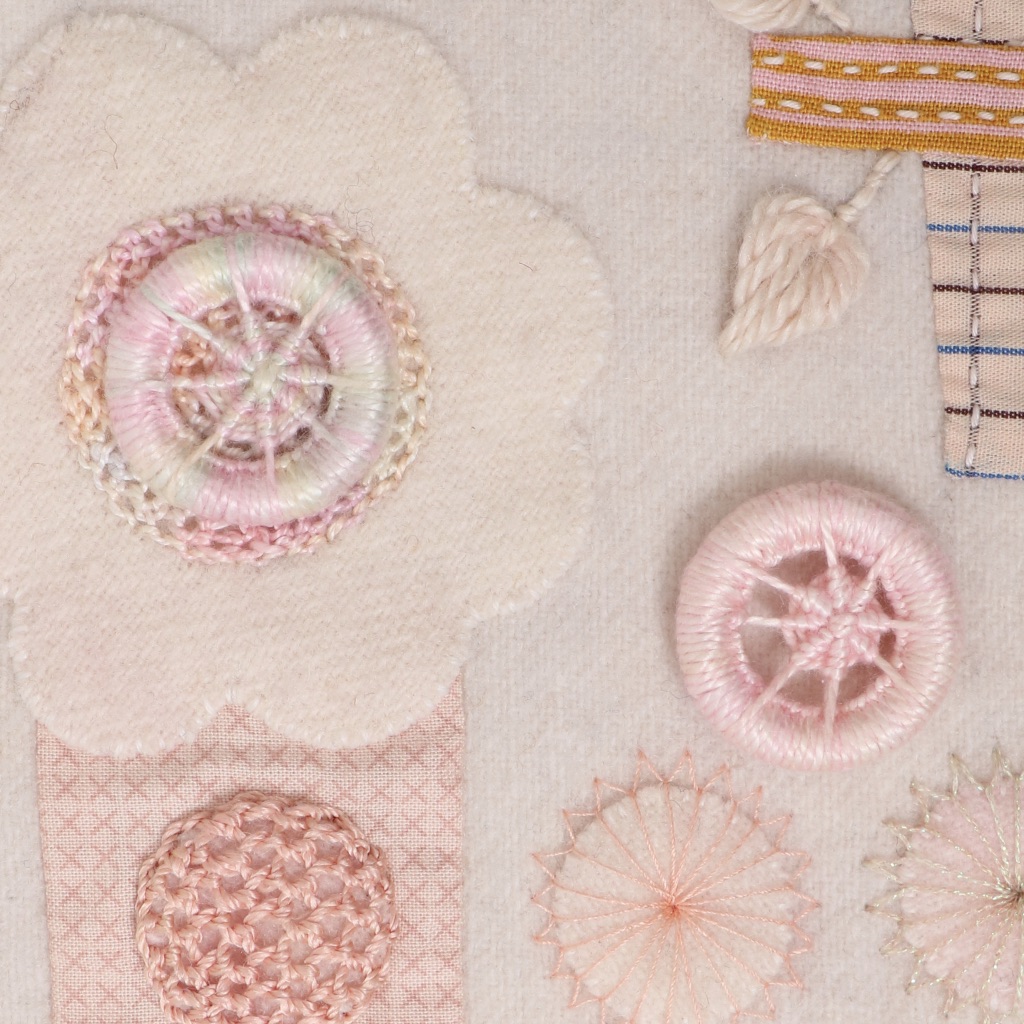
These Dorset buttons were made with HOB Perle Cotton - Fairies (17B) on the left and HOB Perle Cotton - Orchid (9B) on the right. They make perfect decorative elements!
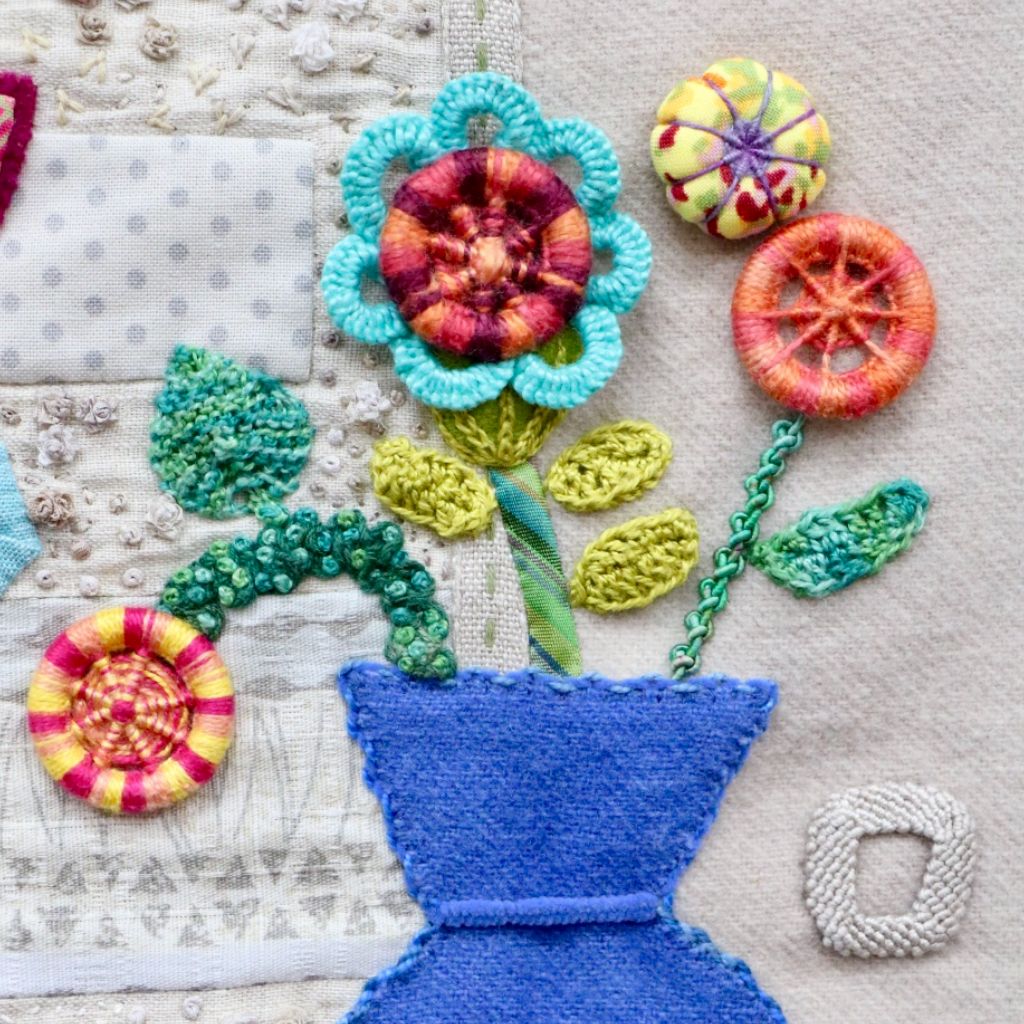
Here, Sue used the Dorset buttons to make flowers! The button to the left was made with #8 Eleganza Saltwater Taffy (EZM32), the middle button with #3 Eleganza Flutter-By (EZM34), and the right button with #5 Eleganza Hibiscus (EZM31).